
iOS 干貨:探探風格卡片視圖切換效果的實現
編輯:iOS 開發基礎
Gif 展示
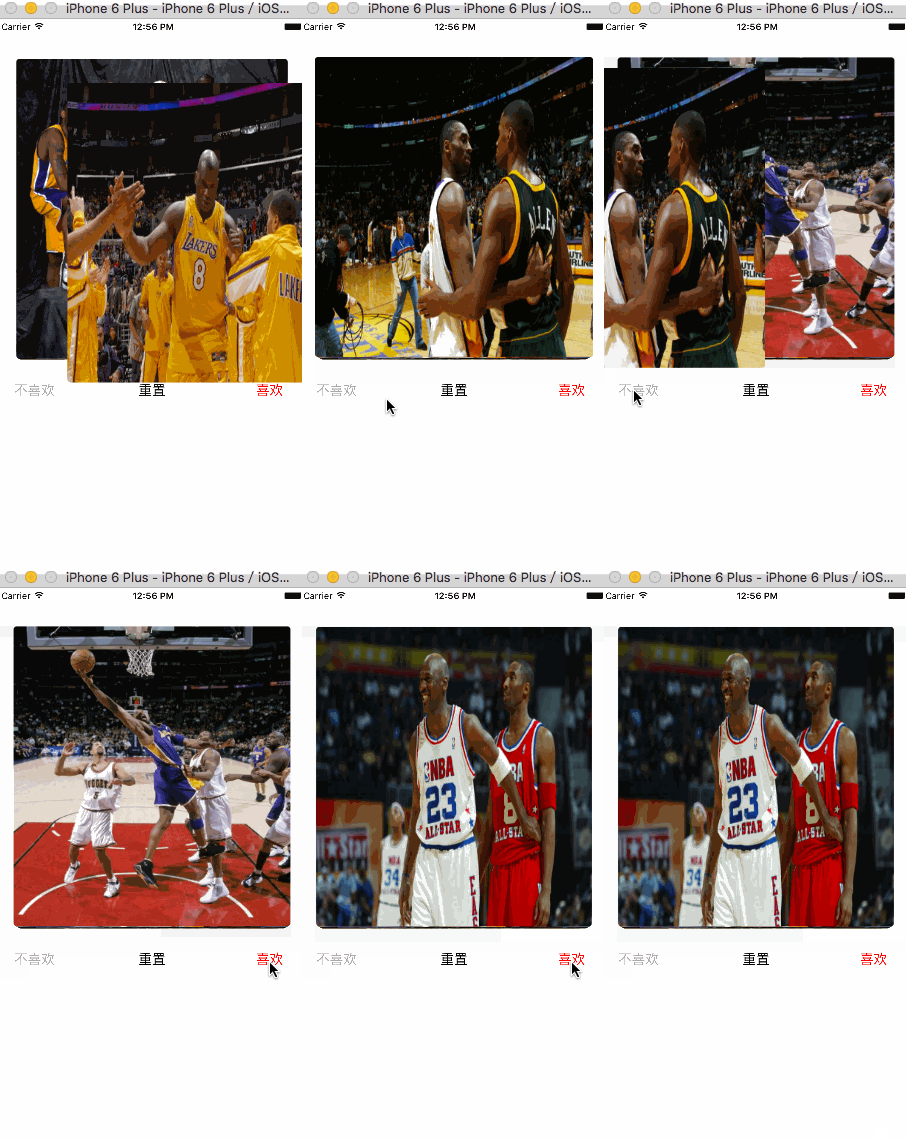
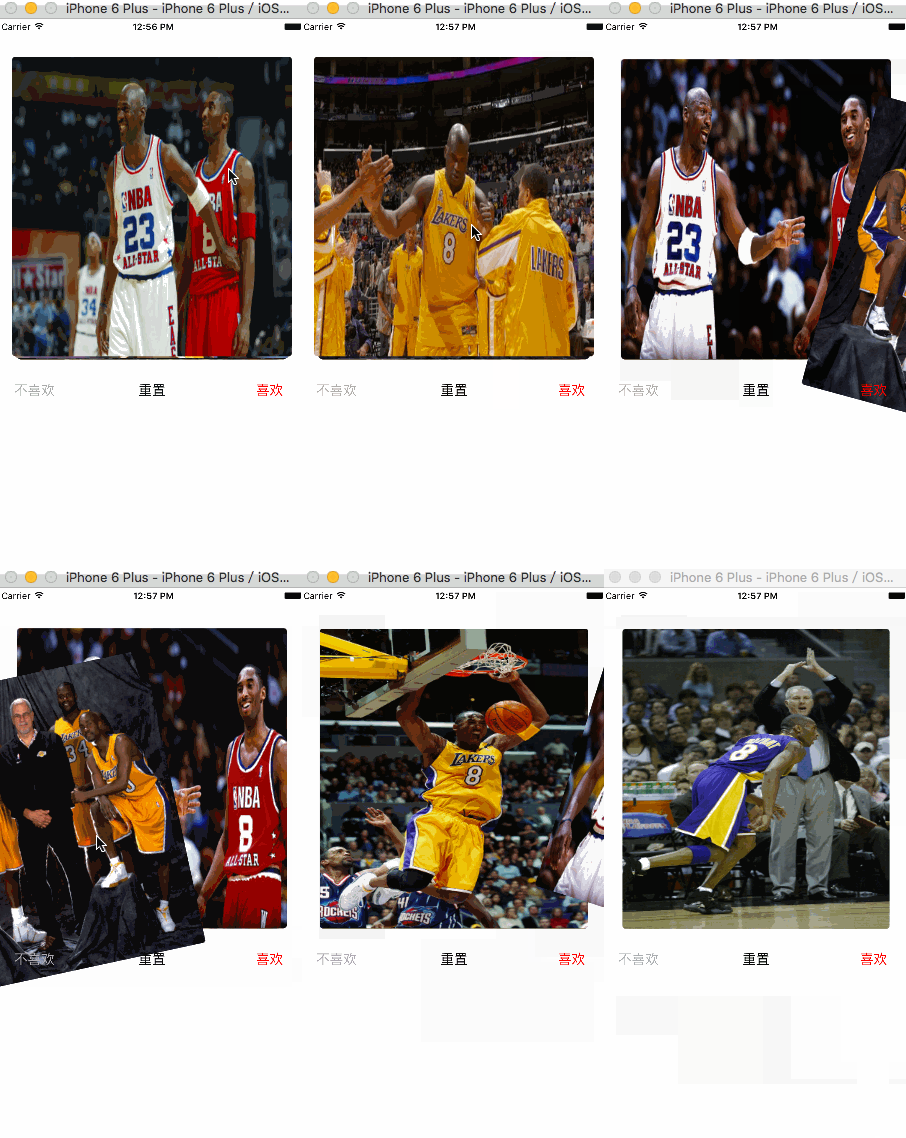
這個效果的核心是:多張卡片以「扇形堆疊」的方式排布,頂層卡片可隨手勢拖動並帶傾斜旋轉,快速滑動或拖出邊界即飛出畫面,並觸發向 dataSource 索取下一批資料。
主要程式碼:CHCardView.h
#import <UIKit/UIKit.h>

@class CHCardView, CHCardItemView;

@protocol CHCardViewDelegate <NSObject>
@optional
- (void)cardView:(CHCardView *)cardView didClickItemAtIndex:(NSInteger)index;
@end

@protocol CHCardViewDataSource <NSObject>
@required
- (NSInteger)numberOfItemViewsInCardView:(CHCardView *)cardView;
- (CHCardItemView *)cardView:(CHCardView *)cardView itemViewAtIndex:(NSInteger)index;
- (void)cardViewNeedMoreData:(CHCardView *)cardView;
@optional
// default is equal to cardView's bounds
- (CGSize)cardView:(CHCardView *)cardView sizeForItemViewAtIndex:(NSInteger)index;
@end

@interface CHCardView : UIView

@property (nonatomic, weak) id <CHCardViewDataSource> dataSource;
@property (nonatomic, weak) id <CHCardViewDelegate>   delegate;

- (void)deleteTheTopItemViewWithLeft:(BOOL)left;
- (void)reloadData;

@end
主要程式碼:CHCardView.m
- (void)reloadData {
    if (_dataSource == nil) {
        return;
    }

    // 1. 移除舊視圖
    [self.subviews makeObjectsPerformSelector:@selector(removeFromSuperview)];

    // 2. 重新建立
    _itemViewCount = [self numberOfItemViews];
    for (int i = 0; i < _itemViewCount; i++) {
        CGSize size = [self itemViewSizeAtIndex:i];
        CHCardItemView *itemView = [self itemViewAtIndex:i];
        [self addSubview:itemView];

        itemView.delegate = self;
        itemView.frame = CGRectMake(self.frame.size.width  / 2.0 - size.width  / 2.0,
                                    self.frame.size.height / 2.0 - size.height / 2.0,
                                    size.width, size.height);
        itemView.tag = i + 1;

        // 先移到畫面外,再逐張延遲飛入,形成扇形堆疊
        itemView.transform = CGAffineTransformMakeTranslation(self.frame.size.width + 500, 400);

        [UIView animateKeyframesWithDuration:0.15
                                      delay:0.05 * i
                                    options:UIViewKeyframeAnimationOptionCalculationModeLinear
                                 animations:^{
            CGAffineTransform scaleTransfrom = CGAffineTransformMakeScale(1 - 0.005 * (10 - i), 1);
            itemView.transform = CGAffineTransformTranslate(scaleTransfrom, 0, 0.5 * (10 - i));
        } completion:nil];

        itemView.userInteractionEnabled = YES;
        [itemView addGestureRecognizer:[[UITapGestureRecognizer alloc] initWithTarget:self
                                                                               action:@selector(tapGestHandle:)]];
    }
}
這段程式碼有兩個值得注意的地方:一是用 animateKeyframesWithDuration:delay: 搭配 0.05 * i 的遞增延遲,讓卡片依序飛入而不會同時出現;二是透過 CGAffineTransformMakeScale 與 CGAffineTransformTranslate 的組合,模擬出「越往後的卡片越小、越往下偏移」的縱深堆疊感。
拖動手勢處理
if (panGest.state == UIGestureRecognizerStateChanged) {
    CGPoint movePoint = [panGest translationInView:self];
    _isLeft = (movePoint.x < 0);

    self.center = CGPointMake(self.center.x + movePoint.x, self.center.y + movePoint.y);

    // 依水平位移比例計算傾斜角度
    CGFloat angle = (self.center.x - self.frame.size.width / 2.0) / self.frame.size.width * 0.5;
    _currentAngle = angle;
    self.transform = CGAffineTransformMakeRotation(angle);

    [panGest setTranslation:CGPointZero inView:self];

} else if (panGest.state == UIGestureRecognizerStateEnded) {
    CGPoint vel = [panGest velocityInView:self];

    // 速度足夠快就直接飛出
    if (vel.x > 400 || vel.x < -400) {
        [self remove];
        return;
    }

    // 位移不夠則判定為取消,回到原位
    if (self.frame.origin.x + self.frame.size.width > 100 && self.frame.origin.x < self.frame.size.width - 100) {
        [UIView animateWithDuration:0.3 animations:^{
            self.center    = _originalCenter;
            self.transform = CGAffineTransformMakeRotation(0);
        }];
    } else {
        [self remove];
    }
}
手勢邏輯可以濃縮成三條判斷:拖動中依水平位移即時計算旋轉角度,做出「卡片被手指帶歪」的手感;松手時速度超過閾值(這裡取 400)就直接飛出,讓快速揮動也能觸發;位移不足且未達速度閾值則視為取消,用 0.3 秒動畫回彈到 _originalCenter 並把旋轉歸零。而 [panGest setTranslation:CGPointZero inView:self] 這一句是關鍵——每次回調後必須清零位移,否則 center 會被連續累加而飛掉。
項目地址與個人主頁請參見簡書原文。
文章轉自 一只孤獨的 iOS 的簡書