
iOS 10 CallKit 入門:來電辨識與黑名單的簡單應用
CallKit 這個開發框架,能讓語音或視訊電話的開發者把 UI 介面整合進 iPhone 原生的「電話」App 中。它允許開發者把通訊 App 的功能內建到電話 App 的「常用聯絡資訊」與「通話記錄」裡,使用者透過原生電話 App 就能直接取用這些第三方功能;也允許使用者在通知中心直接瀏覽並回覆來電,來電畫面整合進 iOS 原生 UI。總體來說,等於讓 iOS 原本單純用來打電信電話的「電話」功能,能夠結合眾多第三方語音通訊軟體,具備更完整的數位電話潛力。CallKit 也擴展了 iOS 8 出現的 App Extensions 能力,可以讓使用者在接聽來電時,直接在原生電話 App 中透過第三方 App 辨識騷擾電話(例如詐騙)。
如何建立一個 Call 專案
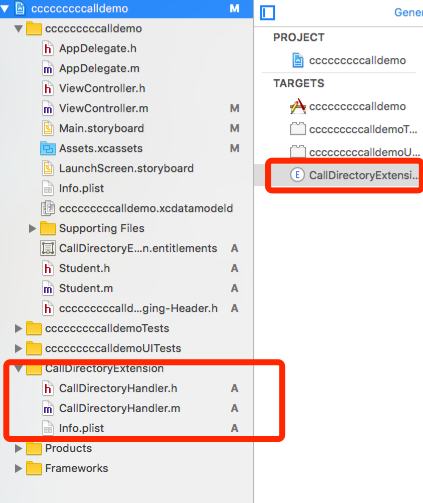
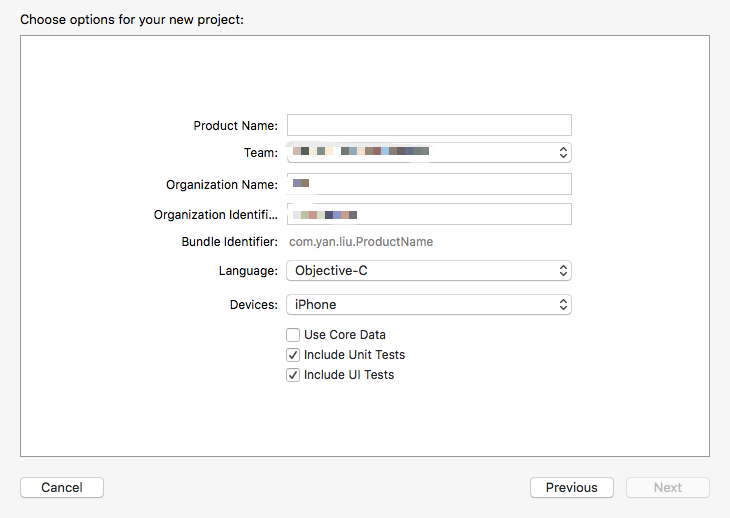
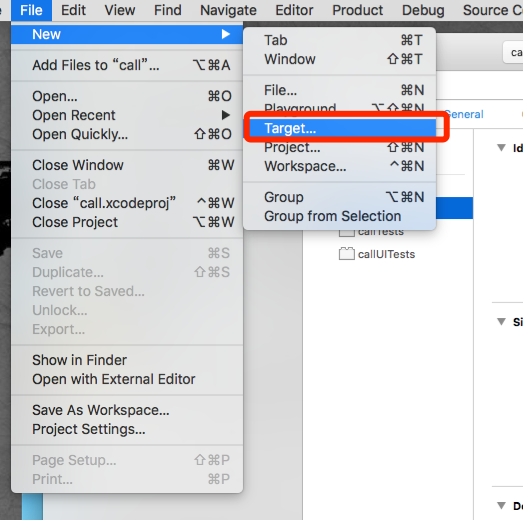
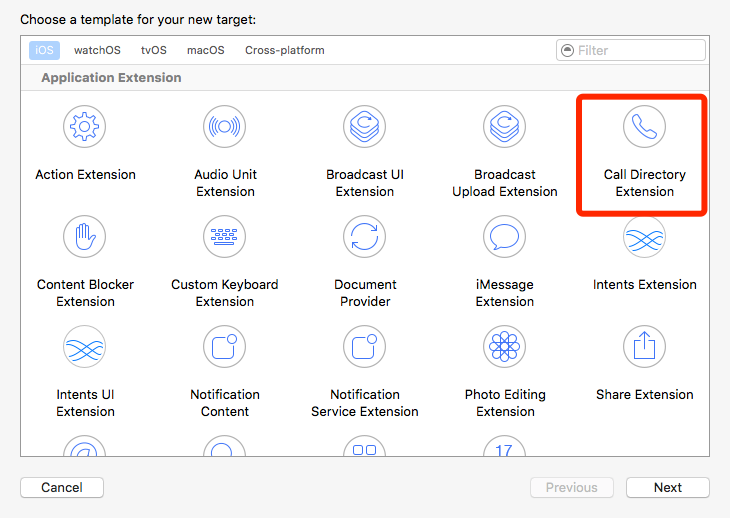
出現下圖結構即說明建立成功:
注意:xxxxxxxxcallDemo.xcdatamodeld 必須建立。
來電提醒功能
透過 extension 範本建立一個 CallDirectoryExtension,主要會用到幾個方法:
// 開始請求的方法。在「設定 - 電話 - 來電阻止與身份識別」中打開開關時,系統會自動呼叫
- (void)beginRequestWithExtensionContext:(CXCallDirectoryExtensionContext *)context;

// 添加黑名單:依產生的範本,只需要修改 CXCallDirectoryPhoneNumber 陣列,
// 陣列內的號碼必須按升序排列
- (BOOL)addBlockingPhoneNumbersToContext:(CXCallDirectoryExtensionContext *)context;

// 添加資訊標識:需要同時修改 CXCallDirectoryPhoneNumber 陣列與對應的標識陣列,
// 兩者必須一一對應,且號碼陣列內的號碼要按升序排列
- (BOOL)addIdentificationPhoneNumbersToContext:(CXCallDirectoryExtensionContext *)context;
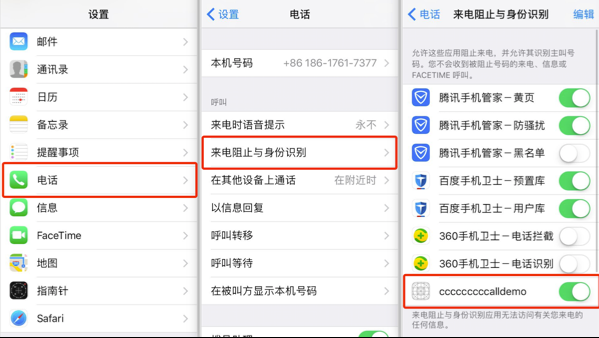
設定
實現流程
使用者在「設定」中打開開關之後,系統會呼叫 beginRequest;在該方法內部再呼叫「添加黑名單」與「添加資訊標識」兩個方法;添加成功後,呼叫 completeRequestWithCompletionHandler 通知系統處理完畢。
程式碼實現
先來看幾個常用的 URL Scheme:
sms:或sms://—— 發送短信tel:或tel://—— 打電話telprompt:或telprompt://—— 打電話(先跳轉到撥號介面)mailto:—— 發送郵件http:或https://—— 瀏覽網址
打電話的按鈕:
NSMutableString *str = [[NSMutableString alloc] initWithFormat:@"tel:%@", self.noTextField.text];
[self.callWebview loadRequest:[NSURLRequest requestWithURL:[NSURL URLWithString:str]]];
if (!self.callWebview.subviews) {
    [self.view addSubview:_callWebview];
}
檢查授權狀態:
CXCallDirectoryManager *manager = [CXCallDirectoryManager sharedInstance];

// 獲取權限狀態
[manager getEnabledStatusForExtensionWithIdentifier:@"com.tq.xxxxxxxxcallDemo.CallDirectoryExtension"
                                  completionHandler:^(CXCallDirectoryEnabledStatus enabledStatus, NSError *_Nullable error) {
    if (!error) {
        NSString *title = nil;
        if (enabledStatus == CXCallDirectoryEnabledStatusDisabled) {
            /*
             CXCallDirectoryEnabledStatusUnknown  = 0,
             CXCallDirectoryEnabledStatusDisabled = 1,
             CXCallDirectoryEnabledStatusEnabled  = 2,
             */
            title = @"未授權,請在 設定 -> 電話 中授權相關權限";
        } else if (enabledStatus == CXCallDirectoryEnabledStatusEnabled) {
            title = @"已授權";
        } else if (enabledStatus == CXCallDirectoryEnabledStatusUnknown) {
            title = @"狀態未知";
        }

        UIAlertController *alert = [UIAlertController alertControllerWithTitle:@"提示"
                                                                      message:title
                                                               preferredStyle:UIAlertControllerStyleAlert];
        UIAlertAction *defaultAction = [UIAlertAction actionWithTitle:@"OK"
                                                               style:UIAlertActionStyleDefault
                                                             handler:^(UIAlertAction *action) {}];
        [alert addAction:defaultAction];
        [self presentViewController:alert animated:YES completion:nil];
    } else {
        UIAlertController *alert = [UIAlertController alertControllerWithTitle:@"提示"
                                                                      message:@"有錯誤"
                                                               preferredStyle:UIAlertControllerStyleAlert];
        UIAlertAction *defaultAction = [UIAlertAction actionWithTitle:@"OK"
                                                               style:UIAlertActionStyleDefault
                                                             handler:^(UIAlertAction *action) {}];
        [alert addAction:defaultAction];
        [self presentViewController:alert animated:YES completion:nil];
    }
}];
CallDirectoryHandler 的實現:
注意:電話號碼前要加區號,例如 +86。
/**
 添加黑名單:無法接通
 */
- (BOOL)addBlockingPhoneNumbersToContext:(CXCallDirectoryExtensionContext *)context

/**
 添加資訊標識
 */
- (BOOL)addIdentificationPhoneNumbersToContext:(CXCallDirectoryExtensionContext *)context
說明:把專案運行到真機之後,還需要在「設定 → 電話」中開啟該 App 的權限。
此時專案基本已能滿足需求:黑名單號碼撥入時處於通話中狀態,被標識的號碼則顯示標識名稱。
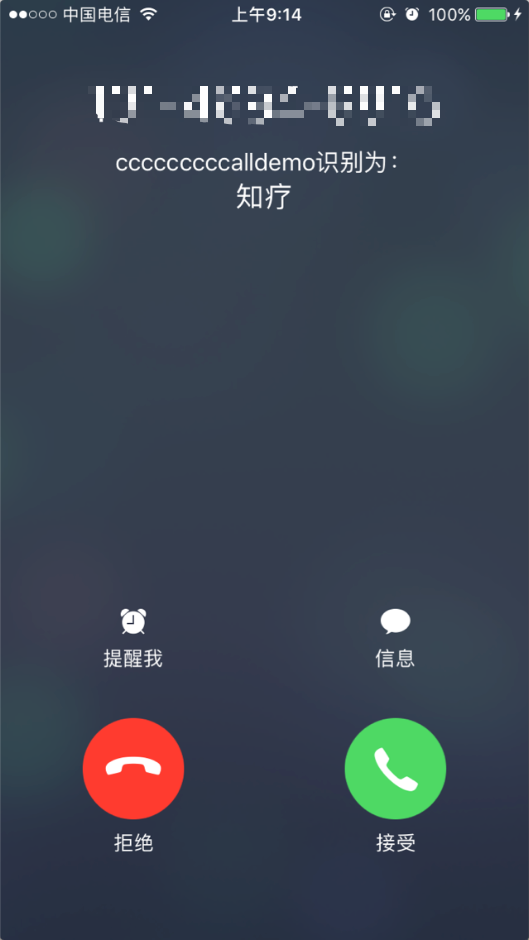
標識的號碼
這時你會發現一個問題:只有第一次運行專案時設定的號碼才生效,或者必須手動去「設定」裡重新授權一次。這顯然不可接受——我們需要能即時更新號碼。
解法是呼叫 reloadExtensionWithIdentifier 讓系統重新載入 extension:
CXCallDirectoryManager *manager = [CXCallDirectoryManager sharedInstance];

[manager reloadExtensionWithIdentifier:@"com.tq.xxxxxxxxcallDemo.CallDirectoryExtension"
                     completionHandler:^(NSError *_Nullable error) {
    NSString *message = (error == nil) ? @"更新成功" : @"更新失敗";

    UIAlertController *alert = [UIAlertController alertControllerWithTitle:@"提示"
                                                                  message:message
                                                           preferredStyle:UIAlertControllerStyleAlert];
    UIAlertAction *defaultAction = [UIAlertAction actionWithTitle:@"OK"
                                                           style:UIAlertActionStyleDefault
                                                         handler:^(UIAlertAction *action) {}];
    [alert addAction:defaultAction];
    [self presentViewController:alert animated:YES completion:nil];
}];
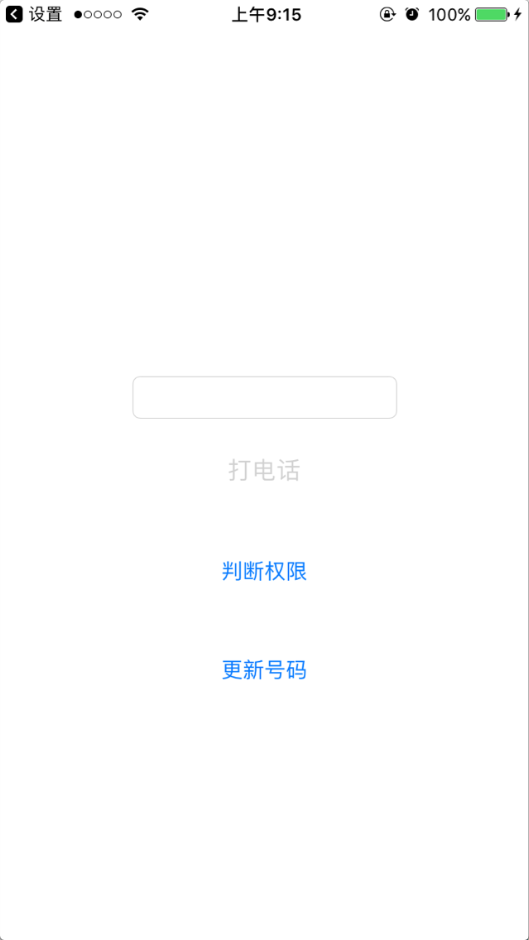
實務上有幾點值得留意:黑名單號碼一定要按升序排列,否則會添加失敗;號碼必須帶上國際區號;而每次修改名單後都要呼叫 reloadExtension,系統才會重新載入 extension 的資料。
文章轉自 芝麻綠豆 的簡書
- 上一篇文章: UITableView 多層級展開與收起:仿檔案目錄樹的實現方案
- 下一篇文章: iOS 干貨:探探風格卡片視圖切換效果的實現