
iOS 實戰:用 UICollectionView 打造新聞列表的無限循環輪播
用集合視圖實現新聞數據的無縫滾動
在資訊類 App 裡,「看了一條又一條、永遠滑不到頭」的輪播體驗幾乎是標配。本文以新聞列表為例,示範如何借助 UICollectionView 完成這種看似無限循環的展示效果。


一、動手前的準備工作
在正式寫代碼之前,先把「彈藥」備齊:
1. 引入字典轉模型的第三方庫 MJExtension,省去大量重複的賦值代碼;
2. 往工程裡放一份存有新聞數據的 plist 文件;
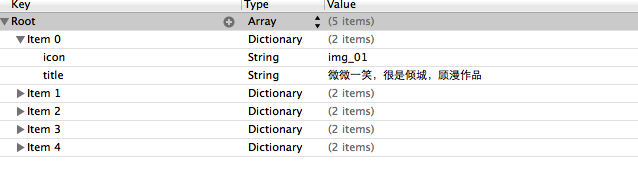
3. 準備好界面要用到的圖片素材。
二、分步實現
1. 建立數據模型
先定義一個簡單的新聞模型 YYnews,用來承載標題與圖標:
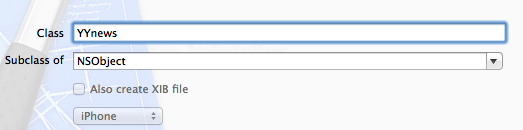
// YYnews.h
#import <Foundation/Foundation.h>

@interface YYnews : NSObject
@property(nonatomic,copy)NSString *title;
@property(nonatomic,copy)NSString *icon;
@end
2. 自定義 Cell
新建一個繼承自 UICollectionViewCell 的類,並配套一個 xib 文件描述它的樣式。
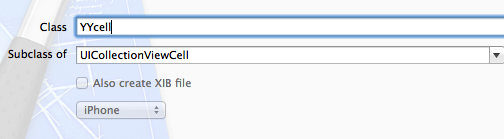
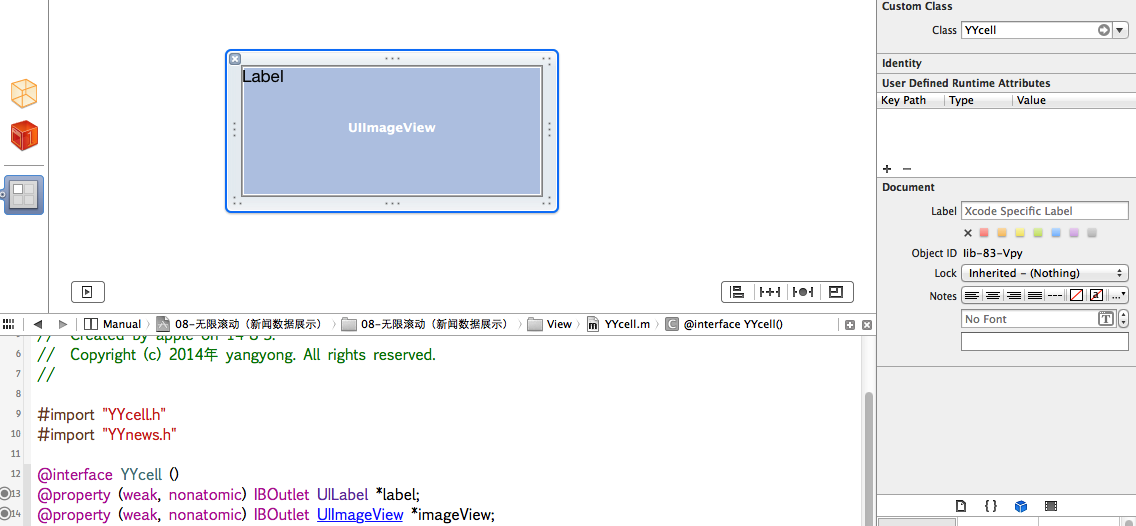
// YYcell.h
#import <UIKit/UIKit.h>

@class YYnews;
@interface YYcell : UICollectionViewCell
@property(nonatomic,strong)YYnews *news;
@end

// YYcell.m
#import "YYcell.h"
#import "YYnews.h"

@interface YYcell ()
@property (weak, nonatomic) IBOutlet UILabel *label;
@property (weak, nonatomic) IBOutlet UIImageView *imageView;
@end

@implementation YYcell
-(void)setNews:(YYnews *)news
{
    _news=news;
    self.label.text=news.title;
    self.imageView.image=[UIImage imageNamed:news.icon];
}
@end
3. 主控制器的數據源處理
在主控制器裡實現數據源方法,並通過懶加載把 plist 讀成模型數組:
// YYViewController.m
#import "YYViewController.h"
#import "MJExtension.h"
#import "YYnews.h"
#import "YYcell.h"

#define YYIDCell @"cell"

@interface YYViewController ()<UICollectionViewDataSource,UICollectionViewDelegate>
@property (weak, nonatomic) IBOutlet UICollectionView *collectinView;
@property(nonatomic,strong)NSArray *news;
@end

@implementation YYViewController

#pragma mark-懶加載
-(NSArray *)news
{
    if (_news==nil) {
        _news=[YYnews objectArrayWithFilename:@"newses.plist"];
    }
    return _news;
}
- (void)viewDidLoad
{
    [super viewDidLoad];
    [self.collectinView registerNib:[UINib nibWithNibName:@"YYcell" bundle:nil] forCellWithReuseIdentifier:YYIDCell];
}

#pragma mark- UICollectionViewDataSource
-(NSInteger)numberOfSectionsInCollectionView:(UICollectionView *)collectionView
{
    return 1;
}
-(NSInteger)collectionView:(UICollectionView *)collectionView numberOfItemsInSection:(NSInteger)section
{
    return self.news.count;
}
-(UICollectionViewCell *)collectionView:(UICollectionView *)collectionView cellForItemAtIndexPath:(NSIndexPath *)indexPath
{
    YYcell *cell=[collectionView dequeueReusableCellWithReuseIdentifier:YYIDCell forIndexPath:indexPath];
    cell.news=self.news[indexPath.item];
    return cell;
}
#pragma mark-UICollectionViewDelegate
@end
4. 幾個容易踩坑的補充
(1)當 cell 是以 xib 方式自定義時,註冊方式與純代碼不同,需要用 registerNib: 這條路徑。
[self.collectinView registerNib:[UINib nibWithNibName:@"YYcell" bundle:nil] forCellWithReuseIdentifier:YYIDCell];
(2)在 xib 裡使用 CollectionViewCell 時,別忘了把它的重用標識(Identifier)設為 cell。
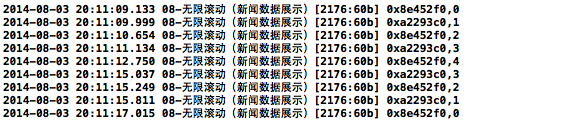
(3)可以打開日誌觀察 cell 的復用情況。
三、如何做到「循環」展示
上面的版本有個明顯短板:plist 裡只有五條數據,滑到頭條之後就沒內容了,根本談不上循環。下面提供兩種常見的變通思路。

方法一:把數據「鋪」成一大片
用一個 for 循環把同一份數據重複加載 200 次(5×200=1000 個模型),再讓程序啟動後默認定位到第 500 個位置——這樣往前有 500 條、往後也有 500 條,用戶便會產生「無限循環」的錯覺。
// YYViewController.m
#import "YYViewController.h"
#import "MJExtension.h"
#import "YYnews.h"
#import "YYcell.h"

#define YYIDCell @"cell"

@interface YYViewController ()<UICollectionViewDataSource,UICollectionViewDelegate>
@property (weak, nonatomic) IBOutlet UICollectionView *collectinView;
@property(nonatomic,strong)NSMutableArray *news;
@end

@implementation YYViewController

#pragma mark-懶加載
-(NSMutableArray *)news
{
    if (_news==nil) {
        _news=[NSMutableArray array];
        for (int i=0; i<200; i++) {
            NSArray *array=[YYnews objectArrayWithFilename:@"newses.plist"];
            [_news addObjectsFromArray:array];
        }
    }
    return _news;
}
- (void)viewDidLoad
{
    [super viewDidLoad];
    [self.collectinView registerNib:[UINib nibWithNibName:@"YYcell" bundle:nil] forCellWithReuseIdentifier:YYIDCell];

    // 默認定位到第 0 組的第 500 個模型
    [self.collectinView scrollToItemAtIndexPath:[NSIndexPath indexPathForItem:500 inSection:0] atScrollPosition:UICollectionViewScrollPositionLeft animated:YES];
}

#pragma mark- UICollectionViewDataSource
-(NSInteger)numberOfSectionsInCollectionView:(UICollectionView *)collectionView
{
    return 1;
}
-(NSInteger)collectionView:(UICollectionView *)collectionView numberOfItemsInSection:(NSInteger)section
{
    return self.news.count;
}
-(UICollectionViewCell *)collectionView:(UICollectionView *)collectionView cellForItemAtIndexPath:(NSIndexPath *)indexPath
{
    YYcell *cell=[collectionView dequeueReusableCellWithReuseIdentifier:YYIDCell forIndexPath:indexPath];
    cell.news=self.news[indexPath.item];
    NSLog(@"%p,%d",cell,indexPath.item);
    return cell;
}
#pragma mark-UICollectionViewDelegate
@end
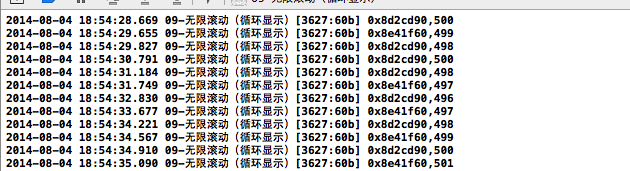
從日誌可以看到,全程依然只創建了兩個 cell,靠的正是集合視圖的復用機制。
關鍵在於這句滾動定位:
[self.collectinView scrollToItemAtIndexPath:<#(NSIndexPath *)#> atScrollPosition:<#(UICollectionViewScrollPosition)#> animated:<#(BOOL)#>]
方法二:用多組(section)來鋪
把 section 數量設為 100,總共就是 100×5=500 個模型,再讓默認位置落在第 50 組的索引 0 處。
// YYViewController.m
#import "YYViewController.h"
#import "MJExtension.h"
#import "YYnews.h"
#import "YYcell.h"

#define YYIDCell @"cell"

@interface YYViewController ()<UICollectionViewDataSource,UICollectionViewDelegate>
@property (weak, nonatomic) IBOutlet UICollectionView *collectinView;
@property(nonatomic,strong)NSArray *news;
@end

@implementation YYViewController

#pragma mark-懶加載
-(NSArray *)news
{
    if (_news==nil) {
        _news=[YYnews objectArrayWithFilename:@"newses.plist"];
    }
    return _news;
}
- (void)viewDidLoad
{
    [super viewDidLoad];
    [self.collectinView registerNib:[UINib nibWithNibName:@"YYcell" bundle:nil] forCellWithReuseIdentifier:YYIDCell];

    // 默認定位到第 50 組的索引 0 處
    [self.collectinView scrollToItemAtIndexPath:[NSIndexPath indexPathForItem:0 inSection:50] atScrollPosition:UICollectionViewScrollPositionLeft animated:YES];
}

#pragma mark- UICollectionViewDataSource
-(NSInteger)numberOfSectionsInCollectionView:(UICollectionView *)collectionView
{
    return 100;
}
-(NSInteger)collectionView:(UICollectionView *)collectionView numberOfItemsInSection:(NSInteger)section
{
    return self.news.count;
}
-(UICollectionViewCell *)collectionView:(UICollectionView *)collectionView cellForItemAtIndexPath:(NSIndexPath *)indexPath
{
    YYcell *cell=[collectionView dequeueReusableCellWithReuseIdentifier:YYIDCell forIndexPath:indexPath];
    cell.news=self.news[indexPath.item];
    NSLog(@"%p,%d",cell,indexPath.item);
    return cell;
}
#pragma mark-UICollectionViewDelegate
@end
性能提醒與改進方向
這兩種做法都存在一個通病:造出了大量用不上的模型,並不可取。集合視圖在內部要遍歷計算所有子控件的 frame,模型數量一旦過大就會白白吃資源。
更推薦的思路是:監聽手指的滾動手勢,當滾動停止時,再把位置重新校正回中間區域。這樣既能維持無限循環的視覺效果,又不會讓數據規模失控。