
iOS 開發入門:cocos2d 環境搭建完整指南
本文示範如何在 Mac 上完成 cocos2d 開發環境的建置,讓你能直接在 Xcode 中建立 2D 遊戲專案。
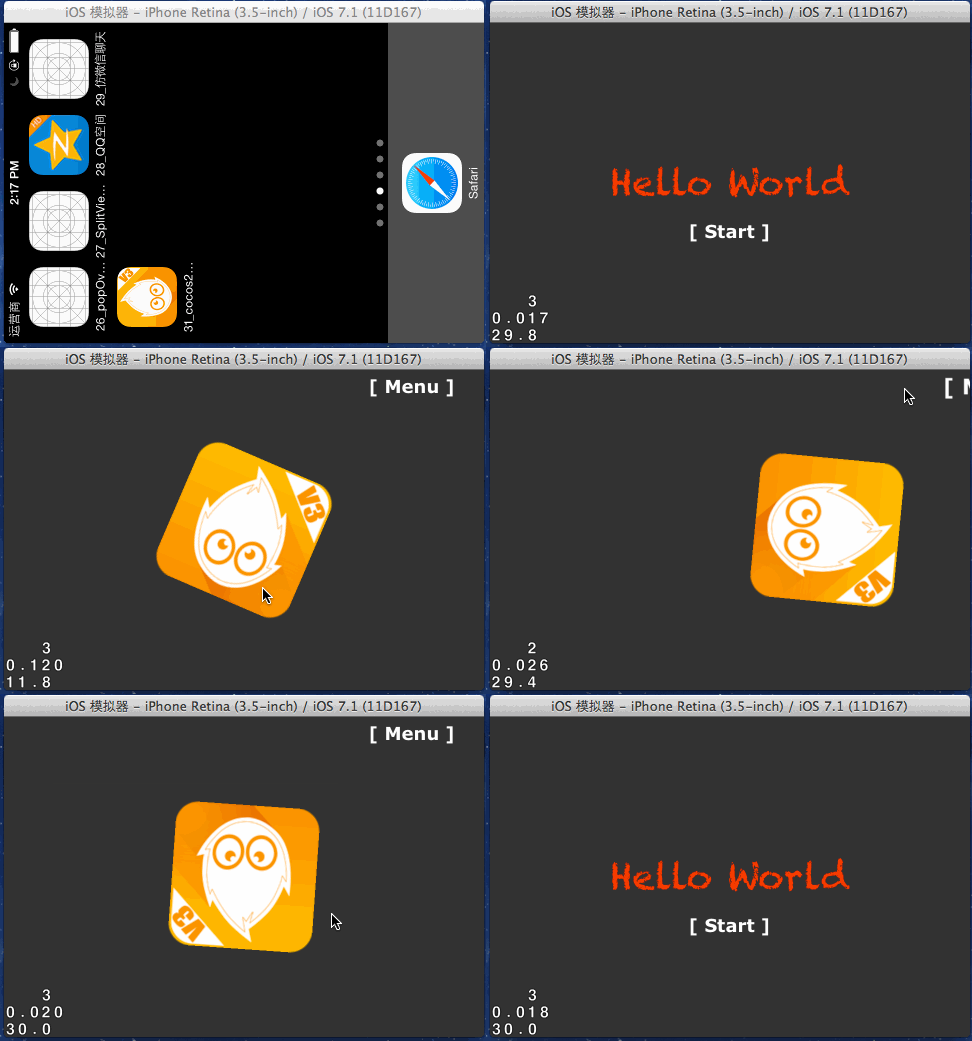
最終執行成果如下:
安裝步驟
1. 下載並解壓 cocos2d 壓縮檔。
2. 進入解壓後的 cocos2d 主目錄,複製該路徑。
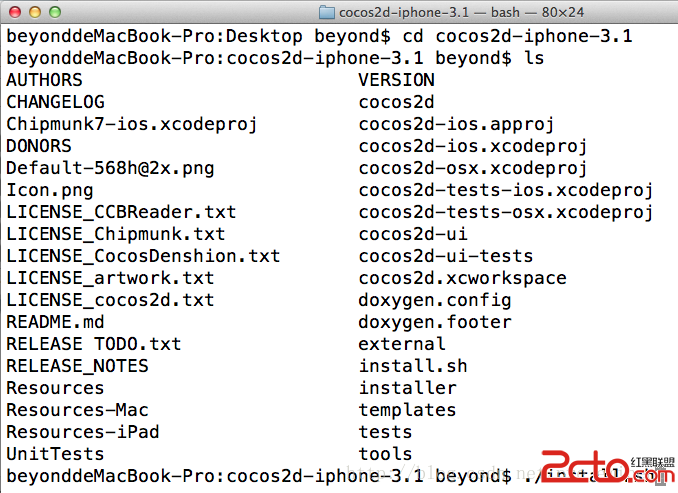
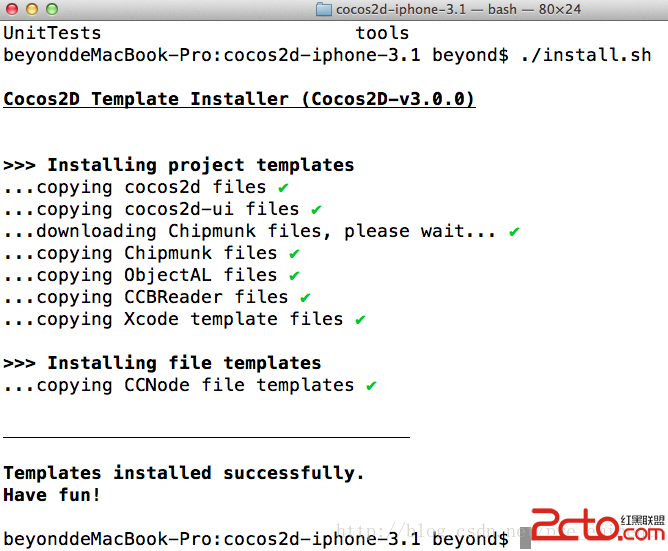
3. 開啟「終端機」,切換到該目錄後執行 ./install.sh 進行安裝。這個腳本的本質,其實就是把 cocos2d 的模板檔案複製到 Xcode 的專案模板目錄中。
驗證安裝結果
安裝前,在 Xcode 新增專案時,畫面如下:
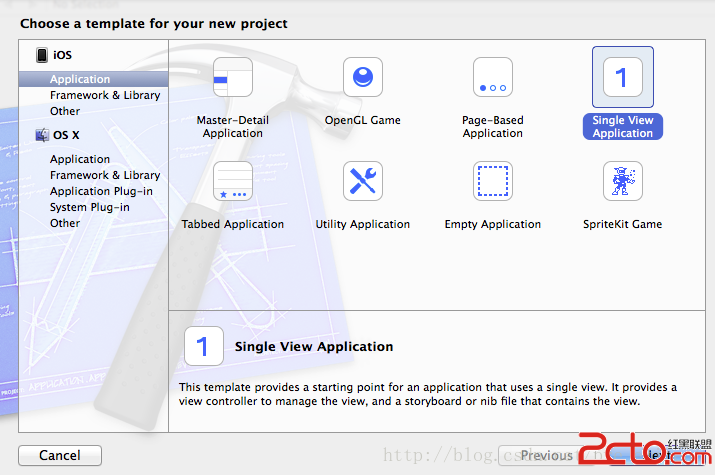
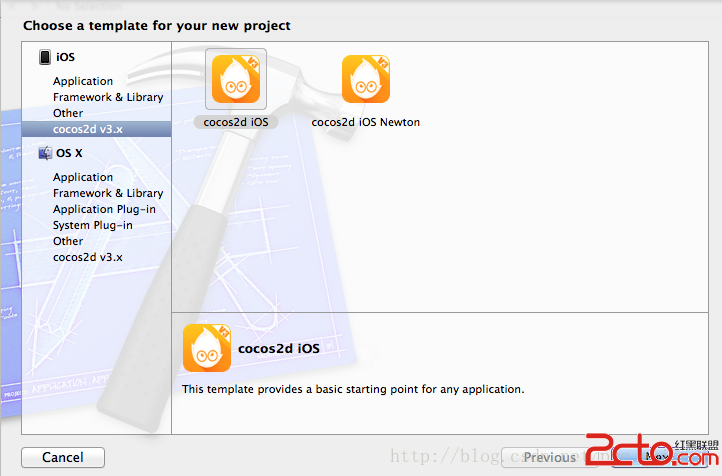
安裝完成後,再次新增專案,就會看到多出的 cocos2d 選項:
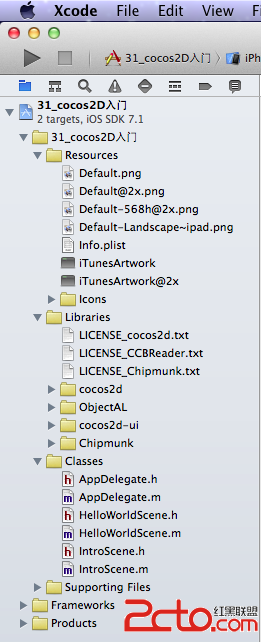
建立好的工程目錄結構如下:
直接編譯執行,即可看到範例畫面:
應用代理 AppDelegate
AppDelegate 繼承自 CCAppDelegate,而 CCAppDelegate 又繼承自 NSObject 並遵守 UIApplicationDelegate 與 CCDirectorDelegate 協議,它扮演著整個應用程式的入口角色。大多數 cocos2d 專案都應該繼承 CCAppDelegate,並至少覆寫 startScene 方法以回傳應用啟動時要展示的第一個場景;若想進一步自訂像素模式等細節,則可覆寫 application:didFinishLaunchingWithOptions:。
#import "AppDelegate.h"
#import "IntroScene.h"
#import "HelloWorldScene.h"

@implementation AppDelegate

- (BOOL)application:(UIApplication *)application didFinishLaunchingWithOptions:(NSDictionary *)launchOptions {
    // 設定 Cocos2D 各項參數
    [self setupCocos2dWithOptions:@{
        CCSetupShowDebugStats: @(YES),        // 顯示 FPS
        // CCSetupScreenOrientation: CCScreenOrientationPortrait, // 豎屏模式
    }];
    return YES;
}

- (CCScene *)startScene {
    // 回傳啟動時顯示的第一個場景
    return [IntroScene scene];
}
@end
場景一:IntroScene
在 v3 之後,場景應以 CCScene 為基礎,而非舊版的 CCLayer。以下建立一個深灰色背景,置中顯示標題文字,並加入一個「開始」按鈕,點擊後以轉場動畫切換到下一個場景。
#import "IntroScene.h"
#import "HelloWorldScene.h"

@implementation IntroScene

+ (IntroScene *)scene {
    return [[self alloc] init];
}

- (id)init {
    self = [super init];
    if (!self) return nil;

    // 深灰色背景
    CCNodeColor *background = [CCNodeColor nodeWithColor:[CCColor colorWithRed:0.2f green:0.2f blue:0.2f alpha:1.0f]];
    [self addChild:background];

    // 置中標題
    CCLabelTTF *label = [CCLabelTTF labelWithString:@"Hello Beyond" fontName:@"Chalkduster" fontSize:36.0f];
    label.positionType = CCPositionTypeNormalized;
    label.color = [CCColor redColor];
    label.position = ccp(0.5f, 0.5f); // 笛卡兒座標系,原點在左下角
    [self addChild:label];

    // 開始按鈕
    CCButton *helloWorldButton = [CCButton buttonWithTitle:@"[ Start ]" fontName:@"Verdana-Bold" fontSize:18.0f];
    helloWorldButton.positionType = CCPositionTypeNormalized;
    helloWorldButton.position = ccp(0.5f, 0.35f);
    [helloWorldButton setTarget:self selector:@selector(onSpinningClicked:)];
    [self addChild:helloWorldButton];

    return self;
}

- (void)onSpinningClicked:(id)sender {
    [[CCDirector sharedDirector] replaceScene:[HelloWorldScene scene]
                               withTransition:[CCTransition transitionPushWithDirection:CCTransitionDirectionLeft duration:1.0f]];
}
@end
場景二:HelloWorldScene
這個場景示範精靈(Sprite)的建立、持續旋轉動畫、返回按鈕,以及觸碰螢幕後精靈跟隨手指移動的效果。
#import "HelloWorldScene.h"
#import "IntroScene.h"

@implementation HelloWorldScene {
    CCSprite *_sprite;
}

+ (HelloWorldScene *)scene {
    return [[self alloc] init];
}

- (id)init {
    if (!(self = [super init])) return nil;
    self.userInteractionEnabled = YES; // 允許互動

    CCNodeColor *background = [CCNodeColor nodeWithColor:[CCColor colorWithRed:0.2f green:0.2f blue:0.2f alpha:1.0f]];
    [self addChild:background];

    // 置中精靈
    _sprite = [CCSprite spriteWithImageNamed:@"ColorCircle.png"];
    _sprite.position = ccp(self.contentSize.width / 2, self.contentSize.height / 2);
    [self addChild:_sprite];

    // 持續旋轉動畫
    CCActionRotateBy *actionSpin = [CCActionRotateBy actionWithDuration:1.5f angle:360];
    [_sprite runAction:[CCActionRepeatForever actionWithAction:actionSpin]];

    // 返回按鈕
    CCButton *backButton = [CCButton buttonWithTitle:@"[ Back ]" fontName:@"Verdana-Bold" fontSize:18.0f];
    backButton.positionType = CCPositionTypeNormalized;
    backButton.position = ccp(0.85f, 0.95f);
    [backButton setTarget:self selector:@selector(onBackClicked:)];
    [self addChild:backButton];

    return self;
}

// 觸碰螢幕,精靈移動到觸碰點
- (void)touchBegan:(UITouch *)touch withEvent:(UIEvent *)event {
    CGPoint touchLoc = [touch locationInNode:self];
    CCActionMoveTo *actionMove = [CCActionMoveTo actionWithDuration:1.0f position:touchLoc];
    [_sprite runAction:actionMove];
}

- (void)onBackClicked:(id)sender {
    [[CCDirector sharedDirector] replaceScene:[IntroScene scene]
                               withTransition:[CCTransition transitionPushWithDirection:CCTransitionDirectionRight duration:1.0f]];
}
@end
透過這套流程,你便能在 Xcode 裡快速產出可執行的 cocos2d 專案,並進一步嘗試場景切換、精靈動畫與觸控互動等常見遊戲開發技巧。