
iOS 五種本地資料持久化方案完整比較與實作
在 iOS 上把資料存到本地,方法不只一種,而且各有適用場景。本文把最常見的五種方案——屬性列表、NSUserDefaults、NSCoding 歸檔、Core Data 與 FMDB——從原理、程式碼到優缺點完整走一遍,最後再談怎麼選。
五種方案速覽
- 直接寫入檔案:可存放 NSString、NSArray、NSDictionary、NSData、NSNumber,資料集中寫進一個屬性列表檔(*.plist)。
- NSUserDefaults(偏好設定):專門用來存 App 設定資訊,檔案位於 Library/Preferences 目錄。
- 歸檔(NSKeyedArchiver):與前兩者最大的差異,是它能序列化「自訂物件」。
- Core Data:Apple 在 iOS 5 之後推出的綜合型資料庫,採用 ORM(Object Relational Mapping)技術把物件轉換為資料後存入本地;為提升效率,它會把常用資料放進記憶體,並可選擇 sqlite、xml 等底層格式。因為完全導向物件,執行效率不及原生資料庫,但它額外提供資料驗證、undo 等功能,是功能面最完整的一種。
- FMDB:以 Objective-C 封裝 SQLite 的 C 語言 API,使用起來更物件導向,省下大量繁瑣冗餘的 C 程式碼;相較於 Core Data 更輕量、更靈活,並提供多執行緒安全的資料庫操作方法,能有效避免資料錯亂。
方式一:直接寫入檔案
先取得沙盒中的快取目錄路徑,有兩種常見寫法:
// 方法一:從主目錄自己拼
NSString *homePath = NSHomeDirectory();
NSString *path = [homePath stringByAppendingPathComponent:@"Library/Caches"];

// 方法二:用系統 API 查(第一個參數是目標目錄,第二個是搜尋範圍,第三個決定是否展開 ~)
NSArray *arr = NSSearchPathForDirectoriesInDomains(NSCachesDirectory, NSUserDomainMask, YES);
NSString *cachePath = [arr lastObject];   // 雖然回傳陣列,但同類目錄只有一個,所以只有一個元素
Document 與 tmp 目錄也可用同樣方式取得,其中 tmp 最方便:
NSString *tmpPath = NSTemporaryDirectory();
接著拼出目標檔案路徑,建立資料並寫入。要注意 writeToFile:atomically: 會覆蓋原本的內容:
NSString *filePath = [cachePath stringByAppendingPathComponent:@"tese.plist"];

NSDictionary *content = @{@"字典數據測試1": @"1",
                          @"字典數據測試2": @"2",
                          @"字典數據測試":  @"3"};

[content writeToFile:filePath atomically:YES];   // 檔案不存在時會自動建立

// 讀取
NSDictionary *dic = [NSDictionary dictionaryWithContentsOfFile:filePath];
NSLog(@"%@", dic);
執行後,Library/Caches 目錄下會多出 tese.plist:
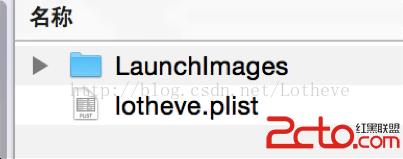
檔案內容如下:
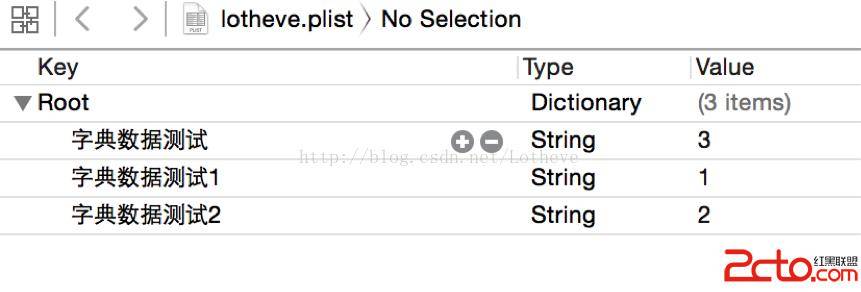
怎麼找到模擬器的沙盒路徑?把下面這段路徑印到 console,複製後在 Mac 的 Finder 點左上角選單「前往」→「前往檔案夾」,貼上即可:
NSString *path = [NSSearchPathForDirectoriesInDomains(NSDocumentDirectory, NSUserDomainMask, YES) objectAtIndex:0];
NSLog(@"%@", path);
方式二:NSUserDefaults(偏好設定)
每個 App 都有一個 NSUserDefaults 單例,用來存放設定與使用者資訊,例如使用者名稱、字體大小、是否自動登入等。資料會自動寫入沙盒的 Library/Preferences 目錄,同樣只支援 NSString、NSArray、NSDictionary、NSData、NSNumber 這幾種型別。
屬性列表本質上是明文的輕量級格式(最常見為 XML)。建立新專案時 Xcode 自動產生的 info.plist 就是同一套機制。由於 plist 只能用 NSArray 或 NSDictionary 讀取,而且完全不加密,安全性幾乎為零,因此不適合存放重要或敏感的資料。
// 儲存
- (IBAction)saveData:(id)sender {
    NSUserDefaults *userDefaults = [NSUserDefaults standardUserDefaults];
    // 不需要指定路徑,系統會存到 Preferences 目錄
    [userDefaults setObject:@"Lotheve" forKey:@"name"];
    [userDefaults setObject:@"NSUserDefaults" forKey:@"demo"];
    // 立刻同步;不寫的話系統會在未來某個時間點自動寫檔
    [userDefaults synchronize];
}

// 讀取
- (IBAction)getData:(id)sender {
    NSUserDefaults *userDefaults = [NSUserDefaults standardUserDefaults];
    NSString *name = [userDefaults objectForKey:@"name"];
    NSString *demo = [userDefaults objectForKey:@"demo"];
    NSLog(@"name = %@ demo = %@", name, demo);
}
點擊「保存數據」後,Library/Preferences 目錄中會出現對應的 plist 檔:
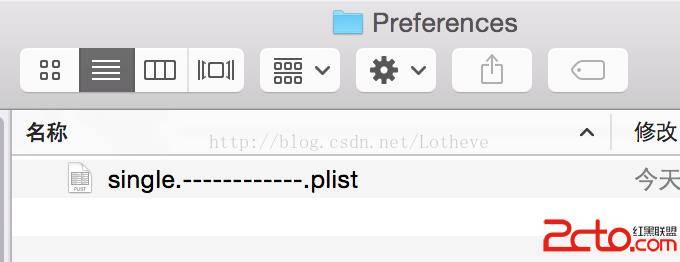
打開來可以看到資料確實以 plist 格式寫入磁碟:
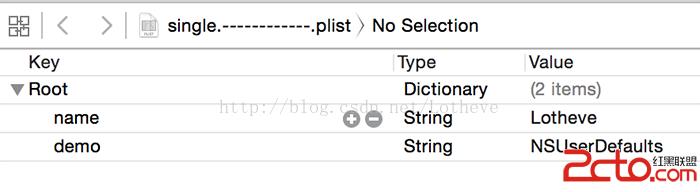
這種方式的優點是像字典一樣直觀方便,缺點很明確:無法存放自訂物件。
方式三:NSKeyedArchiver(歸檔)
與屬性列表相反,歸檔會把資料轉成二進位,安全性遠高於明文 plist。更重要的是,它能存「自訂物件」,而且不管物件有多複雜、要存幾個,寫入磁碟的方式都一樣。
使用前提是:被儲存的模型類別必須遵循 NSCoding 協議並實作它的兩個方法(若想要更嚴謹的防篡改,也可以遵循 iOS 6 之後新增的 NSSecureCoding)。
先定義一個遵循 NSCoding 的模型:
// TestPerson.h
@interface TestPerson : NSObject
@property (nonatomic, copy) NSString *name;
@property (nonatomic, assign) NSInteger age;
@property (nonatomic, copy) NSString *sex;
@property (nonatomic, strong) NSArray *familyMumbers;
@end

// TestPerson.m
#pragma mark - NSCoding 協議方法(一定要實作)

// 歸檔時呼叫:寫清楚要存哪些屬性
- (void)encodeWithCoder:(NSCoder *)aCoder {
    [aCoder encodeObject:_name forKey:@"name"];
    [aCoder encodeInteger:_age forKey:@"age"];
    [aCoder encodeObject:_sex forKey:@"sex"];
    [aCoder encodeObject:_familyMumbers forKey:@"familyMumbers"];
}

// 解檔時呼叫:寫清楚要取出哪些屬性
- (id)initWithCoder:(NSCoder *)aDecoder {
    if (self = [super init]) {
        self.name = [aDecoder decodeObjectForKey:@"name"];
        self.age = [aDecoder decodeIntegerForKey:@"age"];
        self.sex = [aDecoder decodeObjectForKey:@"sex"];
        _familyMumbers = [aDecoder decodeObjectForKey:@"familyMumbers"];
    }
    return self;
}
這裡有個實用的小技巧:與其用大量巨集定義 key(編譯時會造成額外負擔),不如用 static 常數取代:
static NSString * const kUserNameKey = @"userName";
模型準備好之後,就能用 NSKeyedArchiver / NSKeyedUnarchiver 進行存取:
- (IBAction)saveData:(id)sender {
    _p = [[TestPerson alloc] init];
    _p.name = @"Lotheve";
    _p.age = 20;
    _p.sex = @"m";
    _p.familyMumbers = @[@"Father", @"Mather", @"Me"];

    NSString *docPath = [NSSearchPathForDirectoriesInDomains(NSDocumentDirectory, NSUserDomainMask, YES) lastObject];
    // 副檔名可以隨便取,歸檔格式與副檔名無關
    NSString *targetPath = [docPath stringByAppendingPathComponent:@"lotheve.plist"];
    [NSKeyedArchiver archiveRootObject:_p toFile:targetPath];
}

- (IBAction)getData:(id)sender {
    NSString *docPath = [NSSearchPathForDirectoriesInDomains(NSDocumentDirectory, NSUserDomainMask, YES) lastObject];
    NSString *targetPath = [docPath stringByAppendingPathComponent:@"lotheve.plist"];
    TestPerson *person = [NSKeyedUnarchiver unarchiveObjectWithFile:targetPath];
    NSLog(@"name = %@ , age = %ld , sex = %@ , familyMubers = %@",
          person.name, person.age, person.sex, person.familyMumbers);
}
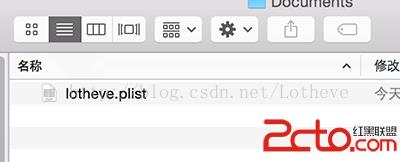
點擊「保存數據」後,Documents 目錄會出現該檔案:
由於是二進位格式,直接打開看到的內容是編碼後的結果:
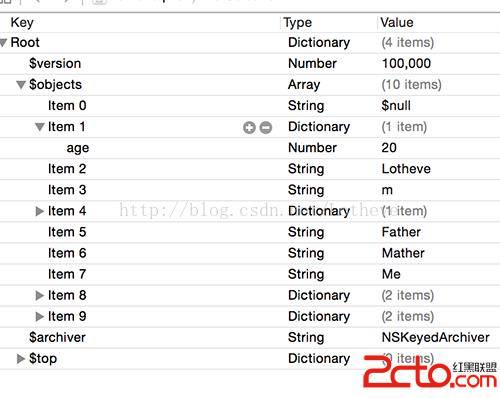
而透過「提取數據」把物件還原回來後,打印結果就是原本的屬性值:

方式四:Core Data
Core Data 是 iOS 5 之後推出的資料持久化框架,提供 ORM 能力,讓物件與資料可以互相轉換。它同時具備關聯模型(也就是資料庫)與物件模型(OC 物件)兩層,底層可選擇 sqlite、xml、plist 等格式,預設使用 sqlite。
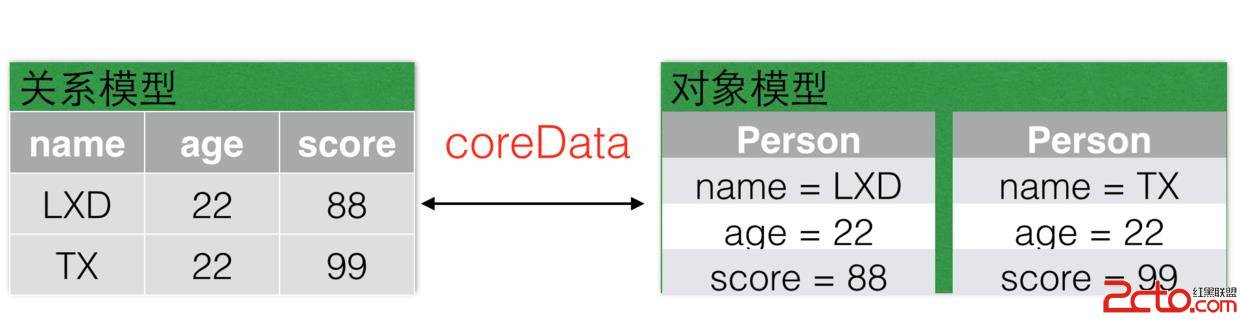
因為不需要自己操心資料怎麼存,Core Data 是三種「進階方案」裡上手門檻最低的。使用方式有兩種:建立專案時勾選 Use Core Data,或手動建置。以下示範前者:
步驟 1:建立新專案時勾選 Use Core Data。
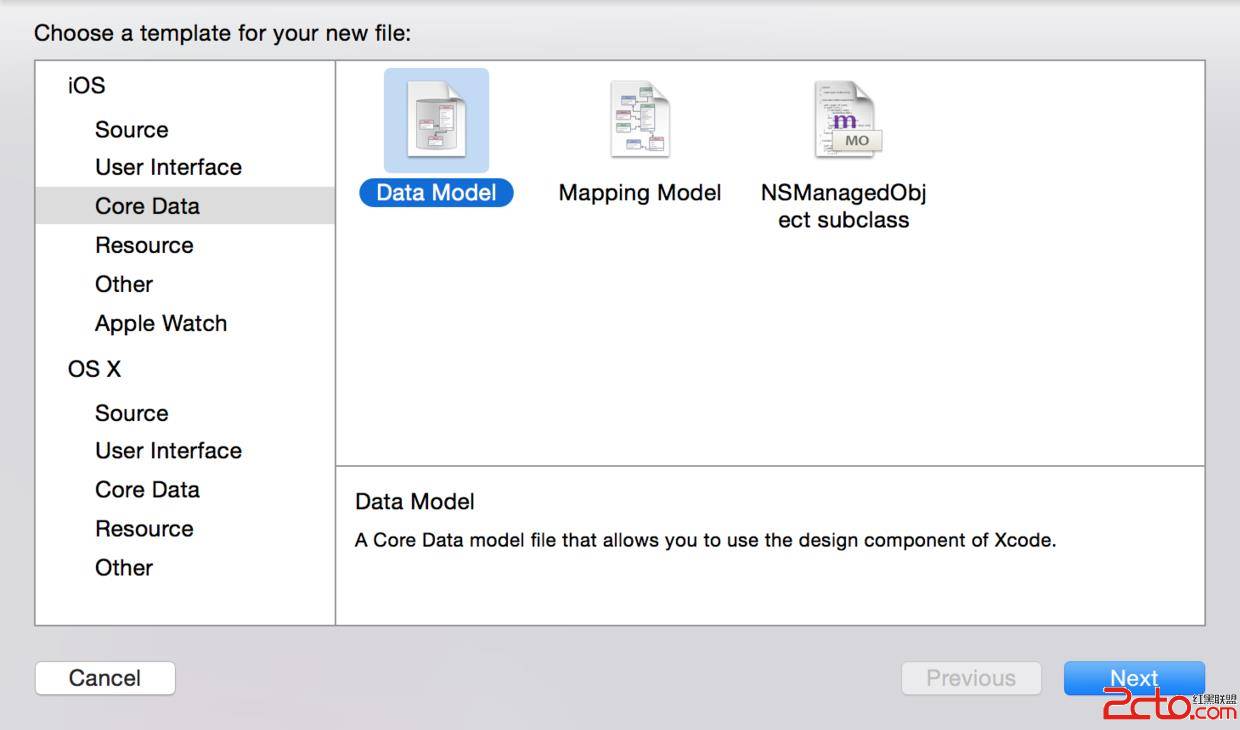
步驟 2:建立關聯模型檔,名稱務必與專案名稱一致(此例為 LXDCoreDataDemo)。
步驟 3:在模型中新增實體 Person,並加入 name、age、score 三個欄位。
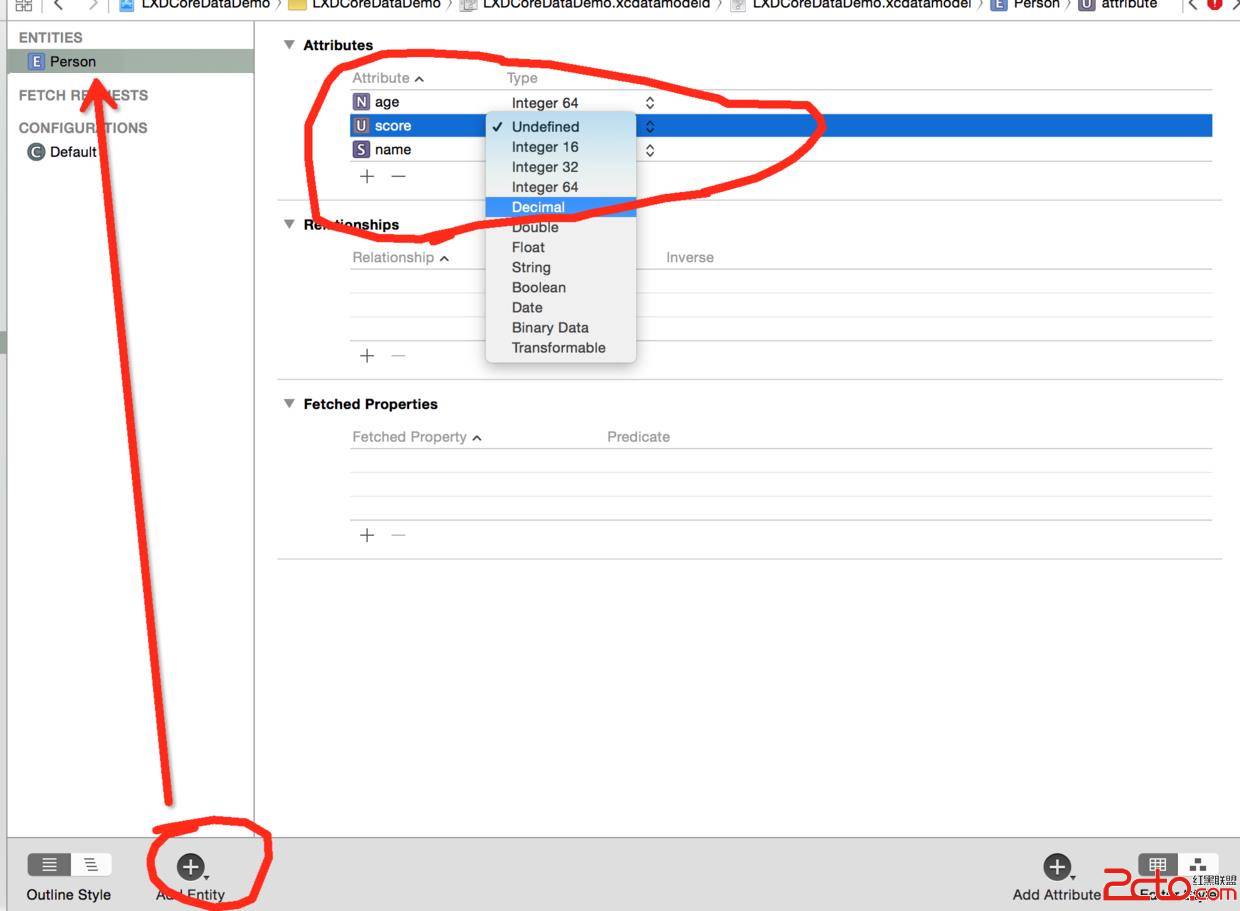
接著要讓 Xcode 依關聯模型產生 NSManagedObject 子類——從 Core Data 取出的物件全都是 NSManagedObject 的子類:
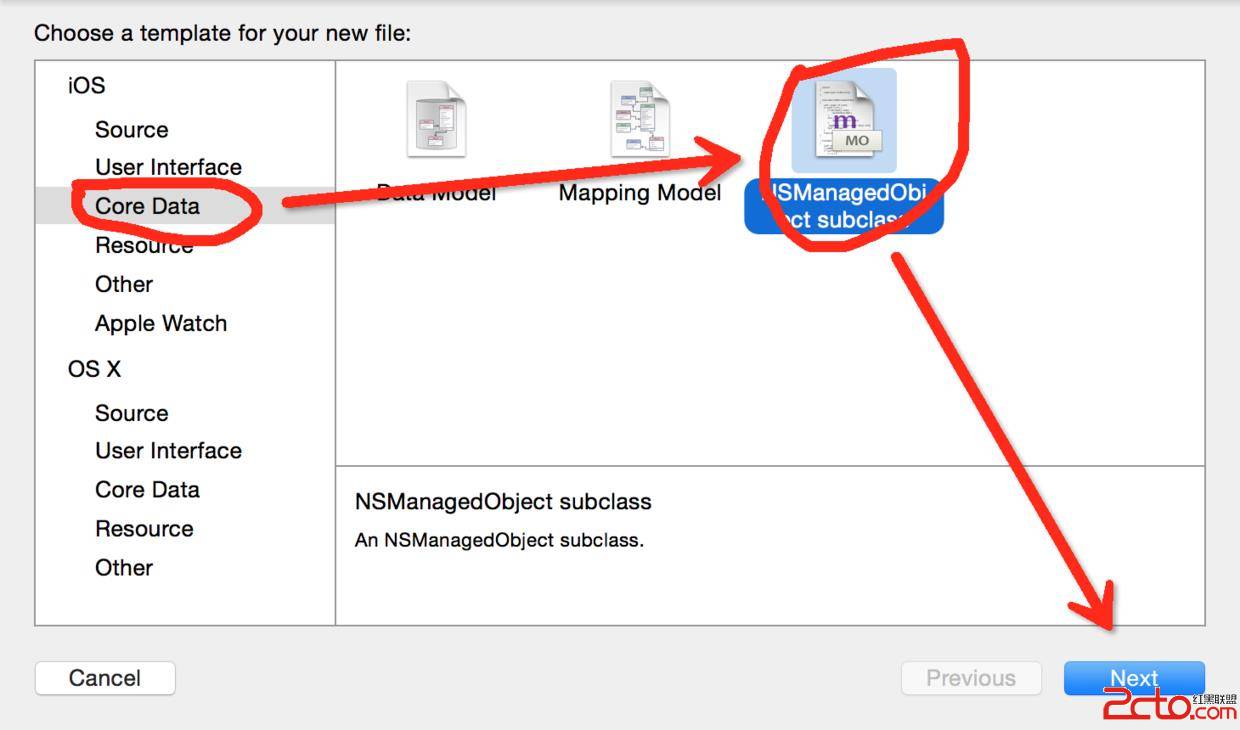
依序選擇 LXDCoreDataDemo → Next → Person → Create,三個屬性會自動補上:
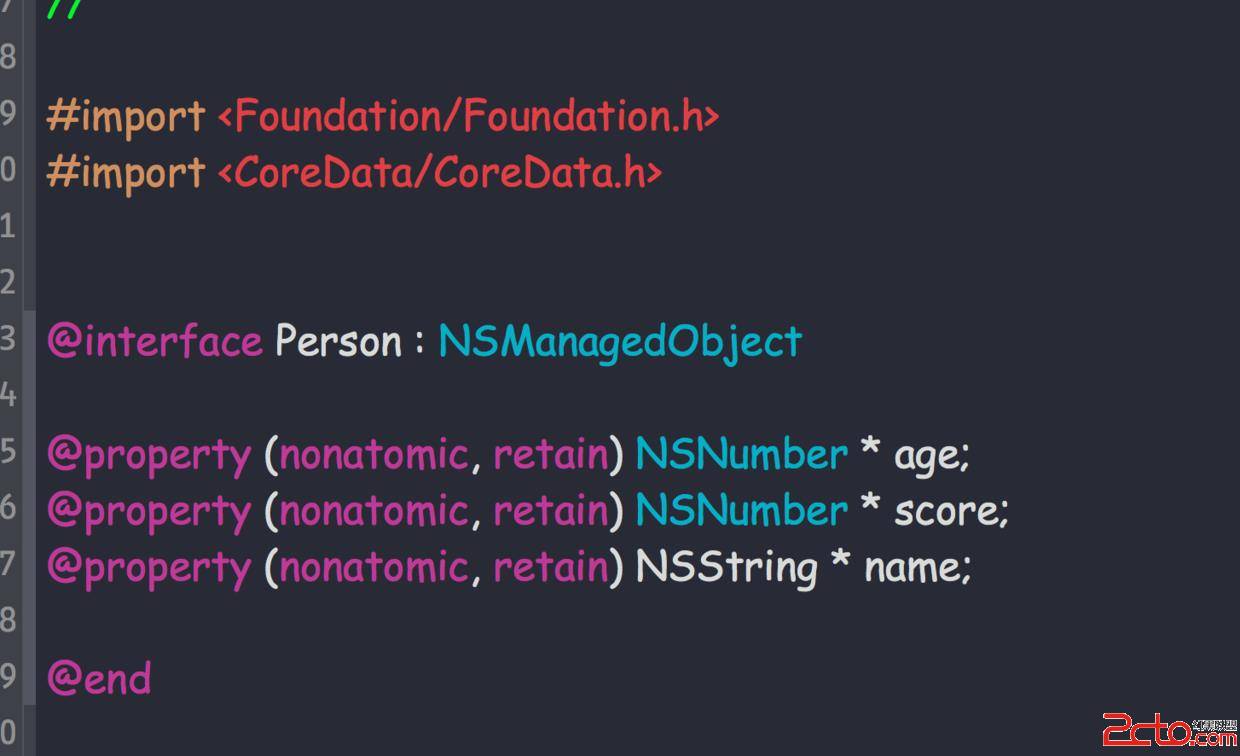
在要操作的類別中引入 AppDelegate 與 Person 的標頭檔。因為建立專案時勾選了 Use Core Data,AppDelegate 已經幫你準備好管理與儲存模型所需的物件,直接使用即可:
// 取出 Core Data 的上下文管理者
AppDelegate *appDelegate = [[UIApplication sharedApplication] delegate];
NSManagedObjectContext *context = appDelegate.managedObjectContext;

// 新增一筆資料
Person *person = [NSEntityDescription insertNewObjectForEntityForName:@"Person" inManagedObjectContext:context];
person.name = @"czk";
person.score = [NSNumber numberWithInt:100];
person.age = [NSNumber numberWithInt:25];
[appDelegate saveContext];

// 查詢全部資料
NSError *error;
NSFetchRequest *request = [NSFetchRequest new];
NSEntityDescription *entity = [NSEntityDescription entityForName:@"Person" inManagedObjectContext:context];
[request setEntity:entity];
NSArray *results = [[context executeFetchRequest:request error:&error] copy];
for (Person *p in results) {
    NSLog(@"%@, %@, %@", p.name, p.age, p.score);
}
注意:若出現崩潰異常,請先移除 App 再重新安裝,這通常是模型與既有資料不相容造成的。
方式五:FMDB
優點:
- 以 Objective-C 封裝 SQLite 的 C API,使用體驗更親近物件導向,也更不容易出錯
- 輕量、靈活,可依需求自由搭配
- 內建對多執行緒並發存取的處理,因此具備執行緒安全機制
缺點:因為是 Objective-C 的封裝,僅能用在 iOS/macOS 開發,跨平台時會受限。
三個主要類別:
- FMDatabase:一個物件代表一個獨立的 SQLite 資料庫,用來執行 SQL 語句。
- FMResultSet:執行查詢後的結果集。
- FMDatabaseQueue:用於在多執行緒中執行多個查詢或更新,是執行緒安全的。
建議用 CocoaPods 匯入 FMDB。建立與開關資料庫:
db = [FMDatabase databaseWithPath:database_path];
[db open];    // 回傳 BOOL
[db close];
關於路徑參數有三種行為:檔案不存在時 FMDB 會自動建立;傳入空字串 @"" 時會在暫存目錄建立,並在關閉連線時刪除;傳入 NULL 則建立記憶體內的資料庫,同樣在斷線時消失。
除了查詢之外,新增、修改、刪除都走 executeUpdate:,回傳 BOOL:

建立資料表:
if ([db open]) {
    NSString *sqlCreateTable = [NSString stringWithFormat:
        @"CREATE TABLE IF NOT EXISTS '%@' ('%@' INTEGER PRIMARY KEY AUTOINCREMENT, '%@' TEXT, '%@' INTEGER, '%@' TEXT)",
        TABLENAME, ID, NAME, AGE, ADDRESS];
    BOOL res = [db executeUpdate:sqlCreateTable];
    NSLog(res ? @"建立成功" : @"建立失敗");
    [db close];
}
新增資料:
if ([db open]) {
    NSString *insertSql = [NSString stringWithFormat:
        @"INSERT INTO '%@' ('%@','%@','%@') VALUES (?,?,?)",
        TABLENAME, NAME, AGE, ADDRESS];
    BOOL res = [db executeUpdate:insertSql, @"張三", @"13", @"濟南"];
    NSLog(res ? @"新增成功" : @"新增失敗");
    [db close];
}
更新與刪除:
// 更新
NSString *updateSql = [NSString stringWithFormat:
    @"UPDATE '%@' SET '%@'='%' WHERE '%@'='%@'", TABLENAME, AGE, @"15", AGE, @"13"];
[db executeUpdate:updateSql];

// 刪除
NSString *deleteSql = [NSString stringWithFormat:
    @"DELETE FROM %@ WHERE %@='%@'", TABLENAME, NAME, @"張三"];
[db executeUpdate:deleteSql];
查詢則使用 executeQuery:,並透過 FMResultSet 逐列取值:
if ([db open]) {
    NSString *sql = [NSString stringWithFormat:@"SELECT * FROM %@", TABLENAME];
    FMResultSet *rs = [db executeQuery:sql];
    while ([rs next]) {
        int Id = [rs intForColumn:ID];
        NSString *name = [rs stringForColumn:NAME];
        NSString *age = [rs stringForColumn:AGE];
        NSString *address = [rs stringForColumn:ADDRESS];
        NSLog(@"id=%d, name=%@, age=%@, address=%@", Id, name, age, address);
    }
    [db close];
}
FMResultSet 提供了一整組型別化的取值方法:
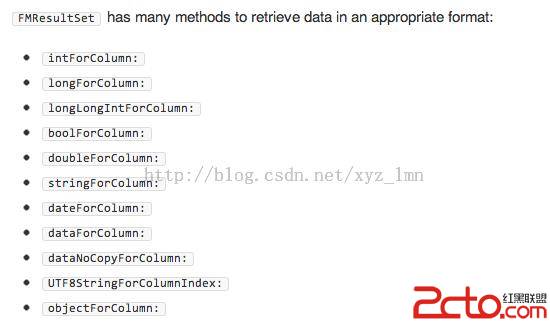
多執行緒存取:同一個 FMDatabase 物件絕不可在多個執行緒中共用,否則會造成資料錯亂。正確做法是用 FMDatabaseQueue,把操作包進 block 交給它排隊執行,你自己完全不碰 FMDatabase 的管理:
FMDatabaseQueue *queue = [FMDatabaseQueue databaseQueueWithPath:database_path];

dispatch_queue_t q1 = dispatch_queue_create("queue1", NULL);
dispatch_queue_t q2 = dispatch_queue_create("queue2", NULL);

dispatch_async(q1, ^{
    for (int i = 0; i < 50; ++i) {
        [queue inDatabase:^(FMDatabase *db2) {
            NSString *insertSql = [NSString stringWithFormat:
                @"INSERT INTO '%@' ('%@','%@','%@') VALUES (?,?,?)",
                TABLENAME, NAME, AGE, ADDRESS];
            NSString *name = [NSString stringWithFormat:@"jack%d", i];
            NSString *age = [NSString stringWithFormat:@"%d", 10 + i];
            BOOL res = [db2 executeUpdate:insertSql, name, age, @"濟南"];
            if (!res) { NSLog(@"寫入失敗:%@", name); }
        }];
    }
});

dispatch_async(q2, ^{
    for (int i = 0; i < 50; ++i) {
        [queue inDatabase:^(FMDatabase *db2) {
            NSString *insertSql = [NSString stringWithFormat:
                @"INSERT INTO '%@' ('%@','%@','%@') VALUES (?,?,?)",
                TABLENAME, NAME, AGE, ADDRESS];
            NSString *name = [NSString stringWithFormat:@"lilei%d", i];
            NSString *age = [NSString stringWithFormat:@"%d", 10 + i];
            BOOL res = [db2 executeUpdate:insertSql, name, age, @"北京"];
            if (!res) { NSLog(@"寫入失敗:%@", name); }
        }];
    }
});
另外提醒一個實務細節:用 stringWithFormat: 拼 SQL 有注入風險,前例中改用 ? 佔位並把參數直接傳給 executeUpdate:,才是較安全的寫法。
怎麼選
五種方案沒有絕對的優劣,只有場景差異:
- 少量、不敏感的設定值 → NSUserDefaults
- 結構簡單、需要快速讀寫的固定資料 → 直接寫 plist
- 需要保存自訂物件、資料量不大 → NSKeyedArchiver 歸檔
- 物件導向、需要查詢條件與 undo 等進階能力 → Core Data
- 需要複雜 SQL、跨表關聯查詢,或明確要求執行緒安全 → FMDB