
用一張大圖加一段 Shell 腳本,批量生成 App Icon 與多倍圖素材
本文為投稿文章,作者:技術漁場。
美術 UI 是團隊裡的稀缺資源。為了不給設計同學添麻煩、按時交付需求,程序員往往需要自己動手處理切圖。
iOS 中我們用 Images.xcassets 管理素材與 App Icon,好處很直接:按要求的尺寸拖進去就行。

Image Asset 能自動適配各種屏幕。
但如果設計只給一張大圖,@2x、@3x 都得自己想辦法——那就來點自動化吧。
一、把圖片縮放到指定尺寸
Mac 下自帶一個很好用的命令行工具 sips,專門處理圖片尺寸。

button 素材示例:假設 button.png 為 256×256,按 2/3、1/3 比例壓縮得到 @2x 的 171×171 與 @1x 的 85×85:
cp button.png button@3x.png
sips -z 171 171 button.png --out button@2x.png
sips -z 85 85 button.png --out button.png
執行後當前目錄下就得到了三個尺寸的素材,拖進 xcassets 即可,配合 Storyboard 與 Auto Layout 自動適配不同設備。
不熟悉的參數可以隨時 sips --help。
二、自動獲取尺寸並等比例縮放
如果素材很多,不可能一個個手算。sips 同樣能查尺寸,再配合 awk 提取數值:
sips -g pixelHeight button.png | awk -F: '{print $2}'
sips -g pixelWidth  button.png | awk -F: '{print $2}'
接下來需要變量存儲與計算,於是我們寫一個 Shell 函數 ScalePic:
ScalePic () {
    # 1 獲取圖片的高和寬
    imageHeight=`sips -g pixelHeight $1 | awk -F: '{print $2}'`
    imageWidth=`sips -g pixelWidth $1 | awk -F: '{print $2}'`
    height=`echo $imageHeight`
    width=`echo $imageWidth`

    # 2 計算 2/3 與 1/3 後的尺寸
    height2x=$(($height*2/3))
    width2x=$(($width*2/3))

    height1x=$(($height/3))
    width1x=$(($width/3))

    # 3 生成 @2x / @3x 文件名
    imageFile=$1
    fileName2x=${imageFile/\.png/@2x\.png}
    fileName3x=${imageFile/\.png/@3x\.png}

    # 4 拷貝並壓縮
    cp $1 $fileName3x
    sips -z $height2x $width2x $1 --out $fileName2x
    sips -z $height1x $width1x $1
}
然後遍歷素材文件夾批量調用。把腳本放在素材夾的上一級目錄:
#!/bin/sh

# 0 進入素材文件夾
cd $1

# 1 遍歷文件夾下所有圖片
for file in ./* do
    # 2 獲取文件名並生成 "文件名.imageset" 文件夾
    imageFile=$(basename $file)
    imageDir=${imageFile/\.png/\.imageset}
    mkdir $imageDir

    # 3 拷貝進文件夾並進入
    cp $imageFile $imageDir/
    cd $imageDir

    # 4 執行縮放
    ScalePic $imageFile
    cd ..
done

cd ..
假設腳本名為 imagesetGenerator.sh,素材夾為 imageiphone:
./imagesetGenerator.sh imageiphone
一瞬間,所有尺寸的圖片都按各自的 .imageset 文件夾生成完畢。
三、連 Contents.json 也一起生成
圖片有了,還得把它們拖進 ImageSet——這一步重複而枯燥,同樣可以自動化。
先在 Xcode 中右鍵打開任意一個 ImageSet 文件夾。
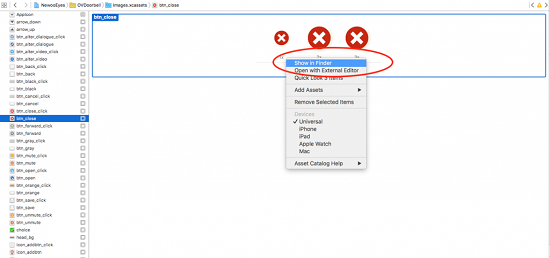
可以看到 .imageset 文件夾裡包含三張圖和一個 Contents.json。
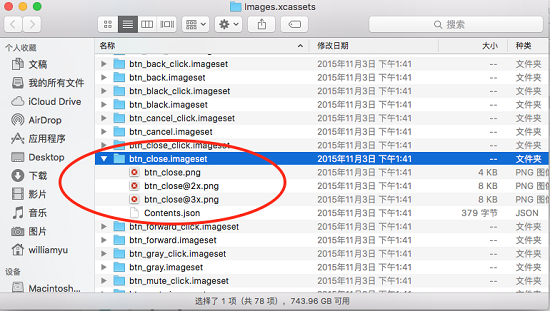
打開 Contents.json,結構一目了然:
{
  "images" : [
    {
      "idiom" : "universal",
      "scale" : "1x",
      "filename" : "btn_close.png"
    },
    {
      "idiom" : "universal",
      "scale" : "2x",
      "filename" : "btn_close@2x.png"
    },
    {
      "idiom" : "universal",
      "scale" : "3x",
      "filename" : "btn_close@3x.png"
    }
  ],
  "info" : {
    "version" : 1,
    "author" : "xcode"
  }
}
本質上就是 1x / 2x / 3x 與文件名的映射。既然格式固定,就用 echo 拼出來:
contents () {
    imageFile=$1
    renameFile2x=${imageFile/\.png/@2x\.png}
    renameFile3x=${imageFile/\.png/@3x\.png}

    echo {                                   >> Contents.json
    echo "  \"images\"" : [                  >> Contents.json
    echo "    {"                              >> Contents.json
    echo "      \"idiom\" : \"universal\","   >> Contents.json
    echo "      \"scale\" : \"1x\","         >> Contents.json
    echo "      \"filename\" : \"$imageFile\"" >> Contents.json
    echo "    },"                             >> Contents.json
    echo "    {"                              >> Contents.json
    echo "      \"idiom\" : \"universal\","   >> Contents.json
    echo "      \"scale\" : \"2x\","         >> Contents.json
    echo "      \"filename\" : \"$renameFile2x\"" >> Contents.json
    echo "    },"                             >> Contents.json
    echo "    {"                              >> Contents.json
    echo "      \"idiom\" : \"universal\","   >> Contents.json
    echo "      \"scale\" : \"3x\","         >> Contents.json
    echo "      \"filename\" : \"$renameFile3x\"" >> Contents.json
    echo "    }"                              >> Contents.json
    echo "  ],"                               >> Contents.json
    echo "  \"info\" : {"                     >> Contents.json
    echo "    \"version\" : 1,"               >> Contents.json
    echo "    \"author\" : \"xcode\""         >> Contents.json
    echo "  }"                                >> Contents.json
    echo }                                   >> Contents.json
}
把 contents 掛進主腳本,在 ScalePic 之後調用一次即可:
#!/bin/sh

cd $1

for file in ./* do
    imageFile=$(basename $file)
    imageDir=${imageFile/\.png/\.imageset}
    mkdir $imageDir

    cp $imageFile $imageDir/
    cd $imageDir

    ScalePic $imageFile
    Contents $imageFile
    cd ..
done

cd ..
執行完畢,把生成的 .imageset 文件夾整體拖入工程的 Assets.xcassets,Xcode 就能直接識別。
腳本已上傳 GitHub,可搜索 imagesetGenerator.sh 獲取。調用過程如下圖。
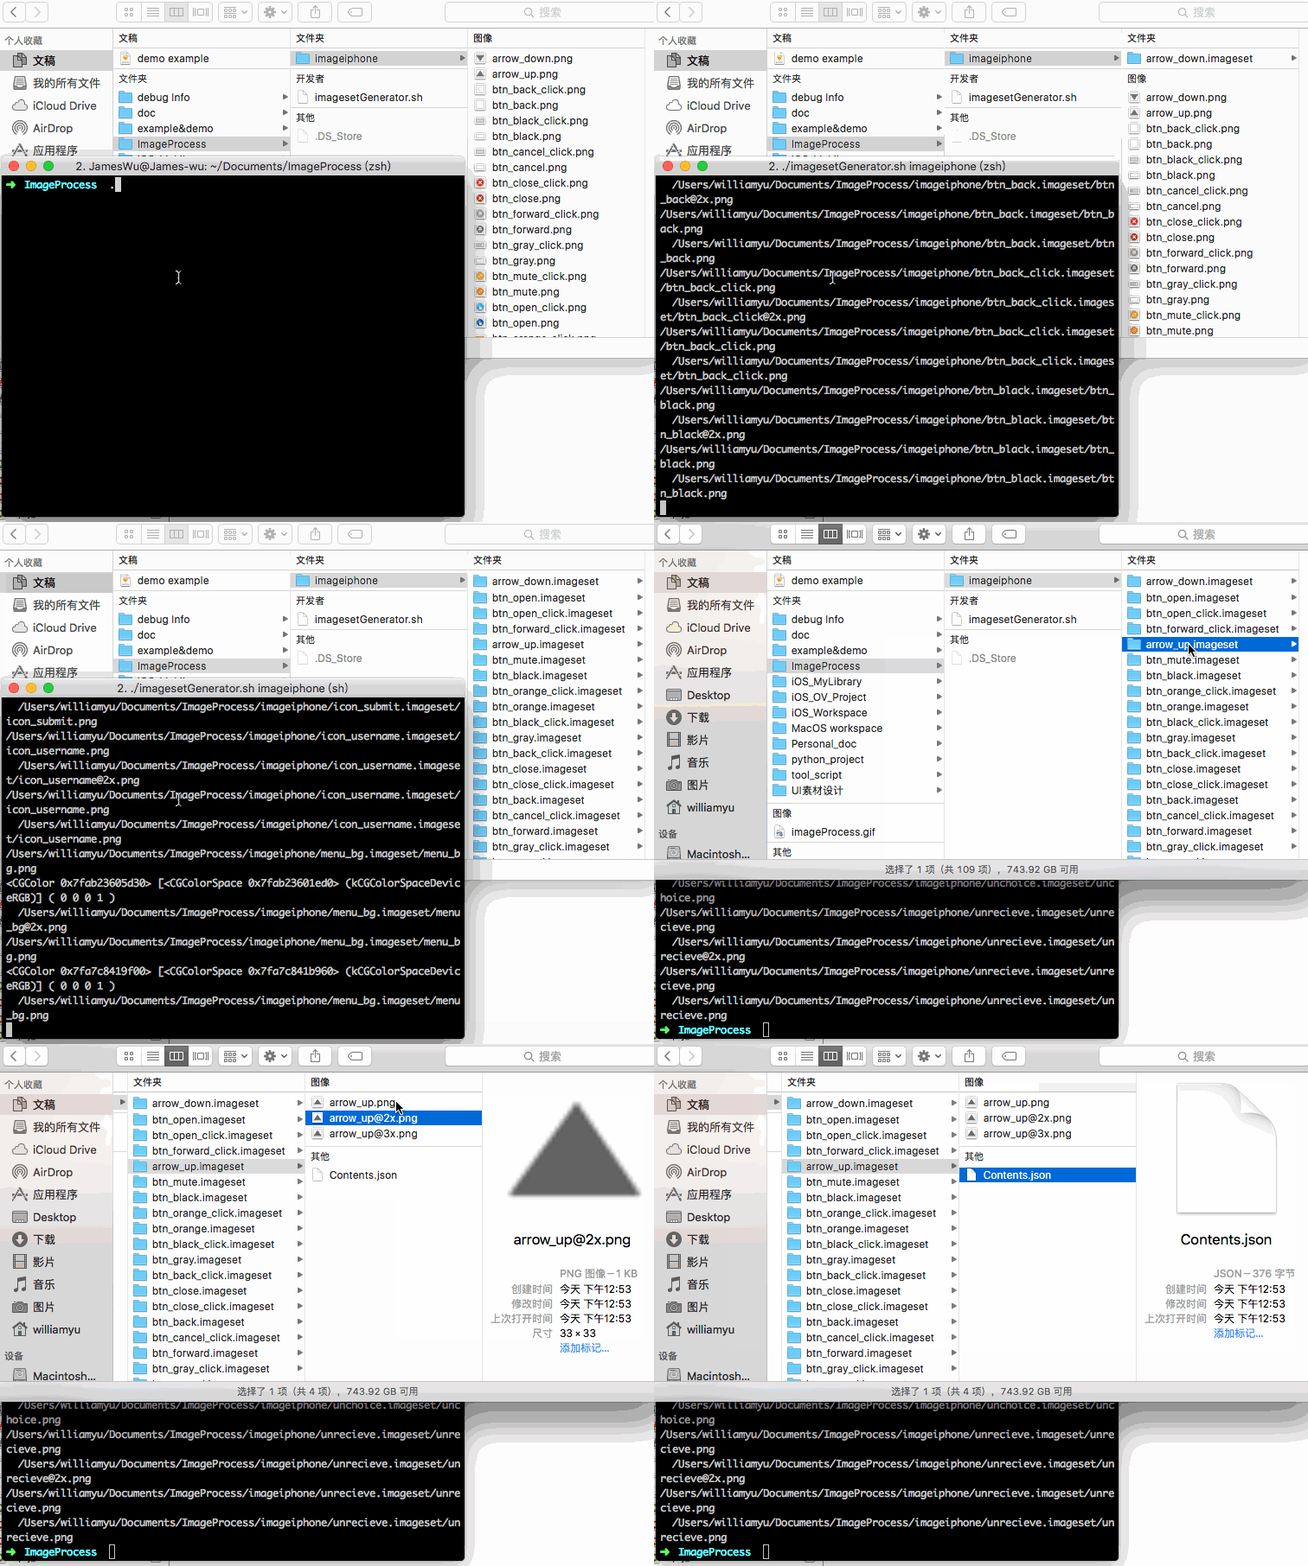
原始圖像批量生成 ImageSet 的過程。
四、彩蛋:App Icon 同理
App Icon 需要匹配的尺寸更多,思路完全一致。注意這裡用 -Z(等比例縮放最長邊)而非 -z:
#!/bin/sh

IconWithSize() {
    # -Z 等比例按給定尺寸縮放最長邊
    sips -Z $1 icon.png --out icon_$1x$1.png
}

for size in 29 40 50 57 58 60 72 76 80 87 100 114 120 144 152 180 do
    IconWithSize $size
done
具體用法就留作練習了。善用工具,把重複勞動交給腳本。