
iOS 多執行緒入門:從行程與執行緒觀念到 NSThread 的三種建立方式
多執行緒是每一個 iOS 開發者都必須跨過的門檻。本文從行程(Process)與執行緒(Thread)的基本概念出發,說明主執行緒為什麼不能阻塞,並整理 GCD 之前最常用的 NSThread 與 pthread 建立方式。
一、行程與執行緒
1. 什麼是行程
行程就是系統中正在運行的一個應用程式。每個行程彼此獨立,各自運行在專屬且受保護的記憶體空間中。
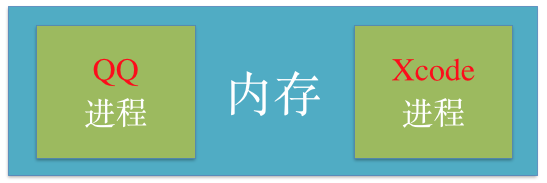
同時打開 QQ 與 Xcode,系統就啟動了兩個行程。在 macOS 上,可以透過「活動監視器」查看目前開啟的所有行程。
2. 什麼是執行緒
行程要執行任務,必須要有執行緒——每一個行程至少有一條執行緒。執行緒是行程的基本執行單元,程式中的所有任務都在執行緒裡跑。用酷狗播放音樂、用迅雷下載電影,背後都是執行緒在工作。
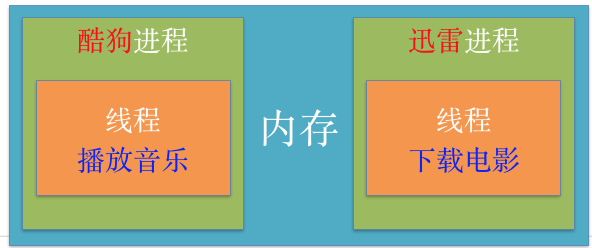
3. 單一執行緒內的任務是串行的
同一條執行緒中的任務只能一個接一個按順序執行。也就是說,在任一瞬间,一條執行緒只能處理一件事。若在同一條執行緒中下載三個檔案 A、B、C,就必須等 A 下完、再下 B、最後才是 C。
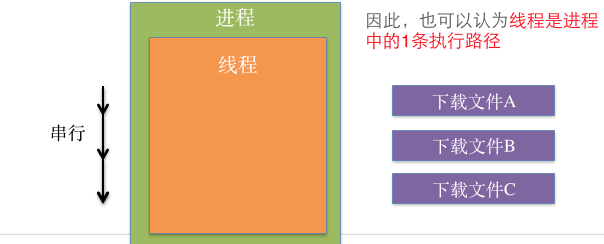
二、多執行緒
1. 定義與類比
一個行程可以開啟多條執行緒,每條執行緒可以並行處理不同任務。有個經典類比:行程像車間,執行緒像車間裡的工人。適度使用多執行緒,可以提升程式的執行效率。
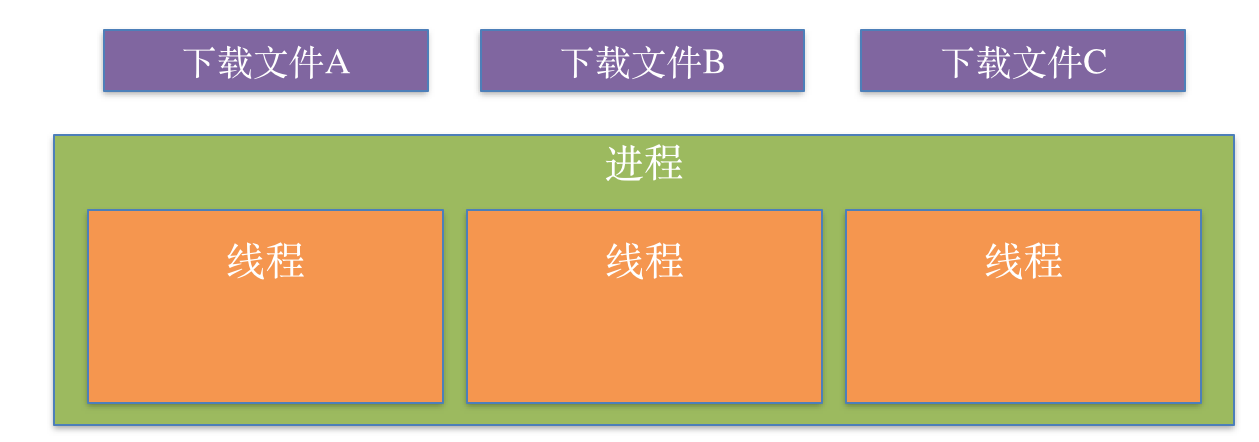
2. 多執行緒的原理
在任一瞬间,CPU 實際上只處理一條執行緒。所謂「同時執行」,是 CPU 在多條執行緒之間快速切換調度,快到讓人產生並行的錯覺。
由此可以推出一個重要結論:執行緒並不是越多越好。當執行緒數量暴增,CPU 忙著在大量執行緒之間切換,不但消耗可觀的運算資源,每一條執行緒被調度到的頻次反而下降,整體效率變差。
3. 優缺點
優點:能適度提高程式執行效率,也能更充分利用 CPU 與記憶體等資源。
缺點:
- 開啟執行緒本身要佔用記憶體(預設主執行緒約 1MB,子執行緒約 512KB)。大量建立執行緒會吃掉可觀的記憶體,反而拖累效能。
- 執行緒越多,CPU 花在調度上的負擔越重。
- 程式設計複雜度上升,例如執行緒間的溝通與多執行緒的資料共享都需要額外處理。
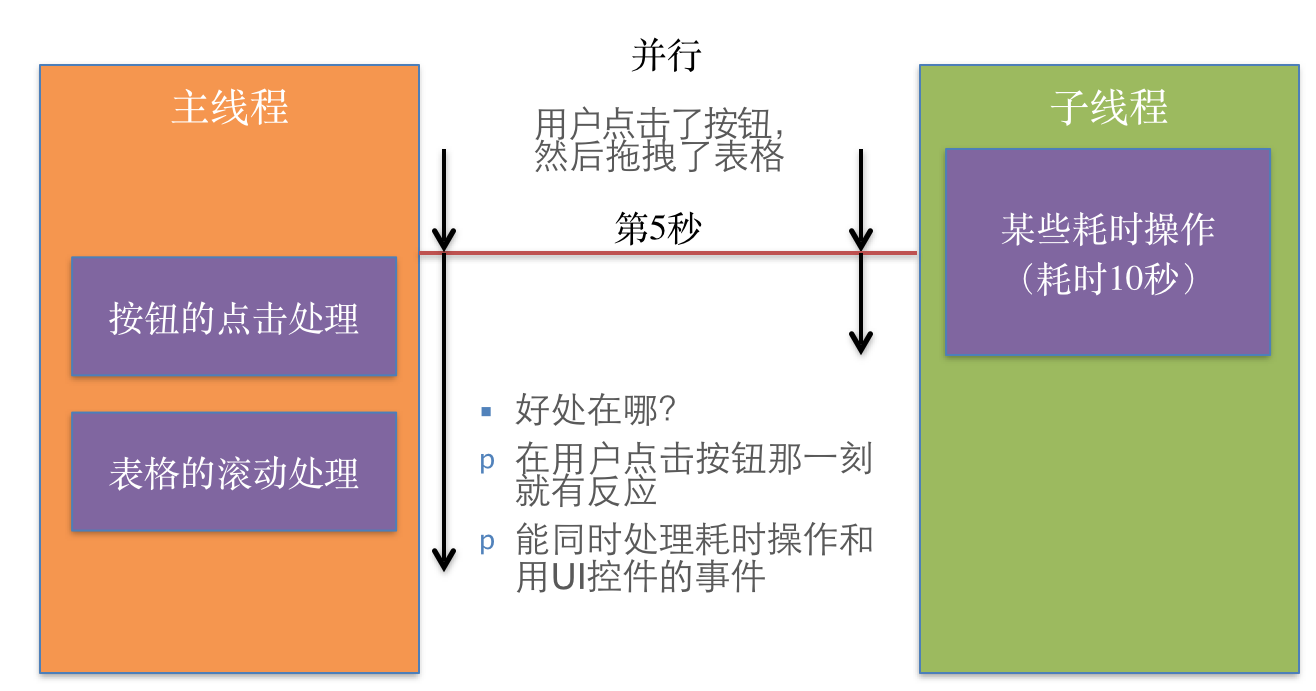
4. 主執行緒(Main Thread / UI 執行緒)
iOS 程式啟動後預設會開一條執行緒,稱為主執行緒或 UI 執行緒。它的主要職責是:
- 顯示與刷新 UI 介面
- 處理 UI 事件,例如點擊、滾動、拖拽
使用要點:切勿把耗時操作放在主執行緒。耗時任務會卡住主執行緒,導致介面無法回應操作,使用者感受到的就是「這 App 很卡」。
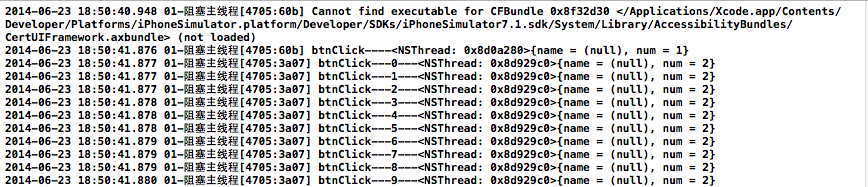
5. 阻塞主執行緒的實測
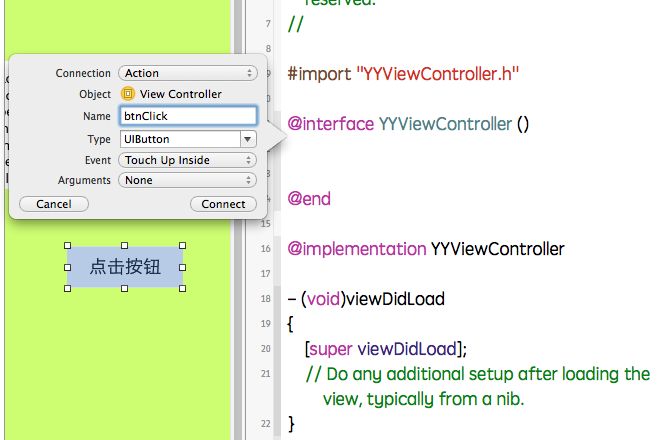
#import "YYViewController.h"

@interface YYViewController ()
- (IBAction)btnClick;
@end

@implementation YYViewController

- (IBAction)btnClick {
    // 1. 取得目前執行緒
    NSThread *current = [NSThread currentThread];
    // 2. 用迴圈模擬耗時任務
    for (int i = 0; i < 10000; i++) {
        NSLog(@"btnClick---%d---%@", i, current);
    }
}

@end
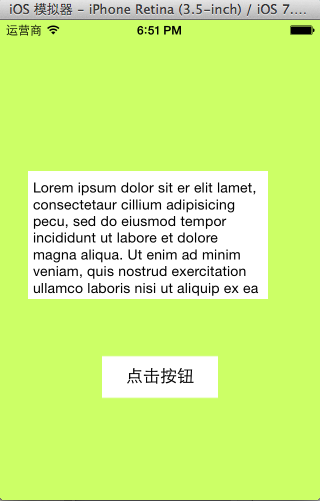
按下按鈕後,textView 完全沒有反應。
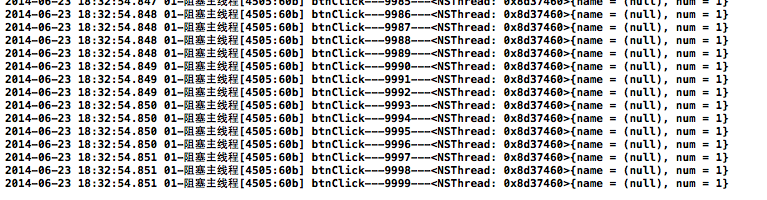
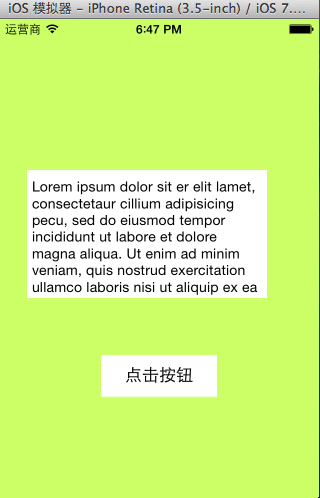
原因很單純:任務在主執行緒上串行執行,UI 只能排在後面等待。
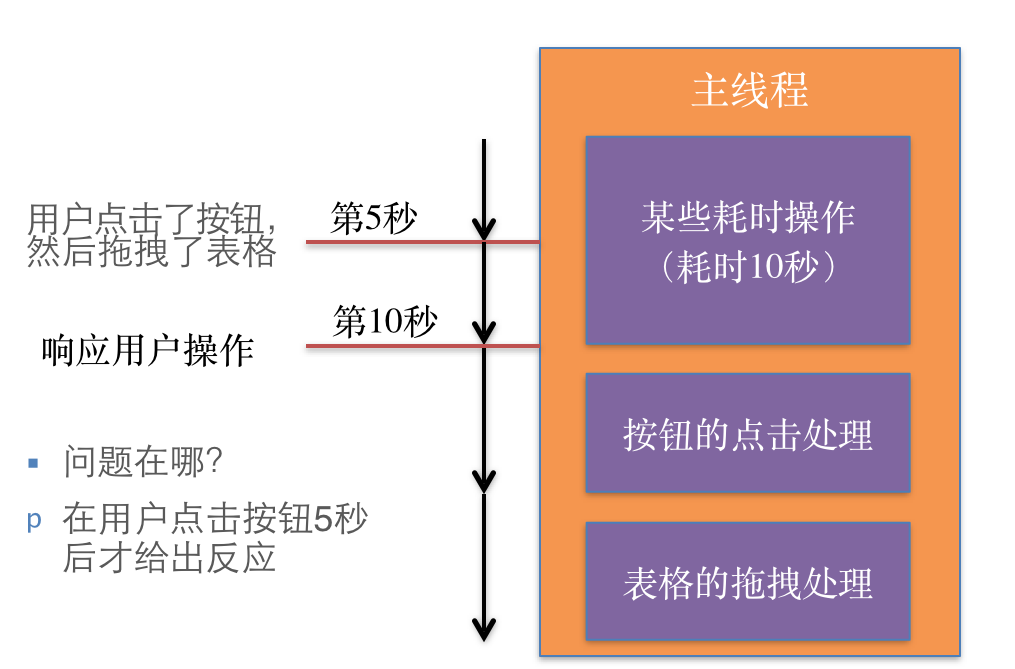
把同樣的迴圈丟到子執行緒,主執行緒立刻恢復順暢。
三、NSThread 的常用 API
一個 NSThread 物件就代表一條執行緒。
建立並啟動
NSThread *thread = [[NSThread alloc] initWithTarget:self
                                          selector:@selector(run)
                                            object:nil];
[thread start];
// 啟動後,會在 thread 這條執行緒上執行 self 的 run 方法
主執行緒相關
+ (NSThread *)mainThread;  // 取得主執行緒
- (BOOL)isMainThread;      // 目前是否為主執行緒
+ (BOOL)isMainThread;      // 是否為主執行緒
其他常用方法
NSThread *current = [NSThread currentThread]; // 取得目前執行緒

+ (double)threadPriority;             // 取得優先權
+ (BOOL)setThreadPriority:(double)p;  // 設定優先權,範圍 0.0 ~ 1.0,預設 0.5,值越大越優先

- (void)setName:(NSString *)n;        // 設定執行緒名稱
- (NSString *)name;                   // 取得執行緒名稱
另外兩種建立方式
// (2) 建立後自動啟動
[NSThread detachNewThreadSelector:@selector(run) toTarget:self withObject:nil];

// (3) 隱式建立並啟動(在背景執行緒執行)
[self performSelectorInBackground:@selector(run) withObject:nil];
這兩種寫法優點是簡短快速,缺點是無法對執行緒做更細緻的設定(例如名稱、優先權)。
四、實作範例
寫法一:最古老的 pthread
#import "YYViewController.h"
#import <pthread.h>

@interface YYViewController ()
- (IBAction)btnClick;
@end

@implementation YYViewController

- (IBAction)btnClick {
    NSThread *current = [NSThread currentThread];
    NSLog(@"btnClick----%@", current); // 這是主執行緒

    pthread_t thread;
    pthread_create(&thread, NULL, run, NULL);
}

// C 語言函式
void *run(void *data)
{
    NSThread *current = [NSThread currentThread]; // 新建立的執行緒
    for (int i = 0; i < 10000; i++) {
        NSLog(@"btnClick---%d---%@", i, current);
    }
    return NULL;
}

@end
按下按鈕後,主執行緒不再被阻塞。
寫法二:NSThread 的三種變體
#import "YYViewController.h"

@interface YYViewController ()
- (IBAction)btnClick;
@end

@implementation YYViewController

- (IBAction)btnClick {
    NSLog(@"btnClick----%@", [NSThread currentThread]);
    NSLog(@"主線程-------%@", [NSThread mainThread]);

    [self creatNSThread];
    // [self creatNSThread2];
    // [self creatNSThread3];
}

/**
 * 方式 1:先初始化,再 start
 */
- (void)creatNSThread
{
    NSThread *thread = [[NSThread alloc] initWithTarget:self
                                              selector:@selector(run:)
                                                object:@"線程A"];
    thread.name = @"線程A";
    [thread start];

    NSThread *thread2 = [[NSThread alloc] initWithTarget:self
                                               selector:@selector(run:)
                                                 object:@"線程B"];
    thread2.name = @"線程B";
    [thread2 start];
}

/**
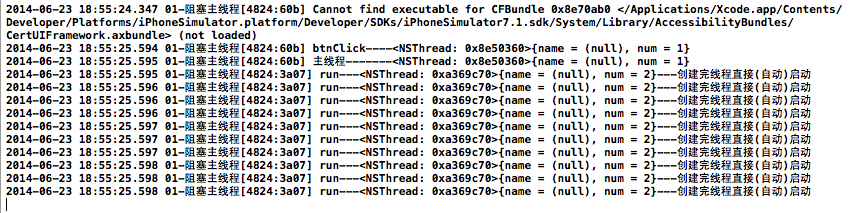
 * 方式 2:建立後直接(自動)啟動
 */
- (void)creatNSThread2
{
    [NSThread detachNewThreadSelector:@selector(run:)
                            toTarget:self
                          withObject:@"建立後直接啟動"];
}

/**
 * 方式 3:隱式建立並自動啟動
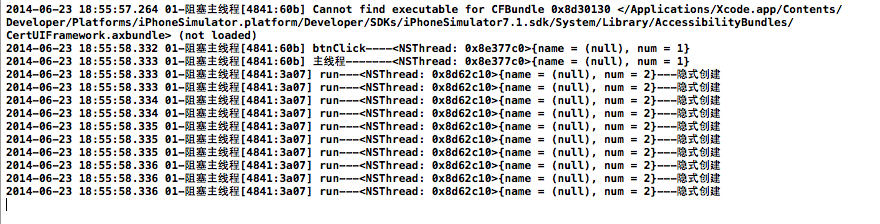
 */
- (void)creatNSThread3
{
    // 在背景執行緒執行,等同在子執行緒執行
    [self performSelectorInBackground:@selector(run:)
                           withObject:@"隱式建立"];
}

- (void)run:(NSString *)str
{
    NSThread *current = [NSThread currentThread];
    for (int i = 0; i < 10; i++) {
        NSLog(@"run---%@---%@", current, str);
    }
}

@end
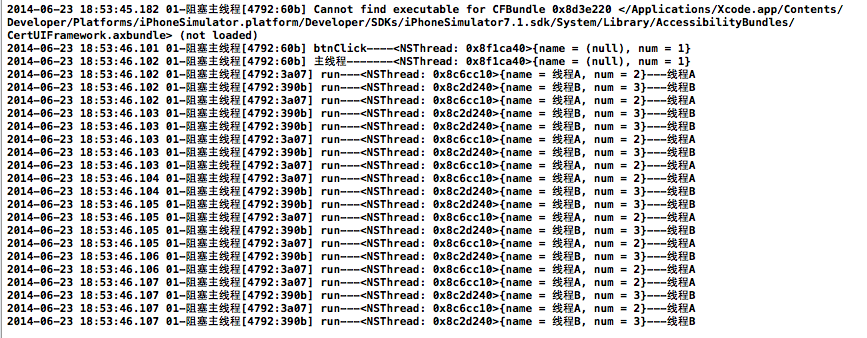
三種寫法的實際輸出:
結語
多執行緒的核心目的不是「多開幾條」,而是把耗時任務從主執行緒移開,讓 UI 隨時保持可互動。實務上,除了本文的 NSThread 與 pthread,還可以進一步使用 GCD 或 OperationQueue 來管理併發,並在需要回到介面時切回主執行緒。