
iOS 開發中 UIWebView 的基本使用方法
一、用 UIWebView 載入網頁
開啟 Xcode,新建一個 Single View Application,命名為 WebViewDemo。
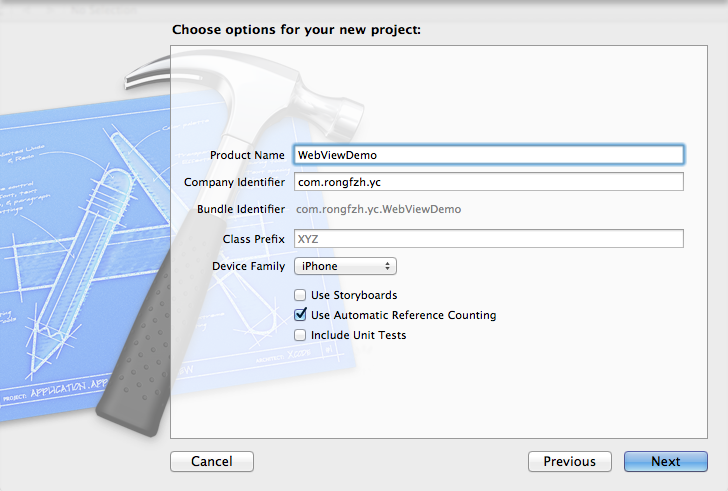
在 ViewController.h 中宣告 webView 成員,並在 .m 中完成載入:
// ViewController.h
#import <UIKit/UIKit.h>

@interface ViewController : UIViewController
{
    UIWebView *webView;
}
@end

// ViewController.m
- (void)viewDidLoad {
    [super viewDidLoad];
    webView = [[UIWebView alloc] initWithFrame:CGRectMake(0, 0, 320, 480)];
    NSURLRequest *request = [NSURLRequest requestWithURL:[NSURL URLWithString:@"https://www.baidu.com"]];
    [self.view addSubview:webView];
    [webView loadRequest:request];
}
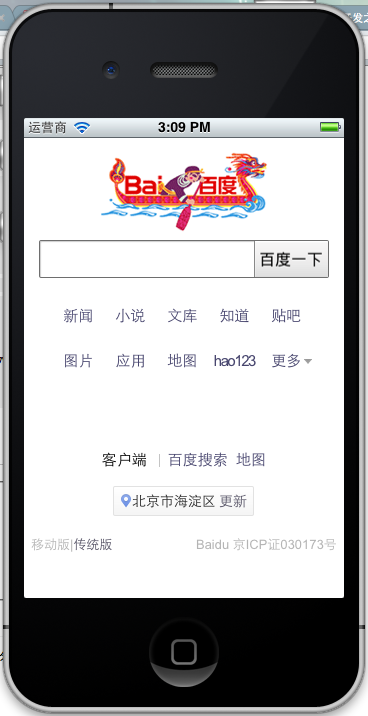
執行後可以看到網頁被載入:
二、實作 UIWebViewDelegate
手機的網路環境是即時變化的。網路慢時如何提示「頁面正在開啟」?載入失敗時如何告知使用者?要處理這些,就得知道網頁何時開始載入、何時載入完成、何時出錯,因此必須實作 UIWebViewDelegate 協定。
#import <UIKit/UIKit.h>

@interface ViewController : UIViewController <UIWebViewDelegate>
{
    UIWebView *webView;
}
@end
按住 control + command + 上鍵切換到 .m 檔,輸入 - (void) webView 就會看到 Xcode 提示的 delegate 方法:

UIWebView 主要有三個 delegate 方法:
1. - (void)webViewDidStartLoad:(UIWebView *)webView; 開始載入時呼叫。
2. - (void)webViewDidFinishLoad:(UIWebView *)webView; 載入完成時呼叫。
3. - (void)webView:(UIWebView *)webView didFailLoadWithError:(NSError *)error; 載入出錯時呼叫。
把轉圈的 activityIndicatorView 放進前兩個方法裡,就能給使用者明確的回饋:
- (void)webViewDidStartLoad:(UIWebView *)webView {
    [activityIndicatorView startAnimating];
}

- (void)webViewDidFinishLoad:(UIWebView *)webView {
    [activityIndicatorView stopAnimating];
}
而按下按鈕時,只要呼叫我們自己寫的載入方法即可:
- (IBAction)buttonPress:(id)sender {
    [textField resignFirstResponder];
    [self loadWebPageWithString:textField.text];
}
請求失敗時給出提示:
- (void)webView:(UIWebView *)webView didFailLoadWithError:(NSError *)error {
    UIAlertView *alterview = [[UIAlertView alloc] initWithTitle:@""
                                                        message:[error localizedDescription]
                                                       delegate:nil
                                              cancelButtonTitle:nil
                                              otherButtonTitles:@"OK", nil];
    [alterview show];
    [alterview release];
}
三、加上載入等待畫面
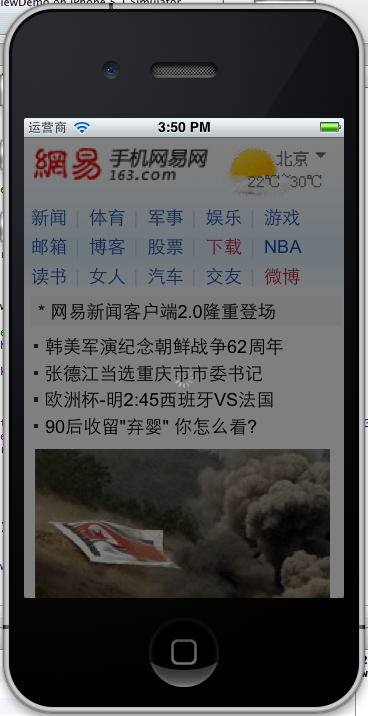
為了讓互動更直觀,可以在開始載入時蓋上一層半透明黑底並放上轉圈動畫:
- (void)webViewDidStartLoad:(UIWebView *)webView {
    // 建立半透明底視圖
    UIView *view = [[UIView alloc] initWithFrame:CGRectMake(0, 0, 320, 480)];
    [view setTag:108];
    [view setBackgroundColor:[UIColor blackColor]];
    [view setAlpha:0.5];
    [self.view addSubview:view];

    activityIndicator = [[UIActivityIndicatorView alloc] initWithFrame:CGRectMake(0.0f, 0.0f, 32.0f, 32.0f)];
    [activityIndicator setCenter:view.center];
    [activityIndicator setActivityIndicatorViewStyle:UIActivityIndicatorViewStyleWhite];
    [view addSubview:activityIndicator];

    [activityIndicator startAnimating];
}
載入完成或失敗時,把等待畫面移除:
- (void)webViewDidFinishLoad:(UIWebView *)webView {
    [activityIndicator stopAnimating];
    UIView *view = (UIView *)[self.view viewWithTag:108];
    [view removeFromSuperview];
    NSLog(@"webViewDidFinishLoad");
}

- (void)webView:(UIWebView *)webView didFailLoadWithError:(NSError *)error {
    [activityIndicator stopAnimating];
    UIView *view = (UIView *)[self.view viewWithTag:108];
    [view removeFromSuperview];
}
執行效果:
實作上還有幾個容易忽略的細節值得留意:使用 tag 來找回等待視圖雖然直觀,但在有多個類似遮罩的畫面裡容易衝突,改成用屬性持有會更安全;另外 UIWebView 早已被 Apple 標記為不建議使用,新專案應改用 WKWebView,它具備獨立的 Web 內容處理程序,效能與穩定性都更好,delegate 也換成 WKNavigationDelegate 的 didStartProvisionalNavigation、didFinishNavigation 與 didFailNavigation 等方法,整體思路與本文完全一致。
- 上一篇文章: iOS 開發中 UIDatePicker 控制項的使用方法
- 下一篇文章: iOS 開發中 UIPickerView 控制項的使用詳解