
iOS 實現 QQ 小紅點「一鍵鞭炮」的黏黏拖拽效果
QQ 那個被拖動時會拉絲、放手後要麼彈回要麼炸開的小紅點,看著不起眼,實作起來卻很有意思。iOS 上討論這個的資料不多,本文就把完整的思路與代碼梳理一遍。
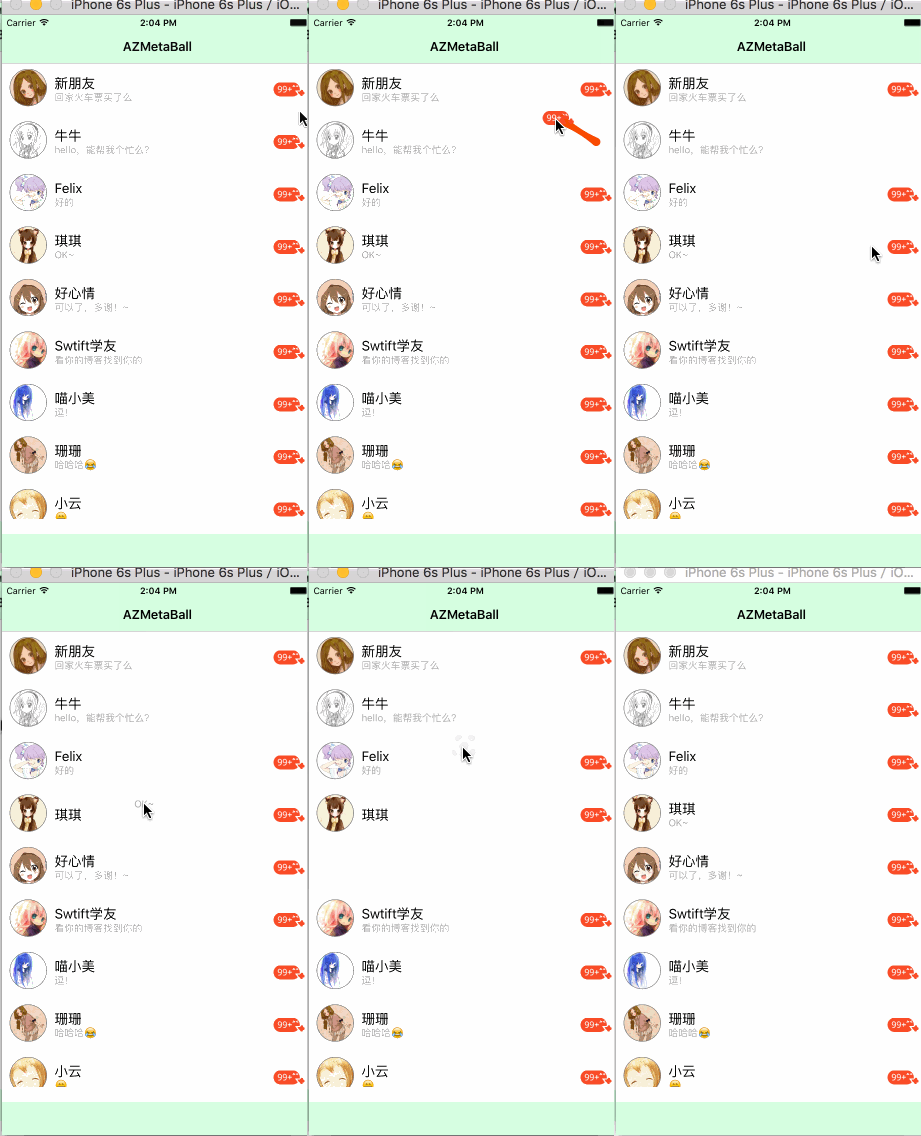
先看最終效果:
除錯時期的中間狀態:
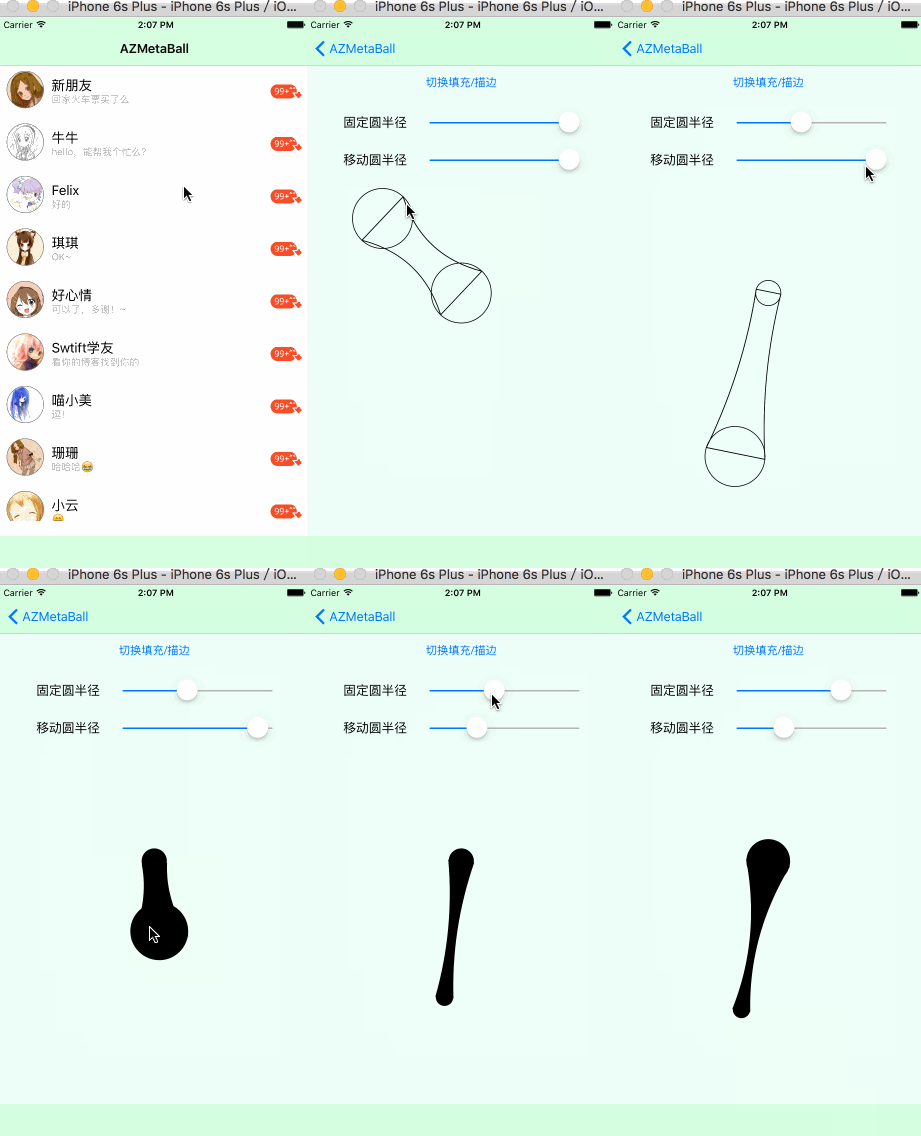
有意思的是,我其實是先做出第二張圖的拖拽效果,再補上分離動畫的。
一、整體思路
- 搞懂原理,也就是那個「黏黏」形狀到底怎麼畫出來。
- 新建一個專用的畫布 AZMetaBallCanvas 繼承自 UIView,承擔全部繪製工作。
- 給畫布加上
attach:方法與手勢監聽,讓任意 view 都能獲得黏黏效果。 - 依據兩圓連心線的距離判斷是否斷開;手指離開時,再按距離決定播放爆炸還是回彈動畫。
二、那個形狀到底是什麼
仔細觀察會發現,拖拽過程中紅點與原位置之間的連接合體,就是所謂的元球效果(MetaBall):兩個半徑不同的圓,加上兩條貝塞爾曲線。
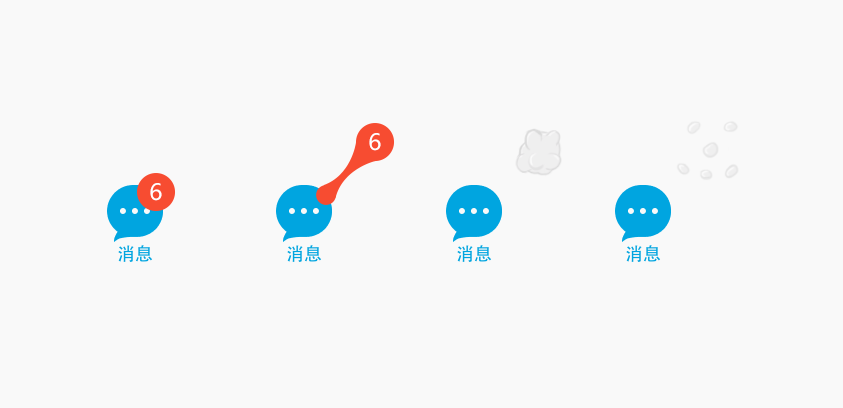
具體的切點與控制點計算比較繁瑣,這裡聚焦在 iOS 的實作上。
三、建立畫布
// AZMetaBallCanvas.h
@interface AZMetaBallCanvas : UIView
@property (nonatomic, strong) Circle *centerCircle;   // 中心圓,位置固定
@property (nonatomic, strong) Circle *touchCircle;    // 觸摸圓,跟隨手指
@end
Circle 是自訂的模型類,只裝圓心座標與半徑等基本屬性。
為什麼要單獨開一塊畫布?因為小紅點是可以跨 cell 全屏拖動的。它雖然寄生在某個 cell 上,但你能把它甩到別的 cell 去,這就需要足夠的繪製空間——乾脆給它一整塊專屬畫布。
// AZMetaBallCanvas.m
#define RADIUS 40.0

@interface AZMetaBallCanvas ()
{
    UIBezierPath *_path;
    CGPoint _touchPoint;
}
@end

@implementation AZMetaBallCanvas

- (instancetype)initWithCoder:(NSCoder *)aDecoder
{
    self = [super initWithCoder:aDecoder];
    if (self) {
        [self initData];
    }
    return self;
}

- (void)initData
{
    _touchCircle  = [Circle initWithcenterPoint:self.center radius:RADIUS];
    _centerCircle = [Circle initWithcenterPoint:self.center radius:RADIUS];
    _touchPoint   = self.center;
}

@end
記得在 init、initWithFrame、initWithCoder 等各個初始化入口都呼叫 initData,避免某條建立路徑下屬性為空。
四、重寫繪製方法
Android 裡是 onDraw(),iOS 裡對應的是 drawRect:,而 [view setNeedsDisplay] 就是那個「請重畫」的通知。
- (void)drawRect:(CGRect)rect
{
    _path = [[UIBezierPath alloc] init];
    [self drawCenterCircle];
    [self drawTouchCircle:_touchPoint];
    [self drawBezierCurveWithCircle1:_centerCircle Circle2:_touchCircle];
}
繪製內容只有三件事:畫中心圓、畫觸摸圓、畫連接兩圓的貝塞爾曲線。所幸 iOS 自帶的 UIBezierPath 提供了 addArcWithCenter:radius:startAngle:endAngle:clockwise:,畫圓一行搞定。
#pragma mark - 畫圓
- (void)drawCenterCircle
{
    [self drawCircle:_path circle:_centerCircle];
}

- (void)drawTouchCircle:(CGPoint)center
{
    _touchCircle.centerPoint = center;
    [self drawCircle:_path circle:_touchCircle];
}

- (void)drawCircle:(UIBezierPath *)path circle:(Circle *)circle
{
    [_path addArcWithCenter:circle.centerPoint
                     radius:circle.radius
                 startAngle:0
                   endAngle:360
                  clockwise:true];
    [_path fill];
    [_path stroke];
    [_path removeAllPoints];
}
貝塞爾曲線部分,核心是算出四個切點,再用兩條曲線把它們連起來:
#pragma mark - 畫貝塞爾曲線
- (void)drawBezierCurveWithCircle1:(Circle *)circle1 Circle2:(Circle *)circle2
{
    float circle1_x = circle1.centerPoint.x;
    float circle1_y = circle1.centerPoint.y;
    float circle2_x = circle2.centerPoint.x;
    float circle2_y = circle2.centerPoint.y;

    // 連心線長度
    float d = sqrt(powf(circle1_x - circle2_x, 2) + powf(circle1_y - circle2_y, 2));
    // 連心線與 x 軸夾角
    float angle1 = atan((circle2_y - circle1_y) / (circle1_x - circle2_x));
    // 連心線與公切線夾角
    float angle2 = asin((circle1.radius - circle2.radius) / d);
    // 切點偏角
    float angle3 = M_PI_2 - angle1 - angle2;
    float angle4 = M_PI_2 - angle1 + angle2;

    float offset1_X = cos(angle3) * circle1.radius;
    float offset1_Y = sin(angle3) * circle1.radius;
    float offset2_X = cos(angle3) * circle2.radius;
    float offset2_Y = sin(angle3) * circle2.radius;
    float offset3_X = cos(angle4) * circle1.radius;
    float offset3_Y = sin(angle4) * circle1.radius;
    float offset4_X = cos(angle4) * circle2.radius;
    float offset4_Y = sin(angle4) * circle2.radius;

    CGPoint p1 = CGPointMake(circle1_x - offset1_X, circle1_y - offset1_Y);
    CGPoint p2 = CGPointMake(circle2_x - offset2_X, circle2_y - offset2_Y);
    CGPoint p3 = CGPointMake(circle1_x + offset3_X, circle1_y + offset3_Y);
    CGPoint p4 = CGPointMake(circle2_x + offset4_X, circle2_y + offset4_Y);

    // 控制點取對應切點的中點,讓過渡更自然
    CGPoint p1_center_p4 = CGPointMake((p1.x + p4.x) / 2, (p1.y + p4.y) / 2);
    CGPoint p2_center_p3 = CGPointMake((p2.x + p3.x) / 2, (p2.y + p3.y) / 2);

    [self drawBezierCurveStartAt:p1 EndAt:p2 controlPoint:p2_center_p3];
    [self drawLineStartAt:p2 EndAt:p4];
    [self drawBezierCurveStartAt:p4 EndAt:p3 controlPoint:p1_center_p4];
    [self drawLineStartAt:p3 EndAt:p1];

    [_path moveToPoint:p1];
    [_path closePath];
    [_path stroke];
}
五、手勢監聽:兩個版本
簡單版
最偷工減料的做法,直接在畫布裡重寫 touchesBegan / touchesMoved,手指到哪圓就到哪。
- (void)touchesBegan:(NSSet<UITouch *> *)touches withEvent:(UIEvent *)event
{
    UITouch *touch = [touches anyObject];
    _touchPoint = [touch locationInView:self];
    [self setNeedsDisplay];
}

- (void)touchesMoved:(NSSet<UITouch *> *)touches withEvent:(UIEvent *)event
{
    UITouch *touch = [touches anyObject];
    _touchPoint = [touch locationInView:self];
    [self setNeedsDisplay];
}
到這裡第二張圖的效果基本就有了,只差半徑的變化:
- (void)changeCenterCircleRadiusTo:(float)radius
{
    _centerCircle.radius = radius;
    [self setNeedsDisplay];
}

- (void)changeTouchCircleRadiusTo:(float)radius
{
    _touchCircle.radius = radius;
    [self setNeedsDisplay];
}
普通版
但真實的交互不是「手指點哪紅點跑哪」,而是拖著紅點走。所以手勢必須掛在紅點自己身上,而不是畫布上。
- (void)attach:(UIView *)item
{
    UIPanGestureRecognizer *drag = [[UIPanGestureRecognizer alloc]
                                    initWithTarget:self action:@selector(drag:)];
    item.userInteractionEnabled = YES;
    [item addGestureRecognizer:drag];
}

- (void)drag:(UIPanGestureRecognizer *)recognizer
{
    _touchPoint = [recognizer locationInView:self];
    UIView *touchView = recognizer.view;

    switch (recognizer.state) {
        case UIGestureRecognizerStateBegan:
            // 在畫布上建立一個 touchView 的副本,原位置留白
            break;

        case UIGestureRecognizerStateChanged:
            // 移動中:更新副本與觸摸圓的座標
            [self resetTouchCenter:_touchPoint];
            break;

        case UIGestureRecognizerStateEnded:
            // 結束:依連心線長度決定播放爆炸動畫或彈簧回彈動畫
            break;

        default:
            break;
    }

    [self setNeedsDisplay];
}
關鍵細節
動畫的選擇依據是連心線長度:拉得夠遠就分離並炸散,不夠遠就回弹合體。這個閾值需要實際調參,太小會讓紅點變得敏感易碎,太大則拖不開。另外別忘了在離開時把半徑動畫加進去,那個「先壓縮再反彈」的過渡才是它看起來有黏性的真正原因。
- 上一篇文章: 用 UIWebView 打造一個簡易網頁瀏覽器
- 下一篇文章: 仿今日頭條滑動切換:iOS 側滑手勢與 ScrollView 衝突的解法