
用 Core Graphics 畫一顆會跳動的愛心:iOS 自繪動畫實作
編輯:iOS 開發綜合
閒下來總想找點有趣的事做。工程師要表達浪漫,光用嘴說太廉價,最起碼得有個能跑的東西拿出來展示才行。
於是有了這個:用 UIBezierPath 畫一顆愛心,再讓上半部像水波一樣起伏。廢話不多說,直接看程式。
HeartView.h
#import <UIKit/UIKit.h>

@interface HeartView : UIView

/** 填充比率(0~1),控制水面的高度 */
@property (nonatomic, assign) CGFloat rate;

/** 填充顏色 */
@property (nonatomic, strong) UIColor *fillColor;

/** 線條顏色 */
@property (nonatomic, strong) UIColor *strokeColor;

/** 線條寬度 */
@property (nonatomic, assign) CGFloat lineWidth;

@end
HeartView.m
#import "HeartView.h"

NSInteger const spaceWidth = 5;      // 內間距
NSInteger const waveAmplitude = 5;   // 波浪振幅

@interface HeartView ()
{
    CGFloat t;   // 波浪相位,用來讓線條隨時間移動
}
@end

@implementation HeartView

- (instancetype)initWithFrame:(CGRect)frame {
    self = [super initWithFrame:frame];
    if (self) {
        [self loadTimer];
    }
    return self;
}

- (void)drawRect:(CGRect)rect {
    [super drawRect:rect];

    // 上方兩個半圓的半徑,取整個 frame 的四分之一
    CGFloat radius = MIN((self.frame.size.width - spaceWidth * 2) / 4,
                         (self.frame.size.height - spaceWidth * 2) / 4);

    // 左側圓心:左邊距 + 半徑
    CGPoint leftCenter = CGPointMake(spaceWidth + radius, spaceWidth + radius);
    // 右側圓心:在左側圓心的右方,間距為兩倍半徑
    CGPoint rightCenter = CGPointMake(spaceWidth + radius * 3, spaceWidth + radius);

    // 左半圓
    UIBezierPath *heartLine = [UIBezierPath bezierPathWithArcCenter:leftCenter
                                                            radius:radius
                                                        startAngle:M_PI
                                                          endAngle:0
                                                         clockwise:YES];
    // 右半圓
    [heartLine addArcWithCenter:rightCenter
                        radius:radius
                    startAngle:M_PI
                      endAngle:0
                     clockwise:YES];

    // 從右半圓末端用二次曲線連到底部尖點
    // 控制點 x 取「總寬 - spaceWidth」,剛好與圓弧相切,過渡才平滑
    // 控制點 y 可依喜好調整:數值越大,線條越接近內切圓弧
    [heartLine addQuadCurveToPoint:CGPointMake(self.frame.size.width / 2,
                                               self.frame.size.height - spaceWidth * 2)
                     controlPoint:CGPointMake(self.frame.size.width - spaceWidth,
                                              self.frame.size.height * 0.6)];

    // 再從底部尖點用曲線回到左半圓的起點,同樣是為了相切平滑
    // 控制點 x 取 spaceWidth;y 越大,愛心看起來越「胖」
    [heartLine addQuadCurveToPoint:CGPointMake(spaceWidth, spaceWidth + radius)
                     controlPoint:CGPointMake(spaceWidth, self.frame.size.height * 0.6)];

    // 線條端點樣式
    [heartLine setLineCapStyle:kCGLineCapRound];
    [self setHeartLineWidthWithPath:heartLine];
    [self setHeartStrokeColor];
    [heartLine stroke];

    // 用路徑做裁剪,確保水波不會溢出愛心輪廓
    [heartLine addClip];

    // 開始畫水波
    UIBezierPath *waves = [UIBezierPath bezierPath];

    // 起始點:x 從左邊距開始
    // y 需要滿足端點條件——rate 為 0 時位於底部,rate 為 1 時位於頂部
    // 由這兩個狀態解出的一次式如下
    CGPoint startPoint = CGPointMake(spaceWidth,
                                     (self.frame.size.height - 3 * spaceWidth + waveAmplitude * 2) * (1 - self.rate)
                                     + spaceWidth - waveAmplitude);
    [waves moveToPoint:startPoint];

    // 波浪線怎麼畫?
    // x 由左至右連續遞增;y 在起始高度上下震盪,這裡用 cos 函數
    // waveAmplitude 控制振幅,50 控制波峰間距,t 讓整條線隨時間移動
    for (int i = 0; i < self.frame.size.width - spaceWidth * 2 + self.lineWidth * 2; i++) {
        // x 要補上線寬,否則左右兩側會填不滿
        CGPoint middlePoint = CGPointMake(spaceWidth + i - self.lineWidth,
                                          startPoint.y + waveAmplitude * cos(M_PI / 50 * i + t));
        [waves addLineToPoint:middlePoint];
    }

    // 補上右下角的垂直線
    [waves addLineToPoint:CGPointMake(self.frame.size.width - spaceWidth * 2,
                                      self.frame.size.height - spaceWidth * 2)];
    // 再補上底部橫線,回到左下角,形成封閉區域
    [waves addLineToPoint:CGPointMake(spaceWidth, self.frame.size.height - spaceWidth * 2)];

    [self setHeartFillColor];
    [waves fill];
}

// 線寬,預設 1
- (void)setHeartLineWidthWithPath:(UIBezierPath *)path {
    CGFloat lineW = self.lineWidth ? self.lineWidth : 1;
    [path setLineWidth:lineW];
}

// 線條顏色,預設黑色
- (void)setHeartStrokeColor {
    UIColor *strokColor = self.strokeColor ? self.strokeColor : [UIColor blackColor];
    [strokColor set];
}

// 填充顏色,預設橘色
- (void)setHeartFillColor {
    UIColor *fillColor = self.fillColor ? self.fillColor : [UIColor orangeColor];
    [fillColor set];
}

// 用 Timer 驅動重繪,產生動態效果
- (void)loadTimer {
    NSTimer *timer = [NSTimer scheduledTimerWithTimeInterval:0.02
                                                    target:self
                                                  selector:@selector(timerAction)
                                                  userInfo:nil
                                                   repeats:YES];
    [timer fire];
}

// t 影響波浪相位,每次遞增後重繪,畫面就會動起來
- (void)timerAction {
    t += M_PI / 50;
    if (t == M_PI) {
        t = 0;
    }
    [self setNeedsDisplay];
}

@end
使用方式
#import "ViewController.h"
#import "HeartView.h"

NSInteger const heartWidth = 200;
NSInteger const heartHeight = 200;

@interface ViewController ()
{
    HeartView *heartView;
}
@end

@implementation ViewController

- (void)viewDidLoad {
    [super viewDidLoad];

    heartView = [[HeartView alloc] initWithFrame:CGRectMake((self.view.frame.size.width - heartWidth) / 2,
                                                            (self.view.frame.size.height - heartHeight) / 2,
                                                            heartWidth, heartHeight)];
    heartView.rate = 0.5;
    heartView.lineWidth = 1;
    heartView.strokeColor = [UIColor blackColor];
    heartView.fillColor = [UIColor redColor];
    heartView.backgroundColor = [UIColor clearColor];
    [self.view addSubview:heartView];

    [self loadSlider];
}

// 加一條滑桿,讓填充比率可以隨手調整
- (void)loadSlider {
    UISlider *valueSlider = [[UISlider alloc] initWithFrame:CGRectMake((self.view.frame.size.width - 300) / 2,
                                                                      self.view.frame.size.height - 150,
                                                                      300, 50)];
    valueSlider.minimumValue = 0.0;
    valueSlider.maximumValue = 1.0;
    valueSlider.value = 0.5;
    [valueSlider addTarget:self action:@selector(valueChangedAction:) forControlEvents:UIControlEventValueChanged];
    [self.view addSubview:valueSlider];
}

- (void)valueChangedAction:(UISlider *)slider {
    heartView.rate = slider.value;
}

- (void)didReceiveMemoryWarning {
    [super didReceiveMemoryWarning];
}

@end
成果
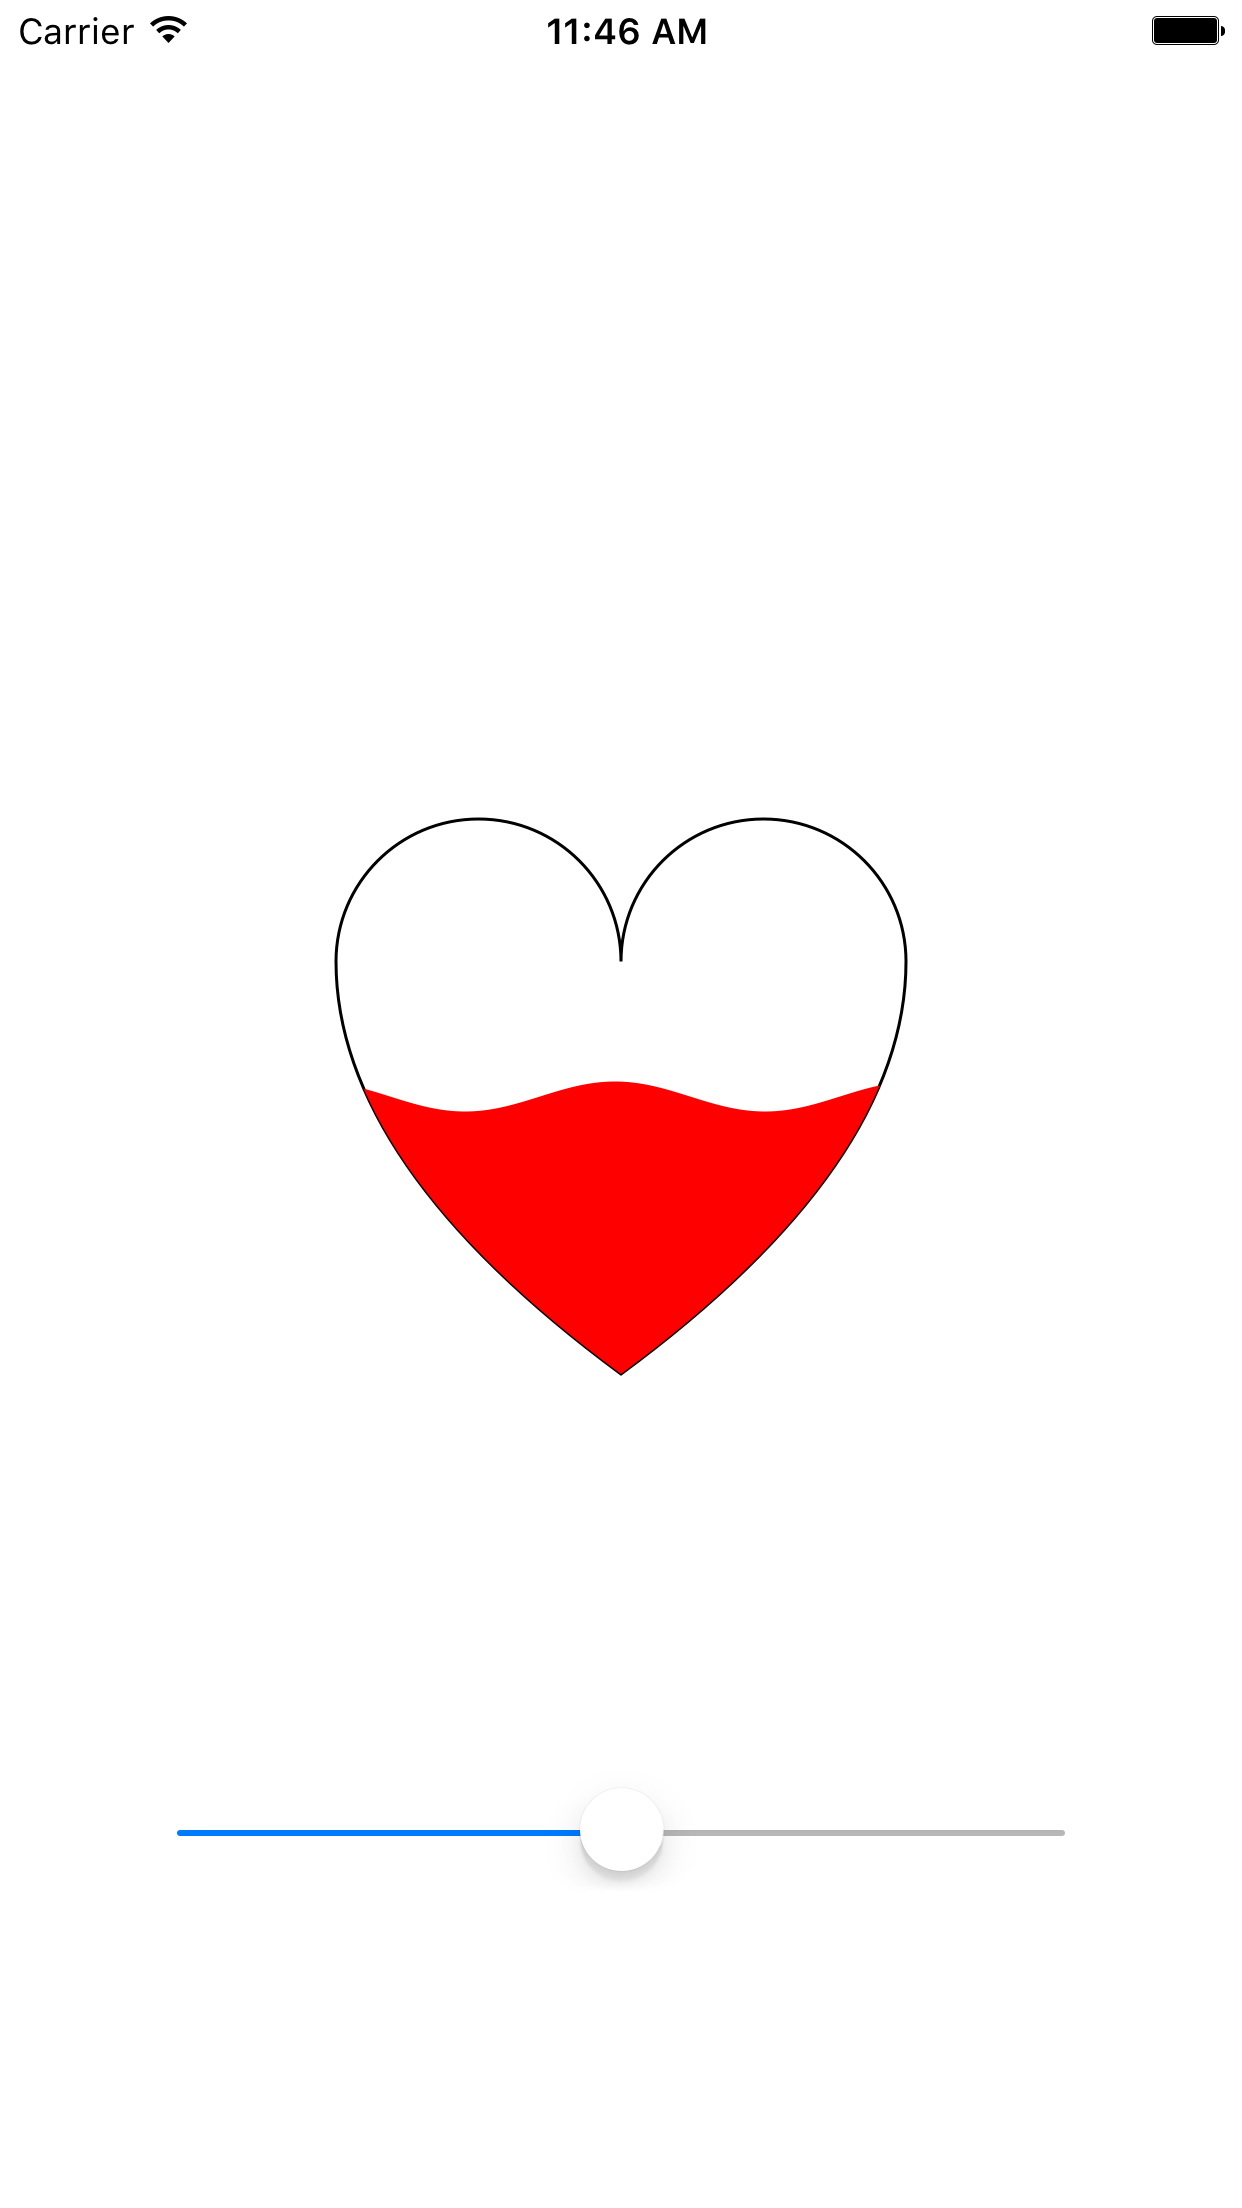
幾個可以延伸玩的地方:把 cos 換成 sin 疊加做出更真實的水波;在 timerAction 裡同步推進 rate,讓愛心自己慢慢被填滿;或者改用 CADisplayLink 取代 NSTimer,讓重繪節奏與螢幕刷新同步,動起來會更順。
趕快動手做一顆屬於自己的浪漫愛心吧。
- 上一篇文章: iOS 向量圖資源實戰:一次產出多倍圖,還能動態改色
- 下一篇文章: iOS 取色實作:讀取圖片像素並取得背景顏色