
告別手算高度:iOS 自適應 Cell 的實作全攻略
用 UITableView 時幾乎都會碰到這個需求:cell 的內容長度不固定,開發時無法預知它的高度,於是得想辦法在載入時算出真實高度。這件事在 iOS 8 前後有截然不同的做法。
iOS 8 之前:一切靠手算
沒有用 Auto Layout 的年代,你必須實作 delegate 的 tableView:heightForRowAtIndexPath:,在其中計算並回傳高度。以一個顯示任意行數純文字的 cell 為例:
override func tableView(tableView: UITableView, heightForRowAtIndexPath indexPath: NSIndexPath) -> CGFloat {
    let content = self.datas[indexPath.row] as String

    let padding: CGFloat = 20
    let width = tableView.frame.size.width - padding * 2;

    let size = CGSizeMake(width, CGFloat.max)
    let attributes = [NSFontAttributeName: UIFont(name: "Helvetica", size: 14)!]
    let frame = content.boundingRectWithSize(size,
        options: NSStringDrawingOptions.UsesLineFragmentOrigin,
        attributes: attributes,
        context: nil)
    return frame.size.height + 1;
}
看起來沒問題,但查一下文件就會發現致命缺陷:每次 reload 時,程式會先把每一個 cell 的高度都算出來,等總高度確定後才開始渲染。這代表畫面出現前得先跑完一堆計算,而且全在主線程。資料上千筆,或者高度計算前還要抓圖片,卡頓幾乎是必然的。
為什麼不能滾到哪才算哪?因為 tableview 需要內容總高度來決定滾動條尺寸等資訊。
iOS 7 在 UITableViewDelegate 補上了新 API:
tableView(tableView: UITableView, estimatedHeightForRowAtIndexPath indexPath: NSIndexPath) -> CGFloat
實作它之後,首次載入不再呼叫 heightForRowAtIndexPath,而是用預估值算出總高度先把畫面顯示出來,等 cell 真正可見時才請求精確高度。首次載入的性能問題就此解決。
但麻煩還在:cell 沒被載入時仍得算高度。上面那段程式碼只是算一個 NSString 就寫了十幾行。到了 iOS 8,這些煩人的程式碼你大概可以不用再寫了。
iOS 8 的自適應機制
self-sizing cell 的邏輯是:只要 cell 有確定的寬度,Auto Layout 就會依內容自動算出對應高度。
要讓 table view 的 cell 自適應,有四個要點:
- 約束必須讓 contentView 知道如何延展——關鍵是 contentView 的四邊都要連到內容,且內容尺寸會動態改變。
- 把 UITableView 的 rowHeight 設為
UITableViewAutomaticDimension。 - 和 iOS 7 一樣,實作 estimatedHeightForRowAtIndexPath 能加快首次載入。
- 任何時候 cell 的 intrinsicContentSize 改變了(例如 table view 寬度變了),都必須重新 reload。
動手做一個自適應 cell
在 Storyboard 建立一個 UITableViewController,擺出如下的 cell:
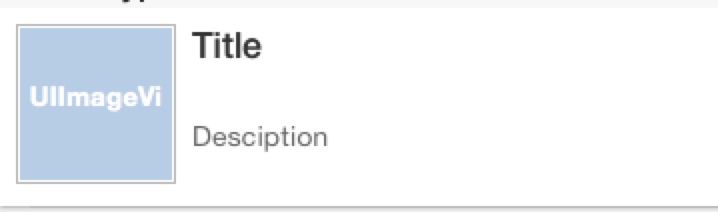
cell 內有三個元素,約束這樣設:
imageView:
- 左邊距 contentView 左邊 0
- 上邊距 contentView 上邊 0
- 寬、高皆為 80
- 下邊距 contentView 下邊大於等於 0(避免內容太少時 cell 比圖片矮)
titleLabel:
- 左邊距 imageView 右邊 8
- 上邊與 imageView 上邊對齊
- 右邊距 contentView 右邊 0
- 下邊距 description 上邊 8
- 高度小於等於 22,優先級 250
descriptionLabel:
- 左邊與 titleLabel 左邊對齊
- 上邊距 titleLabel 8
- 下邊距 contentView 下邊 0
- 右邊距 contentView 右邊 0
載入一些資料後,效果如下:
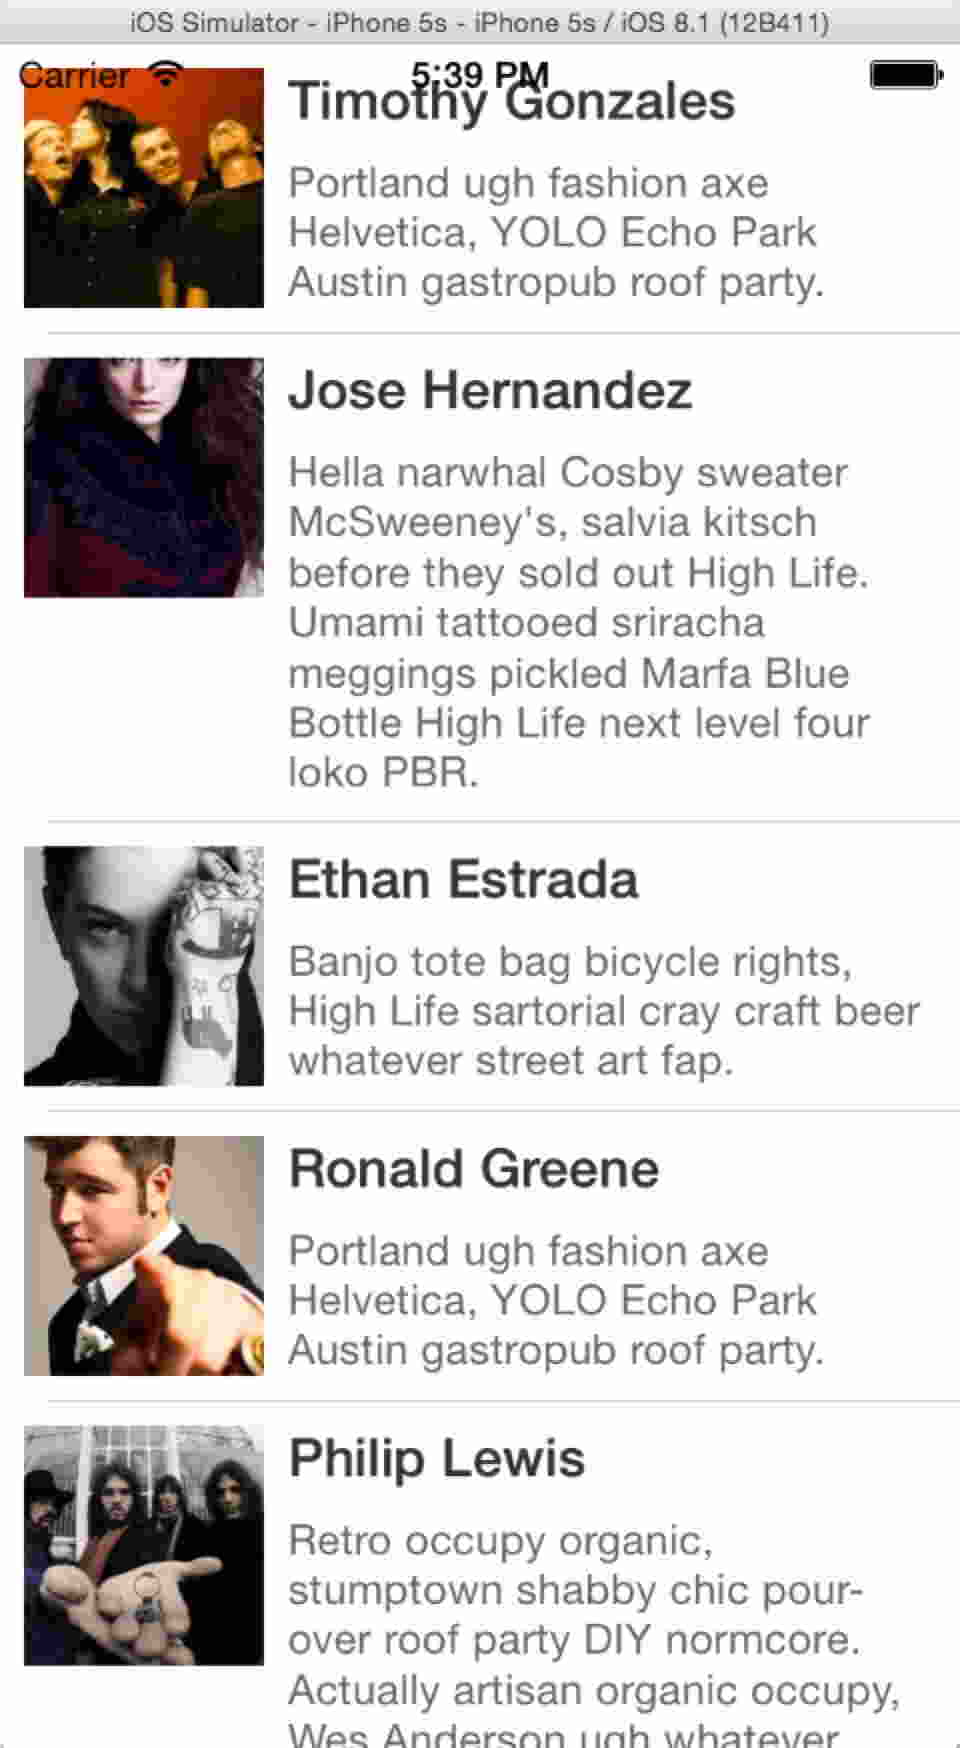
除了 Auto Layout,我設定的只有 tableView.rowHeight = UITableViewAutomaticDimension。一行算高度的程式碼都沒有,連 heightForRowAtIndexPath 都不用實作。如果你已經在做 iOS 8 Only 的 App,把計算交給 Auto Layout 吧。
Collection View 也能自適應
如果 UICollectionView 的 layout 是 UICollectionViewFlowLayout,只要把 layout.itemSize 換成 layout.estimatedItemSize,collection view 就會依 cell 內的 Auto Layout 約束決定大小。原理是:
- 先依 estimatedItemSize 算出估計的 contentSize,據此開始顯示;
- 顯示過程中,即將出現的 cell 依約束算出真實尺寸;
- layout 從 collection view 取回更新後的 size attribute;
- layout 把最終的 size attribute 回傳給 collection view;
- collection view 用最終值呈現 cell。
進階:UITextView 邊打字邊撐高
讓 cell 內的 text view 隨輸入內容即時改變 cell 與 table view 的高度。
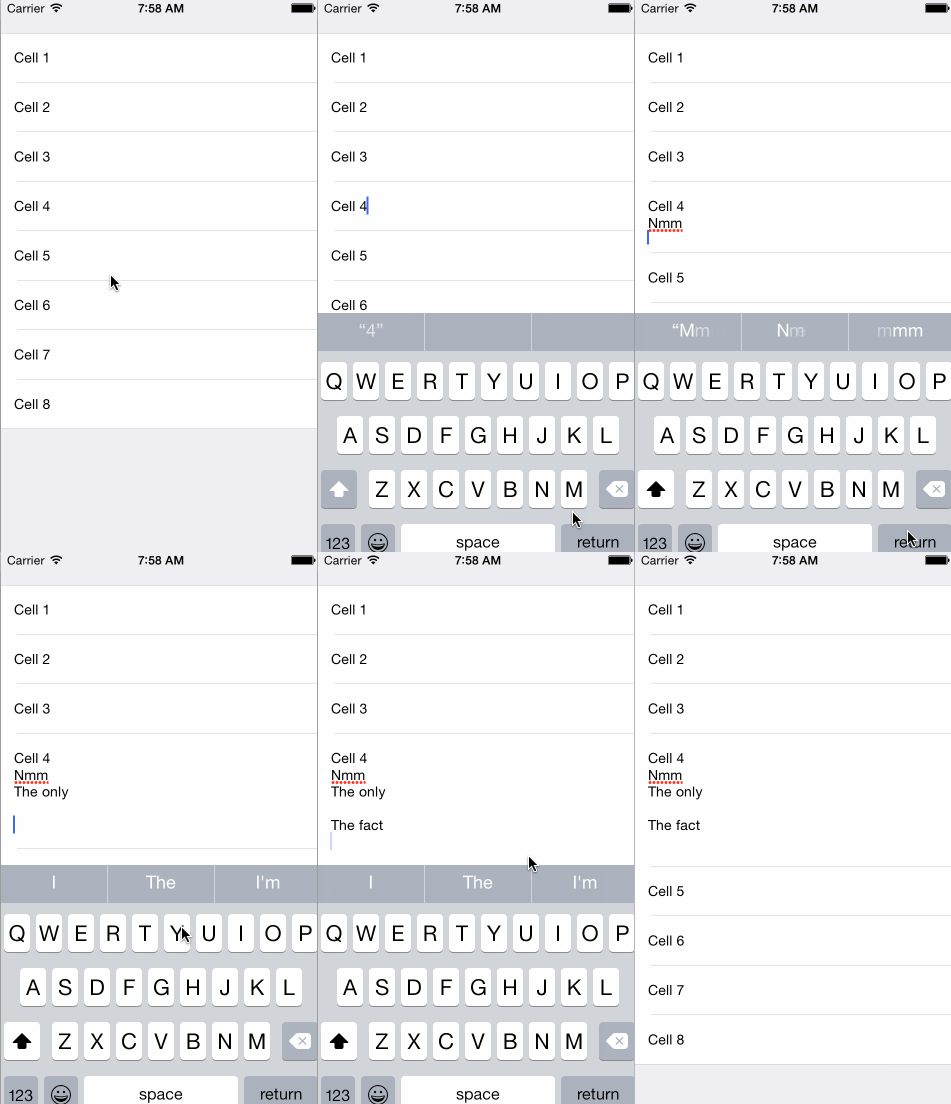
基本原理三步:
- 在 cell 內設定好 text view 的 Auto Layout,讓 cell 能依內容自適應;
- text view 內容改變時,依內容更新它的高度;
- 呼叫 tableView 的 beginUpdates / endUpdates,讓 table view 重算 cell 高度。
另外記得把 text view 更新後的內容存起來,否則滾出一屏再滾回來,文字就回復原樣了。
第一步:拉出 TableViewController,在 cell 上放一個 UITextView。
設定 text view 的 Auto Layout,關鍵約束是「高度大於等於某個值」:
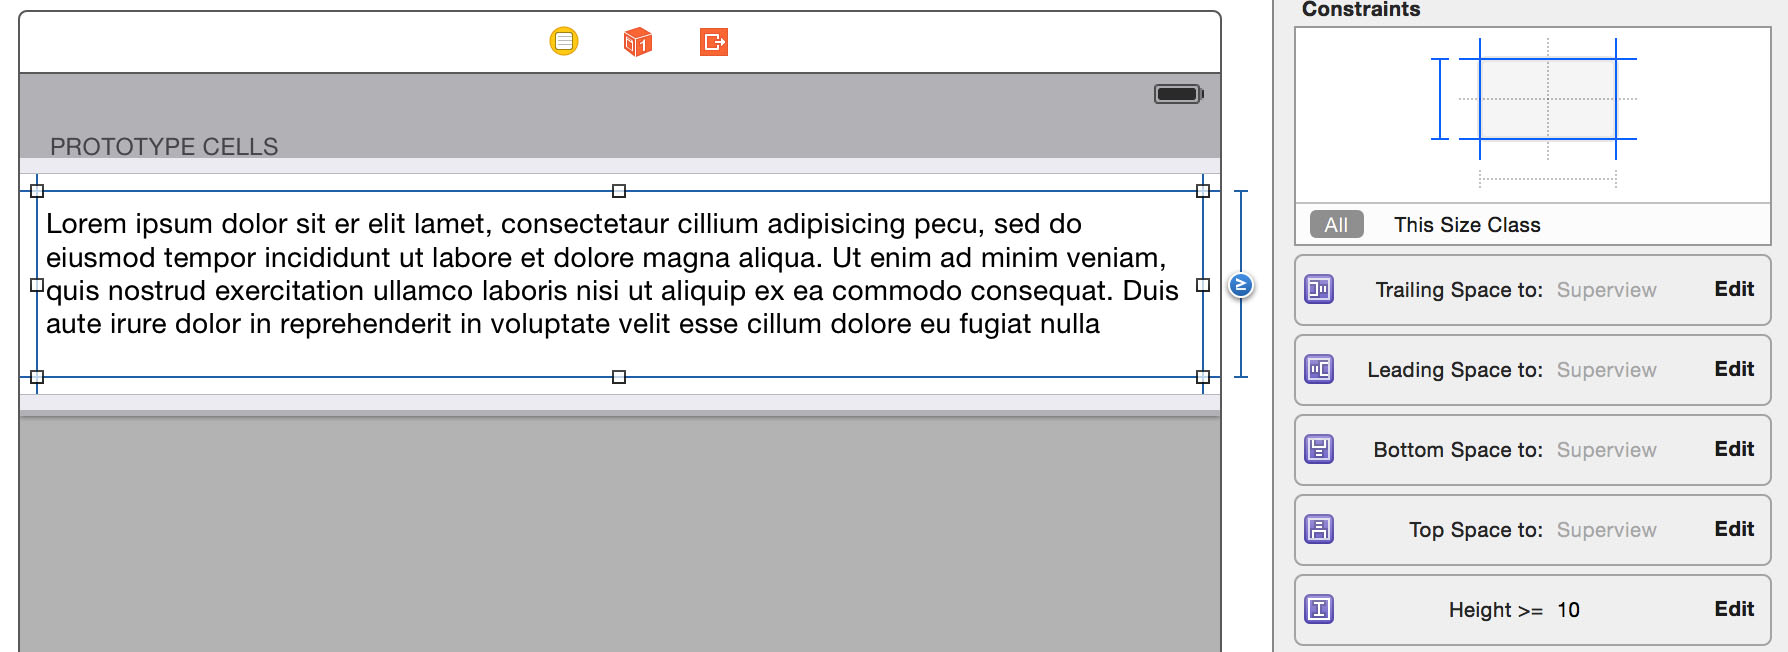
接著把 UITextView 的 scrollEnabled 設為 NO。這一步非常關鍵:不關掉的話,內容超出 frame 之後再改高度會失效,還會冒出滾動條。
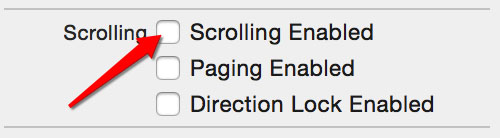
第二步:建立對應的 UITableViewCell 子類。
#import <UIKit/UIKit.h>

@interface TextViewCell : UITableViewCell

@property (weak, nonatomic) IBOutlet UITextView *textView;

@end
第三步:TableViewController 的基礎設定。
- (void)viewDidLoad {
    [super viewDidLoad];

    // 支援自適應 cell
    self.tableView.estimatedRowHeight = 100;
    self.tableView.rowHeight = UITableViewAutomaticDimension;

    self.data = @[@"Cell 1", @"Cell 2", @"Cell 3", @"Cell 4",
                  @"Cell 5", @"Cell 6", @"Cell 7", @"Cell 8"];
}

- (NSInteger)tableView:(UITableView *)tableView numberOfRowsInSection:(NSInteger)section {
    return [self.data count];
}

- (UITableViewCell *)tableView:(UITableView *)tableView cellForRowAtIndexPath:(NSIndexPath *)indexPath {
    TextViewCell *cell = [tableView dequeueReusableCellWithIdentifier:@"TextViewCell" forIndexPath:indexPath];
    cell.textView.text = self.data[indexPath.row];
    return cell;
}
此時專案已能運行,但 text view 還不會自動長高。
第四步:把 UITextView 的 delegate 指向 cell。
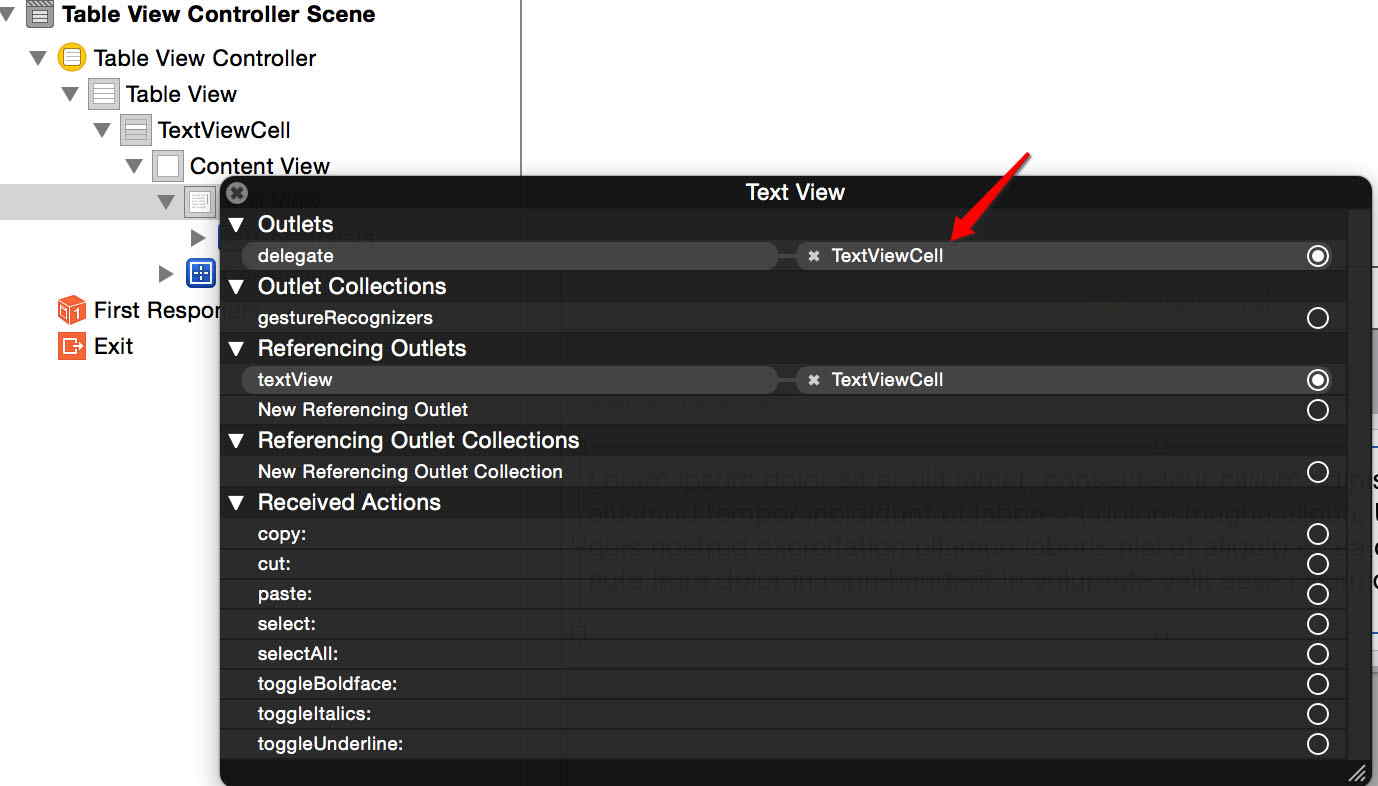
第五步:實作 textViewDidChange,每次內容變化就重算高度並刷新 table view。
#import "TextViewCell.h"

@implementation TextViewCell

- (void)textViewDidChange:(UITextView *)textView {
    CGRect bounds = textView.bounds;

    // 計算 text view 的新高度
    CGSize maxSize = CGSizeMake(bounds.size.width, CGFLOAT_MAX);
    CGSize newSize = [textView sizeThatFits:maxSize];
    bounds.size = newSize;
    textView.bounds = bounds;

    // 讓 table view 重新計算高度
    UITableView *tableView = [self tableView];
    [tableView beginUpdates];
    [tableView endUpdates];
}

- (UITableView *)tableView {
    UIView *tableView = self.superview;

    while (![tableView isKindOfClass:[UITableView class]] && tableView) {
        tableView = tableView.superview;
    }

    return (UITableView *)tableView;
}

@end
到這裡,「打字 → cell 變高」的迴路就通了。
最後一塊拼圖:資料同步
為了避免滾動後 cell 重用導致文字還原,必須在 text view 更新後把資料存回來。做法是給 cell 加一個 delegate,主動通知 TableViewController。
#import <UIKit/UIKit.h>

@protocol TextViewCellDelegate;

@interface TextViewCell : UITableViewCell

@property (weak, nonatomic) IBOutlet UITextView *textView;
@property (weak, nonatomic) id<TextViewCellDelegate> delegate;

@end
@protocol TextViewCellDelegate <NSObject>

- (void)textViewCell:(TextViewCell *)cell didChangeText:(NSString *)text;

@end
在 textViewDidChange 開頭加上通知:
- (void)textViewDidChange:(UITextView *)textView {
    if ([self.delegate respondsToSelector:@selector(textViewCell:didChangeText:)]) {
        [self.delegate textViewCell:self didChangeText:textView.text];
    }

    // 計算 text view 的高度 ...
    // 讓 table view 重新計算高度 ...
}
Controller 端接收並更新資料:
#pragma mark - TextViewCellDelegate

- (void)textViewCell:(TextViewCell *)cell didChangeText:(NSString *)text {
    NSIndexPath *indexPath = [self.tableView indexPathForCell:cell];

    NSMutableArray *data = [self.data mutableCopy];
    data[indexPath.row] = text;
    self.data = [data copy];
}
整篇文章沒有出現任何手算 cell 高度的程式碼,因為那份苦差事已經交給 Auto Layout 了。如果還處於編輯狀態,也記得實作取消編輯時的回滾邏輯——單純陣列可以留一份原始副本,若用的是 NSManagedObject 則可搭配 NSUndoManager。