
動手復刻簡書、淘寶式彈出層:iOS 自訂 View 動畫全流程
編輯:iOS 開發綜合
第一次用簡書 App 時就被它底部彈出的那塊 View 吸引了——動畫乾脆、過渡絲滑,幾乎看不出掉幀。心癢之下自己寫了一版,現在跑起來的效果已經和原版相當接近,索性把思路和代碼一起整理出來。
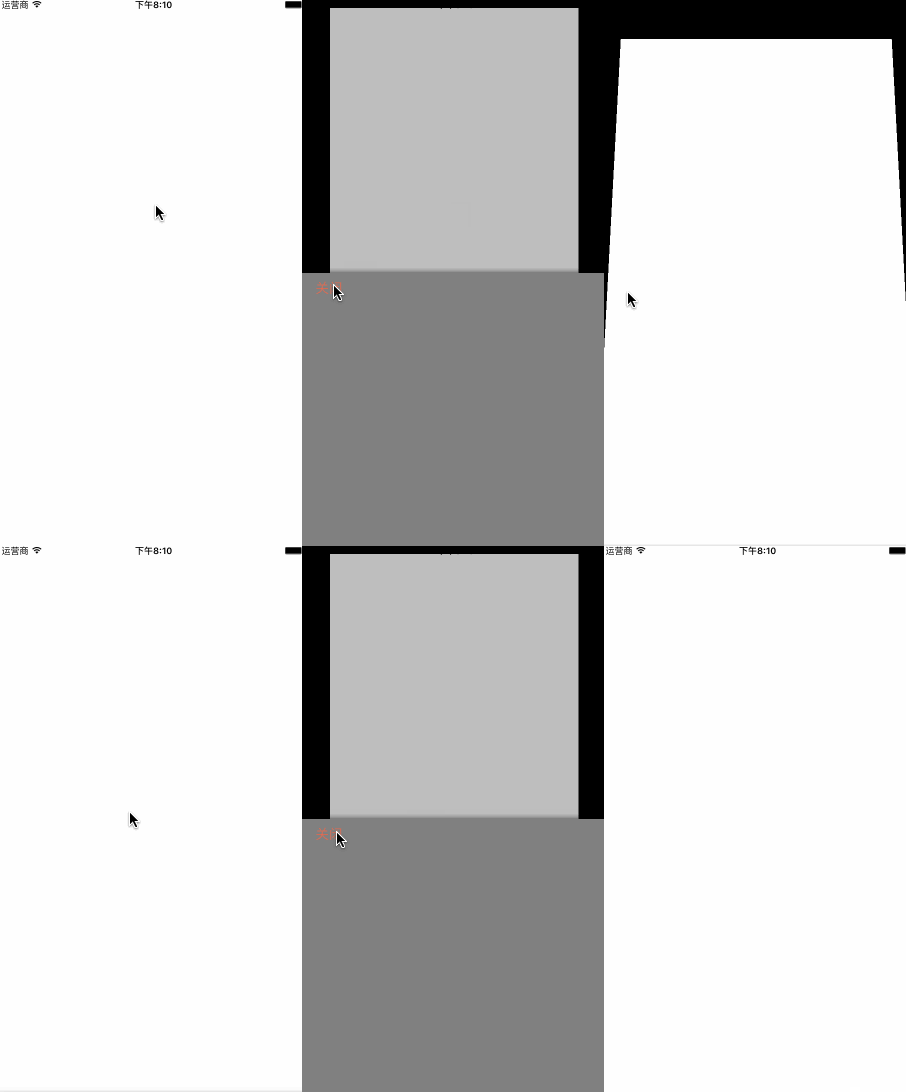
一、先把層次拆清楚
很多人一上手就盯著動畫調參數,結果越調越亂。其實這個效果並不複雜,關鍵在於先看清它到底由幾層 View 疊出來。整個頁面一共四層:
- self.view:最外層容器,背景壓成黑色,襯托彈出層;
- rootVC.view:白色主頁面,也就是被「推遠」的那層內容;
- maskView:蓋在主頁面上的半透明遮罩,負責聚焦視線;
- popView:真正從底部升起來的彈出容器。
層次清楚了,代碼就是照著結構翻譯一遍:
self.view.backgroundColor = [UIColor blackColor]; _popView = ({ UIView * popView = [[UIView alloc]initWithFrame:CGRectMake(0, [UIScreen mainScreen].bounds.size.height, [UIScreen mainScreen].bounds.size.width, [UIScreen mainScreen].bounds.size.height /2.0)]; popView.backgroundColor = [UIColor grayColor]; //加個陰影 popView.layer.shadowColor = [UIColor blackColor].CGColor; popView.layer.shadowOffset = CGSizeMake(0.5, 0.5); popView.layer.shadowOpacity = 0.8; popView.layer.shadowRadius = 5; //關閉btn UIButton * closeBtn = [UIButton buttonWithType:UIButtonTypeCustom]; closeBtn.frame = CGRectMake(15, 0, 50, 40); [closeBtn setTitle:@"關閉" forState:UIControlStateNormal]; [closeBtn setTitleColor:[UIColor colorWithRed:217/255.0 green:110/255.0 blue:90/255.0 alpha:1] forState:UIControlStateNormal]; [closeBtn addTarget:self action:@selector(close) forControlEvents:UIControlEventTouchUpInside]; [popView addSubview:closeBtn]; popView; }); //添加VC的View的方法 _rootVC.view.frame = self.view.bounds; _rootVC.view.backgroundColor = [UIColor whiteColor]; _rootview = _rootVC.view; [self addChildViewController:_rootVC]; [self.view addSubview:_rootview]; //rootVC上的maskView _maskView = ({ UIView * maskView = [[UIView alloc]initWithFrame:self.view.bounds]; maskView.backgroundColor = [UIColor colorWithWhite:0 alpha:0.5]; maskView.alpha = 0; maskView; }); [_rootview addSubview:_maskView];
注意 popView 的初始 y 座標被放在屏幕高度之外,這一步是為了讓它「藏在下面」,後面才有上升的空間。遮罩的 alpha 初始為 0,同理,是為了配合淡入。
二、點擊響應與彈出動畫
為了偷懶,這裡直接用 touchesBegan 觸發,實戰中換成 button 或手勢即可:
- (void)show { [[UIApplication sharedApplication].windows[0] addSubview:_popView]; CGRect frame = _popView.frame; frame.origin.y = self.view.frame.size.height/2.0; [UIView animateWithDuration:0.3 delay:0 options:UIViewAnimationOptionCurveEaseInOut animations:^{ [_rootview.layer setTransform:[self firstTransform]]; } completion:^(BOOL finished) { [UIView animateWithDuration:0.3 delay:0 options:UIViewAnimationOptionCurveEaseInOut animations:^{ [_rootview.layer setTransform:[self secondTransform]]; //顯示maskView [_maskView setAlpha:0.5f]; //popView上升 _popView.frame = frame; } completion:^(BOOL finished) { }]; }]; }
有一行值得單獨拎出來講:[[UIApplication sharedApplication].windows[0] addSubview:_popView];。popView 並沒有加在 self.view 上,而是掛到了 window。這樣做的好處是不受當前控制器層級限制,彈出層永遠浮在最上面,切換頁面也不會被吞掉。
三、真正的主角:兩段 CATransform3D
所謂「高级感」,其實來自兩次形變的接力,而不是一次動畫硬拉到底。
- (CATransform3D)firstTransform{ CATransform3D t1 = CATransform3DIdentity; t1.m34 = 1.0/-900; //帶點縮小的效果 t1 = CATransform3DScale(t1, 0.95, 0.95, 1); //繞x軸旋轉 t1 = CATransform3DRotate(t1, 15.0 * M_PI/180.0, 1, 0, 0); return t1; } - (CATransform3D)secondTransform{ CATransform3D t2 = CATransform3DIdentity; t2.m34 = [self firstTransform].m34; //向上移 t2 = CATransform3DTranslate(t2, 0, self.view.frame.size.height * (-0.08), 0); //第二次縮小 t2 = CATransform3DScale(t2, 0.8, 0.8, 1); return t2; }
拆解一下這兩個方法:
m34 = 1.0/-900是透視效果的來源。不設這個值,旋轉看起來就是「壓扁」而非「遠去」;數值越小景深越誇張,-900 是比較耐看的取值。- firstTransform 做了一次輕微的 0.95 縮放並繞 X 軸前傾 15 度,相當於「啟動」姿態。
- secondTransform 在此基礎上再縮到 0.8,同時向上位移約 8% 屏高,形成「退到背景裡」的錯覺。
兩段動畫串聯播放,加上遮罩同步變暗,層次感就出來了。
四、收尾:反向播放一遍
關閉邏輯基本是彈出的鏡像,只是把「兩段形變」壓成一次完成再復位,這樣手感更緊:
- (void)close { _isShow = NO; CGRect frame = _popView.frame; frame.origin.y += self.view.frame.size.height/2.0; [UIView animateWithDuration:0.3 delay:0 options:UIViewAnimationOptionCurveEaseInOut animations:^{ //maskView隱藏 [_maskView setAlpha:0.f]; //popView下降 _popView.frame = frame; //同時進行 感覺更絲滑 [_rootview.layer setTransform:[self firstTransform]]; } completion:^(BOOL finished) { [UIView animateWithDuration:0.3 delay:0 options:UIViewAnimationOptionCurveEaseInOut animations:^{ //變為初始值 [_rootview.layer setTransform:CATransform3DIdentity]; } completion:^(BOOL finished) { //移除 [_popView removeFromSuperview]; }]; }]; }
最後記得在動畫結束的 completion 中把 popView 從父視圖移除,否則下次彈出會出現殘影。
完整代碼已經封裝好,繼承之後調用創建方法即可。GitHub:Wzxhaha。