
iOS 10 極光推送適配詳解:從 SDK 到代理方法
編輯:iOS 開發綜合
iOS 10 發布後,發現專案中的極光推送接收消息異常了。查了相關資料後才發現,iOS 10 對通知做了不少改動,同時極光也很快更新了對應的 SDK。現在就把適配修改的做法分享一下,希望對有需要的朋友有所幫助。
具體做法如下:
注意:必須先安裝 Xcode 8.0 版本。
一、添加相關 SDK 與 framework 檔案
1、添加 UserNotifications.framework

2、更新 jpush 的 SDK(最新版本:jpush-ios-2.1.9.a,官網 https://www.jiguang.cn)
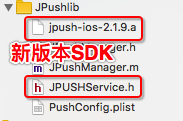
二、進行路徑與消息推送的設定
1、設定 jpush SDK 的路徑
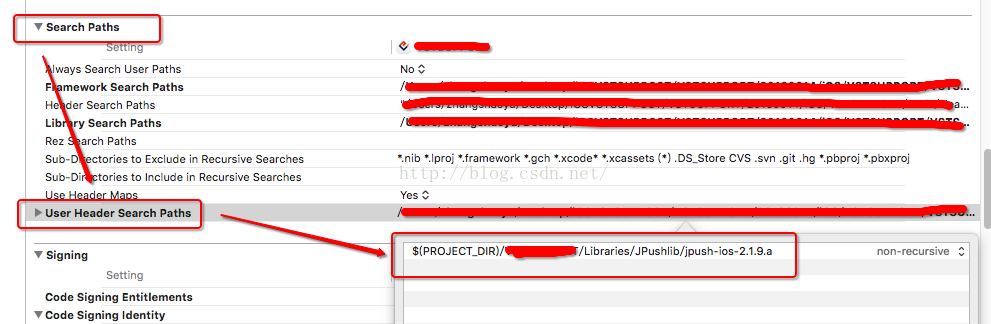
2、開啟消息推送功能

三、程式碼修改
1、添加 userNotification 的標頭檔
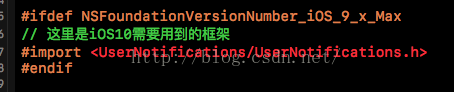
2、添加 userNotification 的啟用程式碼
3、添加 jpush 的適配程式碼
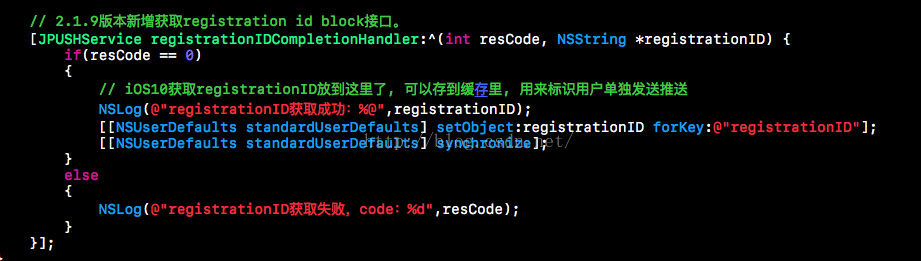
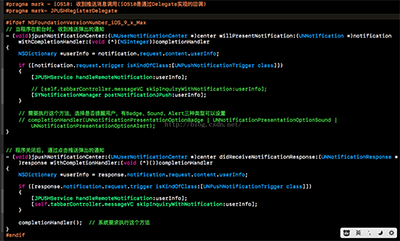
4、添加 jpush 的代理與代理方法(注意:在 appDelegate.m 檔案中使用)

補充:完整使用極光的流程。
1、導入相應標頭檔
#import "JPUSHService.h"
#import <AdSupport/AdSupport.h>
#ifdef NSFoundationVersionNumber_iOS_9_x_Max
// 這裡是 iOS10 需要用到的框架
#import <UserNotifications/UserNotifications.h>
#endif
2、啟動極光推送功能
static NSString *JPushAppKey = @"6abc87b33b23d35b9c3b86e0";
static NSString *JPushChannel = @"Publish channel";
// static BOOL JPushIsProduction = NO;
#ifdef DEBUG
// 開發 極光 FALSE 為開發環境
static BOOL const JPushIsProduction = FALSE;
#else
// 生產 極光 TRUE 為生產環境
static BOOL const JPushIsProduction = TRUE;
#endif
- (BOOL)application:(UIApplication *)application didFinishLaunchingWithOptions:(NSDictionary *)launchOptions {
// Override point for customization after application launch.
// 啟動極光推送 // Required
if ([[UIDevice currentDevice].systemVersion floatValue] >= 10.0) { // iOS10
#ifdef NSFoundationVersionNumber_iOS_9_x_Max
JPUSHRegisterEntity *entity = [[JPUSHRegisterEntity alloc] init];
entity.types = (UNAuthorizationOptionAlert | UNAuthorizationOptionBadge | UNAuthorizationOptionSound);
[JPUSHService registerForRemoteNotificationConfig:entity delegate:target];
#endif
} else if ([[UIDevice currentDevice].systemVersion floatValue] >= 8.0) {
// categories
[JPUSHService registerForRemoteNotificationTypes:(UIUserNotificationTypeBadge | UIUserNotificationTypeSound | UIUserNotificationTypeAlert) categories:nil];
} else {
// categories nil
[JPUSHService registerForRemoteNotificationTypes:(UIRemoteNotificationTypeBadge | UIRemoteNotificationTypeSound | UIRemoteNotificationTypeAlert) categories:nil];
}
// Required
// [JPUSHService setupWithOption:launchOptions] // pushConfig.plist appKey
// 有廣告符標識 IDFA(盡量不用,避免上架審核被拒)
/* NSString *JPushAdvertisingId = [[[ASIdentifierManager sharedManager] advertisingIdentifier] UUIDString];
[JPUSHService setupWithOption:JPushOptions appKey:JPushAppKey channel:JPushChannel apsForProduction:JPushIsProduction advertisingIdentifier:JPushAdvertisingId]; */
// 或無廣告符標識 IDFA(盡量不用,避免上架審核被拒)
[JPUSHService setupWithOption:options appKey:JPushAppKey channel:JPushChannel apsForProduction:JPushIsProduction];
// 2.1.9 版本新增獲取 registration id block 接口。
[JPUSHService registrationIDCompletionHandler:^(int resCode, NSString *registrationID) {
if(resCode == 0) {
// iOS10 獲取 registrationID 放到這裡了,可以存到緩存裡,用來標識用戶單獨發送推送
NSLog(@"registrationID獲取成功:%@",registrationID);
[[NSUserDefaults standardUserDefaults] setObject:registrationID forKey:@"registrationID"];
[[NSUserDefaults standardUserDefaults] synchronize];
} else {
NSLog(@"registrationID獲取失敗,code:%d",resCode);
}
}];
return YES;
}
3、注冊
- (void)application:(UIApplication *)application didRegisterForRemoteNotificationsWithDeviceToken:(NSData *)deviceToken {
[JPUSHService registerDeviceToken:data];
}
4、注冊失敗
- (void)application:(UIApplication *)application didFailToRegisterForRemoteNotificwationsWithError:(NSError *)error {
NSLog(@"did Fail To Register For Remote Notifications With Error: %@", error);
}
5、接收
- (void)application:(UIApplication *)application didReceiveRemoteNotification:(NSDictionary *)userInfo {
// apn 內容獲取:
// 取得 APNs 標准信息內容
[JPUSHService handleRemoteNotification:dict];
}
6、處理通知
6-1、iOS10 以下版本時
- (void)application:(UIApplication *)application didReceiveRemoteNotification:(NSDictionary *)userInfo fetchCompletionHandler:(void (^)(UIBackgroundFetchResult))completionHandler {
DLog(@"2-1 didReceiveRemoteNotification remoteNotification = %@", userInfo);
// apn 內容獲取:
[JPUSHService handleRemoteNotification:dict];
completionHandler(UIBackgroundFetchResultNewData);
DLog(@"2-2 didReceiveRemoteNotification remoteNotification = %@", userInfo);
if ([userInfo isKindOfClass:[NSDictionary class]]) {
NSDictionary *dict = userInfo[@"aps"];
NSString *content = dict[@"alert"];
DLog(@"content = %@", content);
}
if (application.applicationState == UIApplicationStateActive) {
// 程序當前正處於前台
} else if (application.applicationState == UIApplicationStateInactive) {
// 程序處於後台
}
}
6-2、iOS10 及以上版本時
#pragma mark - iOS10: 收到推送消息調用(iOS10 是通過 Delegate 實現的回調)
#pragma mark- JPUSHRegisterDelegate
#ifdef NSFoundationVersionNumber_iOS_9_x_Max
// 當程序在前台時,收到推送彈出的通知
- (void)jpushNotificationCenter:(UNUserNotificationCenter *)center willPresentNotification:(UNNotification *)notification withCompletionHandler:(void (^)(NSInteger))completionHandler {
NSDictionary *userInfo = notification.request.content.userInfo;
if ([notification.request.trigger isKindOfClass:[UNPushNotificationTrigger class]]) {
[JPUSHService handleRemoteNotification:userInfo];
}
// 需要執行這個方法,選擇是否提醒用戶,有 Badge、Sound、Alert 三種類型可以設置
// completionHandler(UNNotificationPresentationOptionBadge | UNNotificationPresentationOptionSound | UNNotificationPresentationOptionAlert);
}
// 程序關閉後,通過點擊推送彈出的通知
- (void)jpushNotificationCenter:(UNUserNotificationCenter *)center didReceiveNotificationResponse:(UNNotificationResponse *)response withCompletionHandler:(void (^)())completionHandler {
NSDictionary *userInfo = response.notification.request.content.userInfo;
if ([response.notification.request.trigger isKindOfClass:[UNPushNotificationTrigger class]]) {
[JPUSHService handleRemoteNotification:userInfo];
}
completionHandler(); // 系統要求執行這個方法
}
#endif
7、其他注意事項
為保證用戶能正常接收、或有針對性地接收通知,登入成功後(或退出後)需要設定別名、標記。通常這段邏輯寫在用戶登入 App 成功之後,或退出當前登入狀態後。
/// 綁定別名(注意:1 登錄成功或者自動登錄後;2 去除綁定-退出登錄後)
+ (void)JPushTagsAndAliasInbackgroundTags:(NSSet *)set alias:(NSString *)name {
// 標簽分組(表示沒有值)
NSSet *tags = set;
// 用戶別名(自定義值,nil 是表示沒有值)
NSString *alias = name;
NSLog(@"tags = %@, alias = %@(registrationID = %@)", tags, alias, [self registrationID]);
// tags、alias 均無值時表示去除綁定
[JPUSHService setTags:tags aliasInbackground:alias];
}
以上便是 iOS 10 中極光推送消息適配的解析,希望對大家有所幫助。
- 上一篇文章: iOS 九宮格布局實現方法:宏定義打造高復用組件
- 下一篇文章: iOS 10 權限崩潰問題詳解:Info.plist 用途說明配置