
iOS 九宮格布局實現方法:宏定義打造高復用組件
編輯:iOS 開發綜合
剛開始搞 iOS 的時候,大部分都靠計算 frame 來佈局視圖;後來漸漸都改用自動佈局了,因為自動佈局實在太方便、太好用了。所以當我某天回看以前寫的九宮格佈局程式碼時,突然發現很多東西都忘了,於是今天特別記錄一下,並透過幾個簡單的宏定義來完成佈局需求。具體大家看程式碼吧,都有註釋,很好懂:
//
// ButtonContainerView.h
// chemuchao
//
// Created by 遇見遠洋 on 16/3/7.
// Copyright © 2016年 zhaoxiaolu. All rights reserved.
//
#import <UIKit/UIKit.h>
//按鈕點擊 block
typedef void(^spitlotBtnClick)(UIButton * btn);
@interface ButtonContainerView : UIView
@property (nonatomic,copy)spitlotBtnClick spitlotBlock;/**<<#展示對話內容的tableview#>*/
@end
這裡順便推薦一個寫註釋的好方法:在聲明屬性時,若想在其他地方調用時能出現提示(如下圖):
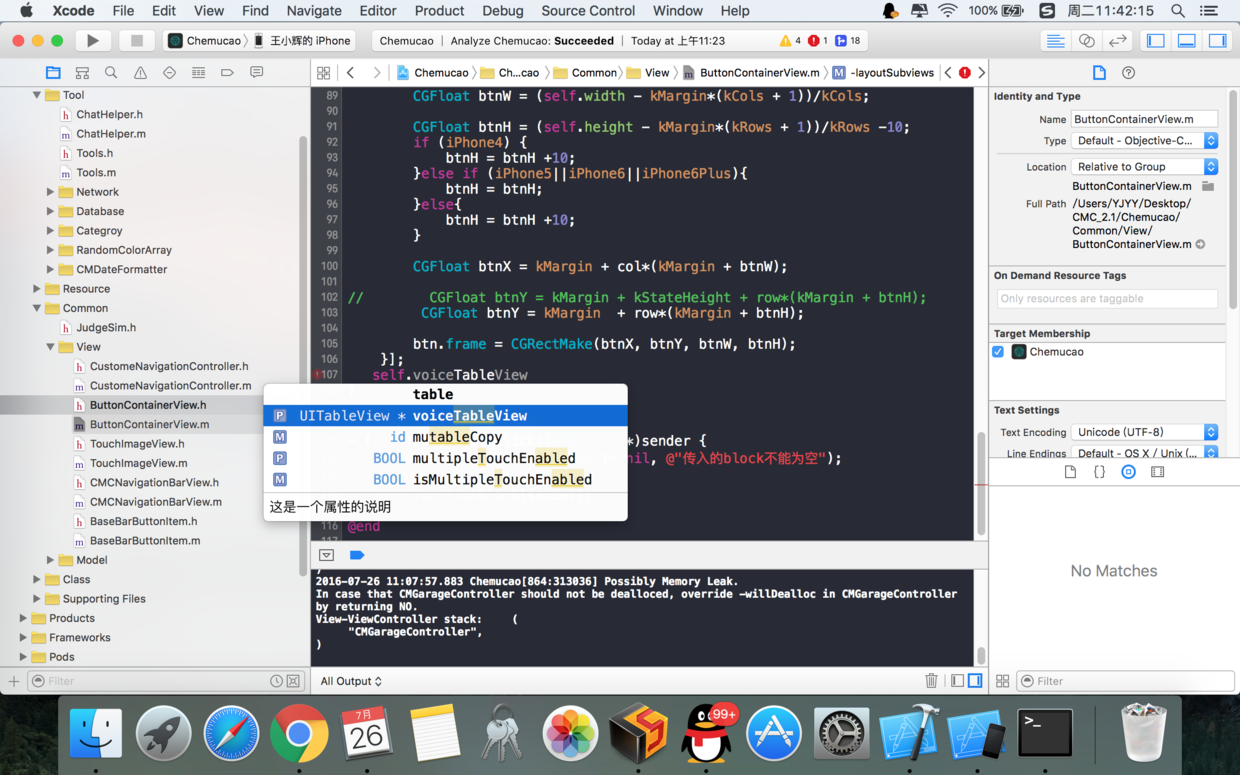
只要在聲明屬性時,跟上面一樣在最后加上
/**<這是要寫的提示文字*/
用這種方式聲明的屬性,在外部調用時就會有提示。好像有點跑題,接下來看 .m 的程式碼:
//
// ButtonContainerView.m
// chemuchao
//
// Created by 遇見遠洋 on 16/3/7.
// Copyright © 2016年 zhaoxiaolu. All rights reserved.
//
#import "ButtonContainerView.h"
#import "UIView+Extension.h"
//狀態欄高度
#define kStateHeight 20
//總行數
#define kRows 2
//總列數
#define kCols 4
//九宮格個數
#define kCount 8
//九宮格之間的間隙
#define kMargin 5
//字體大小
#define kFont15 [UIFont systemFontOfSize:15]
@interface ButtonContainerView ()
@property (nonatomic,strong)NSMutableArray * btns;
@property (nonatomic,strong)NSArray * btnTitles;
@end
@implementation ButtonContainerView
- (NSMutableArray *)btns {
if (!_btns) {
_btns = [NSMutableArray array];
}
return _btns;
}
-(NSArray *)btnTitles {
if (!_btnTitles) {
_btnTitles = @[@"堵成狗",@"堵成翔",@"路太窄",@"沒燈",@"路不平",@"積水多",@"顛簸",@"路太髒"];
}
return _btnTitles;
}
- (instancetype)initWithFrame:(CGRect)frame{
if (self = [super initWithFrame:frame]) {
[self setupUI];
}
return self;
}
- (void)setupUI {
for (int i = 0; i < kCount; i++) {
UIButton * btn = [[UIButton alloc]init];
[btn setTitle:self.btnTitles[i] forState:UIControlStateNormal];
[self addSubview:btn];
btn.layer.borderWidth = 1;
btn.layer.borderColor = [UIColor redColor].CGColor;
btn.titleLabel.font = [UIFont systemFontOfSize:13];
[btn setTitleColor:[UIColor grayColor] forState:UIControlStateNormal];
[btn addTarget:self action:@selector(spitlotBtnClick:) forControlEvents:UIControlEventTouchUpInside];
[self.btns addObject:btn];
}
}
-(void)layoutSubviews {
[super layoutSubviews];
[self.btns enumerateObjectsUsingBlock:^(id _Nonnull obj, NSUInteger idx, BOOL * _Nonnull stop) {
UIButton * btn = obj;
btn.tag = idx;
//行號
NSUInteger row = idx/kCols;
//列號
NSUInteger col = idx%kCols;
CGFloat btnW = (self.width - kMargin*(kCols + 1))/kCols;
CGFloat btnH = (self.height - kMargin*(kRows + 1))/kRows -10;
CGFloat btnX = kMargin + col*(kMargin + btnW);
CGFloat btnY = kMargin + row*(kMargin + btnH) + kStateHeight;
btn.frame = CGRectMake(btnX, btnY, btnW, btnH);
}];
}
#pragma mark 按鈕點擊事件
- (void)spitlotBtnClick:(UIButton *)sender {
NSAssert(self.spitlotBlock != nil, @"傳入的block不能為空");
//執行block
self.spitlotBlock(sender);
}
@end
你只需要更換幾個宏定義,就能定制你的九宮格佈局,例如總行數、總列數、九宮格個數,簡單吧,復用性很高。當然,對於使用自動佈局的朋友來說,這段可以無視。
希望透過本文能幫助大家進行 iOS 九宮格的開發。
- 上一篇文章: iOS 開發正則運算詳解:常用表達式與符號語法
- 下一篇文章: iOS 10 極光推送適配詳解:從 SDK 到代理方法