
iOS 圖片拉伸技巧:端蓋概念與 iOS 5.0 / 6.0 三種方案
一款行動 App 想在市場上站得住腳,實用功能、順手的操作體驗、清爽好看的外觀,三者缺一不可。外觀背後是設計師的心血,但如果工程師不懂得怎麼把這些素材正確地攤在畫面上,設計就白做了。
看下面這張圖,它原本是要當按鈕背景的:

button.png,尺寸 24 × 60。現在把它套到一個 150 × 50 的按鈕上:
- (void)viewDidLoad {
    [super viewDidLoad];
    // 取得 view 的尺寸
    CGSize viewSize = self.view.bounds.size;
    // 初始化按鈕
    UIButton *button = [[UIButton alloc] init];
    // 設定尺寸
    button.bounds = CGRectMake(0, 0, 150, 50);
    // 設定位置
    button.center = CGPointMake(viewSize.width * 0.5f, viewSize.height * 0.5f);
    // 載入圖片
    UIImage *image = [UIImage imageNamed:@"button"];
    // 設為背景圖
    [button setBackgroundImage:image forState:UIControlStateNormal];
    // 加上去
    [self.view addSubview:button];
}
執行結果:
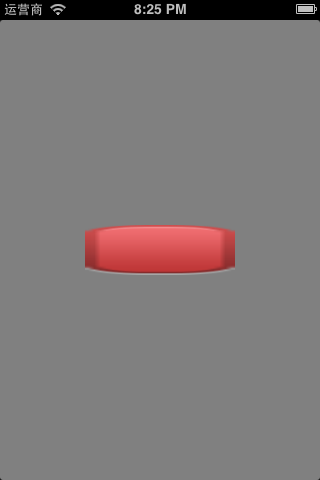
慘不忍睹。原因很單純:原圖 24 × 60 被整張全方位拉成 150 × 50,四個圓角首當其衝。
有人會立刻想到:叫設計師把圖畫大一點不就得了?這確實是一種解法,但不建議。一是圖片變大、安裝包變大、記憶體佔用也變大;二是根本有更漂亮的做法。
仔細看,圖片變醜完全是因為四個角被拉扯,中央區域的變形其實不明顯。所以只要拉伸時避開邊緣、只拉中間那塊矩形,問題就解決了。
比如只拉伸下圖的矩形區域,上下左右四邊一律不動:

iOS 內建的 API 正好就是幹這件事的。截至 iOS 6.0,官方一共提供了三種方案,下面逐一說明。
一、iOS 5.0 之前:端蓋(end cap)
iOS 有個叫「端蓋」的概念,用來指定圖片中哪幾塊區域不准動。下圖黑色代表要拉伸的矩形區域,四周不需要拉伸的邊緣就是端蓋。
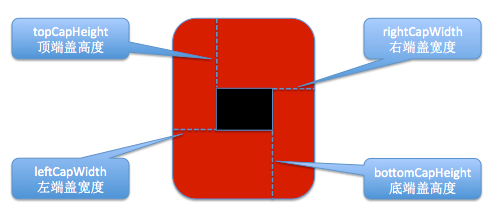
透過設定端蓋寬度,可以拿到一張已處理好的 UIImage:
- (UIImage *)stretchableImageWithLeftCapWidth:(NSInteger)leftCapWidth topCapHeight:(NSInteger)topCapHeight;
這個方法只有兩個參數:leftCapWidth 是左端蓋寬度,topCapHeight 是頂端蓋高度。右端蓋與底端蓋由系統推算:
// width 為圖片寬度
rightCapWidth = width - leftCapWidth - 1;
// height 為圖片高度
bottomCapHeight = height - topCapHeight - 1;
算一下會發現,中間可拉伸的區域剛好只剩 1 × 1:
// stretchWidth 為中間可拉伸區域的寬度
stretchWidth = width - leftCapWidth - rightCapWidth = 1;
// stretchHeight 為中間可拉伸區域的高度
stretchHeight = height - topCapHeight - bottomCapHeight = 1;
因此這個方法只會拉伸正中央那一個像素點,邊緣與角落完全不動。使用範例:
// 左端蓋寬度
NSInteger leftCapWidth = image.size.width * 0.5f;
// 頂端蓋高度
NSInteger topCapHeight = image.size.height * 0.5f;
// 重新賦值
image = [image stretchableImageWithLeftCapWidth:leftCapWidth topCapHeight:topCapHeight];
注意,呼叫後原本的 image 不會被改動,而是產生一張新的 UIImage,所以第六行要把回傳值賦回 image。
執行結果:
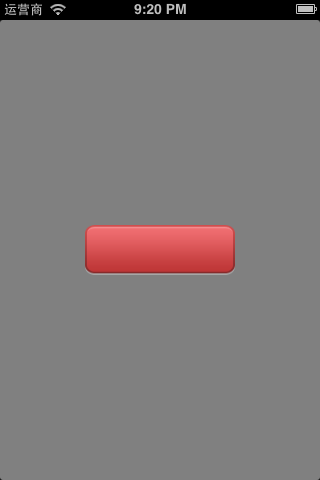
圖片漂亮地呈現出來了。
兩點提醒:一、這個方法在 iOS 5.0 之後就被標記為 deprecated;二、它只能拉伸 1 × 1 的區域。
二、iOS 5.0:resizableImageWithCapInsets
- (UIImage *)resizableImageWithCapInsets:(UIEdgeInsets)capInsets
只收一個 UIEdgeInsets 參數,透過 left、right、top、bottom 分別指定四邊端蓋:
CGFloat top = 25;    // 頂端蓋高度
CGFloat bottom = 25; // 底端蓋高度
CGFloat left = 10;   // 左端蓋寬度
CGFloat right = 10;  // 右端蓋寬度

UIEdgeInsets insets = UIEdgeInsetsMake(top, left, bottom, right);
// 伸縮後重新賦值
image = [image resizableImageWithCapInsets:insets];
執行結果:
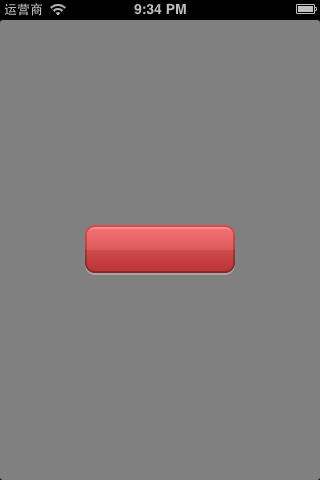
三、iOS 6.0:多一個 resizingMode
- (UIImage *)resizableImageWithCapInsets:(UIEdgeInsets)capInsets resizingMode:(UIImageResizingMode)resizingMode
對比 iOS 5.0 的版本,只多了 UIImageResizingMode,用來決定中間區域怎麼填:
UIImageResizingModeStretch:拉伸模式,把 UIEdgeInsets 框出的矩形區域拉開填滿。
UIImageResizingModeTile:平鋪模式,把該矩形區域重複貼滿。
CGFloat top = 25;    // 頂端蓋高度
CGFloat bottom = 25; // 底端蓋高度
CGFloat left = 10;   // 左端蓋寬度
CGFloat right = 10;  // 右端蓋寬度

UIEdgeInsets insets = UIEdgeInsetsMake(top, left, bottom, right);
// 指定為拉伸模式,伸縮後重新賦值
image = [image resizableImageWithCapInsets:insets resizingMode:UIImageResizingModeStretch];
執行結果:
三個方案一路看下來,結論很清楚:新專案直接用 resizableImageWithCapInsets:resizingMode:,或者更進一步,用 Asset Catalog 的 slicing 把設定從程式碼裡搬到圖片資源上。
- 上一篇文章: iOS 圖片拉伸的 4 種方法(附完整對照)
- 下一篇文章: iOS 城市定位完整流程:從經緯度到中文城市名