
iOS 資料儲存完整解析:五大方式與實作範例
iOS 應用資料儲存的常用方式
- XML 屬性列表(plist)檔案
- Preference(偏好設定)
- NSKeyedArchiver 檔案(NSCoding)
- SQLite3
- Core Data
1. XML 屬性列表(plist)檔案
每個 iOS 應用都有自己的應用沙盒(一個檔案系統目錄),與其他檔案系統隔離。應用只能待在這個沙盒裡,其他應用無法存取。
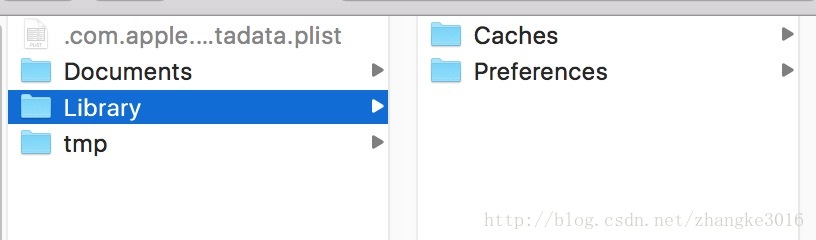
應用沙盒結構分析:
應用程式包:包含所有資源檔與可執行檔。
Documents:儲存應用執行時產生、需要持久化的資料,iTunes 同步時會備份此目錄,例如遊戲存檔。
tmp:儲存臨時資料,用完即刪。應用未執行時系統也可能清除,iTunes 不會備份。
Library/Caches:儲存需要持久化但體積大、不需備份的非重要資料,iTunes 不會備份。
Library/Preference:儲存應用的所有偏好設定,iOS 的「設定」應用會在此查找,iTunes 會備份。
應用沙盒目錄的常見取得方式
沙盒根目錄:NSString *home = NSHomeDirectory(); Documents:(2種方式) 1. 利用沙盒根目錄拼接"Documents"字符串 //不建議采用,因為新版本的操作系統可能會修改目錄名 NSString *home = NSHomeDirectory(); NSString *documents = [home stringByAppendingPathComponent:@"Documents"]; 2. 利用NSSearchPathForDirectoriesInDomains函數 // NSUserDomainMask 代表從用戶文件夾下找 // YES 代表展開路徑中的波浪字符"~" NSArray *array = NSSearchPathForDirectoriesInDomains(NSDocumentDirectory, NSUserDomainMask, NO); // 在iOS中,只有一個目錄跟傳入的參數匹配,所以這個集合裡面只有一個元素 NSString *documents = [array objectAtIndex:0]; tmp: NSString *tmp = NSTemporaryDirectory(); Library/Caches: 跟Documents類似的2種方法: 1. 利用沙盒根目錄拼接"Caches"字符串 2. 利用NSSearchPathForDirectoriesInDomains函數(將函數的第2個參數改為:NSCachesDirectory即可) Library/Preference: 通過NSUserDefaults類存取該目錄下的設置信息
屬性列表
屬性列表是一種 XML 格式的檔案,副檔名為 plist。
若物件是 NSString、NSDictionary、NSArray、NSData、NSNumber 等類型,就能用 writeToFile:atomically: 方法直接寫入屬性列表檔案。
例如:將一個 NSDictionary 物件存成 plist:
/ /獲取路徑 NSString *path = NSSearchPathForDirectoriesInDomains(NSDocumentDirectory, NSUserDomainMask, YES)[0]; path = [path stringByAppendingPathComponent:@"save.plist"]; / /將數據封裝成字典 //不能存儲對象 NSMutableDictionary *dict = [NSMutableDictionary dictionary]; [dict setObject:@"小黃" forKey:@"name"]; [dict setObject:@"12345678" forKey:@"phone"]; [dict setObject:@"24" forKey:@"age"]; // 將字典持久化到Documents/save.plist文件中 [dict writeToFile:path atomically:YES];
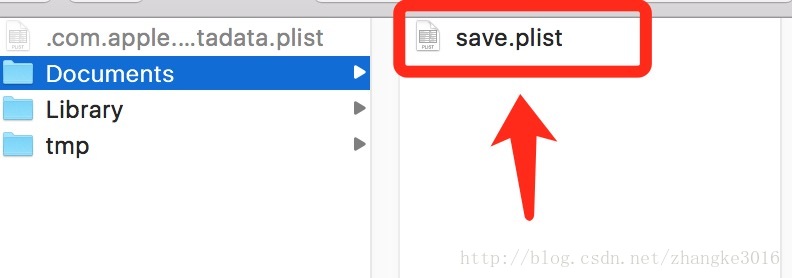
還原 NSDictionary
讀取屬性列表,恢復NSDictionary對象 // 讀取Documents/save.plist的內容,實例化NSDictionary NSDictionary *dict = [NSDictionary dictionaryWithContentsOfFile:path]; NSLog(@"name:%@", [dict objectForKey:@"name"]); NSLog(@"phone:%@", [dict objectForKey:@"phone"]); NSLog(@"age:%@", [dict objectForKey:@"age"]);
NSDictionary —(writeToFile:atomically:)—> save.plist(屬性列表檔案)
save.plist —(dictionaryWithContentsOfFile:)—> NSDictionary
2. Preference(偏好設定)
許多 iOS 應用都支援偏好設定,例如保存使用者名稱、密碼、字型大小等。每個應用都有一個 NSUserDefaults 實例,透過它來存取偏好設定。
//比如,保存用戶名、字體大小、是否自動登錄 NSUserDefaults *defaults = [NSUserDefaults standardUserDefaults]; [defaults setObject:@"mr.zk" forKey:@"username"]; [defaults setFloat:18.0f forKey:@"text_size"]; [defaults setBool:YES forKey:@"auto_login"];
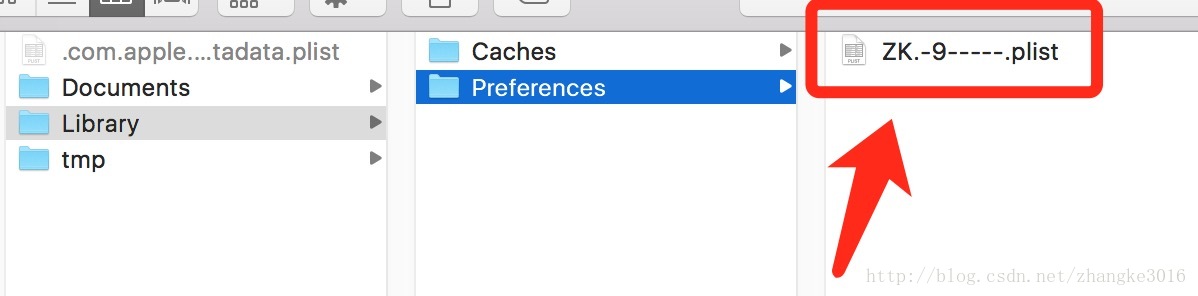
//讀取上次保存的設置 NSUserDefaults *defaults = [NSUserDefaults standardUserDefaults]; NSString *username = [defaults stringForKey:@"username"]; float textSize = [defaults floatForKey:@"text_size"]; BOOL autoLogin = [defaults boolForKey:@"auto_login"];
注意:UserDefaults 設定資料時不會立即寫入,而是依時間戳定時把快取資料寫入本機。因此呼叫 set 後資料可能尚未寫入磁碟程式就結束了。若需強制寫入,可呼叫 synchronize 方法:[defaults synchronize];
3. NSKeyedArchiver 檔案(NSCoding)
若物件是 NSString、NSDictionary、NSArray、NSData、NSNumber 等類型,可直接用 NSKeyedArchiver 進行檔案與還原。並非所有物件都能這樣做,只有遵守 NSCoding 協議的物件才可以。
NSCoding 協議有兩個方法:
encodeWithCoder: 每次檔案物件時呼叫,用來指定如何將各實例變量寫入,可用 encodeObject:forKey:。
initWithCoder: 每次從檔案還原(解碼)物件時呼叫,用來指定如何將檔案資料解為實例變量,可用 decodeObject:forKey:。
將一個 NSArray 存成 Documents/array.data:
NSString *path = NSSearchPathForDirectoriesInDomains(NSCachesDirectory, NSUserDomainMask, YES)[0]; path = [path stringByAppendingPathComponent:@"array.data"]; NSArray *array = [NSArray arrayWithObjects:@"a",@"b",nil]; [NSKeyedArchiver archiveRootObject:array toFile:path];
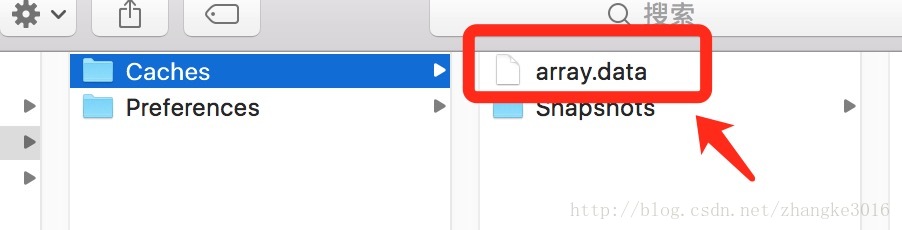
還原(解碼)NSArray
NSArray *array = [NSKeyedUnarchiver unarchiveObjectWithFile:path];
NSArray —(archiveRootObject:toFile:)—> array.data
array.data —(unarchiveObjectWithFile:)—> NSArray
檔案一個 Person 物件(Person.h):
NSKeyedArchiver-歸檔Person對象(Person.h) @interface Person : NSObject<NSCoding> @property (nonatomic, strong) NSString *name; @property (nonatomic, assign) int age; @property (nonatomic, assign) float height; @end
@implementation Person - (void)encodeWithCoder:(NSCoder *)encoder { [encoder encodeObject:self.name forKey:@"name"]; [encoder encodeInt:self.age forKey:@"age"]; [encoder encodeFloat:self.height forKey:@"height"]; } - (id)initWithCoder:(NSCoder *)decoder { self.name = [decoder decodeObjectForKey:@"name"]; self.age = [decoder decodeIntForKey:@"age"]; self.height = [decoder decodeFloatForKey:@"height"]; return self; } @end
//歸檔(編碼) Person *person = [[[Person alloc] init] autorelease]; person.name = @"zk"; person.age = 24; person.height = 1.73f; [NSKeyedArchiver archiveRootObject:person toFile:path]; //恢復(解碼) Person *person = [NSKeyedUnarchiver unarchiveObjectWithFile:path];
若父類也遵守 NSCoding 協議,請注意:encodeWithCoder: 中要加上 [super encodeWithCode:encode;],initWithCoder: 中要加上 self = [super initWithCoder:decoder;],以確保繼承的實例變量也能被編碼與解碼。
NSData
archiveRootObject:toFile: 可將單一物件寫入檔案,但若想把多個物件寫入同一檔案,就要用 NSData 來檔案。NSData 可為資料提供臨時儲存空間,用 [NSMutableData data] 建立可變資料空間。

//歸檔(編碼) // 新建一塊可變數據區 NSMutableData *data = [NSMutableData data]; // 將數據區連接到一個NSKeyedArchiver對象 NSKeyedArchiver *archiver = [[[NSKeyedArchiver alloc] initForWritingWithMutableData:data] autorelease]; // 開始存檔對象,存檔的數據都會存儲到NSMutableData中 [archiver encodeObject:person1 forKey:@"person1"]; [archiver encodeObject:person2 forKey:@"person2"]; // 存檔完畢(一定要調用這個方法) [archiver finishEncoding]; // 將存檔的數據寫入文件 [data writeToFile:path atomically:YES];
利用檔案實作深拷貝
//恢復(解碼) // 從文件中讀取數據 NSData *data = [NSData dataWithContentsOfFile:path]; // 根據數據,解析成一個NSKeyedUnarchiver對象 NSKeyedUnarchiver *unarchiver = [[NSKeyedUnarchiver alloc] initForReadingWithData:data]; Person *person1 = [unarchiver decodeObjectForKey:@"person1"]; Person *person2 = [unarchiver decodeObjectForKey:@"person2"]; // 恢復完畢 [unarchiver finishDecoding];
person1 —(archivedDataWithRootObject:)—> NSData —(unarchiveObjectWithData:)—> person2
4. SQLite3(後續補充)
5. Core Data(後續補充)
以上就是本文的全部內容,希望對大家有所幫助。
- 上一篇文章: iOS 開發深入解析:觸摸事件與手勢處理完整指南
- 下一篇文章: iOS 點擊按鈕隱藏狀態欄:概念與實作重點