
iOS 開發(11)之 UITabBarController 多視圖切換控制器
編輯:iOS 開發綜合
1 前言
UITabBarController 是 iOS 中用來管理多個並列頁面的容器型控制器,畫面底部會出現一條標籤列,點擊不同圖示即可在各自的視圖之間自由切換。它非常適合「首頁、發現、我的」這類互相獨立、需要隨時互相跳轉的功能模組。本文用一個最小的例子,示範如何以純代碼方式組出兩個分頁。
2 代碼實例
ZYViewController.h:宣告兩個子頁面、兩個導航控制器以及多視圖控制器本身。
#import <UIKit/UIKit.h>
#import "ZYFirstViewController.h"
#import "ZYSecondViewController.h"

@interface ZYViewController : UIViewController

@property(nonatomic,strong) ZYFirstViewController *firstViewController;   // 第一個視圖
@property(nonatomic,strong) ZYSecondViewController *secondViewController; // 第二個視圖
@property(nonatomic,strong) UITabBarController *taBarController;          // 多視圖控制器
@property (strong,nonatomic) UINavigationController *firstnavigationController;  // 第一個視圖的導航欄
@property (strong,nonatomic) UINavigationController *secondnavigationController; // 第二個視圖的導航欄

@end
ZYViewController.m:把兩個子控制器各自包進 UINavigationController,再一起塞進 UITabBarController。
@synthesize firstViewController;
@synthesize secondViewController;
@synthesize taBarController;
@synthesize firstnavigationController;
@synthesize secondnavigationController;

- (void)viewDidLoad
{
    [super viewDidLoad];
    self.title = @"UITabBarControllerTest";

    self.firstViewController = [[ZYFirstViewController alloc] initWithNibName:nil bundle:nil];
    firstnavigationController = [[UINavigationController alloc] initWithRootViewController:firstViewController];

    self.secondViewController = [[ZYSecondViewController alloc] initWithNibName:nil bundle:nil];
    secondnavigationController = [[UINavigationController alloc] initWithRootViewController:secondViewController];

    // 把兩個導航控制器組成數組,作為標籤列的頁面來源
    NSArray *twoViewControllers = [[NSArray alloc] initWithObjects:firstnavigationController, secondnavigationController, nil];

    self.taBarController = [[UITabBarController alloc] init];
    [self.taBarController setViewControllers:twoViewControllers];
    [self.view addSubview:taBarController.view];
}
值得注意的是,UITabBarController 在啟動時只會載入首個頁面,其餘分頁要等到第一次被切換到才會觸發初始化。因此每個子頁面的標題與圖示設定,建議都寫在 initWithNibName:bundle: 裡,而不是 viewDidLoad 中,否則非首屏的分頁會拿不到標題。
ZYFirstViewController.m:
- (id)initWithNibName:(NSString *)nibNameOrNil bundle:(NSBundle *)nibBundleOrNil
{
    self = [super initWithNibName:nibNameOrNil bundle:nibBundleOrNil];
    if (self) {
        // 多視圖控制器不會預先載入非首屏,因此初始化寫在這裡
        self.title = @"First";                                        // 標題會自動帶到標籤列按鈕上
        self.tabBarItem.image = [UIImage imageNamed:@"first.png"];    // 設定標籤圖示
        self.view.backgroundColor = [UIColor whiteColor];
    }
    return self;
}
ZYSecondViewController.m:
- (id)initWithNibName:(NSString *)nibNameOrNil bundle:(NSBundle *)nibBundleOrNil
{
    self = [super initWithNibName:nibNameOrNil bundle:nibBundleOrNil];
    if (self) {
        self.title = @"Second";
        self.tabBarItem.image = [UIImage imageNamed:@"second.png"];
        self.view.backgroundColor = [UIColor whiteColor];
    }
    return self;
}
運行結果
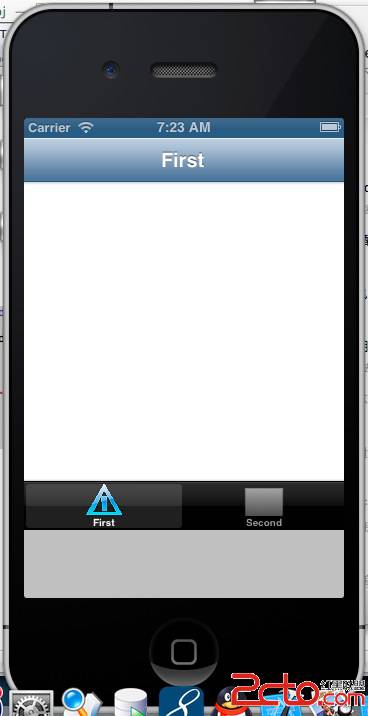
啟動後預設停在第一個分頁:
點擊標籤列上的 Second 之後,畫面立即切換到第二個分頁:
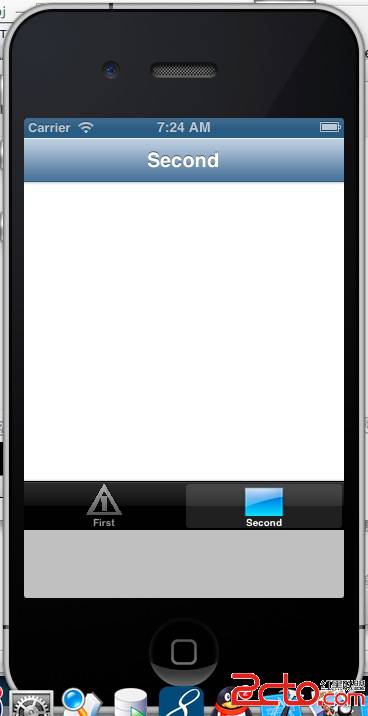
整體效果流暢,切換過程由系統自帶的動畫處理,不需要額外撰寫轉場代碼。