
iOS UITabBarController 作為根視圖的完整配置教程
編輯:iOS 開發綜合
本文以一個 RootViewController 為例,示範如何把 UITabBarController 作為應用的根視圖,並配置多個標簽頁。每個標簽頁都包裹一層 UINavigationController,从而实现「標簽欄 + 導航欄」的經典結構。
打開 RootViewController.m:
#import "RootViewController.h"
#import "HomeViewController.h"
#import "FindViewController.h"
#import "CategoryViewController.h"
#import "ShoppingViewController.h"
#import "UserViewController.h"
#import "SettingViewController.h"

@implementation RootViewController

- (void)viewDidLoad {
    [super viewDidLoad];
    self.view.backgroundColor = [UIColor greenColor];

    // 首頁
    HomeViewController *homeVc = [[HomeViewController alloc] init];
    UINavigationController *homeNC = [[UINavigationController alloc] initWithRootViewController:homeVc];
    homeNC.tabBarItem.title = @"首頁";
    homeNC.tabBarItem.image = [UIImage imageNamed:@"53-house.png"];
    homeNC.tabBarItem.badgeValue = @"12"; // 提示信息(角標)

    // 分類
    CategoryViewController *categoryVC = [[CategoryViewController alloc] init];
    UINavigationController *categoryNC = [[UINavigationController alloc] initWithRootViewController:categoryVC];
    categoryNC.tabBarItem.title = @"分類";
    categoryNC.tabBarItem.image = [UIImage imageNamed:@"06-magnifying-glass.png"];

    // 發現
    FindViewController *findVC = [[FindViewController alloc] init];
    UINavigationController *findNC = [[UINavigationController alloc] initWithRootViewController:findVC];
    findNC.tabBarItem.title = @"發現";
    findNC.tabBarItem.image = [UIImage imageNamed:@"12-eye.png"];

    // 購物車
    ShoppingViewController *shopVC = [[ShoppingViewController alloc] init];
    UINavigationController *shopNC = [[UINavigationController alloc] initWithRootViewController:shopVC];
    shopNC.tabBarItem.title = @"購物車";
    shopNC.tabBarItem.image = [UIImage imageNamed:@"80-shopping-cart.png"];

    // 用戶
    UserViewController *userVC = [[UserViewController alloc] init];
    UINavigationController *userNC = [[UINavigationController alloc] initWithRootViewController:userVC];
    userNC.tabBarItem.title = @"我的";
    userNC.tabBarItem.image = [UIImage imageNamed:@"22-skull-n-crossbones.png"];

    // 設置
    SettingViewController *setVC = [[SettingViewController alloc] init];
    UINavigationController *setNV = [[UINavigationController alloc] initWithRootViewController:setVC];
    setNV.tabBarItem.title = @"設置";
    setNV.tabBarItem.image = [UIImage imageNamed:@"19-gear.png"];

    // 將各控制器添加到 tabBarController 中管理
    self.viewControllers = @[homeNC, categoryNC, findNC, shopNC, userNC, setNV];

    // 標簽欄的顏色
    self.tabBar.barTintColor = [UIColor greenColor]; // 標簽欄背景色
    self.tabBar.tintColor = [UIColor redColor];      // 被選中標簽的顏色

    self.selectedIndex = 2; // 設置默認選中的標簽
}

@end
效果圖如下:
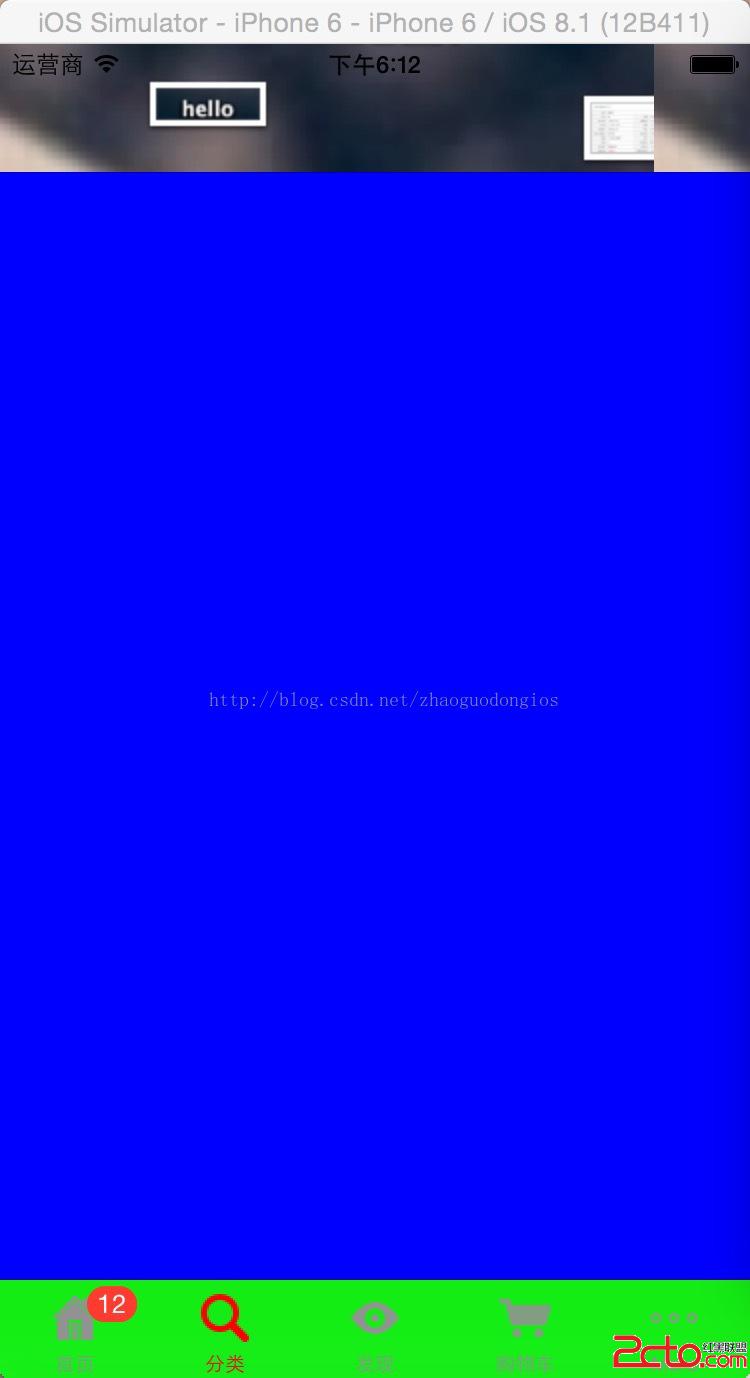
幾個值得注意的小要點:
- 標簽圖片需要預留合適尺寸(普通屏約 30×30,高清屏約 60×60),且背景透明。
badgeValue可用來顯示角標提示信息。- 可透過
barTintColor統一設置標簽欄背景色,tintColor設置選中標簽的顏色。 - 透過 UIAppearance 協議可以統一設置外觀,但並非所有屬性都支持(例如 tintColor 就不支持統一設置)。
最後切記:不要把 UITabBarController 作為導航控制器的根視圖,而應反過來,讓 UITabBarController 作為整個應用的根視圖,每個標簽再各自持有導航控制器,這樣結構才清晰合理。
- 上一篇文章: iOS 頁面之間切換:Container 容器視圖實現雙頁面交換
- 下一篇文章: iOS 各種手勢與 UISlider 的綜合運用