
iOS 本地通知完整解析:UILocalNotification 屬性、排程與三種觸發情境
通知機制概觀
通知是行動裝置開發中非常常用的一種訊息傳遞機制,最大的好處是資源友善——App 不必自己開一條通道持續輪詢(polling)伺服器問「有沒有新東西」,交給系統統一管理即可。
iOS 的通知分兩大類:本地通知(Local Notification)與遠端通知(Remote / Push Notification)。本地通知由系統的 NotificationManager 統一調度,開發者只要把設定好的 UILocalNotification 物件排進佇列,系統就會在指定時間觸發;App 這邊只需寫好收到通知後的處理邏輯,整個流程就完成了。
UILocalNotification 的屬性
本地通知使用的物件是 UILocalNotification,它的屬性幾乎涵蓋了所有需要處理的內容:
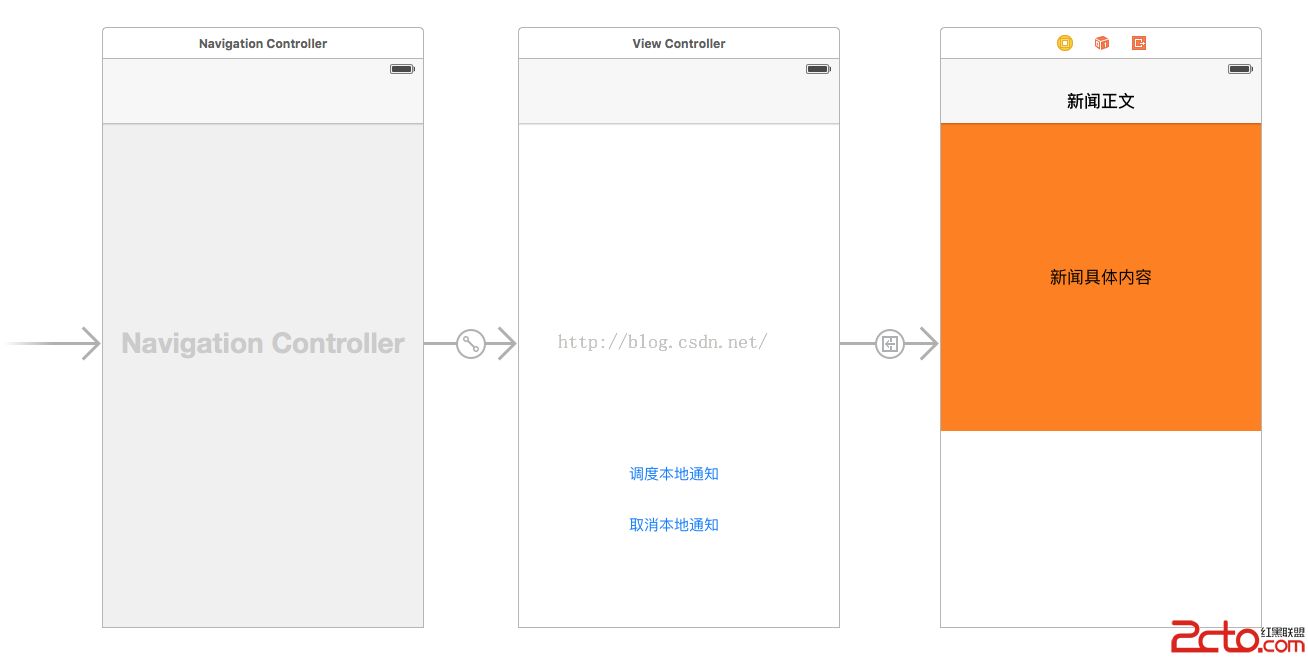
fireDate(首次觸發時間)、timeZone(時區)、repeatInterval / repeatCalendar(重複規則)、alertBody(通知本文)、alertAction(鎖屏上的動作按鈕文字)、hasAction、alertLaunchImage(自訂啟動圖)、applicationIconBadgeNumber(App 圖示上的數字)、soundName(提示音檔名)、userInfo(自訂附帶資料)。
模擬器與真機的差異
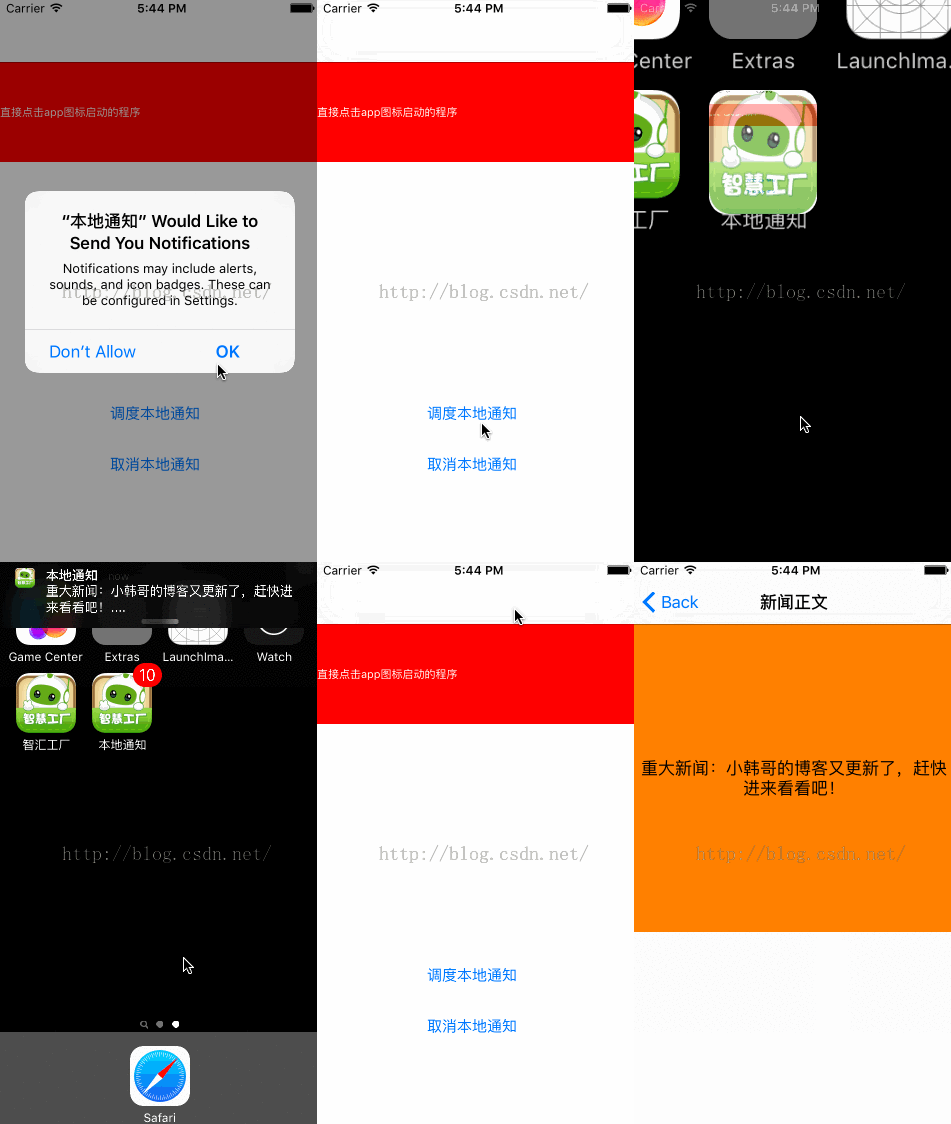
開始之前先記住兩點:模擬器不會播放提示音;模擬器也不會模擬「使用者是否允許通知」的授權流程。因此通知相關的功能,最終一定要在真機上驗證。
另外,iOS 8 之後必須先向使用者「申請授權」,否則通知根本不會顯示:
if ([UIApplication instancesRespondToSelector:@selector(registerUserNotificationSettings:)]) {
    [application registerUserNotificationSettings:
        [UIUserNotificationSettings settingsForTypes:
            UIUserNotificationTypeAlert | UIUserNotificationTypeBadge | UIUserNotificationTypeSound
                                         categories:nil]];
}
建立並排程一個通知
- (IBAction)schedule:(UIButton *)sender {
    UILocalNotification *note = [[UILocalNotification alloc] init];
    if (note) {
        note.timeZone = [NSTimeZone defaultTimeZone];
        note.fireDate = [[NSDate date] dateByAddingTimeInterval:5];   // 5 秒後觸發

        note.soundName = @"click.wav";
        note.alertBody = @"重大新聞:小韓哥的博客又更新了,趕快進來看看吧!";
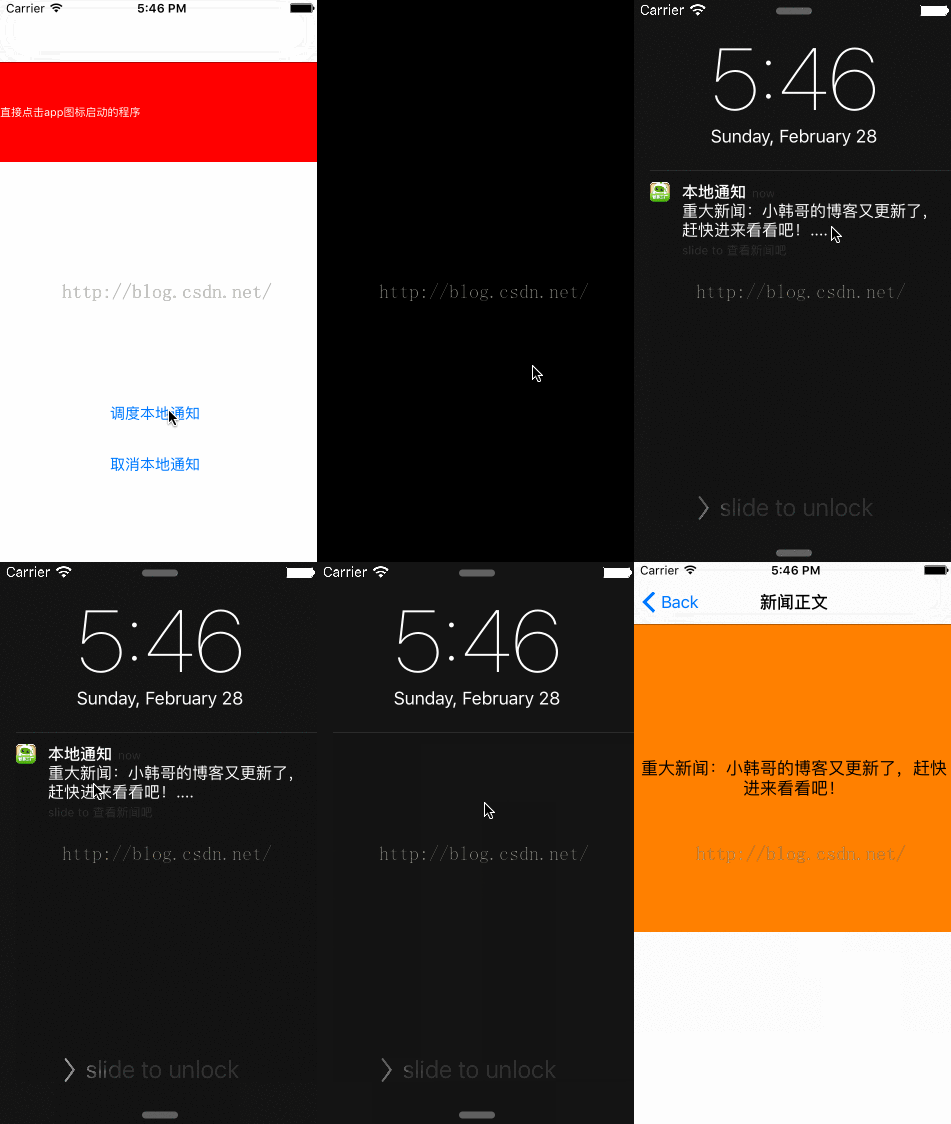
        note.alertAction = @"查看新聞吧";          // 鎖屏時「滑動來...」後面的文字
        note.applicationIconBadgeNumber = 10;     // App 圖示上的紅色數字

        note.userInfo = @{
            @"icon":  @"text.png",
            @"title": @"重大新聞",
            @"time":  @"2016-02-28",
            @"body":  @"重大新聞:小韓哥的博客又更新了,趕快進來看看吧!"
        };

        note.alertLaunchImage = @"101339g76j7j9t2zgzdvkj.jpg";
        // note.repeatInterval = NSCalendarUnitMinute;   // 需要週期性觸發時再開啟

        [[UIApplication sharedApplication] scheduleLocalNotification:note];
        // 想立刻發出可用 presentLocalNotificationNow:,但那樣就失去排程的意義了
    }
}
userInfo 是這裡最值得花心思的屬性:它讓通知與業務資料綁在一起。使用者點了通知進來,你就能從 userInfo 讀出「該跳到哪一頁、帶什麼參數」,而不是只能被動地回到首頁。
取消通知有兩種粒度:全部取消用 cancelAllLocalNotifications;已經觸發且過期的通知會自動從 scheduledLocalNotifications 陣列中移除,因此也可以走訪該陣列逐一取消。
把 userInfo 帶到詳情頁
- (void)prepareForSegue:(UIStoryboardSegue *)segue sender:(id)sender {
    DetailViewController *detailVC = segue.destinationViewController;
    detailVC.userInfo = ((UILocalNotification *)sender).userInfo;
}
詳情頁只需持有並呈現:
@interface DetailViewController ()
@property (weak, nonatomic) IBOutlet UILabel *userInfoContent;
@end

@implementation DetailViewController

- (void)viewDidLoad {
    [super viewDidLoad];
    self.userInfoContent.text = self.userInfo[@"body"];
}

- (void)setUserInfo:(NSDictionary *)userInfo {
    _userInfo = userInfo;
}

@end
AppDelegate 中的監聽
- (BOOL)application:(UIApplication *)application
didFinishLaunchingWithOptions:(NSDictionary *)launchOptions {

    if ([UIApplication instancesRespondToSelector:@selector(registerUserNotificationSettings:)]) {
        [application registerUserNotificationSettings:
            [UIUserNotificationSettings settingsForTypes:
                UIUserNotificationTypeAlert | UIUserNotificationTypeBadge | UIUserNotificationTypeSound
                                             categories:nil]];
    }

    // 判斷 App 是被使用者直接點圖示開啟,還是被通知「喚醒」的
    UILabel *label = [[UILabel alloc] init];
    label.frame = CGRectMake(0, 64, 320, 100);
    label.backgroundColor = [UIColor redColor];
    label.font = [UIFont systemFontOfSize:11];
    label.numberOfLines = 0;
    label.textColor = [UIColor whiteColor];

    UILocalNotification *note = launchOptions[UIApplicationLaunchOptionsURLKey];
    label.text = note ? @"點擊本地通知啟動的程序" : @"直接點擊 App 圖標啟動的程序";

    [[[self.window.rootViewController.childViewControllers firstObject] view] addSubview:label];
    self.label = label;

    return YES;
}

// App 仍在執行時收到通知,使用者點擊後才會呼叫
- (void)application:(UIApplication *)application
didReceiveLocalNotification:(UILocalNotification *)notification {
    self.label.text = @"點擊通知再次回到前台";
    ViewController *homeVC = [self.window.rootViewController.childViewControllers firstObject];
    [homeVC performSegueWithIdentifier:@"toHome" sender:notification];
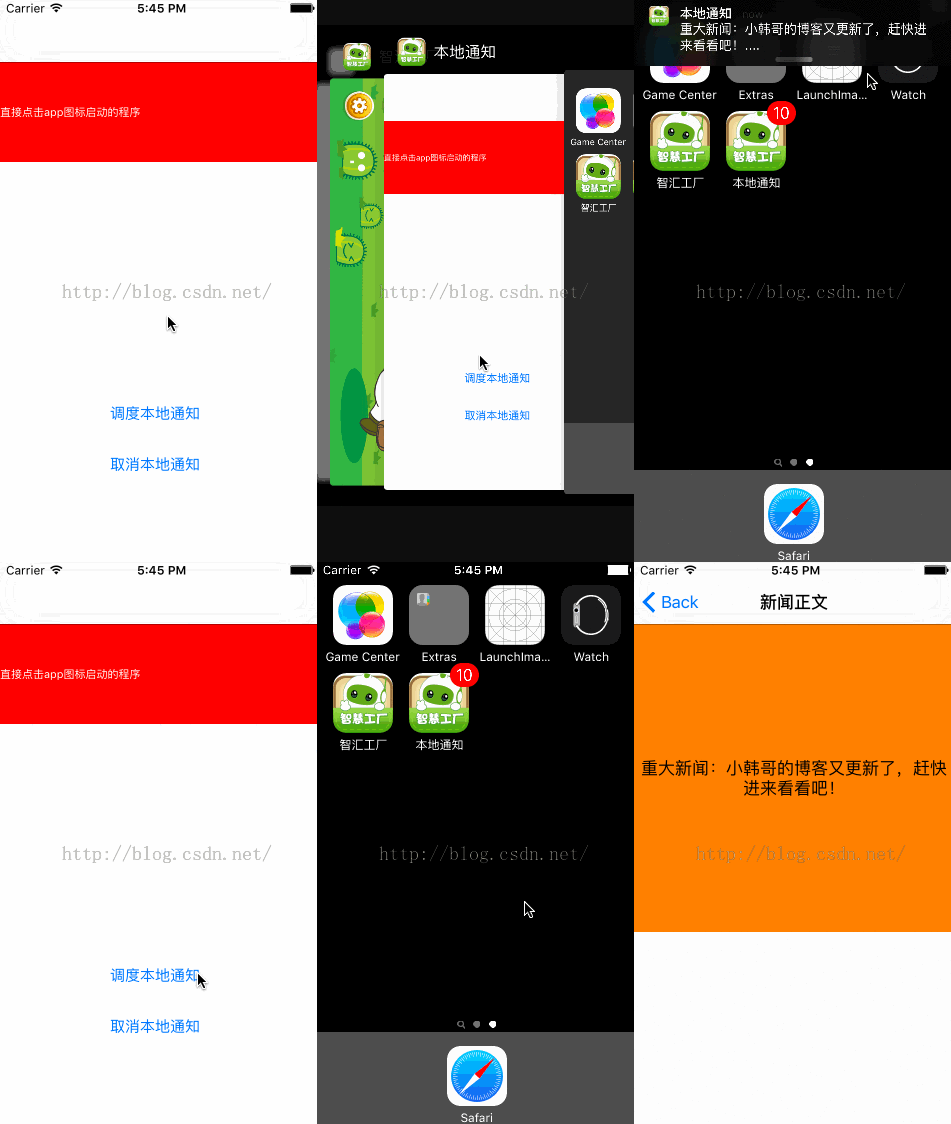
}這裡有個容易混淆的點值得強調:didReceiveLocalNotification: 只在 App 未被關閉(在前景或背景)時收到通知並點擊才會觸發。若 App 已被終止,流程會走 didFinishLaunchingWithOptions,通知內容是從 launchOptions 中取得的,兩條路徑要分開處理。
三種狀態下的行為差異
通知的呈現方式完全取決於 App 當時的狀態:
App 在前景:系統預設什麼都不顯示,必須自己在 didReceiveLocalNotification 裡處理(例如彈出自訂的提示條)。
App 在後台:系統會顯示橫幅或警告框,並播放音效、更新圖示數字。
App 已被關閉:同樣會顯示通知,使用者點擊後 App 被啟動,通知內容由 launchOptions 帶入。
下方幾張動圖示範了實際的呈現效果:
補充:與新舊 API 的差異
本文示範的是 iOS 8~9 時期的 API。從 iOS 10 起,本地與遠端通知已統一到 UserNotifications 框架,UILocalNotification 被 UNNotificationRequest 取代,授權申請改為 requestAuthorizationWithOptions:,處理邏輯則集中到 UNUserNotificationCenterDelegate。新專案應直接採用新 API,但兩者的設計思路是一致的:建立請求、排程、在 delegate 中回應使用者互動。