
iOS 動畫核心知識全解:Core Animation、貝塞爾曲線與 UIView 動畫封裝
前言
好的動畫能讓 App 從「能用」變成「好用」,但動畫知識點分散在 Core Animation、UIView、Core Graphics 好幾個框架裡,初學者常常知其然不知其所以然。本文依序梳理四大板塊:Core Animation 的隱式與顯式動畫、UIBezierPath 貝塞爾曲線繪圖,以及 UIView 層面動畫的封裝實踐。
一、Core Animation 與 CALayer
Core Animation 是一組功能強大的動畫處理 API,能用極少的程式碼換來相當炫麗的效果,並且動畫執行過程在後台完成,不會阻塞主執行緒。它同時可用於 Mac OS X 與 iOS。
關鍵一點:Core Animation 直接作用在 CALayer 上,而不是 UIView。
兩者的關係可以這樣理解:你在 iOS 上看得見摸得著的東西基本都是 UIView——按鈕、標籤、輸入框、圖示。UIView 之所以能顯示,是因為它內部持有一個圖層:建立 UIView 時系統會自動建立一個 CALayer,透過 view.layer 存取。
CALayer 與 UIView 概念高度相似,都有 sublayer、backgroundColor、frame 這類屬性;可以把 UIView 看成一個「能響應事件的特殊 CALayer」。實務上 layer 有兩種用途,彼此並不衝突:一是修飾外觀(圓角、陰影、邊框),二是承載動畫。所以對一個 view 做 Core Animation,本質上就是對它的 .layer 做動畫。
二、隱式動畫
Core Animation 建立在一個大膽的假設上:螢幕上任何東西都可以(或可能)做動畫。因此動畫不需要手動開啟,反而需要明確關閉——它默認一直存在。
當你修改 CALayer 一個可動畫屬性時,值不會立刻跳到新狀態,而是從舊值平滑過渡到新值。這一切無需額外程式碼。
來做個實驗:建立一個藍色方塊,加一個按鈕隨機改變它的顏色。
@interface ViewController ()
@property (nonatomic, weak) IBOutlet UIView   *layerView;
@property (nonatomic, weak) IBOutlet CALayer  *colorLayer;
@end

@implementation ViewController

- (void)viewDidLoad {
    [super viewDidLoad];
    self.colorLayer = [CALayer layer];
    self.colorLayer.frame = CGRectMake(50.0f, 50.0f, 100.0f, 100.0f);
    self.colorLayer.backgroundColor = [UIColor blueColor].CGColor;
    [self.layerView.layer addSublayer:self.colorLayer];
}

- (IBAction)changeColor {
    CGFloat red   = arc4random() / (CGFloat)INT_MAX;
    CGFloat green = arc4random() / (CGFloat)INT_MAX;
    CGFloat blue  = arc4random() / (CGFloat)INT_MAX;
    self.colorLayer.backgroundColor =
        [UIColor colorWithRed:red green:green blue:blue alpha:1.0].CGColor;
}
@end
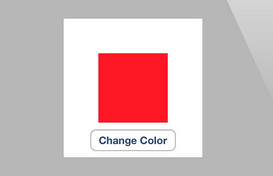
點擊按鈕,你會看到顏色平滑過渡,這就是隱式動畫。之所以叫「隱式」,是因為我們沒有指定任何動畫類型,只改了屬性,剩下的由 Core Animation 自行決定。
事務(CATransaction)
那麼動畫的時長與類型從哪裡來?時長取決於當前事務的設定,類型取決於圖層行為。
事務是 Core Animation 用來打包一系列屬性動畫的機制。CATransaction 由 CATransaction 類管理,設計有點古怪:它沒有屬性也沒有實例方法,不能用 alloc/init 建立,而是維護一疊你無法直接存取的事務,透過 +begin 與 +commit 入棧出棧。
所有可動畫屬性的修改都會被加到棧頂事務,可用 +setAnimationDuration: 設定時長(預設 0.25 秒)。Core Animation 在每個 run loop 週期中會自動開啟一次新事務,即使你不顯式呼叫 begin,同一個 run loop 內的屬性變化也會被合併成一次 0.25 秒的動畫。
於是修改時長就變得很簡單。實務建議先壓入一個新事務再調整時長,避免影響同一時刻的其他動畫(例如螢幕旋轉):
- (IBAction)changeColor {
    [CATransaction begin];
    [CATransaction setAnimationDuration:1.0];   // 一秒

    CGFloat red   = arc4random() / (CGFloat)INT_MAX;
    CGFloat green = arc4random() / (CGFloat)INT_MAX;
    CGFloat blue  = arc4random() / (CGFloat)INT_MAX;
    self.colorLayer.backgroundColor =
        [UIColor colorWithRed:red green:green blue:blue alpha:1.0].CGColor;

    [CATransaction commit];
}
如果你用過 +beginAnimations:context: 與 +commitAnimations,會對這個模式很熟悉——它們本質上就是在操作 CATransaction。iOS 4 之後推出的 block 版本 +animateWithDuration:animations: 只是語法更簡潔,內部同樣自動完成 begin/commit,還順帶避免了配對失誤的風險。
完成塊
要在動畫結束後接續下一段動畫,可用 +setCompletionBlock::
- (IBAction)changeColor {
    [CATransaction begin];
    [CATransaction setAnimationDuration:1.0];

    [CATransaction setCompletionBlock:^{
        // 顏色漸變結束後,再旋轉 45 度
        CGAffineTransform transform = self.colorLayer.affineTransform;
        transform = CGAffineTransformRotate(transform, M_PI_4);
        self.colorLayer.affineTransform = transform;
    }];

    CGFloat red   = arc4random() / (CGFloat)INT_MAX;
    CGFloat green = arc4random() / (CGFloat)INT_MAX;
    CGFloat blue  = arc4random() / (CGFloat)INT_MAX;
    self.colorLayer.backgroundColor =
        [UIColor colorWithRed:red green:green blue:blue alpha:1.0].CGColor;

    [CATransaction commit];
}
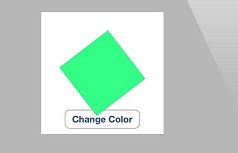
注意旋轉明顯比顏色漸變快——因為完成塊是在前一個事務提交出棧之後才執行,此時又回到了預設的 0.25 秒。
圖層行為:UIView 為何沒有隱式動畫
做個對照實驗:不建立獨立 colorLayer,直接修改 layerView 所關聯圖層的背景色。
- (IBAction)changeColor {
    [CATransaction begin];
    [CATransaction setAnimationDuration:1.0];

    CGFloat red   = arc4random() / (CGFloat)INT_MAX;
    CGFloat green = arc4random() / (CGFloat)INT_MAX;
    CGFloat blue  = arc4random() / (CGFloat)INT_MAX;
    self.layerView.layer.backgroundColor =
        [UIColor colorWithRed:red green:green blue:blue alpha:1.0].CGColor;

    [CATransaction commit];
}
運行後你會發現顏色瞬間切換,隱式動畫消失了。
原因在於 CALayer 修改屬性時會呼叫 -actionForKey:,其查找順序是:先看是否有 delegate 實作了 -actionForLayer:forKey:;再看自身的 actions 字典;接著查 style 字典;最後才落到 -defaultActionForKey:。若最終返回 nil,就不會有動畫。
而每個 UIView 恰好都充當了它關聯圖層的 delegate,並實作了 -actionForLayer:forKey::不在動畫 block 內時一律返回 nil(禁用隱式動畫),在動畫 block 內則返回對應動畫物件(如 CABasicAnimation)。可以列印驗證:
NSLog(@"Outside: %@", [self.layerView actionForLayer:self.layerView.layer forKey:@"backgroundColor"]);
[UIView beginAnimations:nil context:nil];
NSLog(@"Inside: %@", [self.layerView actionForLayer:self.layerView.layer forKey:@"backgroundColor"]);
[UIView commitAnimations];
輸出結果印證了推論:block 外為 nil,block 內為一個動畫物件。
另一種禁用方式是 [CATransaction setDisableActions:YES],它會對所有屬性關閉隱式動畫。
自定義圖層行為
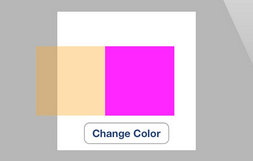
不想用預設的漸變?可以給圖層掛一個自定義 actions 字典,讓顏色變化改成「從左側推入」:
self.colorLayer = [CALayer layer];
self.colorLayer.frame = CGRectMake(50.0f, 50.0f, 100.0f, 100.0f);
self.colorLayer.backgroundColor = [UIColor blueColor].CGColor;

CATransition *transition = [CATransition animation];
transition.type    = kCATransitionPush;
transition.subtype = kCATransitionFromLeft;
self.colorLayer.actions = @{@"backgroundColor": transition};

[self.layerView.layer addSublayer:self.colorLayer];
呈現圖層與模型圖層
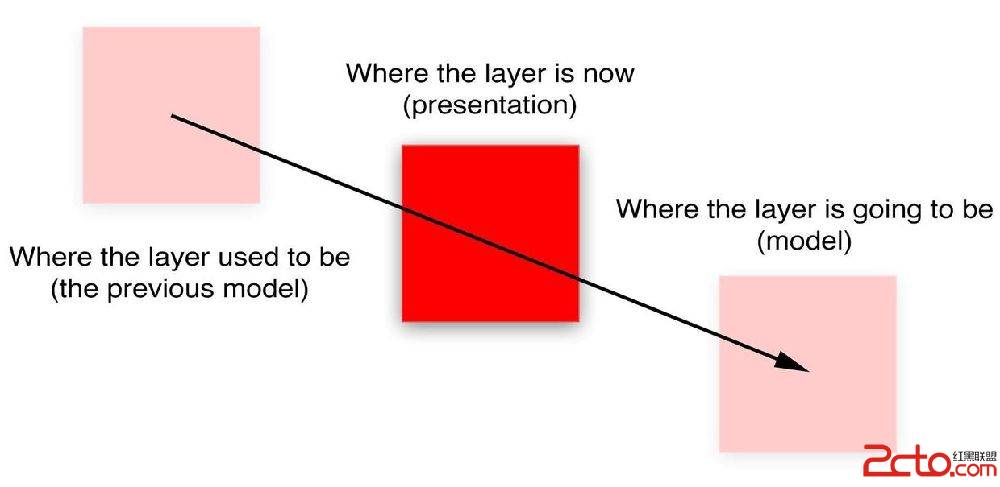
修改屬性時,讀取值會立刻拿到新值,但螢幕上是漸變的。這是因為你設定的屬性並未直接改變外觀,而是定義了「動畫結束後應該長什麼樣」——也就是模型。
Core Animation 在此扮演控制器角色,負責在動畫過程中不斷計算螢幕上應該顯示的中間狀態。這是一個微型的 MVC:CALayer 是模型,Core Animation 是控制器。
由於 iOS 每秒重繪約 60 次,Core Animation 除了「真實值」,還必須知道「當前螢幕上顯示的值」。後者存放在一個名為呈現圖層(presentation layer)的獨立副本中,可透過 -presentationLayer 取得。呈現樹由所有圖層的呈現圖層構成,且只有在圖層首次提交到螢幕之後才會建立,否則回傳 nil。反向查詢用 -modelLayer,它返回呈現所依賴的模型圖層。
多數情況下你只需要和模型圖層互動,但有兩種場景離不開呈現圖層:
場景一:同步動畫。如果你做的是基於定時器的動畫,需要知道某一時刻圖層究竟在哪裡。
場景二:處理使用者互動。用 -hitTest: 判斷是否被點中時,應該對呈現圖層呼叫,因為它代表使用者眼前看到的位置,而不是動畫結束後的位置。否則你會陷入「點圖層點不中,反而要點它將要移去的位置」的怪圈。
- (void)touchesBegan:(NSSet *)touches withEvent:(UIEvent *)event {
    CGPoint point = [[touches anyObject] locationInView:self.view];

    if ([self.colorLayer.presentationLayer hitTest:point]) {
        // 點中圖層:隨機換色
        CGFloat red   = arc4random() / (CGFloat)INT_MAX;
        CGFloat green = arc4random() / (CGFloat)INT_MAX;
        CGFloat blue  = arc4random() / (CGFloat)INT_MAX;
        self.colorLayer.backgroundColor =
            [UIColor colorWithRed:red green:green blue:blue alpha:1.0].CGColor;
    } else {
        // 點空白:用 4 秒緩慢移動到該位置
        [CATransaction begin];
        [CATransaction setAnimationDuration:4.0];
        self.colorLayer.position = point;
        [CATransaction commit];
    }
}
三、顯式動畫
隱式動畫是 UIKit 動畫機制的基礎,但它無法覆蓋所有需求,例如自定義屬性動畫、非線性路徑運動。這時需要顯式動畫。
顯式動畫可以類比「拍電影」,三要素一一對應:
· 演員 → CALayer,決定主角是誰;
· 劇本 → CAAnimation,決定怎麼演、怎麼變;
· 開拍 → addAnimation:forKey:,正式啟動。
CAAnimation 的四個分支
1. CABasicAnimation:設定起點、終點與時長,動畫沿直線變化,可視為特殊的 CAKeyframeAnimation。核心屬性是 fromValue、toValue、byValue,型別為 id,因此數字、向量、矩陣、顏色、圖片都能用。
2. CAKeyframeAnimation:關鍵點動畫。透過 path 或 values 設定起點、若干中間關鍵點與終點,物件會沿指定軌跡運動。
3. CAAnimationGroup:把多個動畫打包,它們會同時執行(若要串列執行需另行安排)。
4. CATransition:蘋果為開發者封裝好的轉場動畫,幾行程式碼即可獲得淡入淡出、推擠、立方體等效果。
其中 CAPropertyAnimation 是所有屬性動畫的抽象基類,透過 keyPath 指定作用的單一屬性;keyPath 不只是屬性名,還能指向巢狀成員甚至虛擬屬性。它同時實現了 CAAction(可作為圖層行為)與 CAMediaTiming 協議,並帶有 removedOnCompletion(預設 YES,防止記憶體洩漏)。
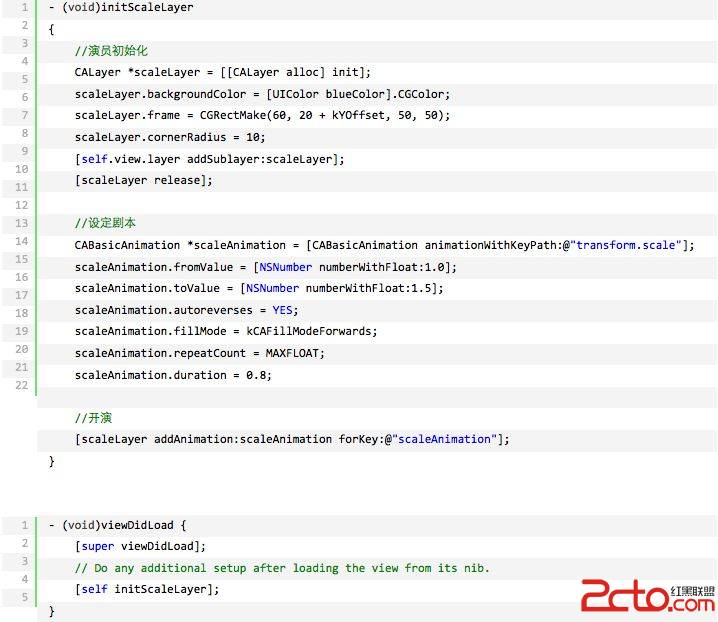
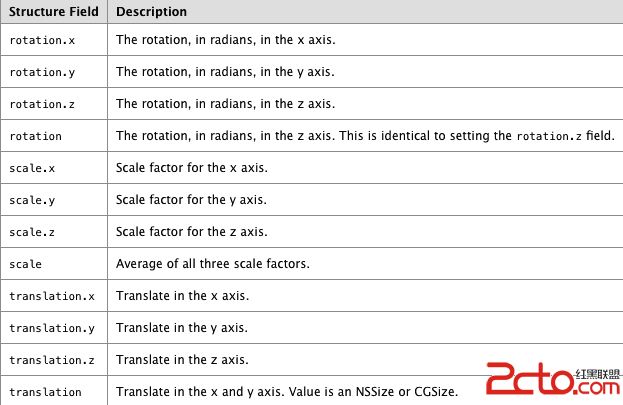
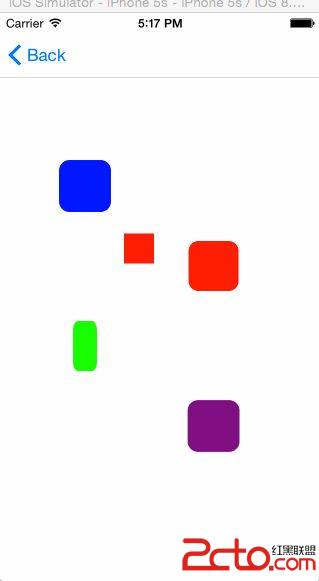
舉個例子,實現類似心跳的縮放動畫只需三步:建立 CALayer(演員)→ 設定 CABasicAnimation 劇本 → addAnimation 開拍。效果參考附圖中的藍色方塊,其他效果依葫蘆畫瓢即可,差別主要在 keyPath:
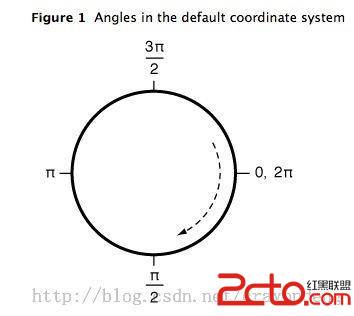
組合動畫則用 CAAnimationGroup,注意其中的動畫是同時進行的:
四、UIBezierPath 貝塞爾曲線繪圖
UIBezierPath 位於 UIKit,本質上是 Core Graphics 中 CGPathRef 的物件化封裝。用它可以定義矩形、橢圓這類簡單形狀,也可以定義由多段直線與曲線組成的複雜圖形。
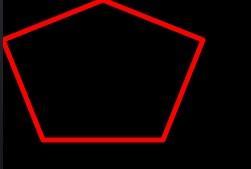
路徑由若干 subpath 組成,每個 subpath 是一串首尾相連的線段。建立流程固定為四步:建立 BezierPath 物件 → 用 moveToPoint: 設定起點 → 用 addLineToPoint:/曲線方法累加線段 → 設定 lineWidth、lineJoinStyle 等繪圖屬性。繪製時呼叫 stroke(描邊)或 fill(填充)。
1. 多邊形
- (void)drawRect:(CGRect)rect {
    [[UIColor redColor] set];
    UIBezierPath *aPath = [UIBezierPath bezierPath];
    aPath.lineWidth = 5.0;
    aPath.lineCapStyle = kCGLineCapRound;
    aPath.lineJoinStyle = kCGLineJoinRound;

    [aPath moveToPoint:CGPointMake(100.0, 0.0)];
    [aPath addLineToPoint:CGPointMake(200.0, 40.0)];
    [aPath addLineToPoint:CGPointMake(160.0, 140.0)];
    [aPath addLineToPoint:CGPointMake(40.0, 140.0)];
    [aPath addLineToPoint:CGPointMake(0.0, 40.0)];
    [aPath closePath];   // 自動補上首尾連線,省去畫第五條邊

    [aPath stroke];
}
注意此方法需寫在 UIView 子類中。closePath 除了結束當前 subpath,還會在最後一點與第一點之間補一條線,畫多邊形時非常方便。
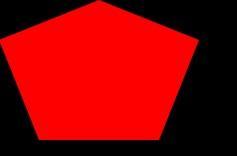
把最後一句換成 [aPath fill];,效果立刻不同——這就是 stroke 與 fill 的差別:
2. 矩形與橢圓
UIBezierPath *rectPath = [UIBezierPath bezierPathWithRect:CGRectMake(20, 20, 100, 50)];
UIBezierPath *ovalPath = [UIBezierPath bezierPathWithOvalInRect:CGRectMake(0, 0, 200, 100)];
bezierPathWithOvalInRect: 會在傳入矩形內畫內切曲線:傳正方形得到內切圓,傳長方形得到內切橢圓。
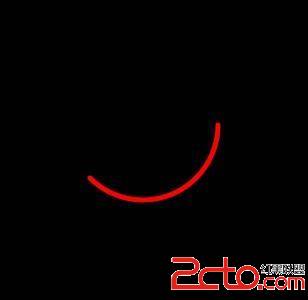
3. 弧線
UIBezierPath *aPath = [UIBezierPath bezierPathWithArcCenter:CGPointMake(150, 150)
                                                    radius:75
                                                startAngle:0
                                                  endAngle:DEGREES_TO_RADIANS(135)
                                                 clockwise:YES];
參數分別是圓心、半徑、起始角度、結束角度(均以弧度為單位)與是否順時針。角度換算可用巨集 #define DEGREES_TO_RADIANS(d) ((M_PI * d) / 180)。
4. 二次與三次貝塞爾曲線
// 二次曲線:一個控制點
[aPath moveToPoint:CGPointMake(20, 100)];
[aPath addQuadCurveToPoint:CGPointMake(120, 100) controlPoint:CGPointMake(70, 0)];

// 三次曲線:兩個控制點
[aPath moveToPoint:CGPointMake(20, 50)];
[aPath addCurveToPoint:CGPointMake(200, 50)
        controlPoint1:CGPointMake(110, 0)
        controlPoint2:CGPointMake(110, 100)];
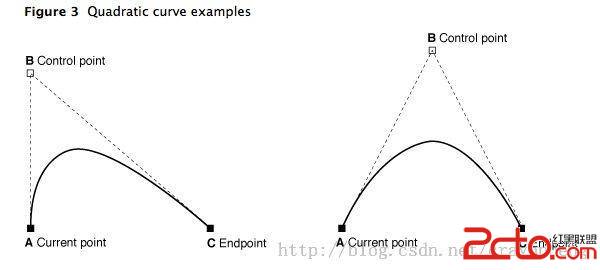
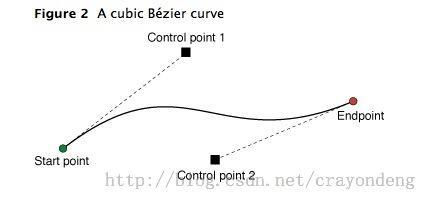
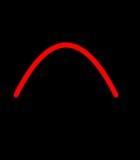
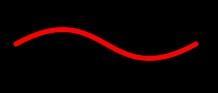
曲線段從當前點開始,在指定終點結束,形狀由控制點的切線方向決定。
5. 與 Core Graphics 混用
UIBezierPath 提供了 CGPath 屬性,可直接操作底層資料型別。完全用 Core Graphics 建立路徑時:
CGMutablePathRef cgPath = CGPathCreateMutable();
CGPathAddEllipseInRect(cgPath, NULL, CGRectMake(0, 0, 300, 300));
CGPathAddEllipseInRect(cgPath, NULL, CGRectMake(50, 50, 200, 200));

UIBezierPath *aPath = [UIBezierPath bezierPath];
aPath.CGPath = cgPath;
aPath.usesEvenOddFillRule = YES;

CGPathRelease(cgPath);   // 賦值後即可安全釋放
若兩種方式混用,必須注意 UIBezierPath 擁有自己底層的 CGPathRef,不能直接修改,正確做法是先拷貝一份可變副本,改完再賦回去:
UIBezierPath *aPath = [UIBezierPath bezierPathWithOvalInRect:CGRectMake(0, 0, 300, 300)];
CGPathRef cgPath = aPath.CGPath;
CGMutablePathRef mutablePath = CGPathCreateMutableCopy(cgPath);

CGPathAddEllipseInRect(mutablePath, NULL, CGRectMake(50, 50, 200, 200));
aPath.CGPath = mutablePath;

CGPathRelease(mutablePath);
6. 渲染注意事項
渲染前有三件事要做:用 UIColor 設定描邊/填充顏色;透過 affine transform 或 CGContextTranslateCTM 調整圖形位置(推薦調整 context,因為容易保存與復原狀態);設定 lineWidth 等繪圖屬性。另外記得先 fill 再 stroke,否則填充色會蓋住描邊線。
- (void)drawRect:(CGRect)rect {
    UIBezierPath *aPath = [UIBezierPath bezierPathWithOvalInRect:CGRectMake(0, 0, 200, 100)];
    [[UIColor blackColor] setStroke];
    [[UIColor redColor] setFill];

    CGContextRef aRef = UIGraphicsGetCurrentContext();
    CGContextSaveGState(aRef);
    CGContextTranslateCTM(aRef, 50, 50);

    aPath.lineWidth = 5;
    [aPath fill];
    [aPath stroke];

    CGContextRestoreGState(aRef);
}
五、UIView 封裝的動畫
UIKit 把動畫直接整合進 UIView:當內部某些屬性改變時,UIView 會為這些變化提供動畫支援。所需工作由 UIView 自動完成,你只需要在希望執行動畫時通知它——把修改屬性的程式碼放在 [UIView beginAnimations:nil context:nil] 與 [UIView commitAnimations] 之間即可。
常用配置方法:
· setAnimationDelegate: 設定動畫代理,開始或結束時回送訊息;
· setAnimationWillStartSelector:/setAnimationDidStopSelector: 動畫即將開始/已結束時呼叫代理方法;
· setAnimationDuration: 持續時間(秒);
· setAnimationDelay: 延遲多久開始;
· setAnimationStartDate: 起始時間,預設為當前;
· setAnimationCurve: 節奏曲線;
· setAnimationRepeatCount: 重複次數;
· setAnimationRepeatAutoreverses: 設為 YES 則每次重複效果相反;
· setAnimationTransition:forView:cache: 設定轉場型別,cache 為 YES 時使用視圖快取、效能更好。
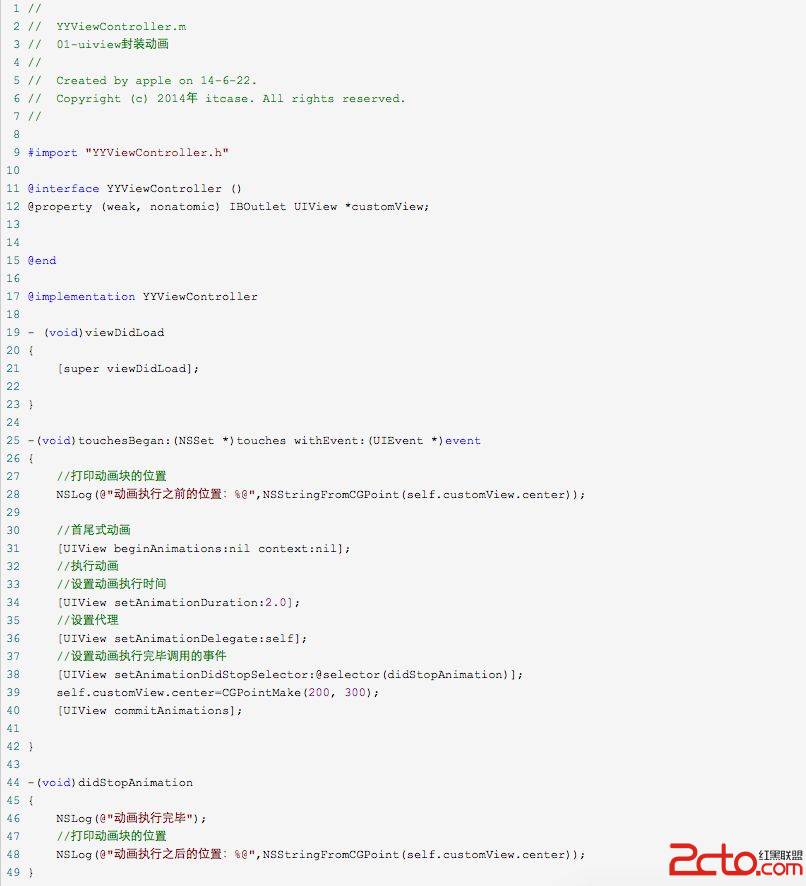
執行結果:
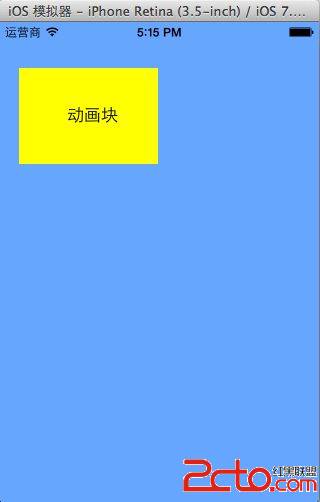
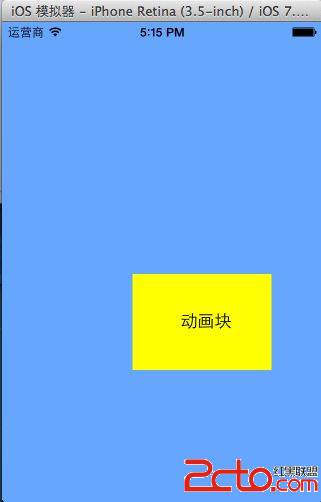
動畫塊位置的列印:

UIView 動畫與 CALayer 動畫的關鍵差異
兩者都能做出動畫,但真實開發中絕大多數場景會選擇 UIView 封裝的動畫,原因只有一個:CALayer 動畫不會「反彈」。
用 Core Animation 改動 layer 的位置,動畫結束後 layer 會自動回到模型值,也就是說外觀上動了,實際屬性並未改變。UIView 動畫則是實打實地修改屬性。
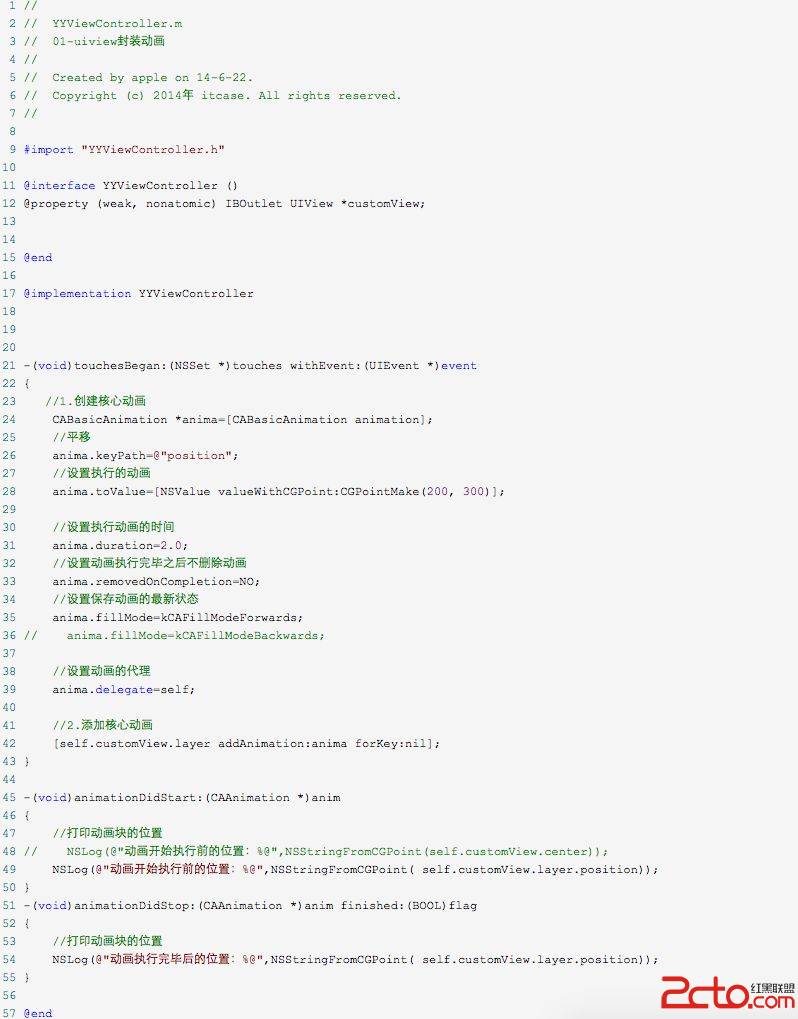
列印結果:

六、Block 動畫
核心方法簽名:
+ (void)animateWithDuration:(NSTimeInterval)duration
                      delay:(NSTimeInterval)delay
                    options:(UIViewAnimationOptions)options
                 animations:(void (^)(void))animations
                 completion:(void (^)(BOOL finished))completion;
參數含義:duration 為持續時間,delay 為延遲,options 為節奏控制,animations 中放置修改視圖屬性的程式碼,completion 在動畫結束後自動呼叫。
轉場動畫:
+ (void)transitionWithView:(UIView *)view
                  duration:(NSTimeInterval)duration
                   options:(UIViewAnimationOptions)options
                animations:(void (^)(void))animations
                completion:(void (^)(BOOL finished))completion;

+ (void)transitionFromView:(UIView *)fromView
                    toView:(UIView *)toView
                  duration:(NSTimeInterval)duration
                   options:(UIViewAnimationOptions)options
                completion:(void (^)(BOOL finished))completion;
第二個方法呼叫完成後,等同於執行了兩句程式碼:把 toView 加到 fromView 的父視圖,再把 fromView 從父視圖移除。
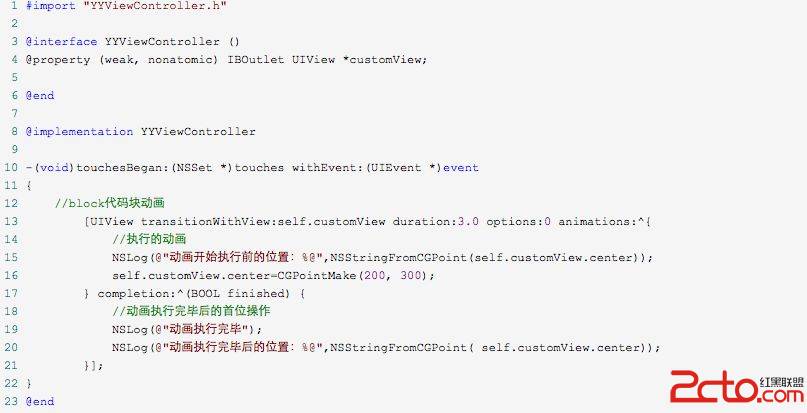
列印結果:

小提示:self.customView.layer.position 與 self.customView.center 等價,因為 position 的錨點預設為 (0.5, 0.5)。
七、補充知識點
UIImageView 幀動畫
UIImageView 可以讓一系列圖片在指定時間內按順序播放。相關屬性:animationImages(UIImage 陣列)、animationDuration(播放一輪所需時間)、animationRepeatCount(執行次數,0 代表無限迴圈);相關方法:startAnimating、stopAnimating、isAnimating。
UIActivityIndicatorView
旋轉進度輪,用於告知使用者某個操作正在進行。三種樣式:WhiteLarge(大型白色)、White(標準白色)、Gray(灰色,適合淺色背景)。方法同樣是 start/stop/isAnimating。
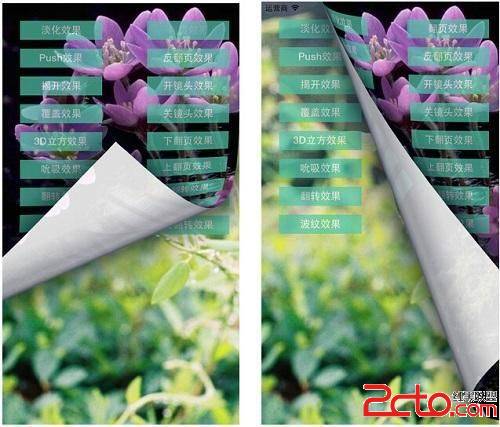
八、封裝轉場動畫
把常見轉場效果整理成一個類,呼叫端只需傳入型別、方向與背景圖:
// ZciotAnimation.h
@interface ZciotAnimation : NSObject
+ (void)ZciotAnimation:(int)type
               ForView:(UIView *)view
               Subtype:(int)subtype
        BackgroundImage:(NSString *)image;
@end

// ZciotAnimation.m
#define DURATION 0.7f

typedef enum : NSUInteger {
    Fade = 1,                 // 淡入淡出
    Push,                     // 推擠
    Reveal,                   // 揭開
    MoveIn,                   // 覆蓋
    Cube,                     // 立方體
    SuckEffect,               // 吮吸
    OglFlip,                  // 翻轉
    RippleEffect,             // 波紋
    PageCurl,                 // 翻頁
    PageUnCurl,               // 反翻頁
    CameraIrisHollowOpen,     // 開鏡頭
    CameraIrisHollowClose,    // 關鏡頭
    CurlDown,                 // 下翻頁
    CurlUp,                   // 上翻頁
    FlipFromLeft,             // 左翻轉
    FlipFromRight             // 右翻轉
} AnimationType;

@implementation ZciotAnimation

+ (void)ZciotAnimation:(int)type ForView:(UIView *)view
               Subtype:(int)subtype BackgroundImage:(NSString *)image {

    AnimationType animationType = type;
    NSString *subtypeString;
    switch (subtype) {
        case 0: subtypeString = kCATransitionFromLeft;   break;
        case 1: subtypeString = kCATransitionFromBottom; break;
        case 2: subtypeString = kCATransitionFromRight;  break;
        case 3: subtypeString = kCATransitionFromTop;    break;
        default: break;
    }

    switch (animationType) {
        case Fade:    [self transitionWithType:kCATransitionFade    WithSubtype:subtypeString ForView:view]; break;
        case Push:    [self transitionWithType:kCATransitionPush    WithSubtype:subtypeString ForView:view]; break;
        case Reveal:  [self transitionWithType:kCATransitionReveal  WithSubtype:subtypeString ForView:view]; break;
        case MoveIn:  [self transitionWithType:kCATransitionMoveIn  WithSubtype:subtypeString ForView:view]; break;
        case Cube:    [self transitionWithType:@"cube"       WithSubtype:subtypeString ForView:view]; break;
        case SuckEffect: [self transitionWithType:@"suckEffect" WithSubtype:subtypeString ForView:view]; break;
        case OglFlip: [self transitionWithType:@"oglFlip"    WithSubtype:subtypeString ForView:view]; break;
        case RippleEffect: [self transitionWithType:@"rippleEffect" WithSubtype:subtypeString ForView:view]; break;
        case PageCurl:    [self transitionWithType:@"pageCurl"    WithSubtype:subtypeString ForView:view]; break;
        case PageUnCurl:  [self transitionWithType:@"pageUnCurl"  WithSubtype:subtypeString ForView:view]; break;
        case CameraIrisHollowOpen:
            [self transitionWithType:@"cameraIrisHollowOpen" WithSubtype:subtypeString ForView:view]; break;
        case CameraIrisHollowClose:
            [self transitionWithType:@"cameraIrisHollowClose" WithSubtype:subtypeString ForView:view]; break;
        case CurlDown:      [self animationWithView:view WithAnimationTransition:UIViewAnimationTransitionCurlDown]; break;
        case CurlUp:        [self animationWithView:view WithAnimationTransition:UIViewAnimationTransitionCurlUp]; break;
        case FlipFromLeft:  [self animationWithView:view WithAnimationTransition:UIViewAnimationTransitionFlipFromLeft]; break;
        case FlipFromRight: [self animationWithView:view WithAnimationTransition:UIViewAnimationTransitionFlipFromRight]; break;
        default: break;
    }

    [self addBgImageWithImageName:image BackgroundView:view];
}

#pragma mark CATransition 實現
+ (void)transitionWithType:(NSString *)type WithSubtype:(NSString *)subtype ForView:(UIView *)view {
    CATransition *animation = [CATransition animation];
    animation.duration = DURATION;
    animation.type = type;
    if (subtype != nil) {
        animation.subtype = subtype;
    }
    animation.timingFunction = UIViewAnimationOptionCurveEaseInOut;
    [view.layer addAnimation:animation forKey:@"animation"];
}

#pragma mark UIView 實現動畫
+ (void)animationWithView:(UIView *)view WithAnimationTransition:(UIViewAnimationTransition)transition {
    [UIView animateWithDuration:DURATION animations:^{
        [UIView setAnimationCurve:UIViewAnimationCurveEaseInOut];
        [UIView setAnimationTransition:transition forView:view cache:YES];
    }];
}

#pragma mark 添加背景圖
+ (void)addBgImageWithImageName:(NSString *)imageName BackgroundView:(UIView *)view {
    view.backgroundColor = [UIColor colorWithPatternImage:[UIImage imageNamed:imageName]];
}
@end
封裝完成後,業務側只需要一行呼叫:

部分動畫效果:
總結
iOS 動畫的知識體系可以壓縮成三層理解:底層是 CALayer 與 Core Animation,隱式動畫靠事務與圖層行為驅動,顯式動畫則用屬性動畫、關鍵幀動畫、動畫組與轉場來精確控制;中間層是 Core Graphics 的 UIBezierPath,負責矢量繪圖與曲線路徑;最上層是 UIKit 對 UIView 的動畫封裝,無論 block 風格還是 begin/commit 風格,本質都是 CATransaction。理解了這三層,任何動畫需求都能找到對應的實現路徑。