
Weex 研究筆記(零):從零在 iOS 專案中跑起 Hello World
這篇記錄如何把 Weex 完整跑進一個 iOS 專案,從環境安裝、專案初始化到頁面加載,把每一步的指令與注意事項都留下來,方便之後回頭查閱。
一、環境安裝
1. 安裝 Node.js
到 https://nodejs.org/en/ 下載安裝,完成後即可使用 npm 指令。
2. 將 npm 切換到淘寶鏡像
參照 https://npm.taobao.org/ 的說明設定。
3. 安裝 Weex 環境
官方教學:https://alibaba.github.io/weex/doc/tutorial.html
npm install -g weex-toolkit
安裝後在命令列輸入 weex 並回車,可檢查是否安裝成功。
4. 安裝 CocoaPods
# 先安裝 / 更新 gem,https://rubygems.org/pages/download
# 將 gem 來源切換到淘寶鏡像
source -r https://rubygems.org/
source -a https://ruby.taobao.org

# 驗證來源
gem sources -l
# 正常輸出:
# CURRENT SOURCES
# https://ruby.taobao.org/

# 安裝 cocoapods
sudo gem install -n /usr/local/bin cocoapods
若中途報錯,依錯誤訊息自行搜尋處理即可。
二、專案初始化
1. 建立 iOS 專案
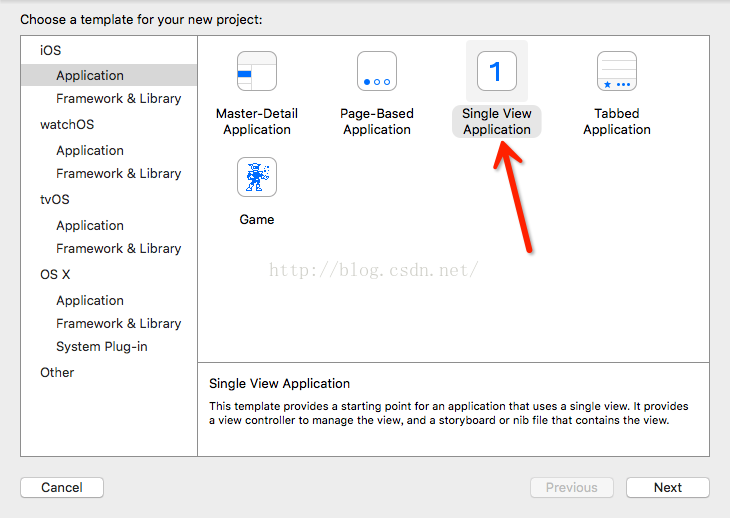
2. 建立 Podfile
在命令列 cd 到專案根目錄執行 pod init,會產生一個 Podfile。
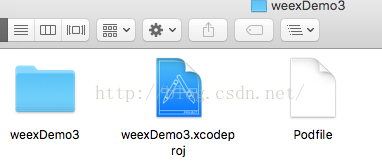
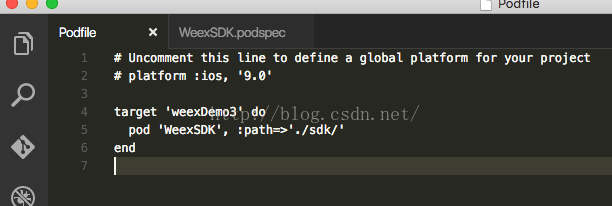
用編輯器打開,加入本地 SDK 路徑:
pod 'WeexSDK', :path => './sdk/'
3. 下載 Weex SDK
從 https://github.com/alibaba/weex 取得最新版 SDK。
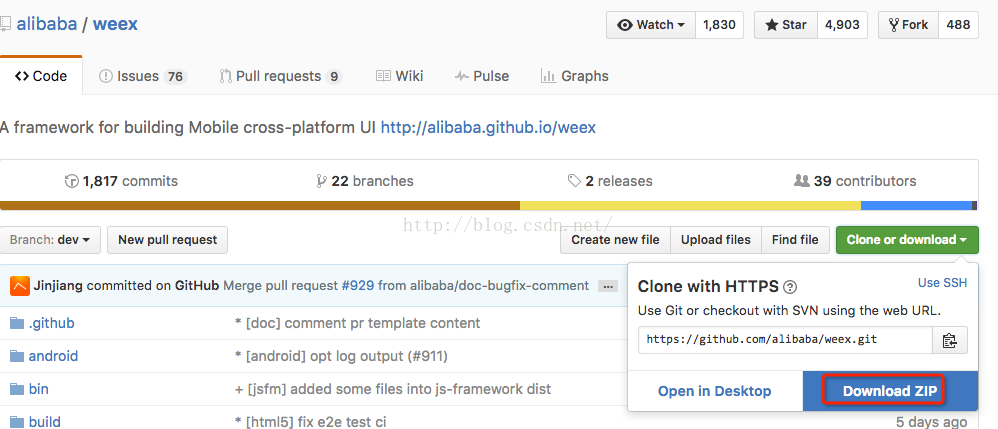
iOS 目錄下有一個 sdk 資料夾,把它複製到 iOS 專案根目錄,位置需與 Podfile 中設定的路徑一致。
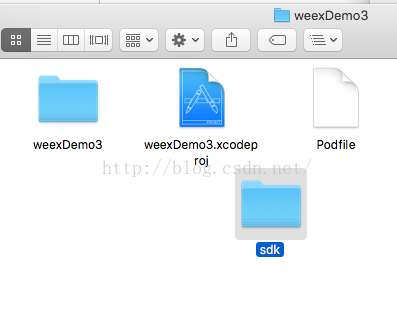
4. 安裝依賴
關閉 Xcode,在專案目錄執行 pod install。
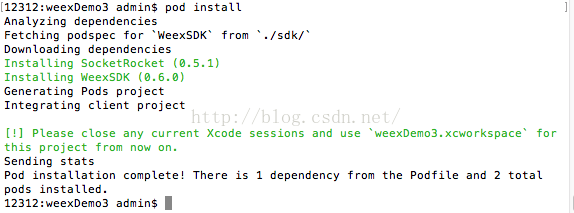
執行後目錄結構會多出 workspace 檔,之後一律用 .xcworkspace 開啟專案。
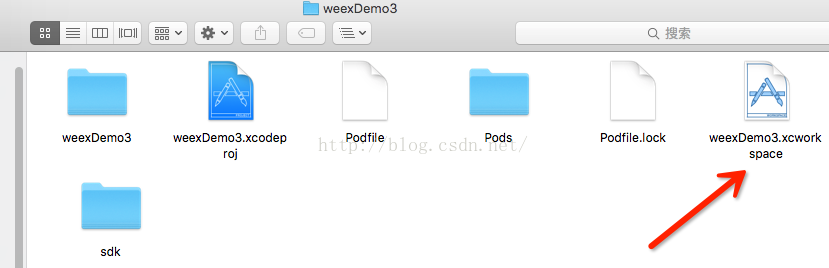
三、建立並編譯 Weex 頁面
建立一個名為 weex 的目錄,cd 進去執行 weex init,依提示輸入專案名稱。
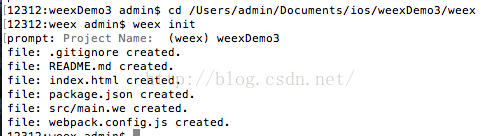
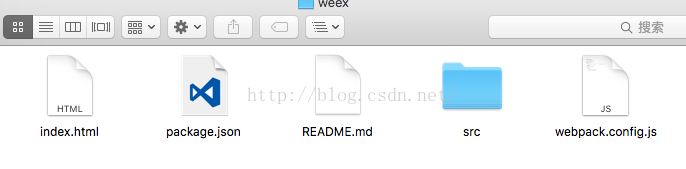
接著在該目錄執行 npm install 安裝相依套件,再建立 js 資料夾並產生最終需要的 js 檔:
npm install
mkdir js
weex src -o js
預覽方式有兩種:用瀏覽器直接開啟 weex src/main.we,或產生 QR Code 後用 Playground App 掃描:
weex src/main.we --qr
四、在 iOS 中加載 Weex 頁面
用 Xcode 開啟 workspace 專案檔。
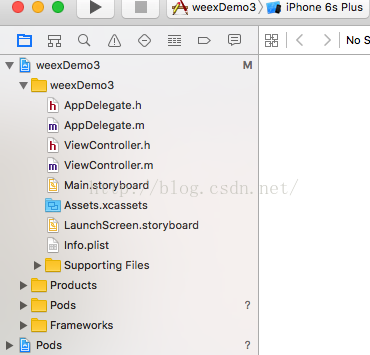
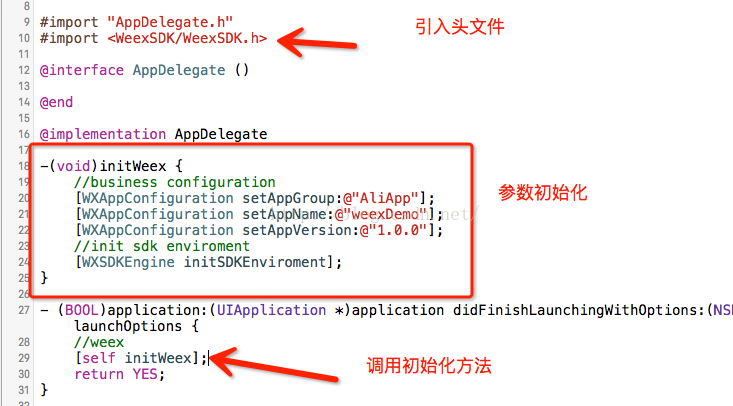
在 AppDelegate.m 中建立 Weex 視圖控制器。
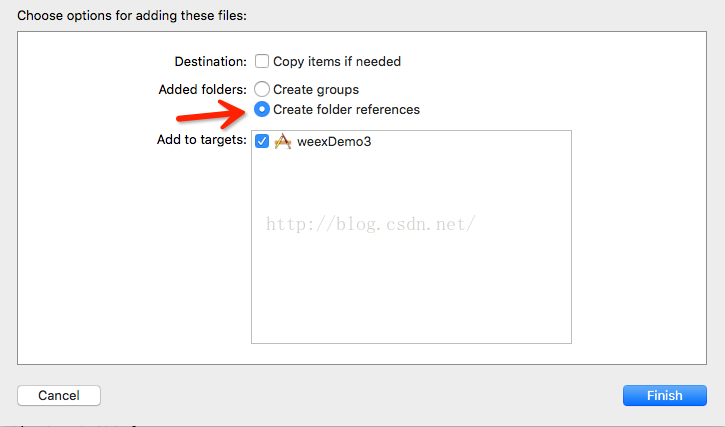
把先前產生的 js 資料夾拖進 Xcode 的檔案清單。
執行後即可看到 Weex 頁面。
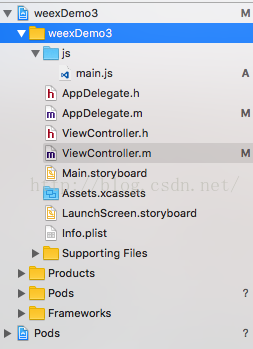
ViewController.h
#import@interface ViewController : UIViewController - (instancetype)initWithJs:(NSString *)filePath; @end
ViewController.m
#import "ViewController.h" #import@interface ViewController () @property (nonatomic, strong) WXSDKInstance *instance; @property (nonatomic, strong) UIView *weexView; @end @implementation ViewController { NSURL *jsUrl; } - (instancetype)initWithJs:(NSString *)filePath { self = [super init]; if (self) { // 遠端 js 檔 // NSString *path = [NSString stringWithFormat:@"https://192.168.232.13:8080/examples/js/%@", filePath]; // 本地 js 檔 NSString *path = [NSString stringWithFormat:@"file://%@/js/%@", [NSBundle mainBundle].bundlePath, filePath]; NSLog(@"-----path:%@", path); jsUrl = [NSURL URLWithString:path]; } return self; } - (void)viewDidLoad { [super viewDidLoad]; _instance = [[WXSDKInstance alloc] init]; _instance.viewController = self; _instance.frame = self.view.frame; __weak typeof(self) weakSelf = self; _instance.onCreate = ^(UIView *view) { [weakSelf.weexView removeFromSuperview]; weakSelf.weexView = view; [weakSelf.view addSubview:weakSelf.weexView]; }; _instance.onFailed = ^(NSError *error) { NSLog(@"加載錯誤"); }; _instance.renderFinish = ^(UIView *view) { NSLog(@"加載完成"); }; if (!jsUrl) { return; } [_instance renderWithURL:jsUrl]; self.view.backgroundColor = [UIColor whiteColor]; } - (void)dealloc { [_instance destroyInstance]; } @end
建立導航控制器
回到 AppDelegate.m,先匯入標頭:
#import "ViewController.h"
- (BOOL)application:(UIApplication *)application didFinishLaunchingWithOptions:(NSDictionary *)launchOptions {
    // weex
    [self initWeex];

    ViewController *vc = [[ViewController alloc] initWithJs:@"main.js"];
    UINavigationController *nav = [[UINavigationController alloc] initWithRootViewController:vc];
    self.window.rootViewController = nav;
    return YES;
}
執行結果:
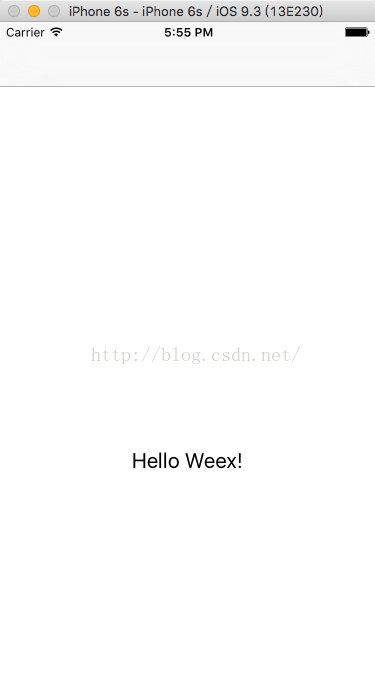
如果圖片顯示不出來,是因為圖片載入需要自行建立模組,可以直接把官方 demo 的程式碼與 pod 設定複製過來使用。
- 上一篇文章: iOS 動畫效果收集:跑馬燈與飄雪動畫實作
- 下一篇文章: CoreText 圖文混排與圖片點擊互動實作(Swift)