
動手做 Uber 風格啟動動畫(上):用 CALayer 與 CAAnimation 堆疊細節
啟動畫面是少數能讓開發者盡情發揮的空間。它一方面填補了 App 首次載入、跟後端握手的那段空檔,另一方面決定了使用者對產品的第一次印象。動態啟動畫面做得好,等待就不再漫長。
市面上的啟動動畫很多,但真正精緻的並不多。Uber 在 2016 年第一季重塑品牌時釋出的這組動畫,就是少數讓人願意多看兩眼的例子。這篇教程要做的,就是盡可能忠實地把它重現出來。

我們會大量使用 CALayer、CAAnimation 與它們的子類。這裡不重複講解這些類的基础概念,重點放在怎麼把它們組裝成高品質的動畫。如果你想補上底層原理,可以參考 Marin Todorov 的 iOS 動畫中階系列。
入門
動畫數量不少,所以我們在一個現成的初始專案上動手。初始專案已經把需要的 CALayer 全部建好,我們的工作只是替它們加上動畫。
先看最終效果:
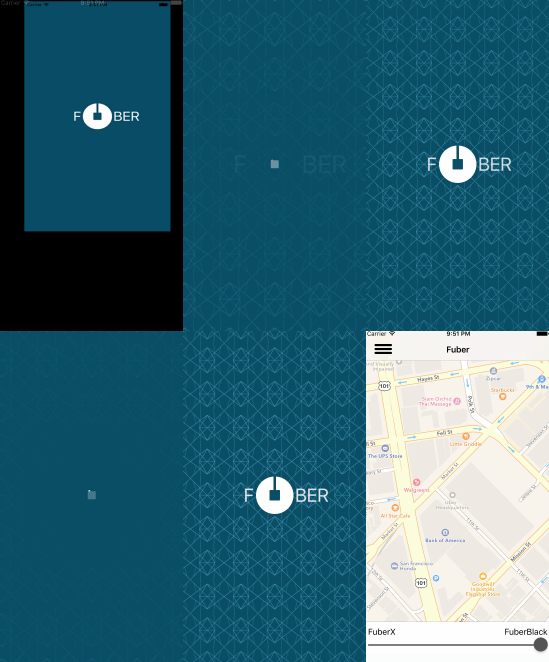
從控制器角度看,SplashViewController 由父容器 RootContainerViewController 產生,會持續循環播放啟動動畫,直到 App 完成載入——也就是與後端 API 握手成功並取得必要資料為止。值得稱讚的是,這個專案把啟動動畫抽成獨立模組,可以直接搬進其他專案使用。
RootContainerViewController 提供兩個方法:showSplashViewController() 與 showSplashViewControllerNoPing()。開發階段我們主要用後者,它只會不停循環動畫、不會跳進主畫面,讓我們能專心調整整體視覺。最後再切回前者,模擬 API 延遲並過場到主畫面。
視圖與圖層結構
SplashViewController 有兩個子視圖:一是波紋格狀背景 TileGridView,由多個 TileView 組成;二是帶有動畫的「U」字標誌 AnimatedULogoView。
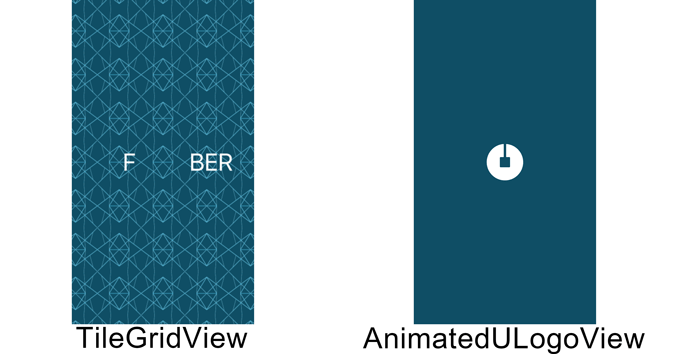
AnimatedULogoView 內含四個 CAShapeLayer:
circleLayer:「U」型標誌的白色圓形底lineLayer:從圓心延伸到邊界的直線squareLayer:位於圓心位置的正方形maskLayer:遮罩層,邊界隨動畫改變時會遮住其他圖層
這四層疊合起來,就構成了 Uber 標誌那個熟悉的「U」。接下來就讓它動起來。
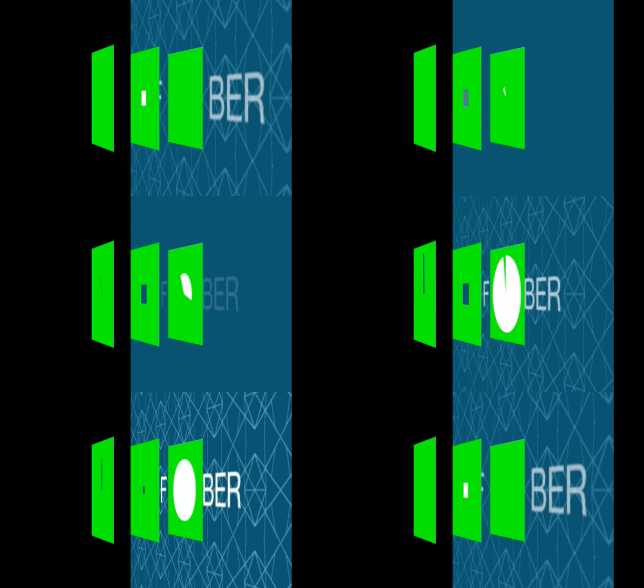
圓形的動畫
做動畫時最好先屏蔽視覺雜訊,一次只專注一層。開啟 AnimatedULogoView.swift,在 init(frame:) 中把 circleLayer 以外的圖層都註解掉:
override init(frame: CGRect) {
    super.init(frame: frame)
    circleLayer = generateCircleLayer()
    lineLayer = generateLineLayer()
    squareLayer = generateSquareLayer()
    maskLayer = generateMaskLayer()

    // layer.mask = maskLayer
    layer.addSublayer(circleLayer)
    // layer.addSublayer(lineLayer)
    // layer.addSublayer(squareLayer)
}
定位到 generateCircleLayer(),這個圓其實只是一個用 UIBezierPath 繪製的 CAShapeLayer。關鍵在這一行:
layer.path = UIBezierPath(arcCenter: CGPointZero,
                          radius: radius / 2,
                          startAngle: -CGFloat(M_PI_2),
                          endAngle: CGFloat(3 * M_PI_2),
                          clockwise: true).CGPath
預設情況下 startAngle 為 0 時,弧線從右側(三點鐘方向)起筆。設為 -M_PI_2,也就是 -90°,起點就換到正上方;endAngle 是 270°(3 * M_PI_2),同樣落在正上方,剛好繞一整圈。另外注意這裡把線寬 lineWidth 設成圓的半徑 radius,因為我們要讓它「畫」出來。
circleLayer 的動畫由兩個 CAAnimation 組成,再用一個 CAAnimationGroup 合併。先在 animateCircleLayer() 加入描繪筆畫的動畫:
let strokeEndAnimation = CAKeyframeAnimation(keyPath: "strokeEnd")
strokeEndAnimation.timingFunction = strokeEndTimingFunction
strokeEndAnimation.duration = kAnimationDuration - kAnimationDurationDelay
strokeEndAnimation.values = [0.0, 1.0]
strokeEndAnimation.keyTimes = [0.0, 1.0]
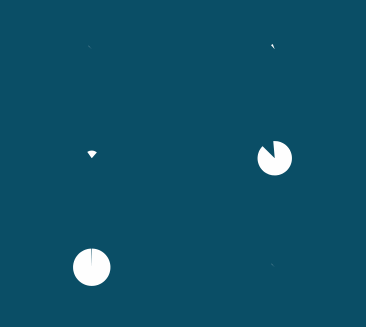
把 values 設為 0.0 到 1.0,等於告訴 Core Animation:從起點畫到終點,做出一個時鐘指針掃過的效果。隨著 strokeEnd 變大,沿著周長的弧線越來越長,整個圓被逐漸填滿。若改成 [0.0, 0.5],動畫就只會畫出半個圓。
接著是形變動畫:
let transformAnimation = CABasicAnimation(keyPath: "transform")
transformAnimation.timingFunction = strokeEndTimingFunction
transformAnimation.duration = kAnimationDuration - kAnimationDurationDelay

// 起始時:逆時針旋轉 45°,x、y 為正常大小的 0.25 倍
var startingTransform = CATransform3DMakeRotation(-CGFloat(M_PI_4), 0, 0, 1)
startingTransform = CATransform3DScale(startingTransform, 0.25, 0.25, 1)

transformAnimation.fromValue = NSValue(CATransform3D: startingTransform)
transformAnimation.toValue = NSValue(CATransform3D: CATransform3DIdentity)
這個動畫同時包含縮放與繞 z 軸旋轉,結果是 circleLayer 一邊順時針轉 45°,一邊放大。旋轉參數在這裡非常關鍵:後面跟 lineLayer 組合時,位置與速度必須對得上。
最後用 CAAnimationGroup 把兩者合併,這樣只需要給 circleLayer 掛一個動畫:
let groupAnimation = CAAnimationGroup()
groupAnimation.animations = [strokeEndAnimation, transformAnimation]
groupAnimation.repeatCount = Float.infinity
groupAnimation.duration = kAnimationDuration
groupAnimation.beginTime = beginTime
groupAnimation.timeOffset = startTimeOffset

circleLayer.addAnimation(groupAnimation, forKey: "looping")
CAAnimationGroup 在這裡設定了兩個重要屬性。beginTime 依父視圖的時間軸決定;timeOffset 則是因為這個動畫第一次播放時,其實是從中途切入的。等你把其他圖層都做完,再回來調整 startTimeOffset 的值,觀察畫面差異會很有幫助。
編譯執行,你會看到圓正在自我描繪並旋轉放大:
提示:試著把
strokeEndAnimation或transformAnimation單獨留著執行,看看各自長什麼樣。不同動畫的組合常常會產生意料之外的視覺效果,值得多試。
直線的動畫
回到 AnimatedULogoView.swift,在 startAnimating() 中只留 animateLineLayer():
public func startAnimating() {
    beginTime = CACurrentMediaTime()
    layer.anchorPoint = CGPointZero

    // animateMaskLayer()
    // animateCircleLayer()
    animateLineLayer()
    // animateSquareLayer()
}
同時調整 init(frame:),只顯示圓與直線:
override init(frame: CGRect) {
    super.init(frame: frame)
    circleLayer = generateCircleLayer()
    lineLayer = generateLineLayer()
    squareLayer = generateSquareLayer()
    maskLayer = generateMaskLayer()

    // layer.mask = maskLayer
    layer.addSublayer(circleLayer)
    layer.addSublayer(lineLayer)
    // layer.addSublayer(squareLayer)
}
接著在 animateLineLayer() 中實作線寬動畫:
let lineWidthAnimation = CAKeyframeAnimation(keyPath: "lineWidth")
lineWidthAnimation.values = [0.0, 5.0, 0.0]
lineWidthAnimation.timingFunctions = [strokeEndTimingFunction, circleLayerTimingFunction]
lineWidthAnimation.duration = kAnimationDuration
lineWidthAnimation.keyTimes = [0.0,
    1.0 - kAnimationDurationDelay / kAnimationDuration,
    1.0]
這段會先把線條加粗,再收回來。接著加上形變:
let transformAnimation = CAKeyframeAnimation(keyPath: "transform")
transformAnimation.timingFunctions = [strokeEndTimingFunction, circleLayerTimingFunction]
transformAnimation.duration = kAnimationDuration
transformAnimation.keyTimes = [0.0,
    1.0 - kAnimationDurationDelay / kAnimationDuration,
    1.0]

var transform = CATransform3DMakeRotation(-CGFloat(M_PI_4), 0.0, 0.0, 1.0)
transform = CATransform3DScale(transform, 0.25, 0.25, 1.0)

// 先放大再縮小
transformAnimation.values = [
    NSValue(CATransform3D: transform),
    NSValue(CATransform3D: CATransform3DIdentity),
    NSValue(CATransform3D: CATransform3DMakeScale(0.15, 0.15, 1.0))
]
邏輯與圓形類似,同樣是繞 z 軸順時針旋轉,並搭配縮放:從原尺寸的 25% 開始,放大到 100%,再縮到 15%。
用 CAAnimationGroup 合併並掛到 lineLayer:
let groupAnimation = CAAnimationGroup()
groupAnimation.repeatCount = Float.infinity
groupAnimation.removedOnCompletion = false
groupAnimation.duration = kAnimationDuration
groupAnimation.beginTime = beginTime
groupAnimation.animations = [lineWidthAnimation, transformAnimation]
groupAnimation.timeOffset = startTimeOffset

lineLayer.addAnimation(groupAnimation, forKey: "looping")
編譯執行看看:
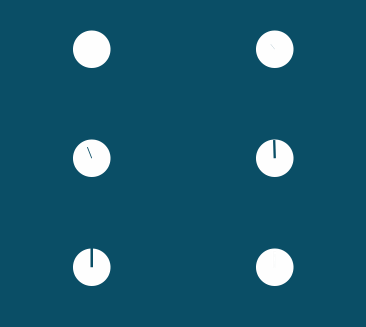
這裡有個細節值得說明。線條的初始角度設為 -M_PI_4,而 keyTimes 設為 [0.0, 1.0 - kAnimationDurationDelay/kAnimationDuration, 1.0]。頭尾兩項很直觀:0.0 是起點,1.0 是終點。中間那個時間點需要計算——也就是「圓形動畫做完、後半段縮小動畫開始」的那一刻。用 kAnimationDurationDelay 除以 kAnimationDuration 就能得到比例,但因為它是延遲量,所以要用 1.0 去減,從尾端往前推。
正方形的動畫
流程你已經很熟了。在 startAnimating() 中只留 animateSquareLayer(),並把 init(frame:) 改成:
override init(frame: CGRect) {
    super.init(frame: frame)
    circleLayer = generateCircleLayer()
    lineLayer = generateLineLayer()
    squareLayer = generateSquareLayer()
    maskLayer = generateMaskLayer()

    // layer.mask = maskLayer
    layer.addSublayer(circleLayer)
    // layer.addSublayer(lineLayer)
    layer.addSublayer(squareLayer)
}
前往 animateSquareLayer(),先做邊框動畫:
let b1 = NSValue(CGRect: CGRect(x: 0.0, y: 0.0,
    width: 2.0/3.0 * squareLayerLength,
    height: 2.0/3.0 * squareLayerLength))
let b2 = NSValue(CGRect: CGRect(x: 0.0, y: 0.0,
    width: squareLayerLength, height: squareLayerLength))
let b3 = NSValue(CGRect: CGRectZero)

// 從 2/3 尺寸放大到完整大小,再收縮到 0
let boundsAnimation = CAKeyframeAnimation(keyPath: "bounds")
boundsAnimation.values = [b1, b2, b3]
boundsAnimation.timingFunctions = [fadeInSquareTimingFunction, squareLayerTimingFunction]
boundsAnimation.duration = kAnimationDuration
boundsAnimation.keyTimes = [0, 1.0 - kAnimationDurationDelay / kAnimationDuration, 1.0]
這個關鍵幀動畫改變 CALayer 的邊框:從邊長的 2/3 開始,放大到完整尺寸,再收縮到零。
再來是背景顏色:
let backgroundColorAnimation = CABasicAnimation(keyPath: "backgroundColor")
backgroundColorAnimation.fromValue = UIColor.whiteColor().CGColor
backgroundColorAnimation.toValue = UIColor.fuberBlue().CGColor
backgroundColorAnimation.timingFunction = squareLayerTimingFunction
backgroundColorAnimation.fillMode = kCAFillModeBoth
backgroundColorAnimation.beginTime = kAnimationDurationDelay * 2.0 / kAnimationDuration
backgroundColorAnimation.duration = kAnimationDuration / (kAnimationDuration - kAnimationDurationDelay)
注意這裡的 fillMode。由於 beginTime 不為零,動畫必須把起訖時的 CGColor 一併納入,否則加進父 CAAnimationGroup 時會出現顏色閃跳。
最後合併成一個 CAAnimationGroup:
let groupAnimation = CAAnimationGroup()
groupAnimation.animations = [boundsAnimation, backgroundColorAnimation]
groupAnimation.repeatCount = Float.infinity
groupAnimation.duration = kAnimationDuration
groupAnimation.removedOnCompletion = false
groupAnimation.beginTime = beginTime
groupAnimation.timeOffset = startTimeOffset

squareLayer.addAnimation(groupAnimation, forKey: "looping")
編譯執行,檢查進度:
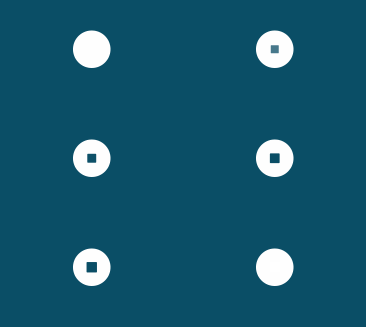
提示:模擬器上的動畫可能會卡頓,因為 Mac 要用軟體模擬原本由 iOS GPU 負責的工作。若跑起來不順,可以縮小模擬器視窗尺寸,或直接上真機測試。
遮罩層
把 init(frame:) 與 startAnimating() 中的註解全部還原,重新編譯執行:
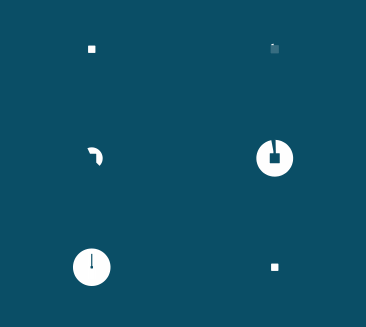
整體已經成型,但少了點什麼——circleLayer 縮小消失得太突然了。遮罩層動畫正是用來修掉這個突兀感的。
定位到 animateMaskLayer(),先加入邊界動畫:
let boundsAnimation = CABasicAnimation(keyPath: "bounds")
boundsAnimation.fromValue = NSValue(CGRect: CGRect(x: 0.0, y: 0.0,
    width: radius * 2.0, height: radius * 2))
boundsAnimation.toValue = NSValue(CGRect: CGRect(x: 0.0, y: 0.0,
    width: 2.0/3.0 * squareLayerLength,
    height: 2.0/3.0 * squareLayerLength))
boundsAnimation.duration = kAnimationDurationDelay
boundsAnimation.beginTime = kAnimationDuration - kAnimationDurationDelay
boundsAnimation.timingFunction = circleLayerTimingFunction
別忘了,當遮罩層邊界改變時,整個 AnimatedULogoView 都會被遮蓋,因為它作用於所有子圖層。
接著讓遮罩保持圓形,加上圓角動畫:
let cornerRadiusAnimation = CABasicAnimation(keyPath: "cornerRadius")
cornerRadiusAnimation.beginTime = kAnimationDuration - kAnimationDurationDelay
cornerRadiusAnimation.duration = kAnimationDurationDelay
cornerRadiusAnimation.fromValue = radius
cornerRadiusAnimation.toValue = 2
cornerRadiusAnimation.timingFunction = circleLayerTimingFunction
合併兩者,這一層就完成了:
let groupAnimation = CAAnimationGroup()
groupAnimation.removedOnCompletion = false
groupAnimation.fillMode = kCAFillModeBoth
groupAnimation.beginTime = beginTime
groupAnimation.repeatCount = Float.infinity
groupAnimation.duration = kAnimationDuration
groupAnimation.animations = [boundsAnimation, cornerRadiusAnimation]
groupAnimation.timeOffset = startTimeOffset

maskLayer.addAnimation(groupAnimation, forKey: "looping")
編譯執行:
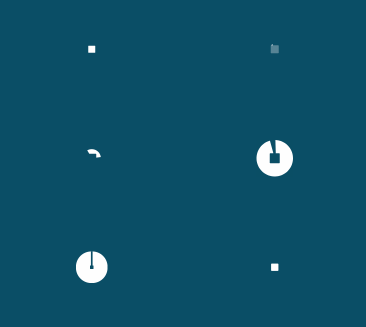
這下順眼多了。標誌的收束變得平滑,整體節奏也連上了。
上半篇到此結束。背景格狀視圖的水波效果,會在下半篇中介紹。
原文:How To Create an Uber Splash Screen