
一個 UICollectionView 搞定列表與網格視圖切換
編輯:iOS 開發基礎
前言
逛電商 App 時應該都見過這個設計:同一頁商品,可以切成一行一筆的列表,也可以切成兩欄並排的網格,點一下右上角的小按鈕就完成切換。京東、淘寶都是這個套路。
先看效果,以下截圖來自京東商城。
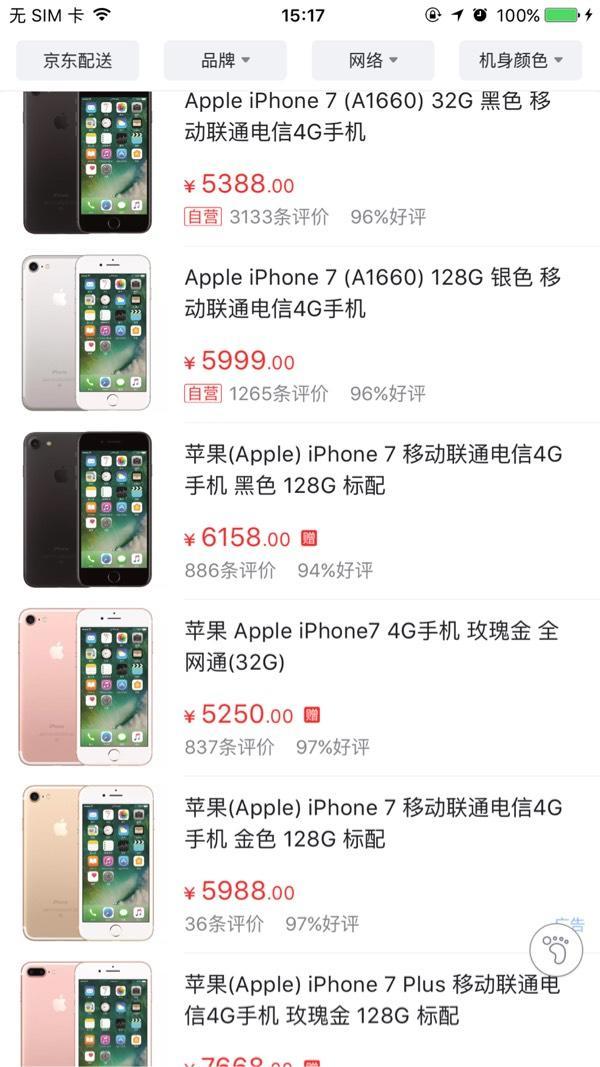
列表視圖
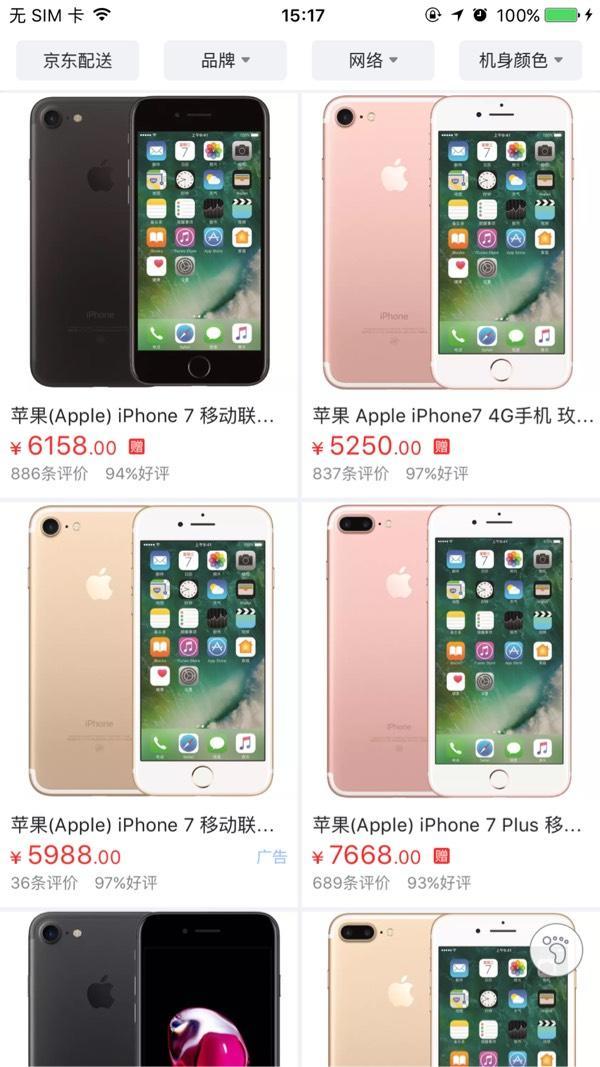
網格視圖
多數人看到這個需求,第一直覺是「用 TableView 和 CollectionView 互相切換」。我一開始也這麼想,後來才發現:只用一個 CollectionView,就能把這件事做得更漂亮。
正文
一、建立 CollectionView
先用 UICollectionViewFlowLayout 設定滾動方向與間距,再註冊自訂的 cell。
- (UICollectionView *)collectionView {
    if (!_collectionView) {
        UICollectionViewFlowLayout *flowlayout = [[UICollectionViewFlowLayout alloc] init];
        // 設定滾動方向
        [flowlayout setScrollDirection:UICollectionViewScrollDirectionVertical];
        // 左右間距
        flowlayout.minimumInteritemSpacing = 2;
        // 上下間距
        flowlayout.minimumLineSpacing = 2;
        _collectionView = [[UICollectionView alloc] initWithFrame:CGRectMake(2, 2, self.view.bounds.size.width - 4, self.view.bounds.size.height - 4) collectionViewLayout:flowlayout];
        _collectionView.delegate = self;
        _collectionView.dataSource = self;
        _collectionView.showsVerticalScrollIndicator = NO;
        _collectionView.showsHorizontalScrollIndicator = NO;
        [_collectionView setBackgroundColor:[UIColor clearColor]];
        // 註冊 cell
        [_collectionView registerClass:[GridListCollectionViewCell class] forCellWithReuseIdentifier:kCellIdentifier_CollectionViewCell];
    }
    return _collectionView;
}
二、準備資料
這裡直接讀取放在 bundle 裡的 product.json,解析後轉成模型。其中 objectWithDictionary: 是我用 Runtime 寫的字典轉模型工具,一行就能完成解析,實作細節可以參考我另一篇【Objective-C 中的 Runtime】。
- (void)viewDidLoad {
    [super viewDidLoad];
    // 預設使用列表視圖
    _isGrid = NO;
    NSString *path = [[NSBundle mainBundle] pathForResource:@"product" ofType:@"json"];
    NSData *data = [NSData dataWithContentsOfFile:path];
    NSDictionary *dict = [NSJSONSerialization JSONObjectWithData:data options:NSJSONReadingAllowFragments error:nil];
    [self.view addSubview:self.collectionView];
    NSArray *products = dict[@"wareInfo"];
    for (id obj in products) {
        [self.dataSource addObject:[GridListModel objectWithDictionary:obj]];
    }
}
三、讓 cell 自己決定長相
關鍵在這裡:替自訂 cell 加一個 isGrid 屬性,由 cell 依據這個旗標決定子視圖的 frame,而不是準備兩套 cell 類別。
.h 檔:
#import

#define kCellIdentifier_CollectionViewCell @"GridListCollectionViewCell"

@class GridListModel;

@interface GridListCollectionViewCell : UICollectionViewCell

/** 0:列表視圖,1:格子視圖 */
@property (nonatomic, assign) BOOL isGrid;
@property (nonatomic, strong) GridListModel *model;

@end
.m 檔:
#import "GridListCollectionViewCell.h"
#import "GridListModel.h"
#import "UIImageView+WebCache.h"

#define ScreenWidth ([UIScreen mainScreen].bounds.size.width)

@interface GridListCollectionViewCell ()
@property (nonatomic, strong) UIImageView *imageV;
@property (nonatomic, strong) UILabel *titleLabel;
@property (nonatomic, strong) UILabel *priceLabel;
@end

@implementation GridListCollectionViewCell

- (instancetype)initWithFrame:(CGRect)frame {
    self = [super initWithFrame:frame];
    if (self) {
        [self configureUI];
    }
    return self;
}

- (void)configureUI {
    _imageV = [[UIImageView alloc] initWithFrame:CGRectZero];
    [self.contentView addSubview:_imageV];

    _titleLabel = [[UILabel alloc] initWithFrame:CGRectZero];
    _titleLabel.numberOfLines = 0;
    _titleLabel.font = [UIFont boldSystemFontOfSize:14];
    [self.contentView addSubview:_titleLabel];

    _priceLabel = [[UILabel alloc] initWithFrame:CGRectZero];
    _priceLabel.textColor = [UIColor redColor];
    _priceLabel.font = [UIFont systemFontOfSize:16];
    [self.contentView addSubview:_priceLabel];
}

- (void)setIsGrid:(BOOL)isGrid {
    _isGrid = isGrid;
    if (isGrid) {
        // 網格:圖片在上,標題與價格疊在下面
        _imageV.frame = CGRectMake(5, 5, self.bounds.size.width - 60, self.bounds.size.width - 60);
        _titleLabel.frame = CGRectMake(5, self.bounds.size.width - 45, ScreenWidth / 2, 20);
        _priceLabel.frame = CGRectMake(5, self.bounds.size.width - 20, ScreenWidth / 2, 20);
    } else {
        // 列表:圖片在左,文字靠右排版
        _imageV.frame = CGRectMake(5, 5, self.bounds.size.height - 10, self.bounds.size.height - 10);
        _titleLabel.frame = CGRectMake(self.bounds.size.height + 10, 0, ScreenWidth / 2, self.bounds.size.height - 20);
        _priceLabel.frame = CGRectMake(self.bounds.size.height + 10, self.bounds.size.height - 30, ScreenWidth / 2, 20);
    }
}

- (void)setModel:(GridListModel *)model {
    _model = model;
    [_imageV sd_setImageWithURL:[NSURL URLWithString:model.imageurl]];
    _titleLabel.text = model.wname;
    _priceLabel.text = [NSString stringWithFormat:@"¥%.2f", model.jdPrice];
}

@end
四、加上切換按鈕
點擊時只要翻轉旗標、重載資料,再換掉按鈕圖示就好。
#pragma mark - Action

- (IBAction)onBtnClick:(id)sender {
    _isGrid = !_isGrid;
    [self.collectionView reloadData];
    if (_isGrid) {
        [self.swithBtn setImage:[UIImage imageNamed:@"product_list_grid_btn"] forState:0];
    } else {
        [self.swithBtn setImage:[UIImage imageNamed:@"product_list_list_btn"] forState:0];
    }
}
五、最後調整 item 尺寸
切換的視覺效果,其實就靠這個 delegate 方法回傳不同的 ItemSize。
- (CGSize)collectionView:(UICollectionView *)collectionView layout:(UICollectionViewLayout *)collectionViewLayout sizeForItemAtIndexPath:(NSIndexPath *)indexPath {
    if (_isGrid) {
        // 兩欄
        return CGSizeMake((ScreenWidth - 6) / 2, (ScreenWidth - 6) / 2 + 40);
    } else {
        // 單欄
        return CGSizeMake(ScreenWidth - 4, (ScreenWidth - 6) / 4 + 20);
    }
}
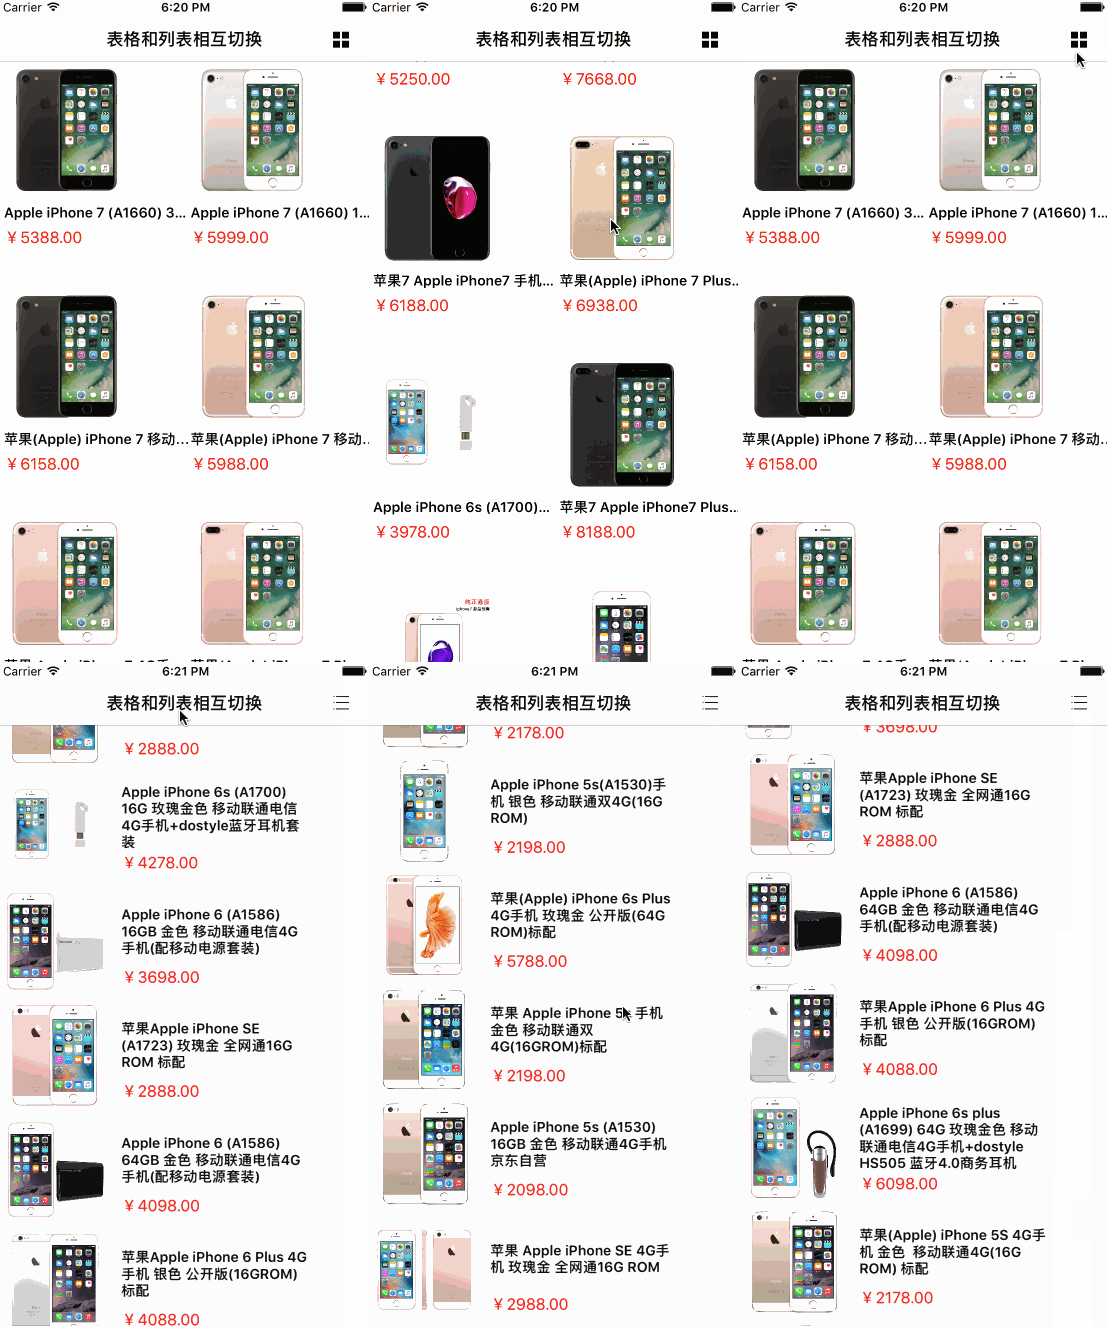
到這裡,列表與網格切換就完成了。對比一下「維護兩個列表元件」的做法,這種寫法只要一個資料源、一個 cell 類別,邏輯集中、維護成本也低得多。
最後
筆者水平有限,文中若有疏漏之處,還請各路高手不吝指正;如果你手上有更好的做法,也歡迎一起交流。本文的 demo 已放在 GitHub 上,搭配程式碼閱讀效果會更好,覺得有幫助的話,順手點個 star 吧。贈人玫瑰,手有餘香。
文章轉自 LeeJay 的簡書