
iOS UITableView 完全指南:基礎用法、常用屬性與 cell 性能優化
一、一個簡單的英雄展示程序
NJHero.h(字典轉模型):
#import <Foundation/Foundation.h>

@interface NJHero : NSObject
/** 頭像 */
@property (nonatomic, copy) NSString *icon;
/** 名稱 */
@property (nonatomic, copy) NSString *name;
/** 描述 */
@property (nonatomic, copy) NSString *intro;

- (instancetype)initWithDict:(NSDictionary *)dict;
+ (instancetype)heroWithDict:(NSDictionary *)dict;
@end
NJViewController.m:
#import "NJViewController.h"
#import "NJHero.h"

@interface NJViewController ()<UITableViewDataSource, UITableViewDelegate>
/** 保存所有英雄數據 */
@property (nonatomic, strong) NSArray *heros;
@property (weak, nonatomic) IBOutlet UITableView *tableView;
@end

@implementation NJViewController

#pragma mark - 懶加載
- (NSArray *)heros
{
   if (_heros == nil) {
       // 1. 獲得全路徑
       NSString *fullPath = [[NSBundle mainBundle] pathForResource:@"heros" ofType:@"plist"];
       // 2. 根據全路徑加載數據
       NSArray *dictArray = [NSArray arrayWithContentsOfFile:fullPath];
       // 3. 字典轉模型
       NSMutableArray *models = [NSMutableArray arrayWithCapacity:dictArray.count];
       for (NSDictionary *dict in dictArray) {
           NJHero *hero = [NJHero heroWithDict:dict];
           [models addObject:hero];
       }
       // 4. 賦值
       _heros = [models copy];
   }
   return _heros;
}

- (void)viewDidLoad
{
   [super viewDidLoad];
   // 各行高度一致時,直接用屬性設置行高
   self.tableView.rowHeight = 60;
   self.tableView.delegate = self;
}

#pragma mark - UITableViewDataSource
- (NSInteger)numberOfSectionsInTableView:(UITableView *)tableView
{
   return 1;
}
- (NSInteger)tableView:(UITableView *)tableView numberOfRowsInSection:(NSInteger)section
{
   return self.heros.count;
}
- (UITableViewCell *)tableView:(UITableView *)tableView cellForRowAtIndexPath:(NSIndexPath *)indexPath
{
   UITableViewCell *cell = [[UITableViewCell alloc] initWithStyle:UITableViewCellStyleSubtitle reuseIdentifier:nil];
   NJHero *hero = self.heros[indexPath.row];
   cell.textLabel.text = hero.name;
   cell.detailTextLabel.text = hero.intro;
   cell.imageView.image = [UIImage imageNamed:hero.icon];
   return cell;
}

#pragma mark - 控制狀態欄是否顯示
- (BOOL)prefersStatusBarHidden
{
   return YES;
}
@end
實現效果:

代碼注意點:
(1)字典轉模型時,用 arrayWithCapacity:dictArray.count 提前為可變數組分配好容量,能提升性能;
(2)設置 cell 高度有三種方式:
1)在初始化方法裡設 self.tableView.rowHeight = 60,適用於各行等高;
2)在 storyboard 裡設置,同樣適用於等高;
3)各行不等高時,用代理方法 heightForRowAtIndexPath: 逐行設置:
- (CGFloat)tableView:(UITableView *)tableView heightForRowAtIndexPath:(NSIndexPath *)indexPath
{
   if (1 == indexPath.row) {
       return 180;
   }
   return 44;
}
二、cell 的常用屬性
下面在 cellForRow 中演示輔助視圖、背景等屬性:
- (UITableViewCell *)tableView:(UITableView *)tableView cellForRowAtIndexPath:(NSIndexPath *)indexPath
{
   UITableViewCell *cell = [[UITableViewCell alloc] initWithStyle:UITableViewCellStyleSubtitle reuseIdentifier:nil];
   NJHero *hero = self.heros[indexPath.row];
   cell.textLabel.text = hero.name;
   cell.detailTextLabel.text = hero.intro;
   cell.imageView.image = [UIImage imageNamed:hero.icon];

   // 2.3 設置輔助視圖
   if (0 == indexPath.row) {
       cell.accessoryView = [UIButton buttonWithType:UIButtonTypeContactAdd];
   } else {
       cell.accessoryView = [[UISwitch alloc] init];
   }

   // 2.4 設置背景顏色
   cell.backgroundColor = [UIColor blueColor];

   // 設置默認狀態的背景
   UIImageView *iv = [[UIImageView alloc] initWithImage:[UIImage imageNamed:@"buttondelete"]];
   cell.backgroundView = iv;

   // 設置選中狀態的背景
   UIView *view2 = [[UIView alloc] init];
   view2.backgroundColor = [UIColor purpleColor];
   cell.selectedBackgroundView = view2;
   return cell;
}
實現效果:
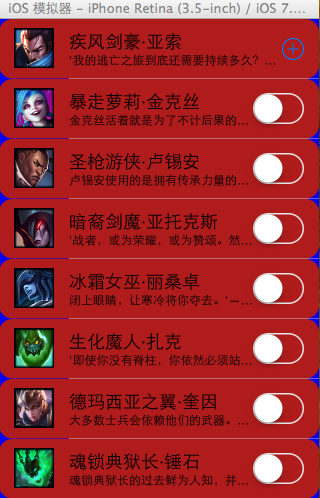
cell 屬性要點:
(1)accessoryView 用於設置輔助指示視圖,系統提供了枚舉類型,也可以自定義;
(2)backgroundColor 與 backgroundView 都能設背景,但後者優先級更高,會蓋住前者;
(3)backgroundView 可設置默認狀態背景,用「父類指針指向子類對象」(如 UIImageView)能以簡單操作做出絢麗效果;
(4)selectedBackgroundView 用於設置選中狀態的背景。
三、tableView 的常用屬性
- (void)viewDidLoad
{
   [super viewDidLoad];
   // 1. 創建 tableview
   UITableView *tableview = [[UITableView alloc] init];
   tableview.frame = self.view.bounds;
   // 2. 設置數據源
   tableview.dataSource = self;
   // 3. 添加到 view
   [self.view addSubview:tableview];

   // 4. 設置分割線樣式(枚舉類型)
   // tableview.separatorStyle = UITableViewCellSeparatorStyleNone;

   // 5. 設置分割線顏色(參數為顏色比例值)
   tableview.separatorColor = [UIColor colorWithRed:0/255.0 green:255/255.0 blue:0/255.0 alpha:255/255.0];

   // 設置頂部與底部視圖
   tableview.tableHeaderView = [UIButton buttonWithType:UIButtonTypeContactAdd];
   tableview.tableFooterView = [[UISwitch alloc] init];
}
實現效果:
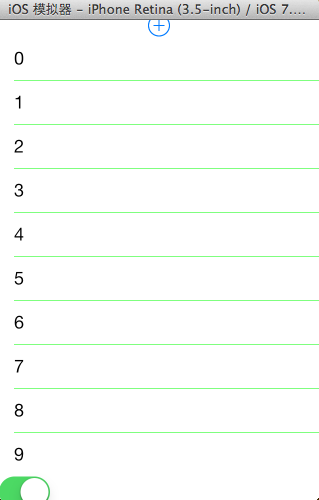
要點:
(1)separatorStyle 是枚舉類型,用於設置分割線樣式;
(2)separatorColor 可設置分割線顏色,系統默認色不夠用時可自定義。順帶一提,顏色分 24 位(RGB 各 8bit)與 32 位(外加 8bit 的 alpha 通道)兩種;
(3)tableHeaderView / tableFooterView 分別設置頂部與底部視圖。
四、cell 的性能問題與復用原理
UITableView 的每一行都是一個 UITableViewCell,通過 tableView:cellForRowAtIndexPath: 初始化。Cell 內部有一個默認子視圖 contentView,它是 cell 內容的父視圖,還可顯示輔助指示視圖。輔助指示視圖可通過 accessoryType 設置,默認是 UITableViewCellAccessoryNone,其他可選值有 DisclosureIndicator、DetailDisclosureButton、Checkmark 等,也可用 accessoryView 自定義。
問題在哪裡?Cell 的工作機制是「能看到多少就創建多少」,滾動時再動態創建新出現的內容。看似合理,但如果數據量巨大、用戶又來回快速滾動,就會不斷創建 cell、不斷開闢內存;而且往回滾時並不會復用之前創建的 cell,而是重新開闢新空間。這顯然是個隱患。
解決之道就是 cell 復用:
(1)iOS 設備內存有限,若成千上萬條數據都創建對應的 cell,必然耗盡內存;
(2)復用原理:滾動時移出窗口的 cell 會被放入一個對象池等待復用;當需要新 cell 時,dataSource 先去池中查找,有未使用的就用新數據重新配置後返回,避免重複創建。這樣一來,若一屏能顯示 5 個 cell,那麼全程只需創建 6 個左右即可;
(3)關鍵點:當一個 tableview 存在多種類型的 cell 時,對象池裡也會混雜不同類型,復用時可能取到錯誤類型。解法是借助 reuseIdentifier——初始化時傳入一個標識字符串(通常用類名),複用時先按標識查找對應類型,找不到才新建。
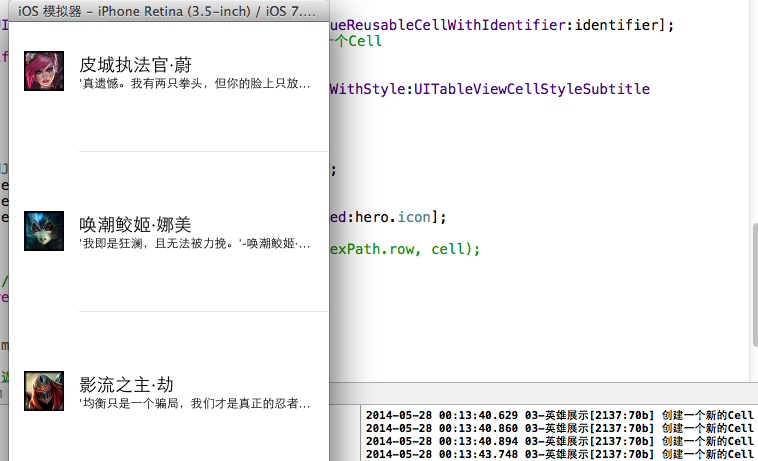
圖示說明:一個窗口能顯示三個 cell,整個程序只需創建 4 個該類型的 cell 即可。
五、cell 的優化代碼
- (UITableViewCell *)tableView:(UITableView *)tableView cellForRowAtIndexPath:(NSIndexPath *)indexPath
{
   // 定義靜態變量保存重用標識
   static NSString *identifier = @"hero";

   // 1. 先去緩存池查找符合條件的 Cell
   UITableViewCell *cell = [tableView dequeueReusableCellWithIdentifier:identifier];
   // 2. 若緩存池沒有,就自己創建
   if (cell == nil) {
       cell = [[UITableViewCell alloc] initWithStyle:UITableViewCellStyleSubtitle reuseIdentifier:identifier];
       NSLog(@"創建一個新的 Cell");
   }
   // 4. 給 cell 設置數據
   NJHero *hero = self.heros[indexPath.row];
   cell.textLabel.text = hero.name;
   cell.detailTextLabel.text = hero.intro;
   cell.imageView.image = [UIImage imageNamed:hero.icon];
   return cell;
}
緩存優化思路:先查緩存池,有則直接用;沒有則新建並打上唯一標記;最後填入數據。
注意:這裡保存重用標識的變量用 static 定義為靜態變量,而不推薦用宏(#define)。因為該變量只在當前作用域內部使用,用宏反而讓定義與使用位置分散、不利於閱讀;由於其值不變,也沒必要每次都重新開闢,用 static 恰到好處。
- 上一篇文章: iOS 數據安全:MD5 加密的原理、破解風險與加鹽改進實戰
- 下一篇文章: iOS UITableView 數據刷新實戰與使用要點全總結