
iOS Modal 模態切換詳解與主流 App UI 框架結構剖析
Modal 模態簡介
除了 push,Modal 是另一種常見的控制器切換方式。它的特點是:任何控制器都能以模態形式被展現出來;默認動畫是新控制器從屏幕最底部往上鑽出,直到完全蓋住之前的控制器。
一、代碼實操
新建項目,在 App 代理裡添加 window 與根控制器:
// YYAppDelegate.m
#import "YYAppDelegate.h"
#import "YYViewController.h"

@implementation YYAppDelegate
- (BOOL)application:(UIApplication *)application didFinishLaunchingWithOptions:(NSDictionary *)launchOptions
{
   // 1. 創建 window 並設置 frame
   self.window=[[UIWindow alloc]initWithFrame:[[UIScreen mainScreen] bounds]];
   self.window.backgroundColor=[UIColor blackColor];

   YYViewController *one=[[YYViewController alloc]init];
   self.window.rootViewController=one;

   // 3. 設為主窗口並顯示
   [self.window makeKeyAndVisible];
   return YES;
}
@end
在當前控制器中打開 modal 窗口:
// YYViewController.m
#import "YYViewController.h"
#import "YYtwoViewController.h"

@implementation YYViewController
- (void)viewDidLoad
{
   [super viewDidLoad];
}

- (IBAction)jump2two:(UIButton *)sender {
   // 創建新的 modal
   YYtwoViewController *two=[[YYtwoViewController alloc]init];
   // 用導航控制器包裝,讓模態窗口自帶導航欄以放置返回按鈕
   UINavigationController *nvc=[[UINavigationController alloc]initWithRootViewController:two];
   [self presentViewController:nvc animated:YES completion:^{
       NSLog(@"彈出一個模態窗口");
   }];
}
@end
在模態控制器中移除窗口:
// YYtwoViewController.m
#import "YYtwoViewController.h"

@implementation YYtwoViewController
- (void)viewDidLoad
{
   [super viewDidLoad];
   // 給導航條加一個返回按鈕
   self.navigationItem.leftBarButtonItem=[[UIBarButtonItem alloc]initWithTitle:@"返回" style:UIBarButtonItemStylePlain target:self action:@selector(change)];
}
-(void)change
{
   // 方式一:通過 navigationController 移除
   // [self.navigationController dismissViewControllerAnimated:YES completion:^{ NSLog(@"移除模態窗口"); }];

   // 方式二:模態展現的控制器及其子控制器都能讓自己消失
   [self dismissViewControllerAnimated:YES completion:^{
       NSLog(@"移除");
   }];
}
@end
二、關鍵注意點
(1)Modal 的特點:窗口彈出(從下往上)後,背後的視圖不可點擊;
(2)彈出控制器視圖,一次只能彈出一個;
(3)移除時,navigationController 的 dismiss 與 self 的 dismiss 兩種方式都可行;
(4)實戰經驗:控制器之間關係緊密時用導航控制器,關係鬆散時用 modal。
三、底層機制
(1)彈出之後,window 上只有一個子視圖;
(2)雖然眼前展示的是 twoView,但 window 的根控制器仍是 YYViewController,並沒有被替換,只是換了 window 上顯示的視圖;
(3)移除的視圖並未銷毀——因為控制器沒被銷毀,其對應的 view 自然也還在;
(4)模態完全顯示後,會有一個強引用持有 two;
(5)向下移除、調用 dismiss 讓窗口關閉後,modal 才會被釋放;
(6)想讓模態窗口擁有導航欄,最快的辦法就是給它套一層導航控制器;
(7)以模態形式展現的控制器,可以調用自己或子控制器讓自己消失。
四、模態之間的數據傳遞
項目結構與 storyboard:
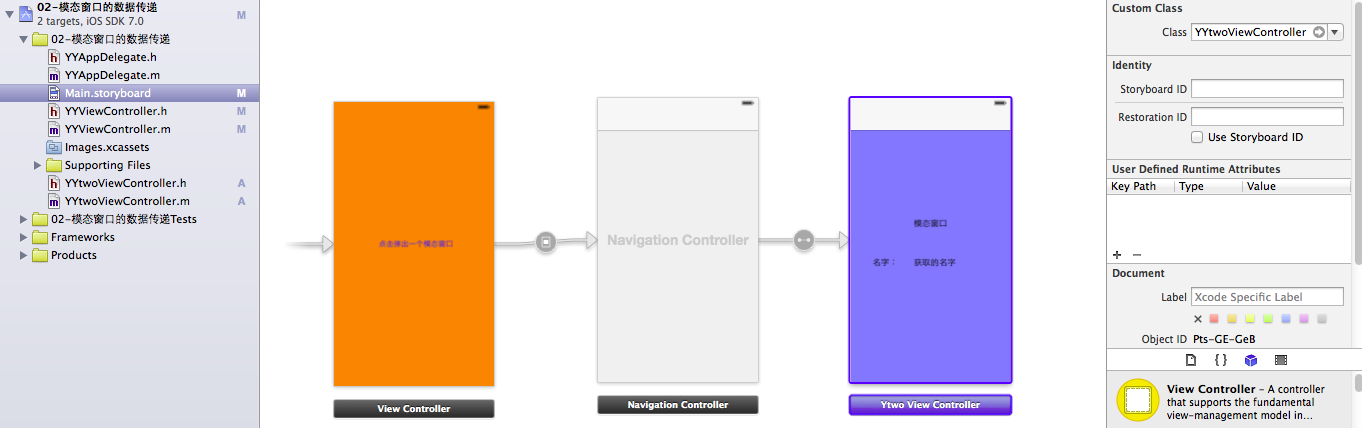
利用 segue 跳轉前會調用 prepareForSegue:sender:,在這裡就能把數據傳給即將彈出的模態窗口:
// YYViewController.m
-(void)prepareForSegue:(UIStoryboardSegue *)segue sender:(id)sender
{
   // 拿到目標控制器
   UINavigationController *nav=segue.destinationViewController;
   YYtwoViewController *two=(YYtwoViewController *)nav.topViewController;
   // 傳遞數據
   two.name=@"文頂頂";
}

// YYtwoViewController.h
@interface YYtwoViewController : UIViewController
@property(nonatomic,copy)NSString *name;
@end

// YYtwoViewController.m
- (void)viewDidLoad
{
   [super viewDidLoad];
   self.nametext.text=self.name;

   // 為導航欄添加返回按鈕
   self.navigationItem.leftBarButtonItem=[[UIBarButtonItem alloc]initWithTitle:@"返回" style:UIBarButtonItemStylePlain target:self action:@selector(black)];
}
-(void)black
{
   [self dismissViewControllerAnimated:YES completion:^{
       NSLog(@"成功移除!");
   }];
}
@end
五、App 主流 UI 框架結構
下面用主流的 UI 框架結構完成一個簡單的界面搭建。
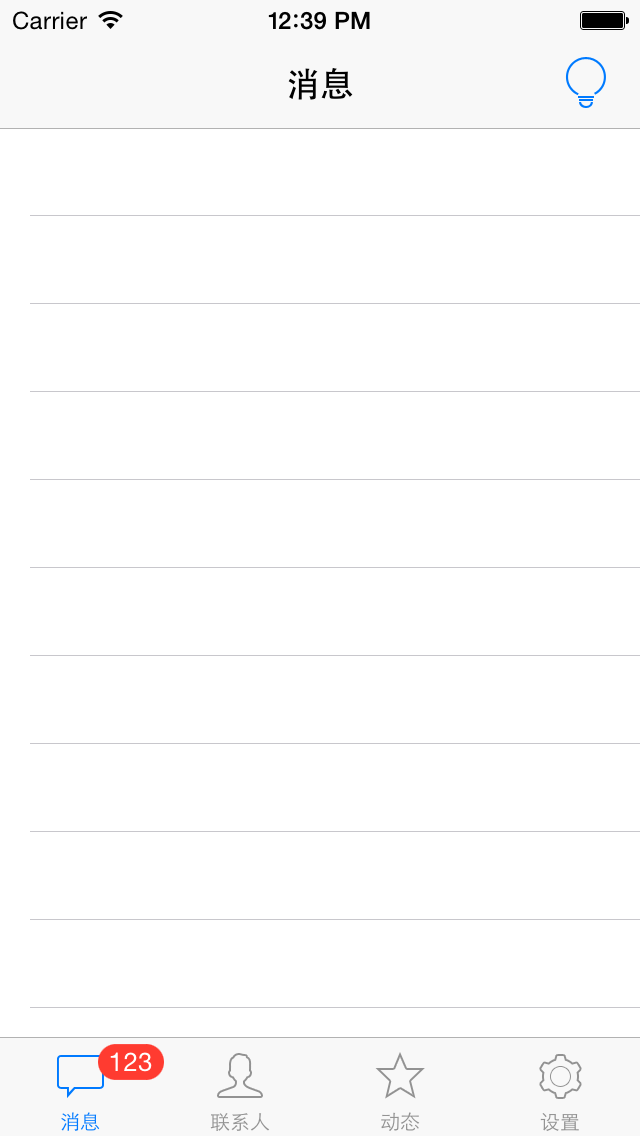
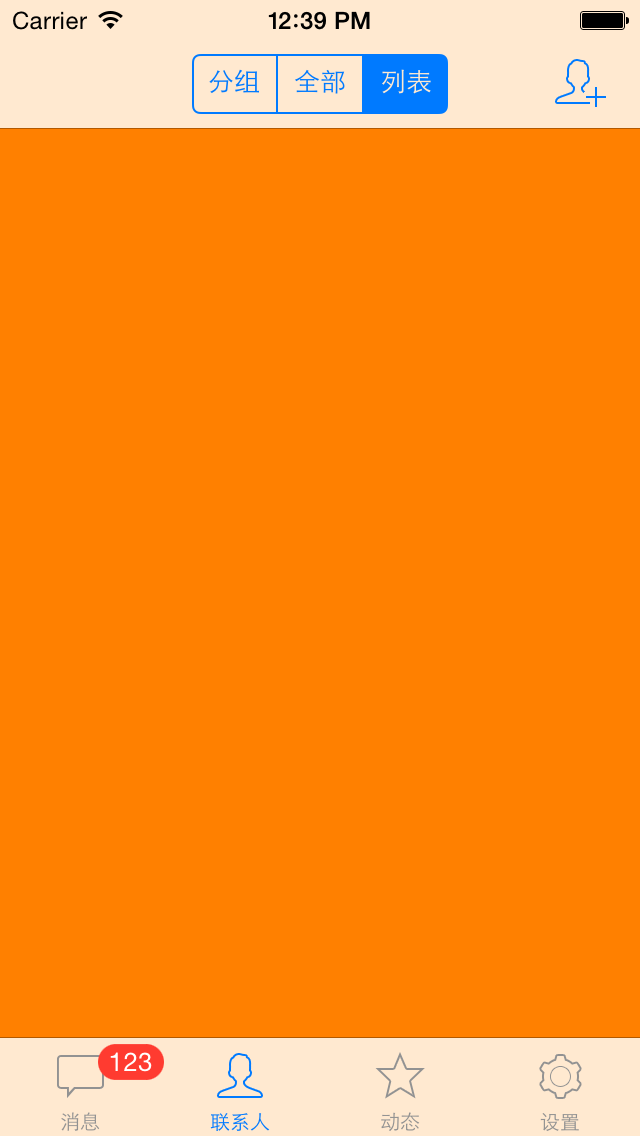
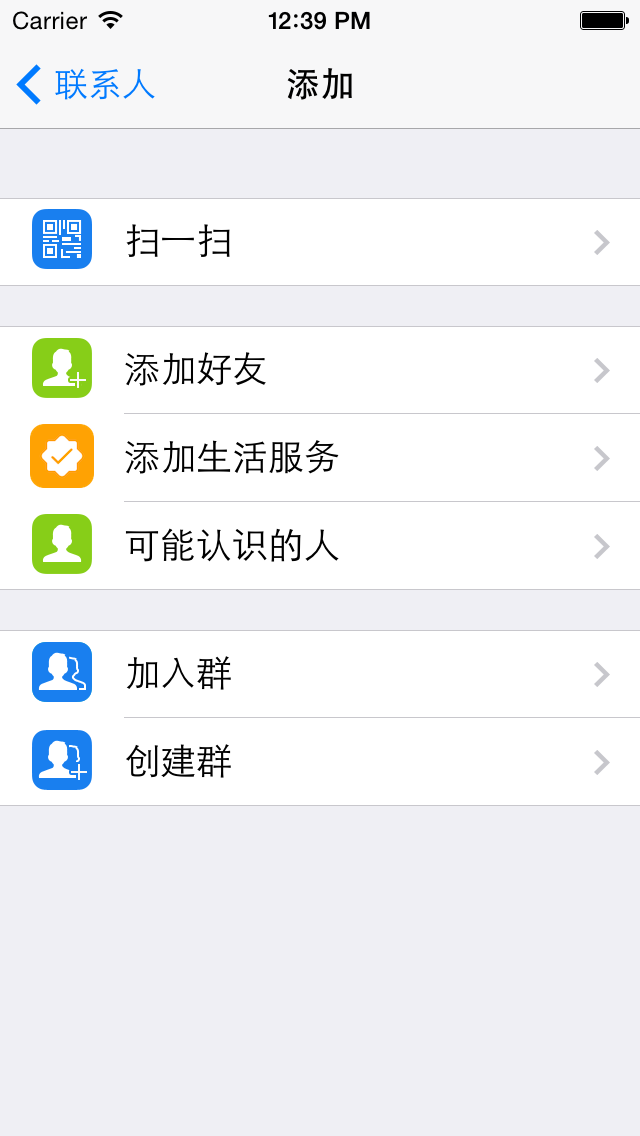
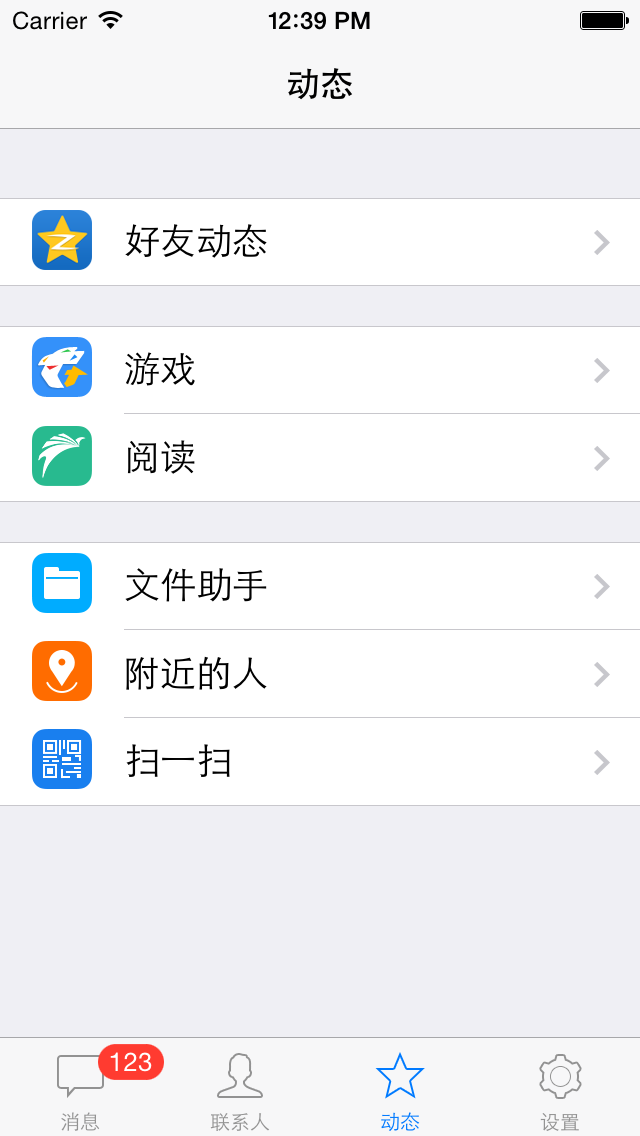
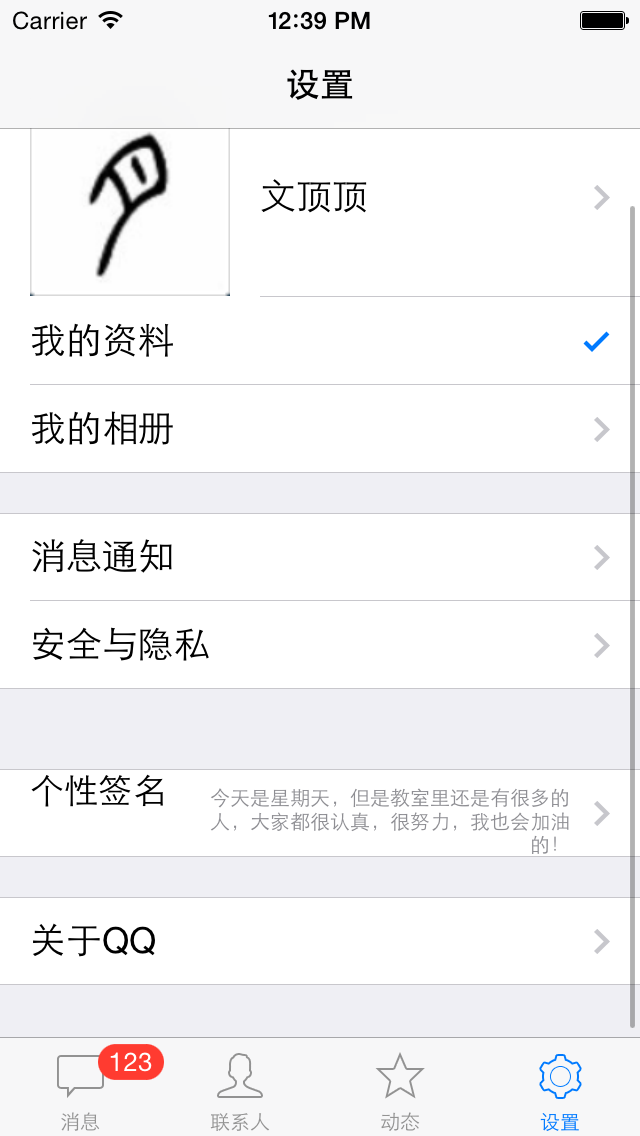
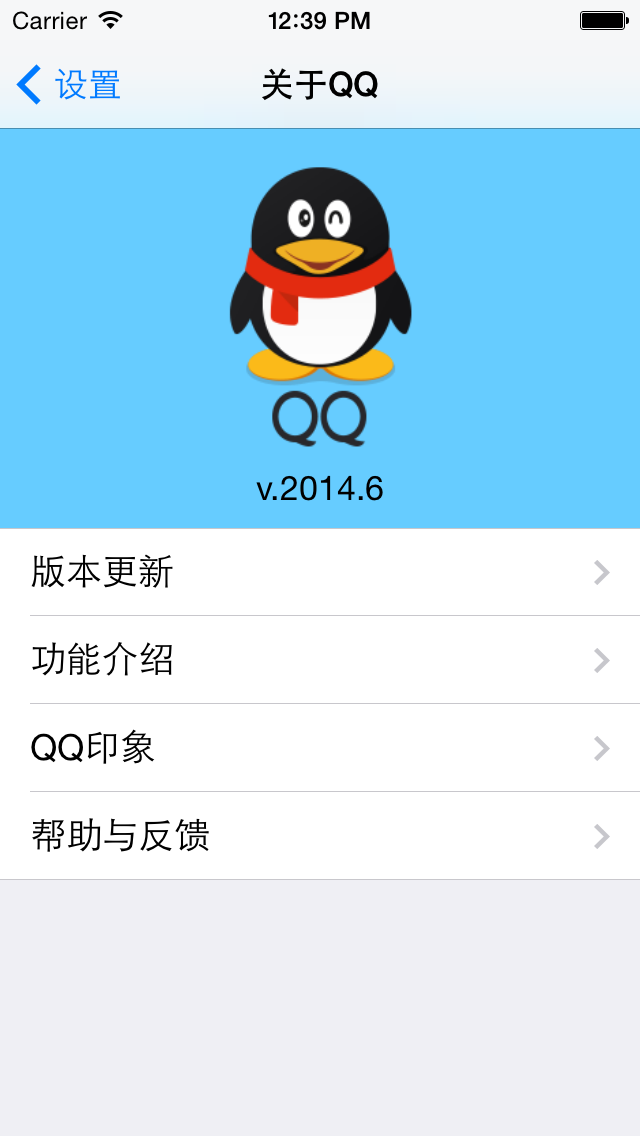
搭建步驟與注意點:
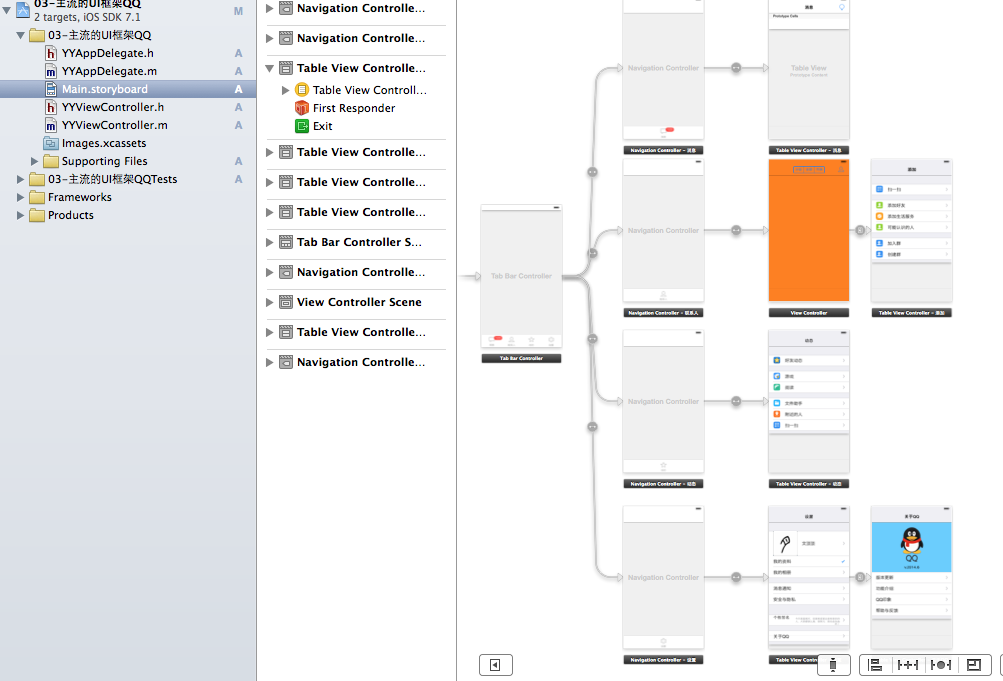
1. 新建項目,刪除原有控制器,添加 UITabBarController 作為管理控制器;
2. 對照界面完成搭建;
3. 注意點:
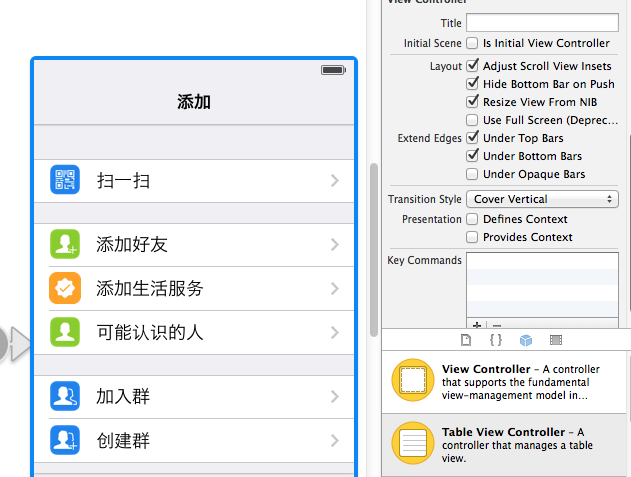
(1)隱藏工具條:通過 Hide Bottom Bar on Push 屬性控制,push 時想在哪個界面隱藏底部的 bar,就在哪個界面設置;
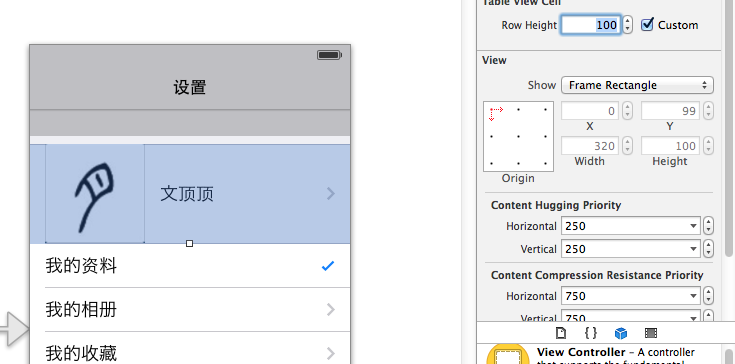
(2)cell 可以設置行高;
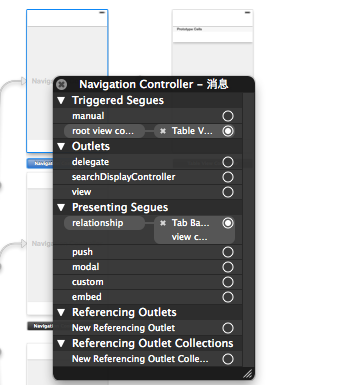
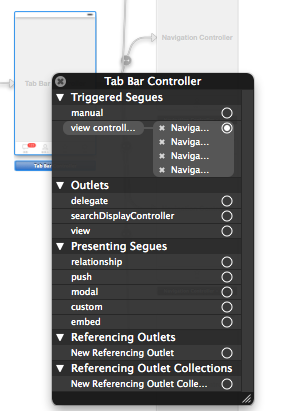
(3)記得完成各控件連線;
(4)上面直接用了靜態單元格,但實際開發中通常不這麼做;
(5)可在 tableview 中添加 headerView。
主流 App 的 UI 框架結構大致如下:
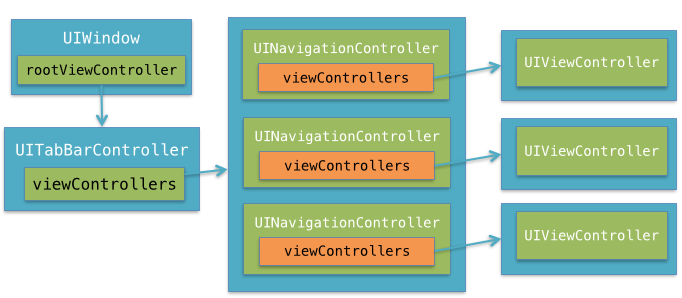
思考一個問題:UITabBarController 與導航控制器在結構中的位置能否互調?答案是——導航條上顯示什麼內容由棧頂控制器決定,整個結構中只有一個導航條,棧頂控制器就是 tabbar 控制器,因此兩者位置關係是固定的。
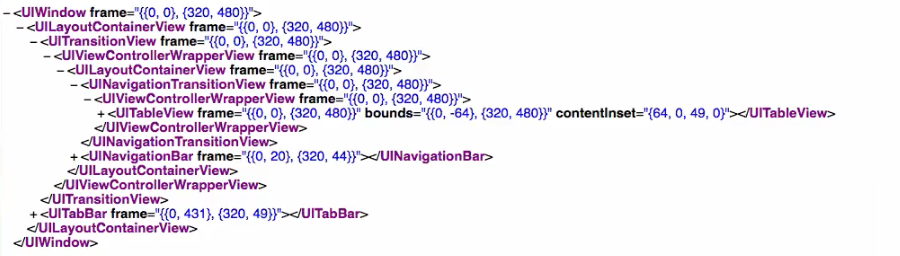
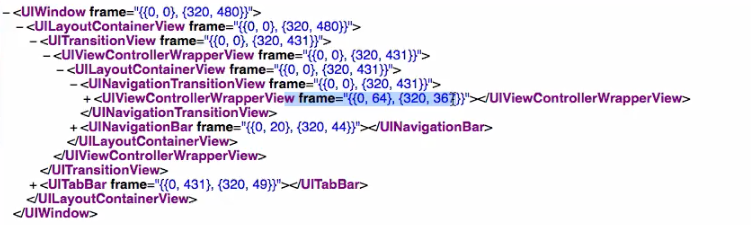
補充:iOS 7 全屏化設計之後,控制器的層次結構也發生了變化。對比打印 iOS 7 與 iOS 6 的控制器層次即可看出差異。
- 上一篇文章: iOS 開發技巧:引導用戶跳轉系統設置重新授予定位等權限
- 下一篇文章: iOS 多線程開發:透徹理解線程的狀態與生命週期