
iOS 表格視圖實戰:靜態與動態單元格的完整用法
靜態單元格:所見即所得的固定列表
先看效果——整個界面由一個 tableView 呈現,數據固定、幾乎不會變化。
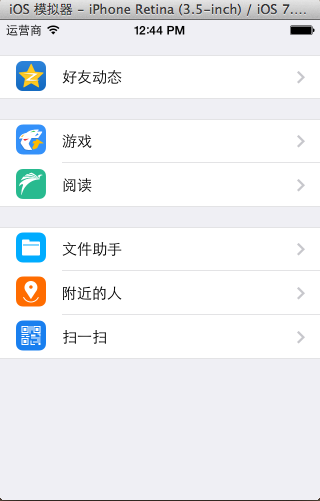
要實現這樣的界面,通常有三條路:
(1)純代碼硬寫死,返回固定組數、固定行數——這種「寫死」的做法強烈不推薦;
(2)把 plist 懶加載進來動態獲取,但觀察界面結構會發現需要模型嵌套,頗為繁瑣;
(3)使用 storyboard 提供的靜態單元格,所見即所得,最省事(不過實際開發中很少這麼用)。
一、用靜態單元格搭建界面
如果整個界面就是一個 tableView,最自然的做法是讓控制器直接繼承自 UITableViewController。
先修改主控制器的父類:

把 storyboard 中默認的 uiview 刪掉,直接拖一個 viewcontroller 進來。
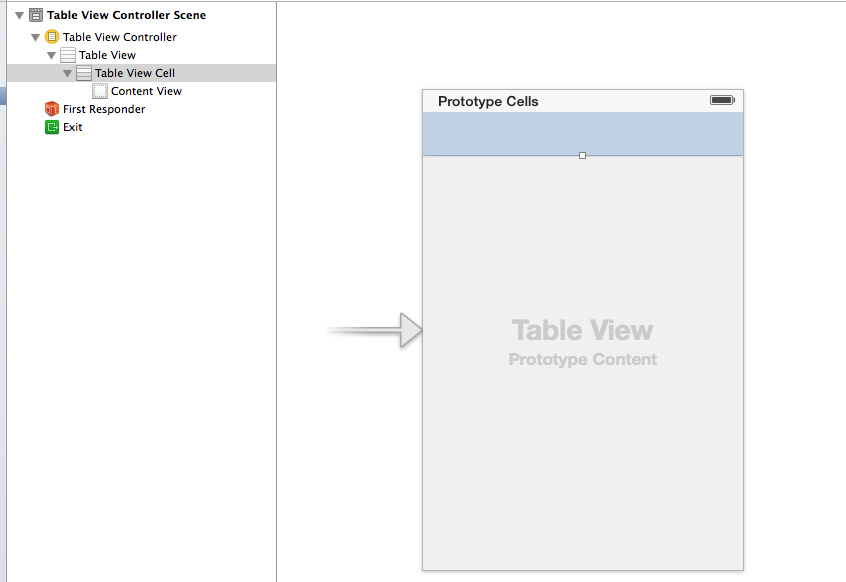
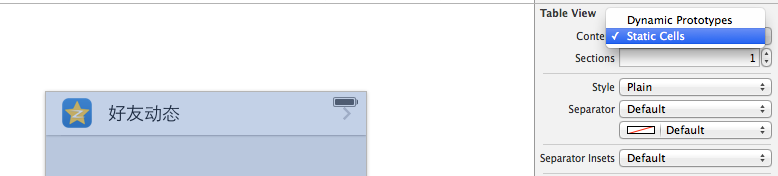
拖入的 viewcontroller 默認自帶一個 cell,此時它是動態的、看不見的。要讓它「現形」,需到屬性面板把 content 設為 Static Cell(靜態 cell)——這一步是關鍵。
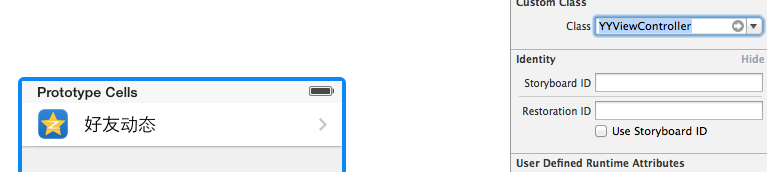
接著讓它與主控制器關聯起來。
然後就能依次設置每行的圖片與文字。設置標題有兩種方式:一是雙擊直接改,二是點開子控件 label 修改。
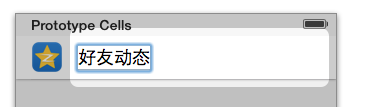

按界面需要設置輔助視圖:

設置組數:點擊 tableView,在屬性面板改 sections。
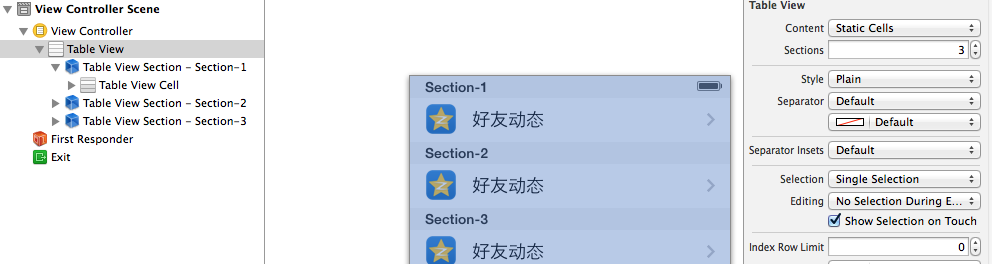
設置每組行數:
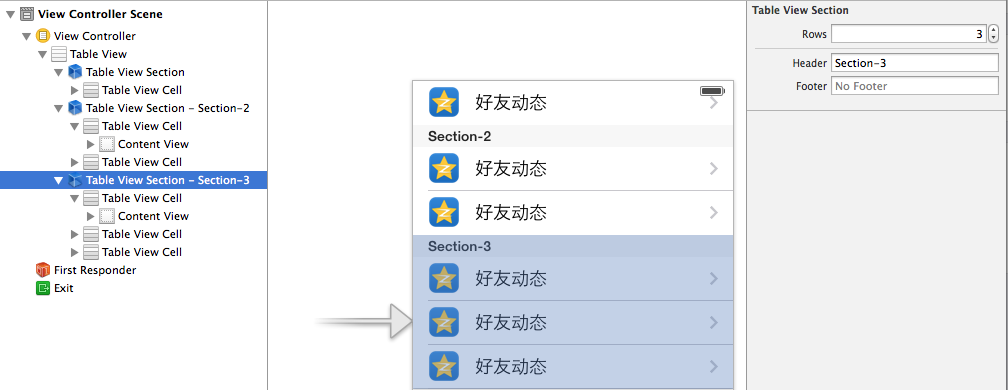
小技巧:如果某個 cell 幾乎千年不變,可以先寫好一組中的一行,再複製稍作修改。再次提醒:靜態單元格在實際開發中很少用到,這裡權當知識點了解。
二、動態單元格:搭建 App 應用管理界面
接下來用動態單元格完成一個更實用的「App 應用程序管理」界面。

本示例在 storyboard 中使用動態單元格完成。
項目文件結構與 plist:
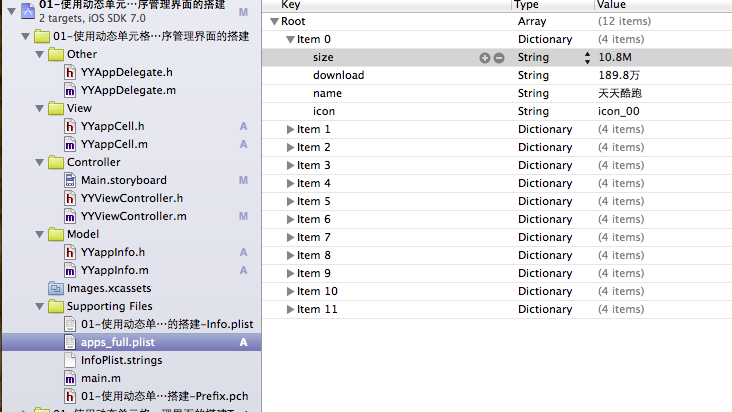
實現過程:
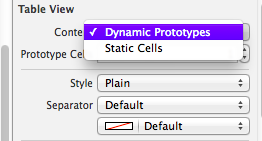
在 tableView 的屬性選擇器中選中「動態單元格」。也就是說,直接在 storyboard 裡定義 cell 樣式,並創建一個管理該 cell 的類,把子控件連線過去。

數據模型
// YYappInfo.h
#import <Foundation/Foundation.h>

@interface YYappInfo : NSObject
@property(nonatomic,copy)NSString *size;
@property(nonatomic,copy)NSString *download;
@property(nonatomic,copy)NSString *icon;
@property(nonatomic,copy)NSString *name;

-(instancetype)initWithDict:(NSDictionary *)dict;
+(instancetype)appInfoWithDict:(NSDictionary *)dict;
@end

// YYappInfo.m
#import "YYappInfo.h"

@implementation YYappInfo
-(instancetype)initWithDict:(NSDictionary *)dict
{
   if (self=[super init]) {
       // 使用 KVC 快速賦值
       [self setValuesForKeysWithDictionary:dict];
   }
   return self;
}
+(instancetype)appInfoWithDict:(NSDictionary *)dict
{
   return [[self alloc]initWithDict:dict];
}
@end
視圖部分
// YYappCell.h
#import <UIKit/UIKit.h>

@class YYappInfo,YYappCell;

@protocol YYappCellDelegate <NSObject>
-(void)btnDidClick:(YYappCell *)cell;
@end

@interface YYappCell : UITableViewCell
@property(nonatomic,strong)YYappInfo *app;
@property(nonatomic,strong)id <YYappCellDelegate> delegate;
@end

// YYappCell.m
#import "YYappCell.h"
#import "YYappInfo.h"

@interface YYappCell ()
@property (weak, nonatomic) IBOutlet UIImageView *appimg;
@property (weak, nonatomic) IBOutlet UILabel *apptitle;
@property (weak, nonatomic) IBOutlet UILabel *appdownload;
@property (weak, nonatomic) IBOutlet UIButton *appbtn;
@end

@implementation YYappCell
-(void)setApp:(YYappInfo *)app
{
   _app=app;
   self.apptitle.text=_app.name;
   self.appdownload.text=[NSString stringWithFormat:@"大小 %@ | 下載量 %@次",_app.size,_app.download];
   self.appimg.image=[UIImage imageNamed:_app.icon];
}

#pragma mark- 完成按鈕點擊事件
- (IBAction)btnOnclick:(UIButton *)sender
{
   // 按鈕點擊後置為不可用
   sender.enabled=NO;

   // 通知代理,播放下載完成的提示動畫
   if ([self.delegate respondsToSelector:@selector(btnDidClick:)]) {
       [self.delegate btnDidClick:self];
   }
}
@end
主控制器
// YYViewController.m
#import "YYViewController.h"
#import "YYappInfo.h"
#import "YYappCell.h"

@interface YYViewController ()<UITableViewDataSource,YYappCellDelegate>
@property(nonatomic,strong)NSArray *apps;
@property (strong, nonatomic) IBOutlet UITableView *tableview;
@end

@implementation YYViewController
- (void)viewDidLoad
{
   [super viewDidLoad];
}

#pragma mark- 懶加載加載 plist 數據
-(NSArray *)apps
{
   if (_apps==Nil) {
       NSString *fullpath=[[NSBundle mainBundle]pathForResource:@"apps_full.plist" ofType:Nil];
       NSArray *arrayM=[NSArray arrayWithContentsOfFile:fullpath];

       NSMutableArray *modles=[NSMutableArray arrayWithCapacity:arrayM.count];
       for (NSDictionary *dict in arrayM) {
           YYappInfo *appinfo=[YYappInfo appInfoWithDict:dict];
           [modles addObject:appinfo];
       }
       _apps=[modles copy];
   }
   return _apps;
}

#pragma mark- 數據源方法
-(NSInteger)numberOfSectionsInTableView:(UITableView *)tableView
{
   return 1;
}
-(NSInteger)tableView:(UITableView *)tableView numberOfRowsInSection:(NSInteger)section
{
   return self.apps.count;
}
-(UITableViewCell *)tableView:(UITableView *)tableView cellForRowAtIndexPath:(NSIndexPath *)indexPath
{
   static NSString *identifier=@"app";
   YYappCell *cell=[tableView dequeueReusableCellWithIdentifier:identifier];
   YYappInfo *appinfo=self.apps[indexPath.row];
   cell.delegate=self;
   cell.app=appinfo;
   return cell;
}

#pragma mark- 實現代理方法
-(void)btnDidClick:(YYappCell *)cell
{
   YYappInfo *app=cell.app;
   NSLog(@"daili");
   UILabel *lab=[[UILabel alloc]init];
   lab.frame=CGRectMake(60, 300, 200, 20);
   lab.text=[NSString stringWithFormat:@"%@已經下載完成",app.name];
   [lab setBackgroundColor:[UIColor grayColor]];
   [self.view addSubview:lab];
   lab.alpha=1.0;

   // 淡出動畫
   [UIView animateWithDuration:2.0 animations:^{
       lab.alpha=0.0;
   } completion:^(BOOL finished) {
       [lab removeFromSuperview];
   }];
}

#pragma mark- 隱藏狀態欄
-(BOOL)prefersStatusBarHidden
{
   return YES;
}
@end
一點補充
程序能通過標識符取出對應的 cell,是因為在 storyboard 裡已經給這個 cell 打上了「app」的重用標識。dequeueReusableCellWithIdentifier: 會拿這個字符串去緩存池找可復用的 cell,找不到才新建,這正是 cell 復用機制的入口。
