
iOS plist 檔案實戰:建立、讀取與寫入使用者設定
編輯:iOS 相關教學
plist(Property List,屬性列表)是一種用來儲存序列化物件的值檔案,副檔名為 .plist,內容為 XML 格式。它最常被用來存放使用者設定,也可以用來承載 bundle 的相關資訊。本文用一個小專案把讀取流程完整走過。
一、建立專案與認識既有 plist
建立名為 Plistdemo 的專案後,可以在專案裡找到既有的 plist 檔:
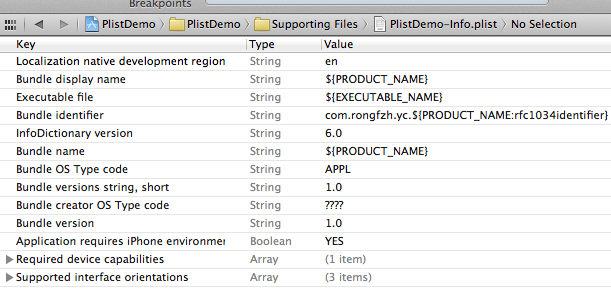
在編輯器中它會以表格形式呈現;按右鍵選擇以原始碼開啟,就能看到 XML 結構。
二、新增自己的 plist
用 Command + N 或 File → New → New File,選擇 Mac OS X 下的 Property List:
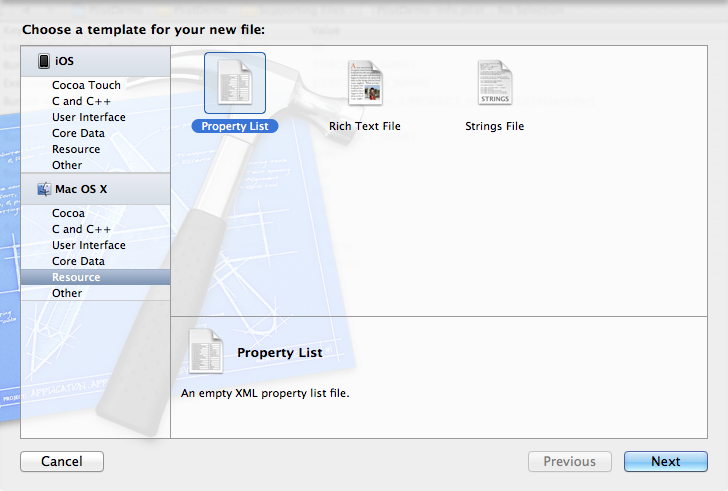
檔名取為 customInfo,Group 選 Supporting Files。
三、填入測試資料
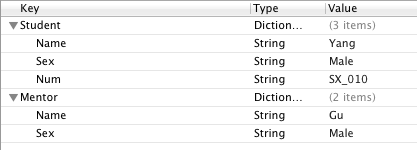
根節點 Type 選 Dictionary,以原始碼檢視如下:
<?xml version="1.0" encoding="UTF-8"?>
<!DOCTYPE plist PUBLIC "-//Apple//DTD PLIST 1.0//EN" "https://www.apple.com/DTDs/PropertyList-1.0.dtd">
<plist version="1.0">
<dict>
    <key>Student</key>
    <dict>
        <key>Name</key><string>Yang</string>
        <key>Sex</key><string>Male</string>
        <key>Num</key><string>SX_010</string>
    </dict>
    <key>Mentor</key>
    <dict>
        <key>Name</key><string>Gu</string>
        <key>Sex</key><string>Male</string>
    </dict>
</dict>
</plist>
四、佈置介面
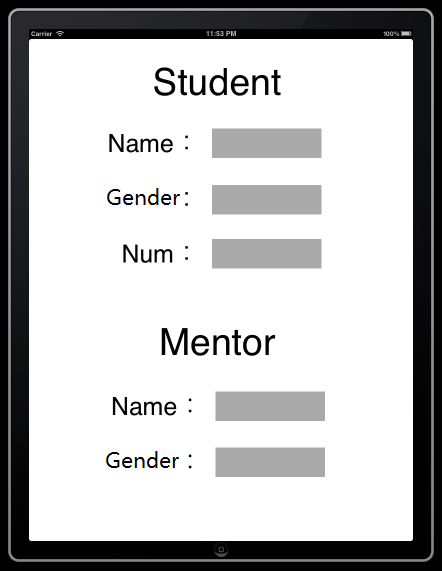
開啟 BIDViewController.xib,拖入幾個 Label 並排好版面:
五、映射 Outlets
把五個 Label 以 Outlet 連到 BIDViewController.h,名稱依序為 stuName、stuSex、stuNum、mtName、mtSex。
六、讀取並填入畫面
在 viewDidLoad 中,先取得 plist 路徑,載入為 NSDictionary,再依 key 分層取值:
// 讀取 customInfo.plist
NSString *plistPath = [[NSBundle mainBundle] pathForResource:@"customInfo" ofType:@"plist"];
NSDictionary *dictionary = [[NSDictionary alloc] initWithContentsOfFile:plistPath];

// 學生資訊
NSDictionary *tmpInfo = [dictionary objectForKey:@"Student"];
self.stuName.text = [NSString stringWithFormat:@"%@", [tmpInfo objectForKey:@"Name"]];
self.stuSex.text  = [NSString stringWithFormat:@"%@", [tmpInfo objectForKey:@"Sex"]];
self.stuNum.text  = [NSString stringWithFormat:@"%@", [tmpInfo objectForKey:@"Num"]];

// 導師資訊
tmpInfo = [dictionary objectForKey:@"Mentor"];
self.mtName.text = [NSString stringWithFormat:@"%@", [tmpInfo objectForKey:@"Name"]];
self.mtSex.text  = [NSString stringWithFormat:@"%@", [tmpInfo objectForKey:@"Sex"]];
七、執行結果
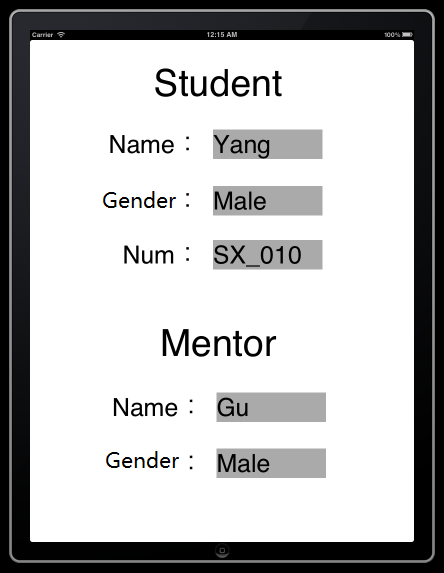
補充一個重點:放在 bundle 裡的 plist 是唯讀的。若需要儲存會變動的使用者設定,應把檔案複製到 Documents 或 Library 目錄後再寫入,例如用 writeToFile:atomically:;簡單的設定值也可以直接交給 NSUserDefaults 處理。