
iOS 導航欄 UINavigationBar 與工具欄 UIToolbar 重點整理
編輯:iOS 相關教學
日常開發裡我們習慣直接用 UINavigationController,但其實 UINavigationBar 完全可以脫離導航控制器單獨使用;UIToolbar 也一樣。這兩個組件都繼承自 UIView,可定制程度遠比多數人以為的高。
一、UINavigationBar
1. 單獨建立導航欄
既然它是 UIView 的子類,建立方式就和普通視圖一樣:
UINavigationBar *bar = [[UINavigationBar alloc] initWithFrame:CGRectMake(0, 0, 320, 80)];
[self.view addSubview:bar];
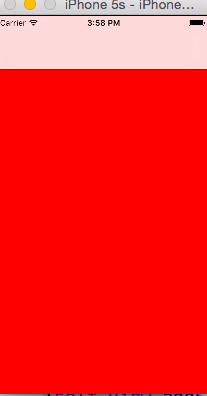
2. 風格設置
從 iOS 6 起,導航欄預設是半透明的,上圖中白色導航欄下方隱約透出的紅色就是這個效果。風格由 barStyle 控制:
@property(nonatomic,assign) UIBarStyle barStyle;

typedef NS_ENUM(NSInteger, UIBarStyle) {
    UIBarStyleDefault = 0,   // 預設(淺色)
    UIBarStyleBlack   = 1,   // 深色
};
其餘樣式多已棄用,實際可用的就是這兩個。
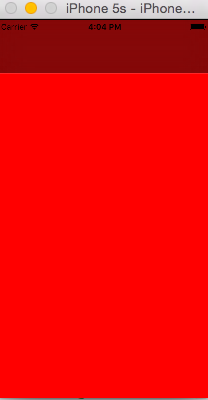
3. 常用屬性與方法
控制是否半透明,設為 NO 即不透明,預設 YES:
@property(nonatomic,assign,getter=isTranslucent) BOOL translucent;
影響返回按鈕等元素的圖案色與文字色:
@property(null_resettable, nonatomic,strong) UIColor *tintColor;

設置導航欄背景色,注意一旦設了這個屬性,半透明效果就失效了:
@property(nullable, nonatomic,strong) UIColor *barTintColor;
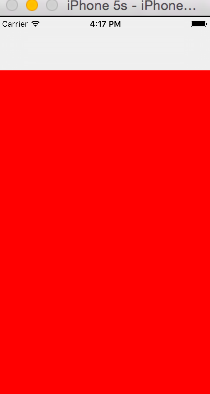
設置與讀取背景圖片。預設背景圖不做縮放,所以圖片尺寸必須和導航欄匹配;barMetrics 用來區分豎屏與橫屏:
- (void)setBackgroundImage:(nullable UIImage *)backgroundImage forBarMetrics:(UIBarMetrics)barMetrics;
- (nullable UIImage *)backgroundImageForBarMetrics:(UIBarMetrics)barMetrics;

typedef NS_ENUM(NSInteger, UIBarMetrics) {
    UIBarMetricsDefault,   // 正常豎屏
    UIBarMetricsCompact,   // 橫屏
};

// 陰影圖片
@property(nullable, nonatomic,strong) UIImage *shadowImage;
// 標題文字屬性
@property(nullable,nonatomic,copy) NSDictionary<NSString *,id> *titleTextAttributes;
標題字體屬性直接影響中間那行標題:
bar.titleTextAttributes = @{NSForegroundColorAttributeName:[UIColor redColor]};
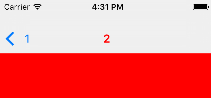
標題的垂直位置同樣可以微調:
- (void)setTitleVerticalPositionAdjustment:(CGFloat)adjustment forBarMetrics:(UIBarMetrics)barMetrics;
- (CGFloat)titleVerticalPositionAdjustmentForBarMetrics:(UIBarMetrics)barMetrics;
左側返回按鈕預設是一個箭頭,想換掉可以用這兩個屬性:
@property(nullable,nonatomic,strong) UIImage *backIndicatorImage;
@property(nullable,nonatomic,strong) UIImage *backIndicatorTransitionMaskImage;
4. item 的 push 與 pop
導航欄不只是顯示標題,它內部維護了一個堆棧,每一層標題抽象為 UINavigationItem:
// 入棧,原棧頂會被推到左側變成返回按鈕,可帶動畫
- (void)pushNavigationItem:(UINavigationItem *)item animated:(BOOL)animated;
// 出棧
- (nullable UINavigationItem *)popNavigationItemAnimated:(BOOL)animated;
// 棧頂
@property(nullable, nonatomic,readonly,strong) UINavigationItem *topItem;
// 次頂,通常就是被推到左側的那個
@property(nullable, nonatomic,readonly,strong) UINavigationItem *backItem;
// 整個堆棧
@property(nullable,nonatomic,copy) NSArray<UINavigationItem *> *items;
// 整體替換
- (void)setItems:(nullable NSArray<UINavigationItem *> *)items animated:(BOOL)animated;
5. UINavigationBarDelegate
@property(nullable,nonatomic,weak) id<UINavigationBarDelegate> delegate;
透過代理可以攔截 push/pop:
// 即將 push,返回 NO 則攔下
- (BOOL)navigationBar:(UINavigationBar *)navigationBar shouldPushItem:(UINavigationItem *)item;
// push 完成
- (void)navigationBar:(UINavigationBar *)navigationBar didPushItem:(UINavigationItem *)item;
// 即將 pop,返回 NO 則攔下
- (BOOL)navigationBar:(UINavigationBar *)navigationBar shouldPopItem:(UINavigationItem *)item;
// pop 完成
- (void)navigationBar:(UINavigationBar *)navigationBar didPopItem:(UINavigationItem *)item;
二、UIToolbar
導航欄在上,工具欄在下,用來放一組操作按鈕:
self.view.backgroundColor = [UIColor grayColor];
UIToolbar *tool = [[UIToolbar alloc] initWithFrame:CGRectMake(0, self.view.frame.size.height - 40, 320, 40)];
[self.view addSubview:tool];
它的 API 和導航欄高度相似,這裡集中列一下:
// 風格,同樣只有黑白兩種
@property(nonatomic) UIBarStyle barStyle;
// 按鈕數組
@property(nullable,nonatomic,copy) NSArray<UIBarButtonItem *> *items;
// 是否半透明
@property(nonatomic,assign,getter=isTranslucent) BOOL translucent;
// 設置按鈕
- (void)setItems:(nullable NSArray<UIBarButtonItem *> *)items animated:(BOOL)animated;
// 元素顏色
@property(null_resettable, nonatomic,strong) UIColor *tintColor;
// 背景色
@property(nullable, nonatomic,strong) UIColor *barTintColor;
// 背景圖與陰影圖(需指定位置與 metrics)
- (void)setBackgroundImage:(nullable UIImage *)backgroundImage forToolbarPosition:(UIBarPosition)topOrBottom barMetrics:(UIBarMetrics)barMetrics;
- (nullable UIImage *)backgroundImageForToolbarPosition:(UIBarPosition)topOrBottom barMetrics:(UIBarMetrics)barMetrics;
- (void)setShadowImage:(nullable UIImage *)shadowImage forToolbarPosition:(UIBarPosition)topOrBottom;
- (nullable UIImage *)shadowImageForToolbarPosition:(UIBarPosition)topOrBottom;
實務上有一點值得記住:工具欄上的元素必須是 UIBarButtonItem,不能直接塞 UIButton。若要用自定義樣式,做法是建立 UIBarButtonItem 時傳入自訂 view。另外,如果界面裡同時出現導航欄和工具欄,建議交給系統的 edgesForExtendedLayout 與 extendedLayoutIncludesOpaqueBars 來協調內容內縮,自己手算 Y 值很容易在異形螢幕上出錯。