
Core Animation 入門:動手玩 CALayer
一、CALayer 是什麼
CALayer 可以說是 Core Animation 體系裡最樸素也最基礎的一塊積木:它負責在螢幕上畫出一塊矩形區域的內容。很多人第一次看到這個定義,會下意識覺得「這不就是 UIView 嗎」?兩者確實長得很像,但分工並不相同。
在 iOS 中,每一個 UIView 背後都預設掛著一個 CALayer,也就是所谓的根層(root layer)。UIView 之所以能在螢幕上呈現內容,正是因為它把繪製工作委託給了這個 layer。反過來說,CALayer 才是真正參與渲染的那一層,UIView 更像是它的管理者與事件入口。
取得這個 layer 非常簡單:
CALayer *myLayer = myView.layer;
拿到 layer 之後,你能調整的顯示效果相當豐富,常見的有:
- 層的大小與位置(frame、bounds)
- 層的背景顏色
- 層的內容,例如圖片或 Core Graphics 繪製結果
- 圓角半徑
- 陰影的顏色、半徑、偏移與透明度
- 邊框、透明度等等
二、準備工作
新建專案時,預設並不會引入 QuartzCore 這個 framework。由於 CALayer 定義在其中,因此必須先手動添加,並在需要時引入標頭檔:
#import <QuartzCore/QuartzCore.h>
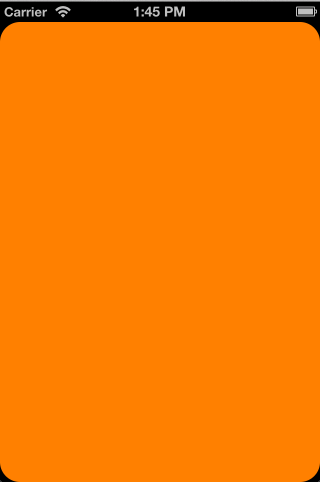
接著做個小實驗:把根層的背景色改成橘色,圓角半徑設為 20。
self.view.layer.backgroundColor = [UIColor orangeColor].CGColor;
self.view.layer.cornerRadius = 20.0;
三、層與子層
除了根層,我們也可以自己建立獨立的 layer 實例:
CALayer *sublayer = [CALayer layer];
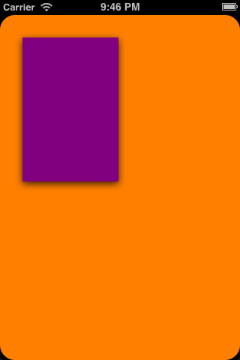
接著為它設定各項屬性,順序大致如下:背景色、陰影偏移量、陰影半徑、陰影顏色、陰影透明度、frame,最後把它加入 view 的根層。
CALayer *sublayer = [CALayer layer];
sublayer.backgroundColor = [UIColor purpleColor].CGColor;
sublayer.shadowOffset = CGSizeMake(0, 3);
sublayer.shadowRadius = 5.0;
sublayer.shadowColor = [UIColor blackColor].CGColor;
sublayer.shadowOpacity = 0.8;
sublayer.frame = CGRectMake(30, 30, 128, 192);
[self.view.layer addSublayer:sublayer];
執行後可以看到一塊帶有陰影的紫色方塊。
四、加入圖片內容與圓角
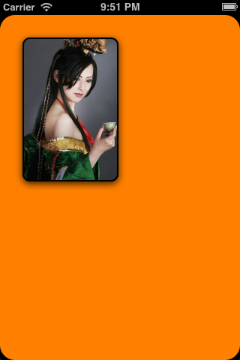
如果希望層裡顯示的不是純色,而是一張圖片,可以透過 contents 屬性塞入 CGImage。這裡的關鍵有幾個:建立一個專門放圖片的 imageLayer、設定 cornerRadius、把 contents 指向 UIImage 的 CGImage,以及用 masksToBounds 讓子層被裁切在圓角範圍內。
CALayer *sublayer = [CALayer layer];
sublayer.backgroundColor = [UIColor purpleColor].CGColor;
sublayer.shadowOffset = CGSizeMake(0, 3);
sublayer.shadowRadius = 5.0;
sublayer.shadowColor = [UIColor blackColor].CGColor;
sublayer.shadowOpacity = 0.8;
sublayer.frame = CGRectMake(30, 30, 128, 192);
sublayer.borderColor = [UIColor blackColor].CGColor;
sublayer.borderWidth = 2.0;
sublayer.cornerRadius = 10.0;
[self.view.layer addSublayer:sublayer];

CALayer *imageLayer = [CALayer layer];
imageLayer.frame = sublayer.bounds;
imageLayer.cornerRadius = 10.0;
imageLayer.contents = (id)[UIImage imageNamed:@"snaguosha.png"].CGImage;
imageLayer.masksToBounds = YES;
[sublayer addSublayer:imageLayer];
效果如下,加上圓角之後確實耐看了不少。
五、用 Core Graphics 自繪內容
不想依賴圖片素材,也可以自己畫。做法是讓 view controller 實作 drawLayer:inContext: 方法,並把該 layer 的 delegate 指向自己。
CALayer *customDrawn = [CALayer layer];
customDrawn.delegate = self;
customDrawn.backgroundColor = [UIColor greenColor].CGColor;
customDrawn.frame = CGRectMake(30, 250, 280, 200);
customDrawn.shadowOffset = CGSizeMake(0, 3);
customDrawn.shadowRadius = 5.0;
customDrawn.shadowColor = [UIColor blackColor].CGColor;
customDrawn.shadowOpacity = 0.8;
customDrawn.cornerRadius = 10.0;
customDrawn.borderColor = [UIColor blackColor].CGColor;
customDrawn.borderWidth = 2.0;
customDrawn.masksToBounds = YES;
[self.view.layer addSublayer:customDrawn];
而在 view controller 內部,我們實作真正的繪製邏輯。以下範例用「圖案填充(pattern)」畫出帶有規則質地的背景:
static inline double radians (double degrees) { return degrees * M_PI / 180; }

void MyDrawColoredPattern (void *info, CGContextRef context) {
    CGColorRef dotColor = [UIColor colorWithHue:0 saturation:0 brightness:0.07 alpha:1.0].CGColor;
    CGColorRef shadowColor = [UIColor colorWithRed:1 green:1 blue:1 alpha:0.1].CGColor;

    CGContextSetFillColorWithColor(context, dotColor);
    CGContextSetShadowWithColor(context, CGSizeMake(0, 1), 1, shadowColor);

    CGContextAddArc(context, 3, 3, 4, 0, radians(360), 0);
    CGContextFillPath(context);

    CGContextAddArc(context, 16, 16, 4, 0, radians(360), 0);
    CGContextFillPath(context);
}

- (void)drawLayer:(CALayer *)layer inContext:(CGContextRef)context {
    CGColorRef bgColor = [UIColor colorWithHue:0 saturation:0 brightness:0.15 alpha:1.0].CGColor;
    CGContextSetFillColorWithColor(context, bgColor);
    CGContextFillRect(context, layer.bounds);

    static const CGPatternCallbacks callbacks = { 0, &MyDrawColoredPattern, NULL };

    CGContextSaveGState(context);
    CGColorSpaceRef patternSpace = CGColorSpaceCreatePattern(NULL);
    CGContextSetFillColorSpace(context, patternSpace);
    CGColorSpaceRelease(patternSpace);

    CGPatternRef pattern = CGPatternCreate(NULL,
        layer.bounds,
        CGAffineTransformIdentity,
        24, 24,
        kCGPatternTilingConstantSpacing,
        true,
        &callbacks);
    CGFloat alpha = 1.0;
    CGContextSetFillPattern(context, pattern, &alpha);
    CGPatternRelease(pattern);
    CGContextFillRect(context, layer.bounds);
    CGContextRestoreGState(context);
}
於是 customDrawn 這個層上就多了一張具有規則紋理的底圖。
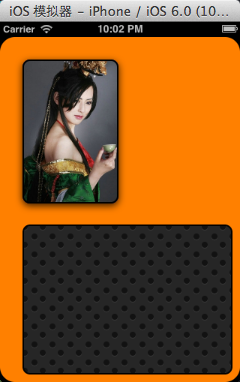
是不是有點像 Mac 上按下 F12 時出現的那種桌面背景?