
iOS 開發系列:讓你的應用動起來(CALayer 與 Core Animation 全解)
iOS 裡動畫無所不在,而實現它們的過程並不像想像中複雜。這篇從最底層的 CALayer 講起,一路帶到 Core Animation 的四類動畫,最後說明 UIView 是如何把這些細節優雅地封裝起來。讀完之後,你會發現很多原本「想做但沒頭緒」的效果,在 iOS 上其實只要幾行。
一、CALayer
1.1 它是什麼
CALayer 位於 QuartzCore 框架中,這是個跨平台框架,iOS 與 Mac OS X 都能用。Core Animation 的本質,就是把圖層內容轉成位圖交給硬體合成,所以想玩動畫,得先熟悉 CALayer。
其實用 Quartz 2D 呼叫 drawRect: 繪圖時,畫的正是 view 的 layer。只是那個過程被 UIKit 藏起來了。而在 Core Animation 中,我們操作的對象直接變成 CALayer。
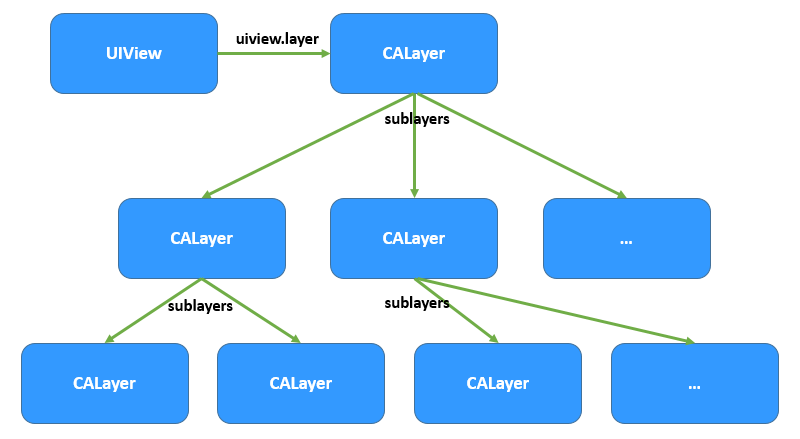
每個 UIView 都有一個 layer 屬性作為根圖層,根圖層上還能放子圖層;你在畫面上看到的一切,都存在圖層裡。
1.2 常用屬性
CALayer 的設計目標是內容呈現與動畫,它本身不在 UIKit 中,因此無法回應事件。也因為動畫是首要考量,許多屬性一改動就會產生動畫效果,這類被稱為「隱式動畫屬性」。不過 UIView 的根圖層是例外:它多半扮演容器,若屬性變動就產生動畫,會直接影響所有子圖層,因此根圖層的屬性變更不會有動畫。
- position:圖層中心點位置,相當於 UIView 的 center(支援隱式動畫)
- anchorPoint:錨點,與 position 重合,範圍 0~1(支援)
- bounds:圖層尺寸(支援)
- frame:尺寸與位置,不支援隱式動畫,所以實務上少用,通常以 bounds + position 取代
- backgroundColor / borderColor / borderWidth:背景與邊框(支援)
- cornerRadius:圓角半徑(支援)
- contents:圖層顯示內容,可直接放 CGImage(支援)
- contentsRect:內容的顯示範圍(支援)
- opacity:透明度,等同 view 的 alpha(支援)
- hidden / doubleSided / masksToBounds:隱藏、背面顯示、子圖層裁切(支援)
- shadowColor / shadowOffset / shadowOpacity / shadowPath / shadowRadius:陰影相關(支援,注意 shadowOpacity 預設為 0,要看到陰影必須設定它)
- transform / sublayerTransform / sublayers:形變與子圖層(支援)
三個容易搞混的對照:透明度用 opacity 而非 alpha,中心點用 position 而非 center,而 frame 因為不支援動畫而盡量避開。
1.3 搞懂 anchorPoint
假設有個圖層尺寸 100x100,中心點在 (50,50),對應 frame 為 (0,0,100,100)。anchorPoint 預設 (0.5,0.5),正好與中心點重合;改為 (0,0) 時錨點移到左上角,但 position 不變,圖層便向右下移動;再改為 (1,1),錨點落到右下角,圖層又往另一側偏移。
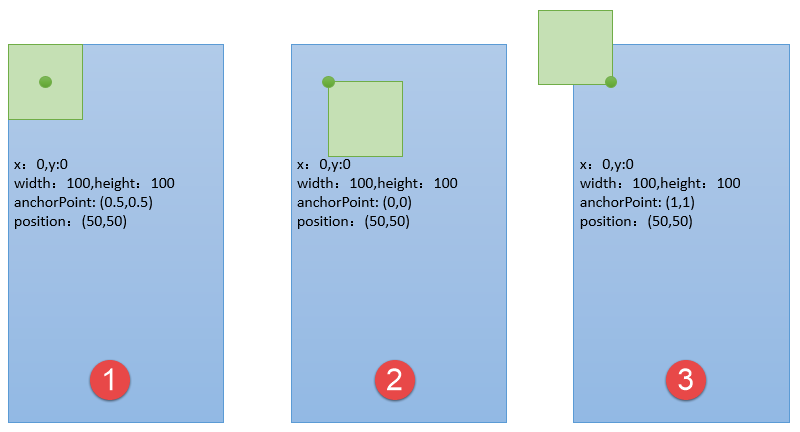
關鍵一句話:錨點永遠與 position 重合,所以在中心點固定的前提下,調整 anchorPoint 就能改變圖層的視覺位置。而所有形變(旋轉、縮放)也都是以錨點為基準點進行的。
下面這個例子建立一個圓形圖層,點擊時放大並移動:
#define WIDTH 50

- (void)drawMyLayer {
    CGSize size = [UIScreen mainScreen].bounds.size;
    CALayer *layer = [[CALayer alloc] init];
    // QuartzCore 是跨平台框架,需改用 CGColor
    layer.backgroundColor = [UIColor colorWithRed:0 green:146/255.0 blue:1.0 alpha:1.0].CGColor;
    layer.position = CGPointMake(size.width / 2, size.height / 2);
    layer.bounds = CGRectMake(0, 0, WIDTH, WIDTH);
    layer.cornerRadius = WIDTH / 2;      // 圓角半徑為邊長一半即成圓形
    layer.shadowColor = [UIColor grayColor].CGColor;
    layer.shadowOffset = CGSizeMake(2, 2);
    layer.shadowOpacity = 0.9;
    [self.view.layer addSublayer:layer];
}

- (void)touchesEnded:(NSSet *)touches withEvent:(UIEvent *)event {
    UITouch *touch = [touches anyObject];
    CALayer *layer = self.view.layer.sublayers[0];
    CGFloat width = (layer.bounds.size.width == WIDTH) ? WIDTH * 4 : WIDTH;
    layer.bounds = CGRectMake(0, 0, width, width);
    layer.position = [touch locationInView:self.view];
    layer.cornerRadius = width / 2;
}
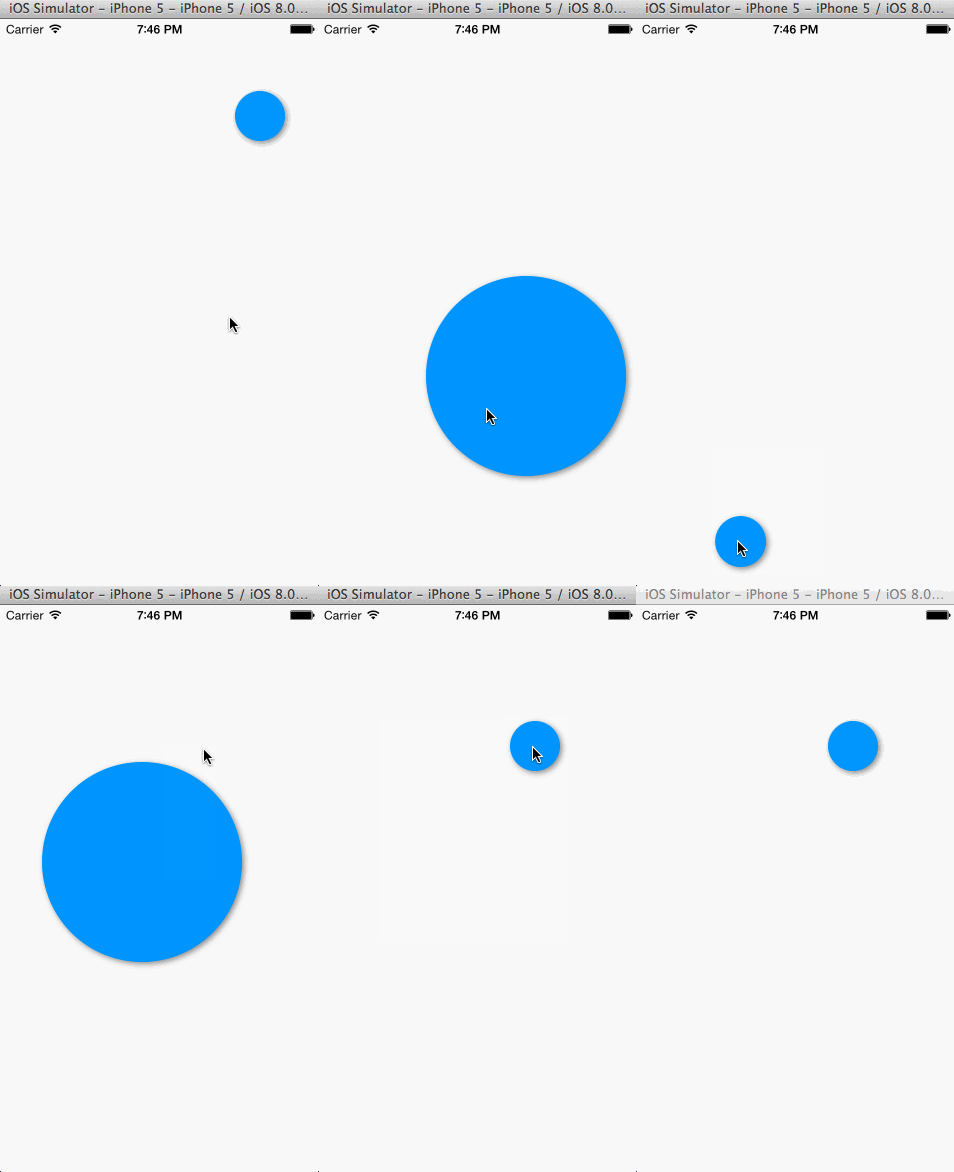
注意程式裡改的是子圖層而非 rootLayer,這正是為了讓隱式動畫生效。
1.4 在圖層中繪圖
繪圖方式與 Quartz 2D 幾乎相同,差別是 drawRect: 由 UIKit 呼叫,裡頭能用 UIKit 包裝過的方法;直接畫進圖層時只能走 Core Graphics 原生 API。兩種途徑任選其一,但繪製完成後必須呼叫圖層的 setNeedsDisplay,否則不會重繪。
- 透過圖層代理:實作 drawLayer:inContext:
- 透過自訂圖層:覆寫 drawInContext:
方式一:代理方法
設定 layer.delegate 後,在代理中實作 - (void)drawLayer:(CALayer *)layer inContext:(CGContextRef)ctx 即可。不需要宣告遵循 CALayerDelegate,因為 CALayer 為 NSObject 做了分類擴充,所有物件都具備這個方法。
- (void)viewDidLoad {
    [super viewDidLoad];
    CALayer *layer = [[CALayer alloc] init];
    layer.bounds = CGRectMake(0, 0, PHOTO_HEIGHT, PHOTO_HEIGHT);
    layer.position = CGPointMake(160, 200);
    layer.cornerRadius = PHOTO_HEIGHT / 2;
    // 僅設圓角對圖形有效,但圖片會另建子圖層,必須裁切才會跟著變圓
    layer.masksToBounds = YES;
    layer.borderColor = [UIColor whiteColor].CGColor;
    layer.borderWidth = 2;
    layer.delegate = self;
    [self.view.layer addSublayer:layer];
    [layer setNeedsDisplay];   // 不呼叫則代理方法不會觸發
}

- (void)drawLayer:(CALayer *)layer inContext:(CGContextRef)ctx {
    CGContextSaveGState(ctx);
    CGContextScaleCTM(ctx, 1, -1);              // 修正圖片上下顛倒
    CGContextTranslateCTM(ctx, 0, -PHOTO_HEIGHT);
    UIImage *image = [UIImage imageNamed:@"photo.png"];
    // 座標相對於圖層,而非螢幕
    CGContextDrawImage(ctx, CGRectMake(0, 0, PHOTO_HEIGHT, PHOTO_HEIGHT), image.CGImage);
    CGContextRestoreGState(ctx);
}
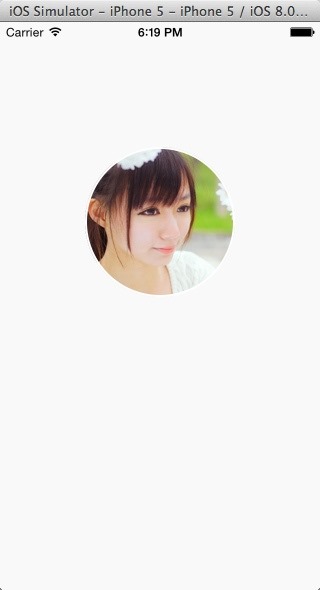
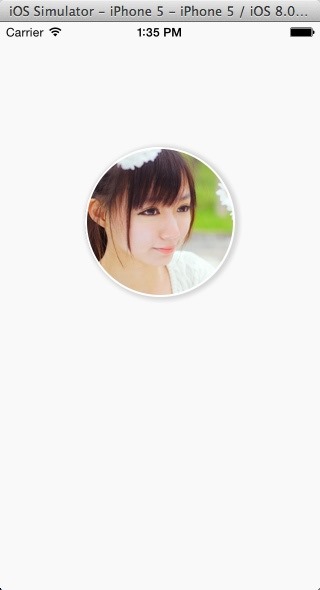
這也解釋了一個常見疑問:為什麼給 UIImageView 的 layer 設了 cornerRadius 卻沒出現圓角?因為圖片會另開一個子圖層,底圖層圓了、子圖層還是方的,唯有 masksToBounds = YES 讓子圖層依底圖層裁切才會生效。
延伸:圓形裁切又要陰影怎麼辦
masksToBounds = YES 會把邊緣外的一切裁掉,而陰影正好畫在邊緣外,兩者天生衝突。解法是換個思路——用兩個同尺寸的圖層,下層負責陰影,上層負責裁切顯示圖片:
CALayer *layerShadow = [[CALayer alloc] init];
layerShadow.bounds = bounds;
layerShadow.position = position;
layerShadow.cornerRadius = cornerRadius;
layerShadow.shadowColor = [UIColor grayColor].CGColor;
layerShadow.shadowOffset = CGSizeMake(2, 1);
layerShadow.shadowOpacity = 1;
layerShadow.borderColor = [UIColor whiteColor].CGColor;
layerShadow.borderWidth = borderWidth;
[self.view.layer addSublayer:layerShadow];

CALayer *layer = [[CALayer alloc] init];
layer.bounds = bounds;
layer.position = position;
layer.cornerRadius = cornerRadius;
layer.masksToBounds = YES;
layer.delegate = self;
[self.view.layer addSublayer:layer];
[layer setNeedsDisplay];
延伸:用形變取代上下文的翻轉
前面靠 CGContextScaleCTM 把顛倒的圖片翻正,但二維上下文無法繞 x 軸旋轉。有了圖層之後,直接設定 transform 更直觀:
layer.transform = CATransform3DMakeRotation(M_PI, 1, 0, 0);
transform 是 CATransform3D,可在三個維度上變形,並有 CATransform3DMakeTranslation / MakeScale / MakeRotation 等對應函式。
如果目的只是單純顯示一張圖,其實不必這麼麻煩,直接指定 contents 即可,也沒有顛倒問題:
[layer setContents:(id)[UIImage imageNamed:@"photo.jpg"].CGImage];
那為什麼還要談形變?因為在動畫中形變通常透過 keyPath 設定,這讓多種變形能輕鬆組合:
[layer setValue:@M_PI forKeyPath:@"transform.rotation.x"];
可用的 keyPath 清單可查 Xcode 文件中的「CATransform3D Key Paths」。
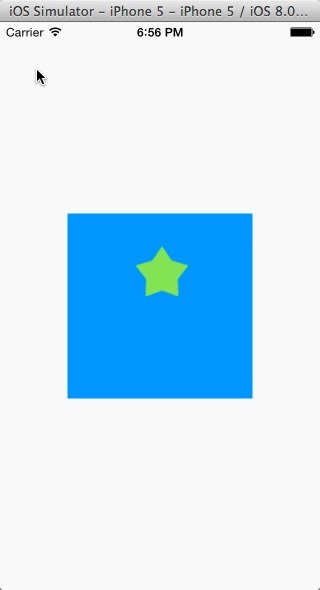
方式二:自訂圖層
寫一個繼承自 CALayer 的類別,在 drawInContext: 中繪圖,同樣要呼叫 setNeedsDisplay 才會觸發。
// KCLayer.m
- (void)drawInContext:(CGContextRef)ctx {
    CGContextSetRGBFillColor(ctx, 135.0/255.0, 232.0/255.0, 84.0/255.0, 1);
    CGContextSetRGBStrokeColor(ctx, 135.0/255.0, 232.0/255.0, 84.0/255.0, 1);
    CGContextMoveToPoint(ctx, 94.5, 33.5);
    CGContextAddLineToPoint(ctx, 104.02, 47.39);
    CGContextAddLineToPoint(ctx, 120.18, 52.16);
    CGContextAddLineToPoint(ctx, 109.91, 65.51);
    CGContextAddLineToPoint(ctx, 110.37, 82.34);
    CGContextAddLineToPoint(ctx, 94.5, 76.7);
    CGContextAddLineToPoint(ctx, 78.63, 82.34);
    CGContextAddLineToPoint(ctx, 79.09, 65.51);
    CGContextAddLineToPoint(ctx, 68.82, 52.16);
    CGContextAddLineToPoint(ctx, 84.98, 47.39);
    CGContextClosePath(ctx);
    CGContextDrawPath(ctx, kCGPathFillStroke);
}
把自訂圖層掛到一個 UIView 上時,可以觀察到呼叫順序:view 顯示時其根圖層會建立 CGContextRef,接著呼叫圖層代理的 drawLayer:inContext:,而 UIView 的該實作又會去呼叫 drawRect:,其中透過 UIGraphicsGetCurrentContext() 取得的,正是同一個上下文。
// KCView.m
- (instancetype)initWithFrame:(CGRect)frame {
    if (self = [super initWithFrame:frame]) {
        KCLayer *layer = [[KCLayer alloc] init];
        layer.bounds = CGRectMake(0, 0, 185, 185);
        layer.position = CGPointMake(160, 284);
        [layer setNeedsDisplay];
        [self.layer addSublayer:layer];
    }
    return self;
}
二、Core Animation
用 UIView 的區塊寫動畫一行就搞定,但中間發生了什麼完全不透明,而且有些事它做不到——例如暫停、組合控制。核心動畫就是為了填補這些空缺。
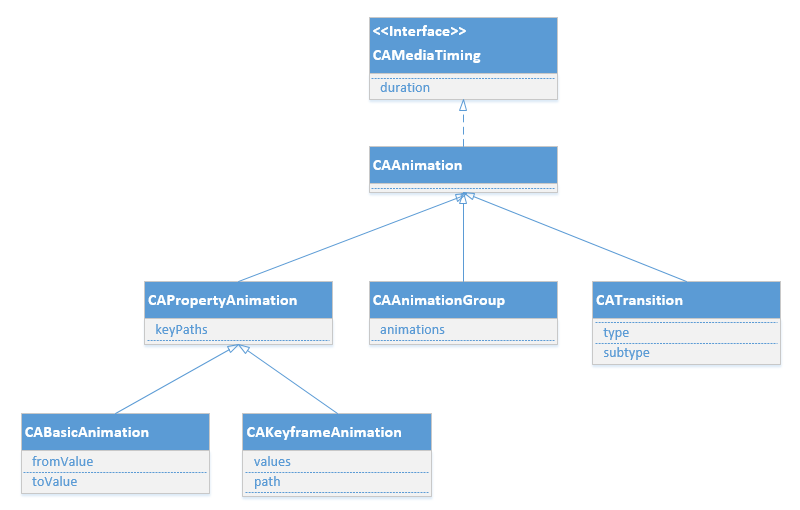
- CAAnimation:基礎類別,負責時間與速度控制,實作 CAMediaTiming 協定,不可直接使用。
- CAPropertyAnimation:屬性動畫的基類,不可直接使用。
- CABasicAnimation:基礎動畫,只有起始與結束兩個狀態。
- CAKeyframeAnimation:關鍵幀動畫,可有多個狀態。
- CAAnimationGroup:動畫組,組合模式,可統一控制並讓成員動畫並發執行。
- CATransition:轉場動畫,透過濾鏡切換場景。
基礎動畫與關鍵幀動畫都屬「屬性動畫」:你只設定關鍵狀態,中間的補間動畫由系統計算。以此觀之,基礎動畫可視為只有兩個關鍵幀的特例。
2.1 基礎動畫
建立步驟固定三步:初始化並指定 keyPath → 設定初始值/結束值與其他參數 → 把動畫加到圖層上。
- (void)translatonAnimation:(CGPoint)location {
    CABasicAnimation *animation = [CABasicAnimation animationWithKeyPath:@"position"];
    // animation.fromValue 可省略,預設為圖層當前狀態
    animation.toValue = [NSValue valueWithCGPoint:location];
    animation.duration = 5.0;
    // animation.repeatCount = HUGE_VALF;      // 無限循環
    // animation.removedOnCompletion = NO;     // 執行完不移除
    animation.delegate = self;
    [animation setValue:[NSValue valueWithCGPoint:location] forKey:@"KCBasicAnimationLocation"];
    [_layer addAnimation:animation forKey:@"KCBasicAnimation_Translation"];
}
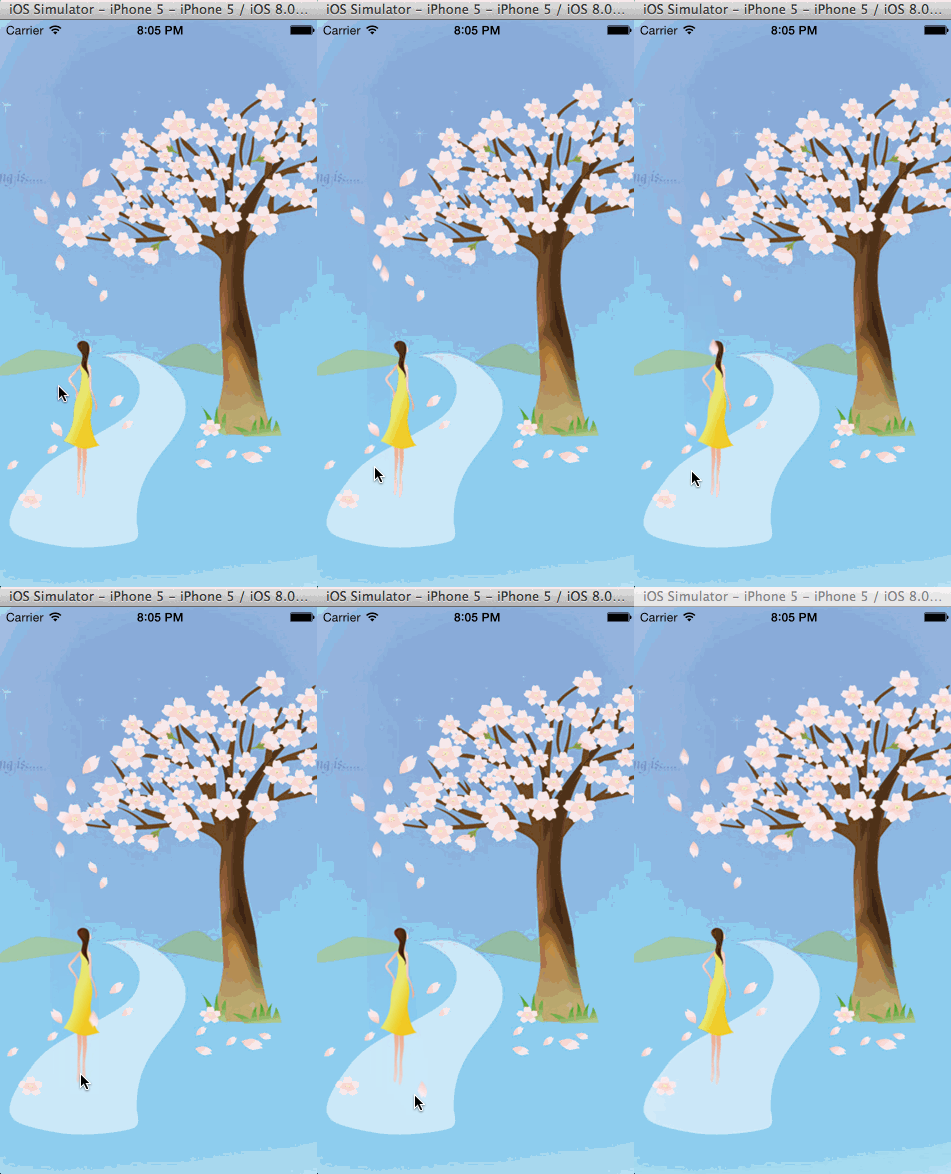
動畫跑完,圖層卻跳回原點?
這不是 bug,而是核心動畫的設計:圖層內容只是被轉成位圖交給硬體播放,圖層本身的屬性從未改變。所以動畫結束後它自然回到原位。這也解釋了為什麼一個「移動過」的 view 仍只能點擊它原本的位置。
解法是在動畫結束後把最終狀態寫回圖層:
- (void)animationDidStop:(CAAnimation *)anim finished:(BOOL)flag {
    _layer.position = [[anim valueForKey:@"KCBasicAnimationLocation"] CGPointValue];
}
但這樣一寫又會冒出第二個問題:動畫結束後會再從原點飛一次到終點。原因是 position 屬於可動畫屬性,對非根圖層設定它會觸發隱式動畫。關掉隱式動畫才是正解,方法是包在 CATransaction 裡:
- (void)animationDidStop:(CAAnimation *)anim finished:(BOOL)flag {
    [CATransaction begin];
    [CATransaction setDisableActions:YES];   // 關閉隱式動畫
    _layer.position = [[anim valueForKey:@"KCBasicAnimationLocation"] CGPointValue];
    [CATransaction commit];
}
實務上,單純的平移動畫直接用隱式動畫設定終點即可,不必繞這一圈;上面這樣寫主要是為了示範隱式動畫的關閉方式與動畫間傳值的技巧。
加上旋轉,並學會暫停
落花不會只是自由落體,還會在空中翻轉擺盪。旋轉同樣走 keyPath,而旋轉中心就是錨點:
- (void)rotationAnimation {
    CABasicAnimation *animation = [CABasicAnimation animationWithKeyPath:@"transform.rotation.z"];
    animation.toValue = [NSNumber numberWithFloat:M_PI_2 * 3];
    animation.duration = 6.0;
    animation.autoreverses = YES;
    animation.repeatCount = HUGE_VALF;
    animation.removedOnCompletion = NO;
    animation.delegate = self;   // 若移動動畫也設代理,回呼會跑兩次,慎選
    [_layer addAnimation:animation forKey:@"KCBasicAnimation_Rotation"];
}
核心動畫有「媒體時間」的概念:若旋轉一圈需 60 秒,轉了 90 度時媒體時間就是 15 秒。要暫停,就把圖層的 timeOffset 設為當前媒體時間、speed 設為 0;要恢復,則把 beginTime 設為「目前媒體時間 − timeOffset」,再把 timeOffset 歸零、speed 復原為 1。
- (void)animationPause {
    CFTimeInterval interval = [_layer convertTime:CACurrentMediaTime() fromLayer:nil];
    [_layer setTimeOffset:interval];   // 定格在當前位置
    _layer.speed = 0;                  // 真正讓動畫停下的是速度
}

- (void)animationResume {
    CFTimeInterval beginTime = CACurrentMediaTime() - _layer.timeOffset;
    _layer.timeOffset = 0;
    _layer.beginTime = beginTime;
    _layer.speed = 1.0;
}
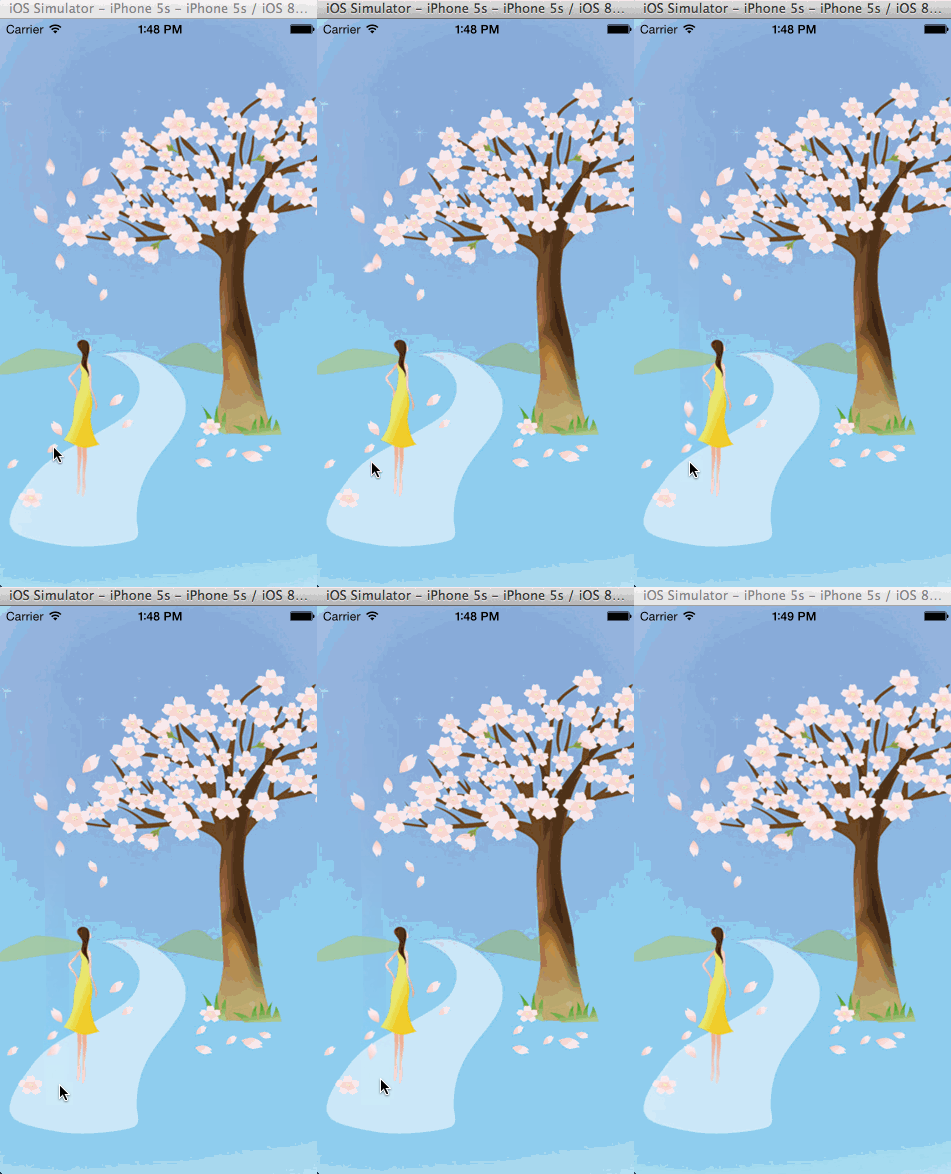
兩點提醒:暫停是針對「整個圖層」而非圖層上的某個動畫;另外想做無限循環,removedOnCompletion 一定要設為 NO,否則跑完一次動畫就被銷毀了。
2.2 關鍵幀動畫
關鍵幀動畫讓你指定幾個主要狀態,中間由系統補足。它有兩種控制方式:values(設定各關鍵狀態的值)與 path(指定路徑)。兩者同時存在時,路徑優先,values 會被忽略。
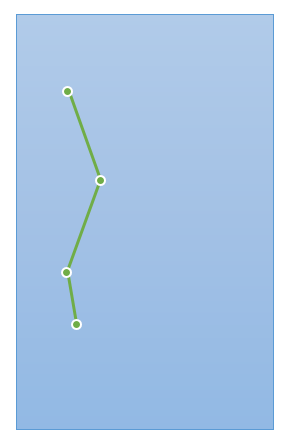
- (void)translationAnimation {
    CAKeyframeAnimation *animation = [CAKeyframeAnimation animationWithKeyPath:@"position"];
    // 關鍵幀動畫的初始值不可省略
    animation.values = @[
        [NSValue valueWithCGPoint:_layer.position],
        [NSValue valueWithCGPoint:CGPointMake(80, 220)],
        [NSValue valueWithCGPoint:CGPointMake(45, 300)],
        [NSValue valueWithCGPoint:CGPointMake(55, 400)]
    ];
    animation.duration = 8.0;
    animation.beginTime = CACurrentMediaTime() + 2;   // 延遲 2 秒
    [_layer addAnimation:animation forKey:@"KCKeyframeAnimation_Position"];
}
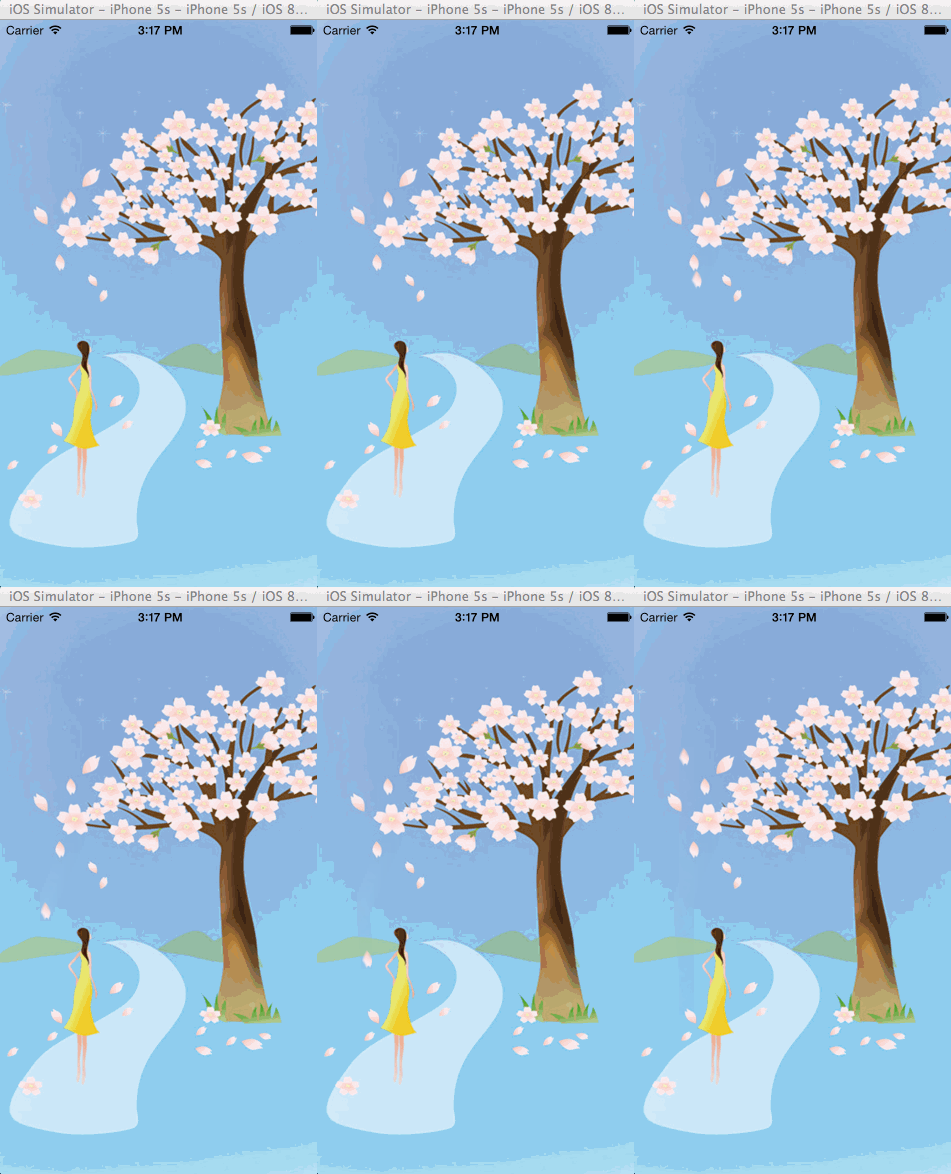
用 values 串出來的軌跡是直線段,看起來仍有點生硬。想讓它沿著曲線飄落,改用路徑:
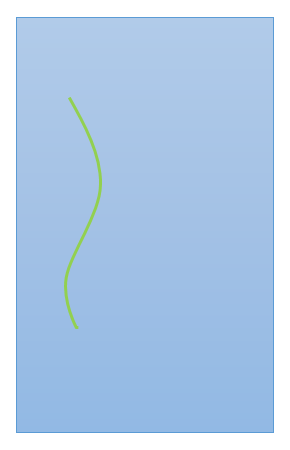
- (void)translationAnimation {
    CAKeyframeAnimation *animation = [CAKeyframeAnimation animationWithKeyPath:@"position"];
    CGPathRef path = CGPathCreateMutable();
    CGPathMoveToPoint(path, NULL, _layer.position.x, _layer.position.y);
    CGPathAddCurveToPoint(path, NULL, 160, 280, -30, 300, 55, 400);
    animation.path = path;
    CGPathRelease(path);   // 記得釋放
    animation.duration = 8.0;
    animation.beginTime = CACurrentMediaTime() + 5;
    [_layer addAnimation:animation forKey:@"KCKeyframeAnimation_Position"];
}
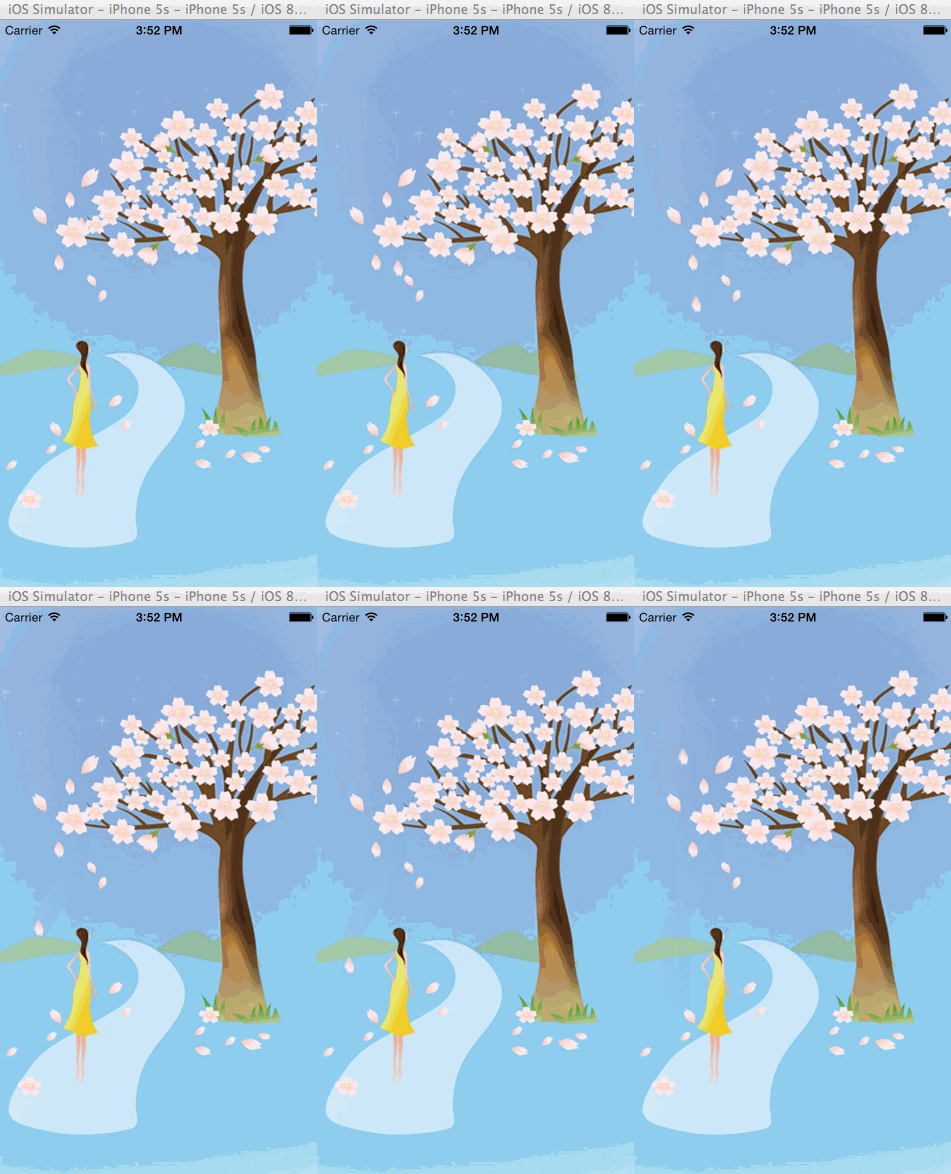
路徑動畫的起點由路徑本身決定:矩形路徑會從左上角順時針跑一圈,橢圓則從最右側(0 度)開始。
幾個易混屬性
- keyTimes:各關鍵幀的時間佔比。四個關鍵幀預設均分總時長,若要讓第一段佔一半、後兩段各佔四分之一,可設為 0.0、0.5、0.75、1.0(需包裝成 NSNumber)。
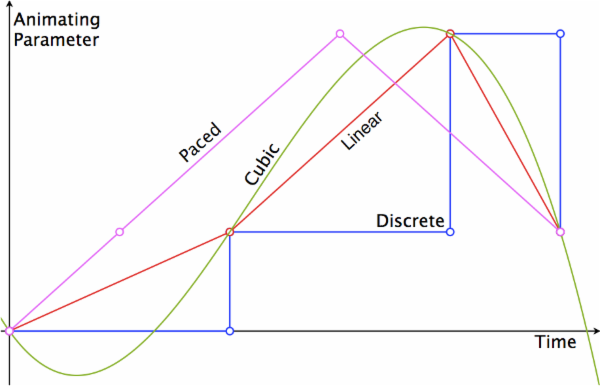
- calculationMode:計算模式。
- kCAAnimationLinear(預設):連續線性插值。
- kCAAnimationDiscrete:離散,直接跳過中間狀態。
- kCAAnimationPaced:均勻執行,會忽略 keyTimes。
- kCAAnimationCubic:平滑執行,位置類動畫的軌跡更順。
- kCAAnimationCubicPaced:平滑且均勻。
2.3 動畫組
真實世界的運動幾乎都是複合運動,但屬性動畫一次只能處理一個屬性。動畫組就是把多個動畫打包,讓公共行為(時長、延遲、代理)統一設定,成員動畫則並發播放。
- (CABasicAnimation *)rotationAnimation {
    CABasicAnimation *animation = [CABasicAnimation animationWithKeyPath:@"transform.rotation.z"];
    animation.toValue = [NSNumber numberWithFloat:M_PI_2 * 3];
    animation.autoreverses = YES;
    animation.repeatCount = HUGE_VALF;
    animation.removedOnCompletion = NO;
    [animation setValue:[NSNumber numberWithFloat:M_PI_2 * 3] forKey:@"Property_ToValue"];
    return animation;
}

- (CAKeyframeAnimation *)translationAnimation {
    CAKeyframeAnimation *animation = [CAKeyframeAnimation animationWithKeyPath:@"position"];
    CGPoint endPoint = CGPointMake(55, 400);
    CGPathRef path = CGPathCreateMutable();
    CGPathMoveToPoint(path, NULL, _layer.position.x, _layer.position.y);
    CGPathAddCurveToPoint(path, NULL, 160, 280, -30, 300, endPoint.x, endPoint.y);
    animation.path = path;
    CGPathRelease(path);
    [animation setValue:[NSValue valueWithCGPoint:endPoint] forKey:@"Property_EndPosition"];
    return animation;
}

- (void)groupAnimation {
    CAAnimationGroup *group = [CAAnimationGroup animation];
    group.animations = @[[self rotationAnimation], [self translationAnimation]];
    group.delegate = self;
    group.duration = 10.0;                       // 成員動畫若已自設時長則此處不生效
    group.beginTime = CACurrentMediaTime() + 5;
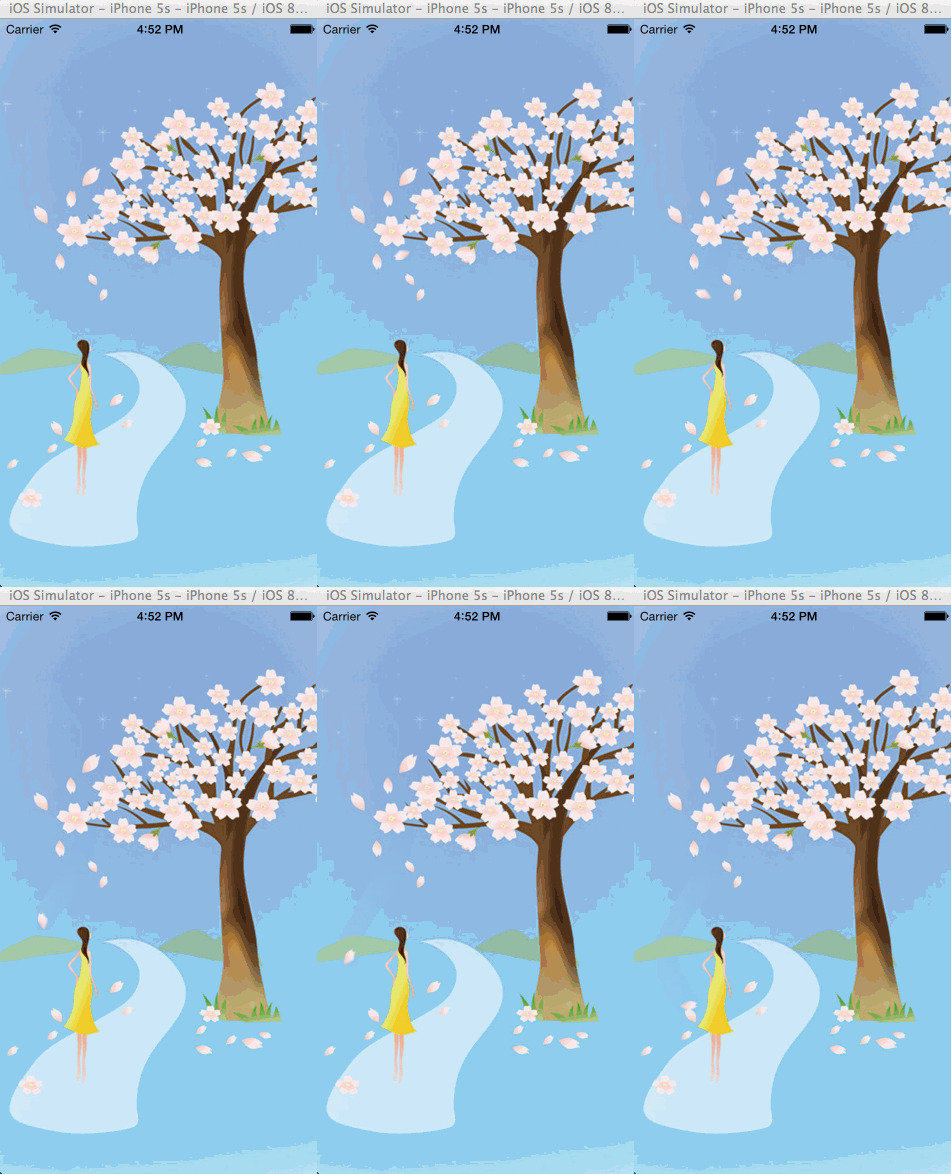
    [_layer addAnimation:group forKey:nil];
}

- (void)animationDidStop:(CAAnimation *)anim finished:(BOOL)flag {
    CAAnimationGroup *group = (CAAnimationGroup *)anim;
    CGFloat toValue = [[group.animations[0] valueForKey:@"Property_ToValue"] floatValue];
    CGPoint endPoint = [[group.animations[1] valueForKey:@"Property_EndPosition"] CGPointValue];
    [CATransaction begin];
    [CATransaction setDisableActions:YES];
    _layer.position = endPoint;
    _layer.transform = CATransform3DMakeRotation(toValue, 0, 0, 1);
    [CATransaction commit];
}
2.4 轉場動畫
步驟:建立 CATransition → 設定 type/subtype 與時長 → 換上新內容並把動畫加到圖層。
公開的類型有 fade(淡出)、moveIn(新視圖移入)、push(新視圖推開舊視圖)、reveal(移開舊視圖),對應常量為 kCATransitionFade 等,且都支援方向子類型:kCATransitionFromRight / FromLeft / FromTop / FromBottom。
此外還有一批只能透過字串使用的私有類型,例如 cube(立方翻轉)、oglFlip(翻轉)、suckEffect(收縮)、rippleEffect(水滴)、pageCurl/pageUnCurl(翻頁)、cameraIrisHollowOpen/Close(快門)。這些不在蘋果公開 API 之列,上架時有風險,自用專案則無妨。
- (void)transitionAnimation:(BOOL)isNext {
    CATransition *transition = [[CATransition alloc] init];
    transition.type = @"cube";      // 私有類型只能用字串
    transition.subtype = isNext ? kCATransitionFromRight : kCATransitionFromLeft;
    transition.duration = 1.0f;
    _imageView.image = [self getImage:isNext];
    [_imageView.layer addAnimation:transition forKey:@"KCTransitionAnimation"];
}
搭配左右滑動手勢,一個 UIImageView 就能做出流暢的循環相簿,程式碼極短而效果驚人。

2.5 逐幀動畫
有些運動無法用屬性動畫描述,例如人物動作,這時只能逐幀播放。三種常見做法各有取捨:
- UIImageView 的 animationImages:最省事,但會一次載入全部圖片,記憶體吃重,且播放過程無法控制。
- NSTimer 定時換圖:可控性提高,但系統繁忙時容易掉幀,動畫連續性打折。
- CADisplayLink:正解。它是計時器,但刷新週期與螢幕完全一致(約每秒 60 次),因此感覺不到停頓。
CADisplayLink 加入主 RunLoop 後會隨主循環被反覆呼叫,而主循環週期就是螢幕刷新週期。在回呼中更新圖層內容即可。
- (void)viewDidLoad {
    [super viewDidLoad];
    self.view.layer.contents = (id)[UIImage imageNamed:@"bg.png"].CGImage;

    _layer = [[CALayer alloc] init];
    _layer.bounds = CGRectMake(0, 0, 87, 32);
    _layer.position = CGPointMake(160, 284);
    [self.view.layer addSublayer:_layer];

    // 與其每幀重新解碼,不如先把 10 張圖快取起來
    _images = [NSMutableArray array];
    for (int i = 0; i < 10; ++i) {
        [_images addObject:[UIImage imageNamed:[NSString stringWithFormat:@"fish%i.png", i]]];
    }

    CADisplayLink *displayLink = [CADisplayLink displayLinkWithTarget:self selector:@selector(step)];
    [displayLink addToRunLoop:[NSRunLoop mainRunLoop] forMode:NSDefaultRunLoopMode];
}

- (void)step {
    static int s = 0;
    if (++s % 10 == 0) {          // 螢幕每秒約 60 次刷新,每 10 次換一幀 ≈ 每秒 6 幀
        _layer.contents = (id)[_images[_index] CGImage];
        _index = (_index + 1) % IMAGE_COUNT;
    }
}
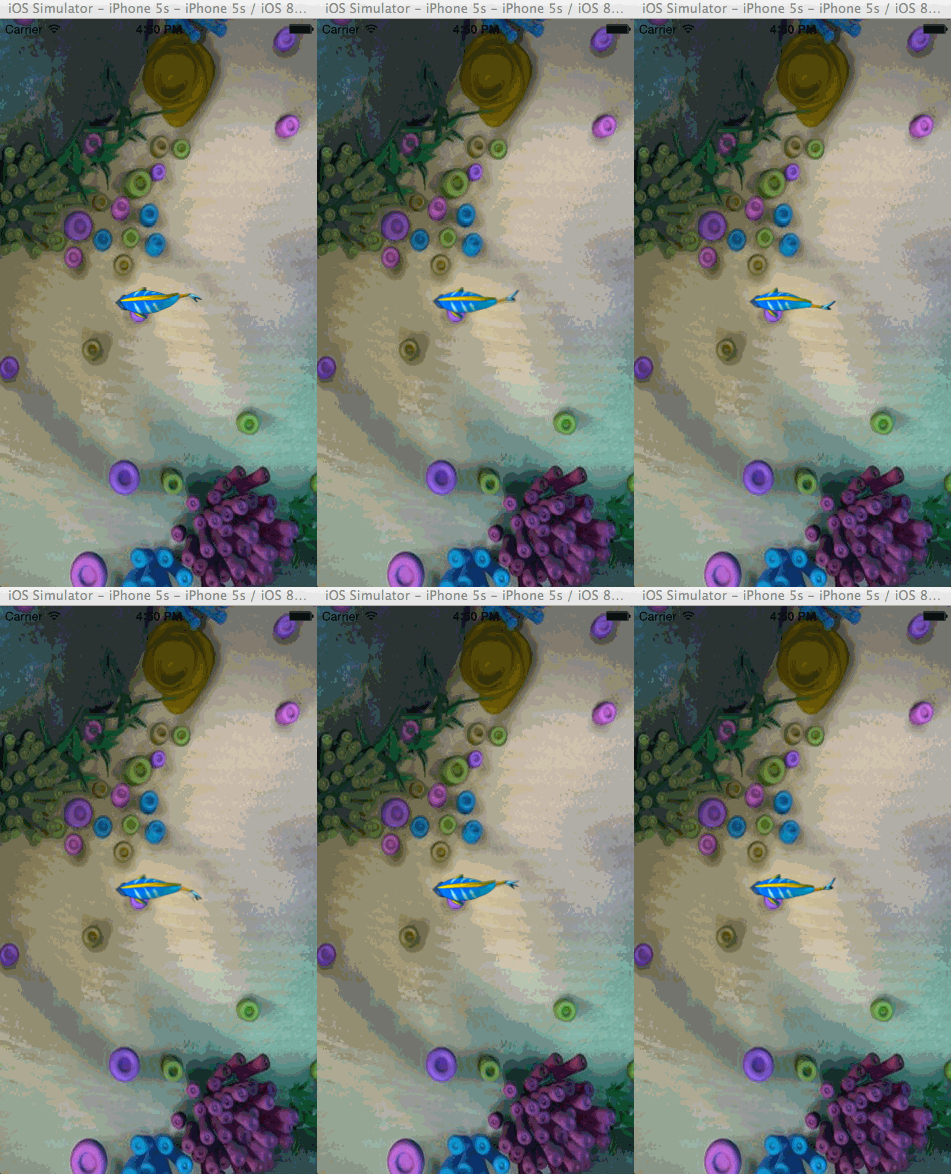
逐幀動畫的效能天然偏低,所以迴圈內務必降低演算法複雜度、控制記憶體峰值。記得在離開畫面時 invalidate displayLink,否則它會持續被主循環呼叫。
三、UIView 的動畫封裝
有了核心動畫的底子,UIView 的封裝就很好懂了。日常開發中九成以上的動畫需求,用 UIView 的方法就能解決。
3.1 基礎動畫
// 區塊寫法
[UIView animateWithDuration:5.0
                      delay:0
                    options:UIViewAnimationOptionCurveLinear
                 animations:^{ _imageView.center = location; }
                 completion:^(BOOL finished) { NSLog(@"Animation end."); }];

// 傳統靜態方法寫法
[UIView beginAnimations:@"KCBasicAnimation" context:nil];
[UIView setAnimationDuration:5.0];
_imageView.center = location;
[UIView commitAnimations];
彈簧動畫
iOS 7 之後提供了專用方法,damping 越小彈性越明顯:
[UIView animateWithDuration:5.0
                      delay:0
     usingSpringWithDamping:0.1
      initialSpringVelocity:1.0
                    options:UIViewAnimationOptionCurveLinear
                 animations:^{ _imageView.center = location; }
                 completion:nil];
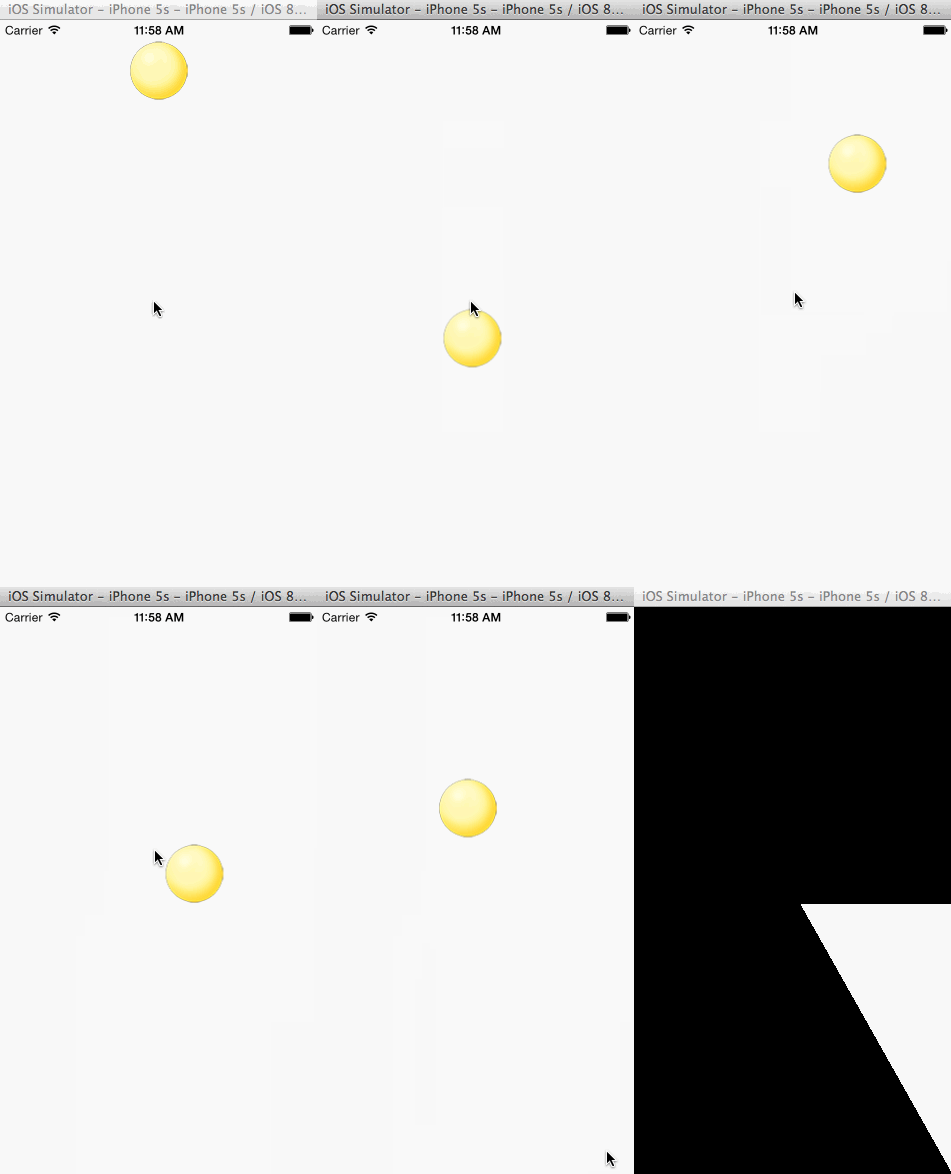
options 參數可分三大類,可組合使用
常規屬性(可多選):LayoutSubviews(子視圖隨動)、AllowUserInteraction(動畫中仍可互動)、BeginFromCurrentState(從當前狀態開始)、Repeat、Autoreverse(到終點後動畫返回)、OverrideInheritedDuration/Curve/Options(忽略巢狀動畫的時間、速度或整體設定)、AllowAnimatedContent(僅轉場動畫用)、ShowHideTransitionViews(切換時隱藏舊視圖而非移除,僅轉場動畫用)。
速度曲線(單選):CurveEaseInOut(先慢後快)、CurveEaseIn(逐漸變慢)、CurveEaseOut(逐漸加速)、CurveLinear(等速,預設)。
轉場類型(僅轉場動畫,單選):TransitionNone、FlipFromLeft/Right/Top/Bottom、CurlUp/CurlDown、CrossDissolve。
3.2 關鍵幀動畫
iOS 7 起 UIView 也封裝了關鍵幀動畫,寫法是把各段狀態登記進區塊:
[UIView animateKeyframesWithDuration:5.0
                               delay:0
                             options:UIViewAnimationOptionCalculationModeLinear
                          animations:^{
    // 第一個關鍵幀即起始位置,此處自第二段登記起
    [UIView addKeyframeWithRelativeStartTime:0.0
                            relativeDuration:0.5
                                  animations:^{ _imageView.center = CGPointMake(80.0, 220.0); }];
    [UIView addKeyframeWithRelativeStartTime:0.5
                            relativeDuration:0.25
                                  animations:^{ _imageView.center = CGPointMake(45.0, 300.0); }];
    [UIView addKeyframeWithRelativeStartTime:0.75
                            relativeDuration:0.25
                                  animations:^{ _imageView.center = CGPointMake(55.0, 400.0); }];
}
                          completion:^(BOOL finished) { NSLog(@"Animation end."); }];
options 分兩類:常規屬性與前述相同;計算模式則對應核心動畫的 CalculationModeLinear/Discrete/Paced/Cubic/CubicPaced。要注意的是,路徑型關鍵幀動畫目前 UIView 並未封裝,需要曲線軌跡時仍得回到 CAKeyframeAnimation。
3.3 轉場動畫
- (void)transitionAnimation:(BOOL)isNext {
    UIViewAnimationOptions option = isNext
        ? (UIViewAnimationOptionCurveLinear | UIViewAnimationOptionTransitionFlipFromRight)
        : (UIViewAnimationOptionCurveLinear | UIViewAnimationOptionTransitionFlipFromLeft);
    [UIView transitionWithView:_imageView
                      duration:1.0
                       options:option
                    animations:^{ _imageView.image = [self getImage:isNext]; }
                    completion:nil];
}
若要在兩個布局完全不同的 view 之間轉場,改用 transitionFromView:toView:duration:options:completion:。預設轉出的 view 會從父視圖移除、轉入後再加回;若想改成隱藏再顯示,加上 UIViewAnimationOptionShowHideTransitionViews 即可。
最後提醒:UIView 封裝的轉場動畫可用類型較少,因為它無法直接調用私有 API;對效果有講究時,還是得回到 CATransition。
- 上一篇文章: App 進入背景時蓋上一張圖:保護多任務畫面的隱私
- 下一篇文章: Core Animation 入門:動手玩 CALayer