
iOS 瀑布流佈局:TMQuiltView 的用法與實作解析
瀑布流在行動應用裡相當常見,Pinterest、500px、Fab 都是代表。對 iOS 開發者來說,TMQuiltView 是一個不錯的選擇,能用熟悉的 TableView 思維做出同樣的視覺體驗。
一、先看效果
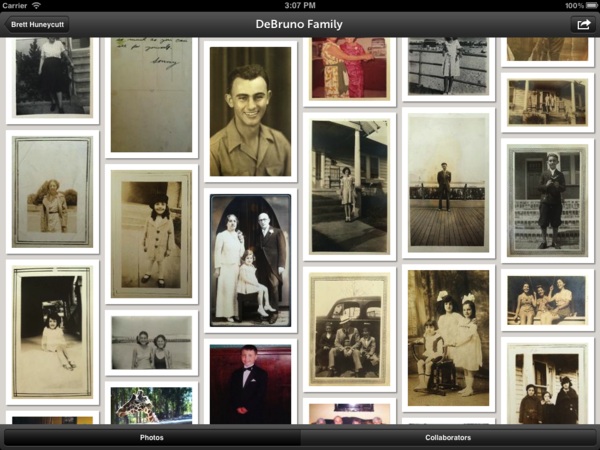
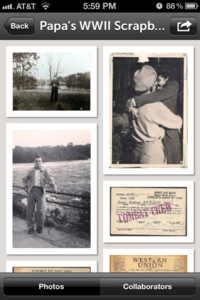

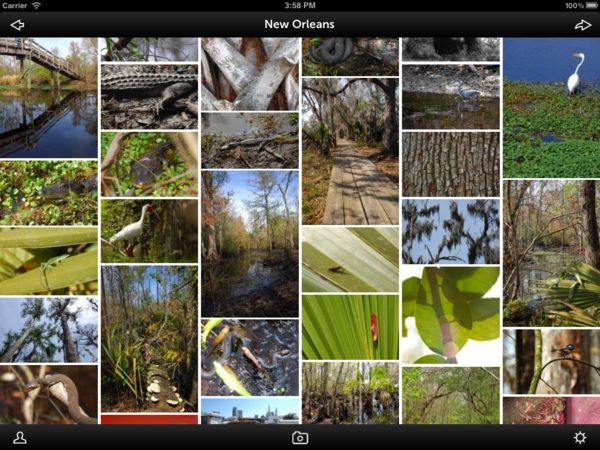
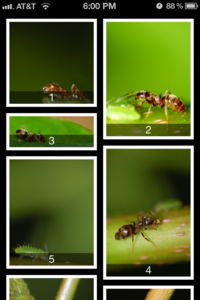
二、TMQuiltView 的設計思路
TMQuiltView 的原型來自 UITableView,主要達成兩個目標:提供簡單友善的介面,以及即使有成千上萬個 cell 也能維持順暢捲動。以下是實作時考量的幾個細節:
資料源與委派:採用與 UITableView 類似的 delegate 與 dataSource 設計(例如 cellAtIndexPath:)。要注意 quilt 視圖本身沒有「列」的概念,因為不同欄的 cell 並不是水平對齊的。不過為了與 NSFetchedResultsController 相容,仍以 NSIndexPath 作為識別依據。資料源定義的是 cell 的順序,不指定欄位。
Cell 重用:與 UITableView 相同,quilt 只保留可見的 cell 物件。這使得即使資料量龐大,實際建立的 cell 數量仍然很少,確保載入速度與捲動流暢度。
資料源變更:quilt 需要反映資料源的任何變化,包含新增、刪除、重新排序。由於變更常成批發生,它採批次方式處理;也支援單筆變更,透過視圖控制器的 endUpdates 方法提交並重算一次佈局。
欄位平衡:與 UITableView 最大的差異在於多欄。quilt 會依各 cell 的高度把它們分配到最短的那一列,讓視覺上的欄高保持平衡。
螢幕方向:欄數會依方向調整,TMQuiltViewController 會在方向變更時自動重新載入資料。
客製化:多數外觀調整應該做在 cell 上。quilt 的 delegate 另外提供了定義邊距、cell 高度與欄數的方法。
三、整合步驟
第一步,到 GitHub 下載開源程式碼。
第二步,下載回來的壓縮檔裡有好幾個資料夾,只需把其中 6 個檔案拖進你的專案(不必像官方 demo 那樣全數加入):
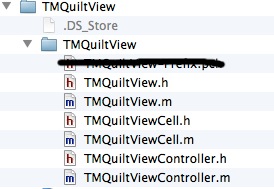
第三步:Header 宣告
#import <UIKit/UIKit.h>
#import "TMQuiltView.h"

@interface WaterFlowVC : UIViewController <TMQuiltViewDataSource, TMQuiltViewDelegate>

{
    TMQuiltView *_tmQuiltView;
    NSMutableArray *_images;
}

@property (nonatomic, retain) TMQuiltView *tmQuiltView;
@property (nonatomic, retain) NSMutableArray *images;

@end
tmQuiltView 就是這個瀑布流控件,從需要實作的協議就能看出它與 UITableView 有多相似;_images 是存放圖片的資料源陣列。
第四步:實作資料源與委派
#pragma mark - TMQuiltViewDataSource

- (NSInteger)quiltViewNumberOfCells:(TMQuiltView *)quiltView
{
    return [self.images count];
}

- (TMQuiltViewCell *)quiltView:(TMQuiltView *)quiltView
             cellAtIndexPath:(NSIndexPath *)indexPath
{
    NSString *identifierStr = @"photoIdentifier";
    TMPhotoQuiltViewCell *cell =
        (TMPhotoQuiltViewCell *)[quiltView dequeueReusableCellWithReuseIdentifier:identifierStr];

    if (!cell) {
        cell = [[[TMPhotoQuiltViewCell alloc] initWithReuseIdentifier:identifierStr] autorelease];
    }

    cell.photoView.image = [self imageAtIndexPath:indexPath];
    cell.titleLabel.text = [NSString stringWithFormat:@"%d", indexPath.row + 1];

    return cell;
}

#pragma mark - TMQuiltViewDelegate

// 欄數
- (NSInteger)quiltViewNumberOfColumns:(TMQuiltView *)quiltView
{
    return 2;
}

// 每個 cell 的高度
- (CGFloat)quiltView:(TMQuiltView *)quiltView heightForCellAtIndexPath:(NSIndexPath *)indexPath
{
    return [self imageAtIndexPath:indexPath].size.height / [self quiltViewNumberOfColumns:quiltView];
}
需要實作的資料源與委派方法就這些,其他需求可以跳到協議定義處查閱。官方 demo 另外把 images 與 imageAtIndexPath: 兩個輔助方法也放在資料源分類裡,但這兩個並非協議要求的方法,只是示範用的輔助函式。
其中 TMPhotoQuiltViewCell 是從 demo 直接複製出來的自訂 cell,你可以依需求改成自己想要的樣式。
第五步:建立視圖並載入資料
- (void)viewDidLoad
{
    [super viewDidLoad];
    self.view.backgroundColor = [UIColor blackColor];

    _tmQuiltView = [[TMQuiltView alloc] init];
    _tmQuiltView.frame = CGRectMake(0, 0, 320,
                                    [[UIScreen mainScreen] bounds].size.height - 20 - 44);
    _tmQuiltView.delegate = self;
    _tmQuiltView.dataSource = self;
    [self.view addSubview:_tmQuiltView];
    [_tmQuiltView reloadData];

    // 準備一批圖片檔名作為資料源
    NSMutableArray *imageNames = [[NSMutableArray alloc] init];
    for (int i = 0; i < kNumberOfCells; i++) {
        [imageNames addObject:[NSString stringWithFormat:@"%d.jpeg", i % 10 + 1]];
    }
    self.images = imageNames;
    [imageNames release];

    [_tmQuiltView reloadData];
}
四、與 UICollectionView 的關係
TMQuiltView 的價值在於它出現的時代——那時 iOS 還沒有官方的瀑布流方案,只能靠自製或第三方控件。從 iOS 6 起,Apple 提供了 UICollectionView,只要自訂一個 UICollectionViewLayout 子類並實作 collectionView:layout:sizeForItemAtIndexPath:,就能做出同樣效果,而且 cell 重用、動畫批次更新、方向切換都由系統處理。
因此新專案建議直接走 UICollectionView 路線;但讀懂 TMQuiltView 這套 dataSource/delegate 設計仍有意義——它與 UICollectionView 的 delegate 幾乎如出一轍,理解其中「資料源定義順序、佈局決定位置」的分工,寫自訂 layout 時會順手很多。
- 上一篇文章: iOS 圖片等比例拉伸:讓小圖不變形的三種方案
- 下一篇文章: iOS 本地通知實作:UILocalNotification 的屬性與排程