
iOS 開發:用 GCD 在背景佇列執行非 UI 任務
編輯:iOS 相關資訊
一、前言
GCD(Grand Central Dispatch)真正發揮威力的地方,是把運算丟到主佇列以外的佇列去跑。要在 dispatch queue 上異步執行任務,可用下面兩個函式:
dispatch_async:向佇列提交一個 Block 物件。
dispatch_async(concurrentQueue, ^{ ... });
dispatch_async_f:向佇列提交一個 C 函式加上一塊上下文記憶體。
dispatch_async_f(concurrentQueue, NULL, printFrom1To1000);
二、範例一:背景抓圖,主執行緒顯示
這個例子示範最典型的分工:在背景佇列下載圖片,完成後切回主執行緒更新 UI。
- (void)viewDidAppear:(BOOL)paramAnimated
{
    [super viewDidAppear:paramAnimated];

    // 取得一個全域並行佇列
    dispatch_queue_t concurrentQueue =
        dispatch_get_global_queue(DISPATCH_QUEUE_PRIORITY_DEFAULT, 0);

    dispatch_async(concurrentQueue, ^{
        __block UIImage *image = nil;

        dispatch_sync(concurrentQueue, ^{
            NSString *urlAsString = @"https://example.com/demo.jpg";
            NSURL *url = [NSURL URLWithString:urlAsString];
            NSURLRequest *request = [NSURLRequest requestWithURL:url];

            // NSError 能承載比單一錯誤碼更豐富的資訊
            NSError *downloadError = nil;
            NSData *imageData = [NSURLConnection sendSynchronousRequest:request
                                                    returningResponse:nil
                                                                error:&downloadError];

            if (downloadError == nil && imageData != nil) {
                image = [UIImage imageWithData:imageData];
            } else if (downloadError != nil) {
                NSLog(@"Error happened = %@", downloadError);
            } else {
                NSLog(@"No data could be downloaded from the URL.");
            }
        });

        // 回到主佇列更新 UI
        dispatch_sync(dispatch_get_main_queue(), ^{
            if (image != nil) {
                UIImageView *imageView = [[UIImageView alloc] initWithFrame:self.view.bounds];
                [imageView setImage:image];
                [imageView setContentMode:UIViewContentModeScaleAspectFit];
                [self.view addSubview:imageView];
            } else {
                NSLog(@"Image isn't downloaded. Nothing to display.");
            }
        });
    });
}
執行後圖片會被下載並鋪滿整個視圖:
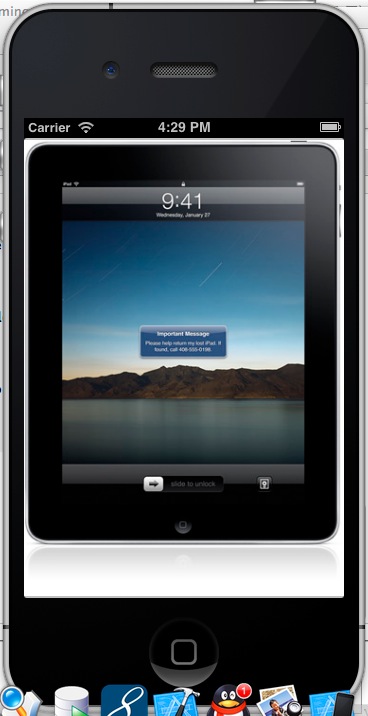
這裡有個觀念要補充:在 GCD 中更新 UI 應該用 dispatch_async 而非 dispatch_sync。sync 會讓背景執行緒停下來等主執行緒,一旦主執行緒同時也在等這塊背景工作,就會直接死鎖。範例保留 sync 只是為了貼近原始教學寫法,實務請改用 async。
三、範例二:產生隨機數、排序、顯示
第二個例子更接近真實場景:檢查本地檔案是否存在,不存在就先產生一萬個隨機數寫檔,再讀回來排序,最後把結果顯示在畫面上。
Header
#import <UIKit/UIKit.h>

@interface ZYViewController : UIViewController

@property (nonatomic, strong) UILabel *myLabel;

@end
實作
@synthesize myLabel;

- (void)viewDidLoad
{
    [super viewDidLoad];

    dispatch_queue_t concurrentQueue =
        dispatch_get_global_queue(DISPATCH_QUEUE_PRIORITY_DEFAULT, 0);

    dispatch_async(concurrentQueue, ^{

        NSUInteger numberOfValuesRequired = 10000;

        // 若檔案還不存在,先產生資料並寫入磁碟
        if ([self hasFileAlreadyBeenCreated] == NO) {
            dispatch_sync(concurrentQueue, ^{
                NSMutableArray *arrayOfRandomNumbers =
                    [[NSMutableArray alloc] initWithCapacity:numberOfValuesRequired];

                for (NSUInteger counter = 0; counter < numberOfValuesRequired; counter++) {
                    unsigned int randomNumber = arc4random() % ((unsigned int)RAND_MAX + 1);
                    [arrayOfRandomNumbers addObject:[NSNumber numberWithUnsignedInt:randomNumber]];
                }

                [arrayOfRandomNumbers writeToFile:[self fileLocation] atomically:YES];
            });
        }

        // 讀檔並排序
        __block NSMutableArray *randomNumbers = nil;

        dispatch_sync(concurrentQueue, ^{
            if ([self hasFileAlreadyBeenCreated]) {
                randomNumbers = [[NSMutableArray alloc] initWithContentsOfFile:[self fileLocation]];
                [randomNumbers sortUsingComparator:^NSComparisonResult(id obj1, id obj2) {
                    NSNumber *number1 = (NSNumber *)obj1;
                    NSNumber *number2 = (NSNumber *)obj2;
                    return [number1 compare:number2];
                }];
            }
        });

        // 回主執行緒更新 UI
        dispatch_async(dispatch_get_main_queue(), ^{
            if ([randomNumbers count] > 0) {
                CGRect labelFrame = CGRectMake(0.0f, 0.0f, 300.0f, 200.0f);
                self.myLabel = [[UILabel alloc] initWithFrame:labelFrame];
                self.myLabel.numberOfLines = 10;

                NSString *str = [[NSString alloc] initWithFormat:@"RandomNumbers is %@", randomNumbers];
                self.myLabel.text = str;
                self.myLabel.font = [UIFont boldSystemFontOfSize:14.0f];
                self.myLabel.center = self.view.center;

                [self.view addSubview:self.myLabel];
            }
        });
    });
}

// 取得 Documents 目錄下的檔案路徑
- (NSString *)fileLocation
{
    NSArray *folders = NSSearchPathForDirectoriesInDomains(NSDocumentDirectory,
                                                           NSUserDomainMask, YES);
    if ([folders count] == 0)
        return nil;

    NSString *documentsFolder = [folders objectAtIndex:0];
    return [documentsFolder stringByAppendingPathComponent:@"list.txt"];
}

// 判斷檔案是否已存在
- (BOOL)hasFileAlreadyBeenCreated
{
    NSFileManager *fileManager = [[NSFileManager alloc] init];
    return [fileManager fileExistsAtPath:[self fileLocation]];
}
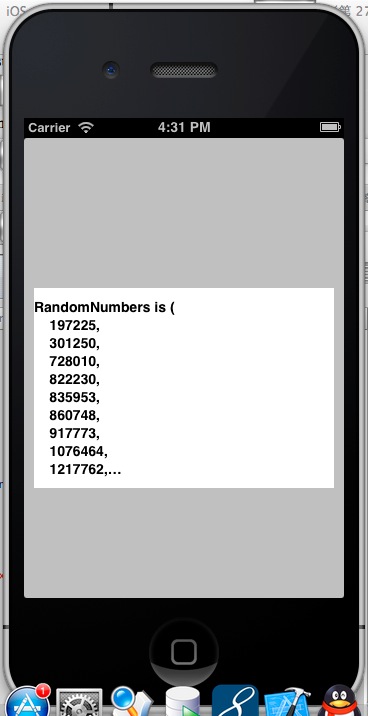
執行結果如下,排序後的一萬個隨機數被包成十行顯示在標籤上:
四、重點整理
這兩個範例其實傳達同一個模式:運算在背景、UI 在主執行緒。GCD 的價值在於你不需要自己管理 NSThread 與 thread pool,只要描述「這段工作該放哪個佇列」,系統會依硬體核心數自動調度。
實作上還應留意:同步式 API(如 sendSynchronousRequest:)本身不該出現在主執行緒;真實專案建議改用 NSURLSession 的異步接口,並以 dispatch_async 取代 dispatch_sync 回主佇列,才能完全避開死鎖風險。