
美圖類應用實戰:圖片美化之邊框功能與界面重構
編輯:iOS 開發綜合
在動手寫邊框功能之前,要先說明一件事:整個圖片美化界面的開發已經完全重寫,請先下載最新版本的項目再跟著看。
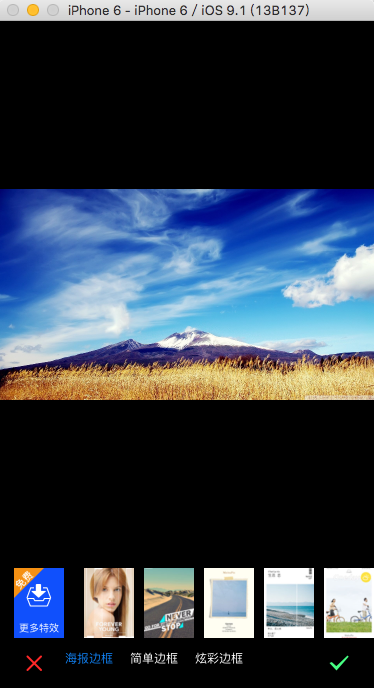
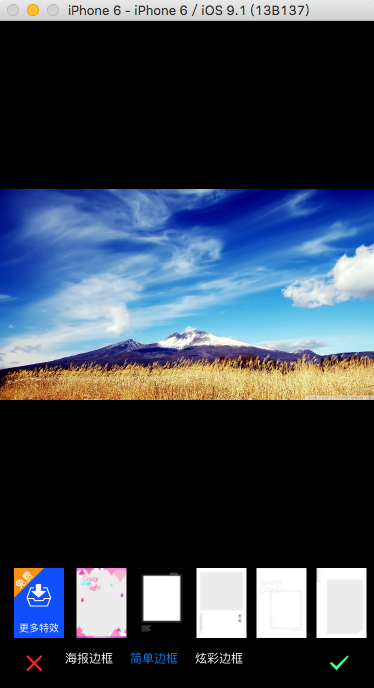
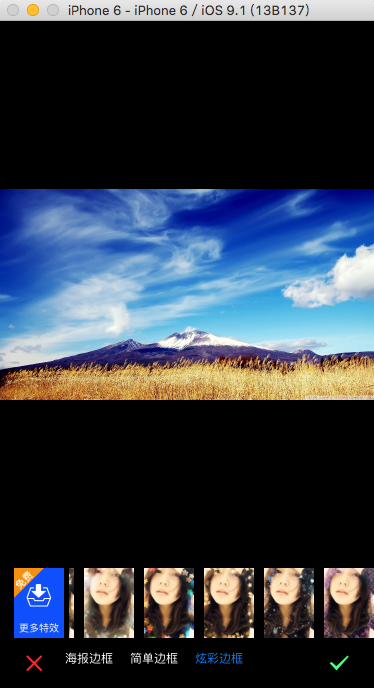
之所以重寫,是因為最初的實現沒有充分考虑各項因素,導致 viewController 裡代碼越堆越亂。新架構把每一個獨立的美化功能拆到各自的 viewController 中,職責清晰,後續擴展也更容易。另外補充一個關於 imageNamed 的細節:加載 @2x、@3x 這類帶倍率的圖片時,傳入的檔名要去掉倍率後綴,系統會自動按當前設備挑選合適的資源。
一、功能入口
else if ([text isEqualToString:@"邊框"]) {
    FWBorderViewController *vc = [[FWBorderViewController alloc] initWithImage:self.image];
    [self presentViewController:vc animated:YES completion:^{ }];
}
二、加載界面
1. 加載待處理的圖片

//顯示圖片
self.imageView = [[UIImageView alloc] initWithImage:self.image];
self.imageView.frame = CGRectMake(0, 0, WIDTH, HEIGHT - 50 - 70);
self.imageView.contentMode = UIViewContentModeScaleAspectFit;
[self.view addSubview:self.imageView];
2. 加載保存與取消按鈕


//保存與取消按鈕的添加
UIImage *i1 = [UIImage imageNamed:@"btn_cancel_a@2x.png"];
self.btnClose = [UIButton buttonWithType:UIButtonTypeCustom];
[self.btnClose setImage:i1 forState:UIControlStateNormal];
self.btnClose.frame = CGRectMake(20, HEIGHT - kCancelHeight - 10, kCancelHeight, kCancelHeight);
[self.btnClose addTarget:self action:@selector(btnCancelOrSaveClicked:) forControlEvents:UIControlEventTouchUpInside];
[self.view addSubview:self.btnClose];

UIImage *i2 = [UIImage imageNamed:@"btn_ok_a@2x.png"];
self.btnSave = [UIButton buttonWithType:UIButtonTypeCustom];
[self.btnSave setImage:i2 forState:UIControlStateNormal];
self.btnSave.frame = CGRectMake(WIDTH - kCancelHeight - 20, HEIGHT - kCancelHeight - 10, kCancelHeight, kCancelHeight);
[self.view addSubview:self.btnSave];
[self.btnSave addTarget:self action:@selector(btnCancelOrSaveClicked:) forControlEvents:UIControlEventTouchUpInside];
3. 加載邊框大類切換欄(海報 / 簡單 / 炫彩)

self.styleBar = [[FWEffectBar alloc] initWithFrame:CGRectMake(50, HEIGHT - 40, 200, 20)];
NSMutableArray *items = [[NSMutableArray alloc] initWithCapacity:0];
NSArray *titles = [NSArray arrayWithObjects:@"海報邊框", @"簡單邊框", @"炫彩邊框", nil];
for (int i = 0; i < [titles count]; i ++) {
    FWEffectBarItem *item = [[FWEffectBarItem alloc] initWithFrame:CGRectZero];
    item.title = [titles objectAtIndex:i];
    [items addObject:item];
}
self.styleBar.items = items;
self.styleBar.effectBarDelegate = self;
[self.styleBar setSelectedItem:[self.styleBar.items objectAtIndex:0]];
[self effectBar:self.styleBar didSelectItemAtIndex:0];
[self.view addSubview:self.styleBar];
4. 加載「更多素材」視圖

FWMoreEffectView *seView = [[FWMoreEffectView alloc] initWithFrame:CGRectMake(15, HEIGHT - 50 - kHeight, kWidth, kHeight)];
[self.view addSubview:seView];
FWMoreEffectView 是一個比較簡單的自定義視圖,這裡不展開。
5. 加載具體邊框樣式
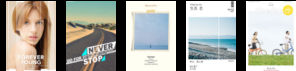
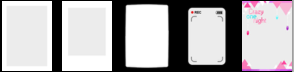

self.borderStyleBar = [[FWEffectBar alloc] initWithFrame:CGRectMake(70, HEIGHT - 50 - kHeight, WIDTH - 70, kHeight)];
self.borderStyleBar.effectBarDelegate = self;
self.borderStyleBar.itemBeginX = 15.0;
self.borderStyleBar.itemWidth = 50.0;
self.borderStyleBar.margin = 10.0;

//邊框樣式默認視圖
[self setupPosterBorder];

[self.view addSubview:self.borderStyleBar];
下面這個方法封裝了樣式加載的通用邏輯:傳入一個圖片名數組,遍歷生成 item 並掛到 bar 上。
- (void)setupBorderEffect:(NSArray *)images {
    FWEffectBarItem *item = nil;
    NSMutableArray *items = [[NSMutableArray alloc] initWithCapacity:0];
    for (int i = 0; i < [images count]; i++) {
        item = [[FWEffectBarItem alloc] initWithFrame:CGRectMake((kWidth + kSpace) * i + 10, 0, kWidth, kHeight)];
        item.backgroundColor = [UIColor whiteColor];
        UIImage *img1 = [UIImage scaleImage:[UIImage imageNamed:[images objectAtIndex:i]] targetWidth:50];
        [item setFinishedSelectedImage:img1 withFinishedUnselectedImage:img1];
        [items addObject:item];
    }
    self.borderStyleBar.items = items;
}
三個具體樣式各自傳入對應的資源數組即可:
//簡單邊框視圖
- (void)setupSimpleBorderView {
    [self setupBorderEffect:[NSArray arrayWithObjects:@"border_baikuang_a.jpg", @"border_baolilai_a.jpg", @"border_heikuang_a.jpg", @"border_luxiangji_a.jpg", @"border_onenight_a.jpg", @"border_simple_15.jpg", @"border_simple_16.jpg", @"border_simple_17.jpg", @"border_simple_18.jpg", @"border_simple_19.jpg", nil]];
}

//海報邊框視圖
- (void)setupPosterBorder {
    [self setupBorderEffect:[NSArray arrayWithObjects:@"pb1", @"pb2", @"pb3", @"pb4", @"pb5", @"pb6", @"pb7", @"pb8", @"pb9", @"pb10", nil]];
}

//炫彩邊框視圖
- (void)setupDazzleBorder {
    [self setupBorderEffect:[NSArray arrayWithObjects:@"xborder_aixin_a.jpg", @"xborder_guangyun_a.jpg", @"xborder_qisehua_a.jpg", @"xborder_wujiaoxing_a.jpg", @"xborder_xueye_a.jpg", @"xborder_yinhe_a.jpg", nil]];
}
也就是說,只要給 borderStyleBar 換一份 items,展示的樣式就跟著變。
6. 實現 bar 的代理回調
#pragma mark - FWEffectBarDelegate
- (void)effectBar:(FWEffectBar *)bar didSelectItemAtIndex:(NSInteger)index {
    if (bar == self.styleBar) {
        switch (index) {
            case 0:
                [self setupPosterBorder];
                break;
            case 1:
                [self setupSimpleBorderView];
                break;
            case 2:
                [self setupDazzleBorder];
                break;
        }
    } else {
        FWEffectBarItem *item = (FWEffectBarItem *)[bar.items objectAtIndex:index];
        item.ShowBorder = YES;
    }
}
點擊 styleBar 切換邊框大類,點擊 borderStyleBar 則應用具體樣式,並讓選中項顯示出邊框效果。
最後記得把狀態欄隱藏掉,讓編輯界面更乾淨:
//隱藏狀態欄
- (BOOL)prefersStatusBarHidden {
    return YES;
}
以上,感謝閱讀。