
Core Animation 基础动画实战:平移、缩放、旋转与关键帧动画
一、基础动画 CABasicAnimation 是什么
CABasicAnimation 是 CAPropertyAnimation 的子类,通过 keyPath 指定要修改的属性,再用 fromValue 与 toValue 描述起点与终点。随着动画推进,在时长 duration 内,该属性的值会从 fromValue 逐渐变为 toValue。
属性解析:
fromValue:keyPath 对应属性的初始值toValue:keyPath 对应属性的结束值
一个必须理解的陷阱:如果设置了 fillMode = kCAFillModeForwards 且 removedOnCompletion = NO,动画执行完毕后图层会保持在动画结束的状态;但实质上,图层的属性值仍是动画执行前的初始值,并没有真正被改变。
举例来说:CALayer 的 position 初始值为 (0, 0),CABasicAnimation 的 fromValue 为 (10, 10)、toValue 为 (100, 100)。动画结束后,图层视觉上停在 (100, 100),但代码读取 layer.position 得到的依然是 (0, 0)。这是 Core Animation「视觉呈现」与「模型图层」分离的设计,理解这一点是掌握 CA 动画的关键。
二、平移动画
#import "YYViewController.h"

@interface YYViewController ()
@property (nonatomic, strong) CALayer *myLayer;
@end

@implementation YYViewController

- (void)viewDidLoad
{
    [super viewDidLoad];

    // 建立 layer
    CALayer *myLayer = [CALayer layer];
    myLayer.bounds = CGRectMake(0, 0, 50, 80);
    myLayer.backgroundColor = [UIColor yellowColor].CGColor;
    myLayer.position = CGPointMake(50, 50);
    myLayer.anchorPoint = CGPointMake(0, 0);
    myLayer.cornerRadius = 20;
    [self.view.layer addSublayer:myLayer];
    self.myLayer = myLayer;
}

// 设置基础动画
-(void)touchesBegan:(NSSet *)touches withEvent:(UIEvent *)event
{
    // 1. 建立基础动画
    CABasicAnimation *anima = [CABasicAnimation animation];

    // 1.1 告诉系统要执行什么样的动画:修改 position 就是平移动画
    anima.keyPath = @"position";
    anima.fromValue = [NSValue valueWithCGPoint:CGPointMake(0, 0)];
    anima.toValue = [NSValue valueWithCGPoint:CGPointMake(200, 300)];

    // 1.2 动画执行完毕后不删除动画
    anima.removedOnCompletion = NO;
    // 1.3 保存动画的最新状态
    anima.fillMode = kCAFillModeForwards;

    // 2. 把动画添加到 layer
    [self.myLayer addAnimation:anima forKey:nil];
}

@end
代码说明:
- keyPath 设为
@"position",说明要修改 CALayer 的 position 属性,也就是执行平移动画。 - fromValue 与 toValue 接收的是 id 类型参数,因此不能直接传入 CGPoint 这种结构体,必须先包装成 NSValue 对象。
- 默认情况下动画执行完毕后会自动从 CALayer 移除,图层回到原状态;加上
removedOnCompletion = NO与fillMode = kCAFillModeForwards就能保持动画结束后的状态。 byValue与toValue的区别:前者是在当前位置上「增加多少」(相对值),后者是移动到「指定位置」(绝对值)。
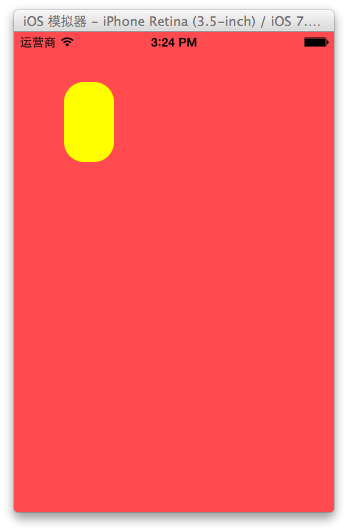
执行效果:
设置代理:监听动画的执行过程
把控制器设为动画代理,就能在开始与结束时收到回调,并借机验证前面提到的「属性值并未真正改变」:
-(void)touchesBegan:(NSSet *)touches withEvent:(UIEvent *)event
{
    CABasicAnimation *anima = [CABasicAnimation animation];
    anima.keyPath = @"position";
    anima.fromValue = [NSValue valueWithCGPoint:CGPointMake(0, 0)];
    anima.toValue = [NSValue valueWithCGPoint:CGPointMake(200, 300)];

    anima.removedOnCompletion = NO;
    anima.fillMode = kCAFillModeForwards;
    anima.delegate = self;

    NSLog(@"执行前:%@", NSStringFromCGPoint(self.myLayer.position));

    [self.myLayer addAnimation:anima forKey:nil];
}

-(void)animationDidStart:(CAAnimation *)anim
{
    NSLog(@"开始执行动画");
}

-(void)animationDidStop:(CAAnimation *)anim finished:(BOOL)flag
{
    // 动画执行完毕,打印 position
    NSLog(@"执行后:%@", NSStringFromCGPoint(self.myLayer.position));
}
打印结果验证了图层的属性值仍是动画执行前的初始值 {50, 50},并没有真正变成 {200, 300}。

三、缩放动画
把 keyPath 换成 @"bounds",就能实现缩放效果。
-(void)touchesBegan:(NSSet *)touches withEvent:(UIEvent *)event
{
    // 1. 建立动画
    CABasicAnimation *anima = [CABasicAnimation animationWithKeyPath:@"bounds"];
    anima.duration = 2.0;                  // 1.1 执行时长
    anima.removedOnCompletion = NO;        // 1.2 执行完不删除
    anima.fillMode = kCAFillModeForwards;  // 1.3 保持最新状态
    anima.toValue = [NSValue valueWithCGRect:CGRectMake(0, 0, 200, 200)]; // 1.4 目标尺寸

    // 2. 添加到 layer
    [self.myLayer addAnimation:anima forKey:nil];
}
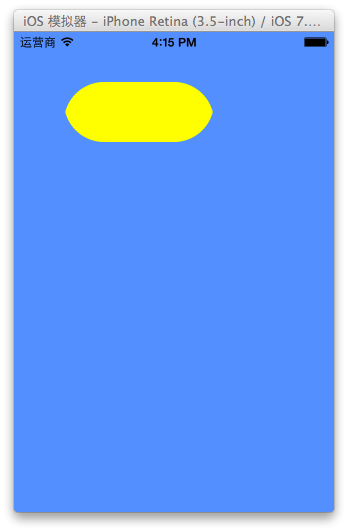
实现效果:
四、旋转动画
keyPath 换成 @"transform",并用 CATransform3DMakeRotation 生成旋转矩阵。
-(void)touchesBegan:(NSSet *)touches withEvent:(UIEvent *)event
{
    // 1. 建立动画
    CABasicAnimation *anima = [CABasicAnimation animationWithKeyPath:@"transform"];
    anima.duration = 2.0;   // 1.1 执行时长

    // 1.2 旋转 135 度(M_PI_2 + M_PI_4),绕 (1, 1, 0) 轴
    anima.toValue = [NSValue valueWithCATransform3D:CATransform3DMakeRotation(M_PI_2 + M_PI_4, 1, 1, 0)];

    anima.removedOnCompletion = NO;        // 1.3 执行完不删除
    anima.fillMode = kCAFillModeForwards;  // 1.4 保持最新状态

    // 2. 添加到 layer
    [self.myLayer addAnimation:anima forKey:nil];
}
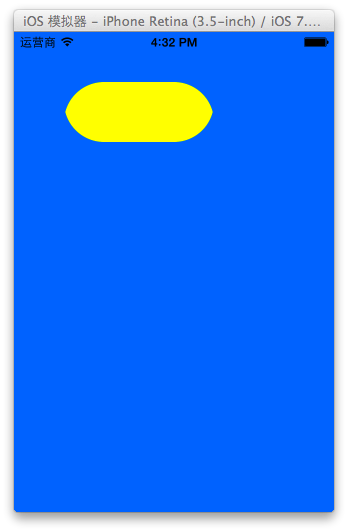
实现效果:
补充:用 transform 做平移
-(void)touchesBegan:(NSSet *)touches withEvent:(UIEvent *)event
{
    CABasicAnimation *anima = [CABasicAnimation animation];
    anima.keyPath = @"transform";
    anima.duration = 2.0;

    // 在 y 方向上移动 100
    anima.toValue = [NSValue valueWithCATransform3D:CATransform3DMakeTranslation(0, 100, 1)];

    anima.removedOnCompletion = NO;
    anima.fillMode = kCAFillModeForwards;

    [self.myLayer addAnimation:anima forKey:nil];
}
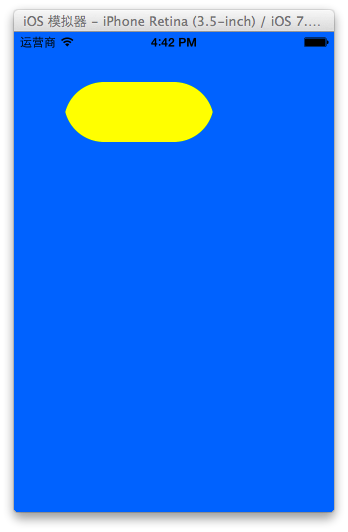
实现效果:图形在 y 方向上移动 100 个单位。
五、关键帧动画 CAKeyframeAnimation
1. 概念
CAKeyframeAnimation 同样是 CAPropertyAnimation 的子类。它与 CABasicAnimation 的区别在于:CABasicAnimation 只能从一个值(fromValue)变到另一个值(toValue),而 CAKeyframeAnimation 用一个 NSArray 保存多个值。
属性解析:
values:上述 NSArray 对象,其中的元素称为「关键帧」(keyframe)。动画会在指定的 duration 内依次显示 values 数组中的每一帧。path:可以设置一个 CGPathRef / CGMutablePathRef,让图层沿路径移动。path 只对 CALayer 的 anchorPoint 和 position 起作用;一旦设置了 path,values 会被忽略。keyTimes:为对应的关键帧指定时间点,取值范围 0 到 1.0,每个时间值对应 values 中的每一帧。未设置时,各关键帧的时间是平分的。
可以这样理解:CABasicAnimation 相当于最多只有两个关键帧的 CAKeyframeAnimation。
2. 代码示例
第一种方式:用 values 数组
#import "YYViewController.h"

@interface YYViewController ()
@property (weak, nonatomic) IBOutlet UIView *customView;
@end

@implementation YYViewController

-(void)touchesBegan:(NSSet *)touches withEvent:(UIEvent *)event
{
    // 1. 建立关键帧动画
    CAKeyframeAnimation *keyAnima = [CAKeyframeAnimation animation];
    keyAnima.keyPath = @"position";   // 平移

    // 1.1 定义五个关键帧,走出一个矩形轨迹
    NSValue *value1 = [NSValue valueWithCGPoint:CGPointMake(100, 100)];
    NSValue *value2 = [NSValue valueWithCGPoint:CGPointMake(200, 100)];
    NSValue *value3 = [NSValue valueWithCGPoint:CGPointMake(200, 200)];
    NSValue *value4 = [NSValue valueWithCGPoint:CGPointMake(100, 200)];
    NSValue *value5 = [NSValue valueWithCGPoint:CGPointMake(100, 100)];
    keyAnima.values = @[value1, value2, value3, value4, value5];

    keyAnima.removedOnCompletion = NO;       // 1.2 执行完不删除
    keyAnima.fillMode = kCAFillModeForwards; // 1.3 保持最新状态
    keyAnima.duration = 4.0;                 // 1.4 执行时长
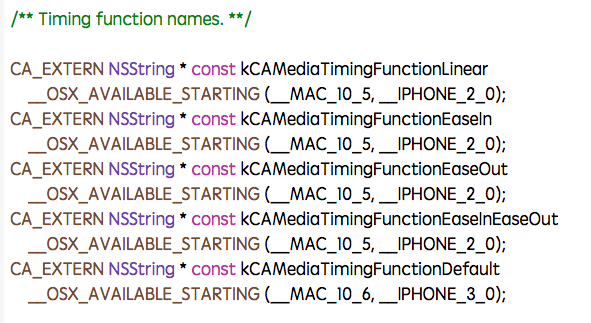
    // 1.5 动画节奏:缓入缓出
    keyAnima.timingFunction = [CAMediaTimingFunction functionWithName:kCAMediaTimingFunctionEaseInEaseOut];

    keyAnima.delegate = self;                // 监听开始与结束

    // 2. 添加动画
    [self.customView.layer addAnimation:keyAnima forKey:nil];
}

-(void)animationDidStart:(CAAnimation *)anim
{
    NSLog(@"开始动画");
}

-(void)animationDidStop:(CAAnimation *)anim finished:(BOOL)flag
{
    NSLog(@"结束动画");
}

@end
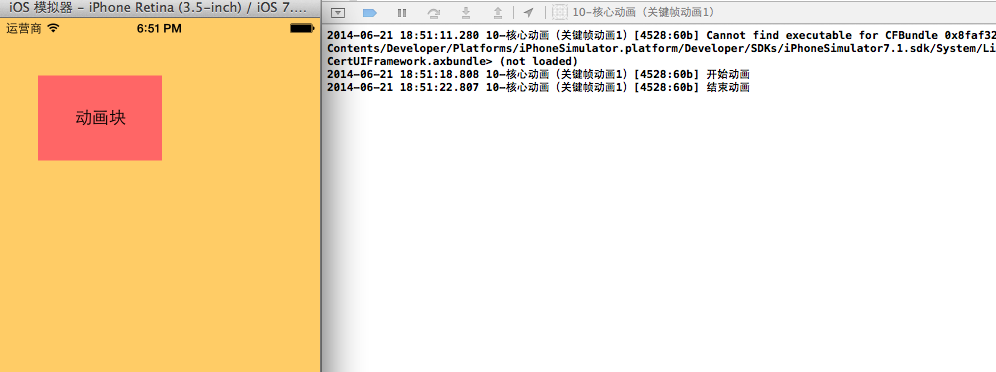
说明:这个项目中在 storyboard 里拖入了一个 view,并与控制器中的 customView 建立了关联。
效果与打印结果:
动画节奏(timingFunction)的可选值:
第二种方式:用 path 让图层沿指定轨迹移动(画圆)
-(void)touchesBegan:(NSSet *)touches withEvent:(UIEvent *)event
{
    CAKeyframeAnimation *keyAnima = [CAKeyframeAnimation animation];
    keyAnima.keyPath = @"position";

    // 1.1 建立一条圆形路径
    CGMutablePathRef path = CGPathCreateMutable();
    CGPathAddEllipseInRect(path, NULL, CGRectMake(150, 100, 100, 100));
    keyAnima.path = path;

    // 有 create 就一定要有 release
    CGPathRelease(path);

    keyAnima.removedOnCompletion = NO;
    keyAnima.fillMode = kCAFillModeForwards;
    keyAnima.duration = 5.0;
    keyAnima.timingFunction = [CAMediaTimingFunction functionWithName:kCAMediaTimingFunctionEaseInEaseOut];
    keyAnima.delegate = self;

    [self.customView.layer addAnimation:keyAnima forKey:nil];
}
说明:通过 path 属性,可以让图层沿着指定轨迹运动。注意 Core Foundation 的内存管理规则——凡是带 Create 的都要 Release。
停止动画
添加动画时给了一个 key,之后就能按 key 精确移除:
-(void)touchesBegan:(NSSet *)touches withEvent:(UIEvent *)event
{
    CAKeyframeAnimation *keyAnima = [CAKeyframeAnimation animation];
    keyAnima.keyPath = @"position";

    CGMutablePathRef path = CGPathCreateMutable();
    CGPathAddEllipseInRect(path, NULL, CGRectMake(150, 100, 100, 100));
    keyAnima.path = path;
    CGPathRelease(path);

    keyAnima.removedOnCompletion = NO;
    keyAnima.fillMode = kCAFillModeForwards;
    keyAnima.duration = 5.0;
    keyAnima.timingFunction = [CAMediaTimingFunction functionWithName:kCAMediaTimingFunctionEaseInEaseOut];

    // 添加时指定 key
    [self.customView.layer addAnimation:keyAnima forKey:@"wendingding"];
}

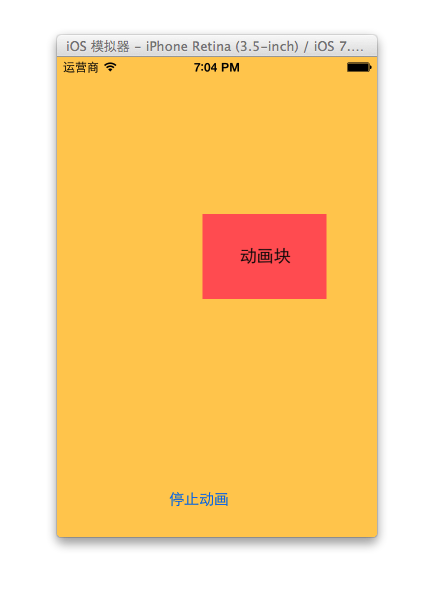
- (IBAction)stopOnClick:(UIButton *)sender {
    // 停止 layer 上以 wendingding 为标识的动画
    [self.customView.layer removeAnimationForKey:@"wendingding"];
}
点击停止按钮,程序内部会调用 removeAnimationForKey: 把该动画移除。
3. 实战小案例:图标抖动
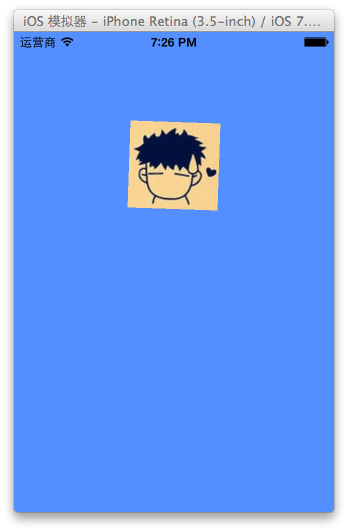
桌面图标在删除模式下会左右轻微摇摆,用关键帧动画几行代码就能复现:把 keyPath 设为 transform.rotation,values 给出「左 4 度、右 4 度、左 4 度」,再把 repeatCount 设为最大值即可持续抖动。
#import "YYViewController.h"

// 角度转弧度的宏:度数 / 180 * M_PI
#define angle2Radian(angle)  ((angle) / 180.0 * M_PI)

@interface YYViewController ()
@property (weak, nonatomic) IBOutlet UIImageView *iconView;
@end

@implementation YYViewController

-(void)touchesBegan:(NSSet *)touches withEvent:(UIEvent *)event
{
    // 1. 建立关键帧动画
    CAKeyframeAnimation *keyAnima = [CAKeyframeAnimation animation];
    keyAnima.keyPath = @"transform.rotation";
    keyAnima.duration = 0.1;    // 单次摆动时长

    // 2. 左右各偏转 4 度,形成抖动
    keyAnima.values = @[@(-angle2Radian(4)),
                        @(angle2Radian(4)),
                        @(-angle2Radian(4))];

    keyAnima.repeatCount = MAXFLOAT;   // 无限重复
    keyAnima.fillMode = kCAFillModeForwards;
    keyAnima.removedOnCompletion = NO;

    // 3. 添加动画
    [self.iconView.layer addAnimation:keyAnima forKey:nil];
}

@end
说明:图标向左、向右各偏转 4 度,快速往复就产生了抖动的视觉效果。
程序界面:
小结
基础动画的用法可以归纳成一张速查表:平移看 position,缩放看 bounds,旋转与位移看 transform,复杂轨迹看 CAKeyframeAnimation 的 values 或 path。再加上 removedOnCompletion = NO 与 fillMode = kCAFillModeForwards 这对固定组合,以及 delegate 提供的开始/结束回调,就足以应付绝大多数界面动效需求。
- 上一篇文章: iOS 执行绪沟通与执行绪安全:从图片下载实作到互斥锁与原子属性
- 下一篇文章: 深入淺出理解 iOS 多線程開發與線程創建方式