
Quartz2D 繪圖入門:直線、多邊形、圓弧、文字與圖片的完整實作
Quartz2D 是 iOS 早期最常被拿來做自訂繪圖的 2D 渲染引擎。所有绘制流程其实都围绕同一个模式展开:取得图形上下文 → 累积绘制指令 → 设定绘图状态 → 渲染到目标。本文用七个由浅入深的范例,把这套流程完整跑一遍。
一、绘制直线
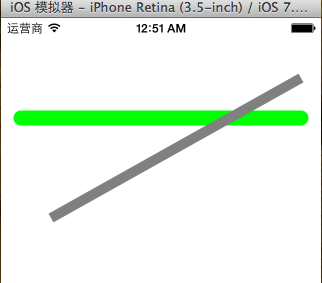
直线是最基础的图元,需要指定起点与终点,再决定线宽、颜色、端点与转角样式。值得注意的是,线条属于「路径」,只能用 CGContextStrokePath 描边,若改用 CGContextFillPath 是无法画出实心线的。
#import "YYlineview.h"

@implementation YYlineview

// 当自定义 view 第一次显示时,系统会自动调用 drawRect:
- (void)drawRect:(CGRect)rect
{
    // 1. 取得与当前视图关联的图形上下文(上下文决定绘制的输出目标)
    // 在 drawRect 中呼叫 UIGraphicsGetCurrentContext 取得的是 Layer 的上下文
    CGContextRef ctx = UIGraphicsGetCurrentContext();

    // 2. 累积绘图指令:设定起点与终点
    CGContextMoveToPoint(ctx, 20, 100);
    CGContextAddLineToPoint(ctx, 300, 100);

    // 3. 设定绘图状态
    CGContextSetRGBStrokeColor(ctx, 0, 1.0, 0, 1.0); // 蓝色描边
    CGContextSetLineWidth(ctx, 15);                  // 线宽
    CGContextSetLineCap(ctx, kCGLineCapRound);       // 端点圆角
    CGContextSetLineJoin(ctx, kCGLineJoinRound);     // 转角圆角

    // 4. 渲染(空心线条)
    CGContextStrokePath(ctx);

    // 第二条线:起点、终点
    CGContextMoveToPoint(ctx, 50, 200);
    CGContextAddLineToPoint(ctx, 300, 60);

    // 第二种设定颜色的方式:直接用 UIColor
    [[UIColor grayColor] set];
    CGContextSetLineWidth(ctx, 10);
    CGContextSetLineCap(ctx, kCGLineCapButt);

    CGContextStrokePath(ctx);
}

@end
效果:
二、绘制三角形
三角形属于封闭路径。只要连续用 CGContextAddLineToPoint 连出三个顶点,再呼叫 CGContextClosePath 让系统自动把终点接回起点即可,不必手动把坐标写回第一个点。
#import "YYrectview.h"

@implementation YYrectview

- (void)drawRect:(CGRect)rect
{
    // 1. 取得图形上下文
    CGContextRef ctx = UIGraphicsGetCurrentContext();

    // 2. 绘制三角形
    CGContextMoveToPoint(ctx, 20, 100);    // 起点
    CGContextAddLineToPoint(ctx, 40, 300); // 第二个点
    CGContextAddLineToPoint(ctx, 200, 200);// 第三个点
    CGContextClosePath(ctx);               // 自动闭合路径

    // 3. 渲染到 layer
    CGContextStrokePath(ctx);
}

@end
效果:
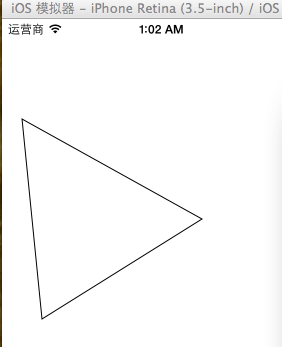
关键提示:CGContextClosePath(ctx); 负责把起点与终点闭合,省下手动回画的麻烦。
三、绘制四边形
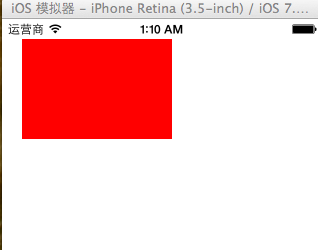
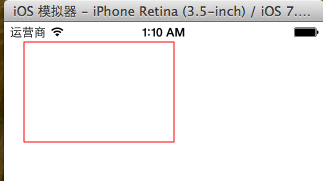
矩形与一般四边形不需要逐点连线,直接用 CGContextAddRect 传入一个 CGRect 就好。这里要特别记住一个规则:绘图状态必须在渲染之前设定,渲染之后再改颜色不会有任何效果。
#import "YYrect.h"

@implementation YYrect

- (void)drawRect:(CGRect)rect
{
    // 1. 取得图形上下文
    CGContextRef ctx = UIGraphicsGetCurrentContext();

    // 2. 加入矩形路径
    CGContextAddRect(ctx, CGRectMake(20, 20, 150, 100));

    // 设定绘图状态(务必在渲染前)
    // 纯 C 写法:
    // CGContextSetRGBStrokeColor(ctx, 1.0, 0, 0, 1.0);  // 只影响描边
    // CGContextSetRGBFillColor(ctx, 1.0, 0, 0, 1.0);    // 只影响填充

    // OC 写法:setFill / setStroke / set 三种
    // [[UIColor purpleColor] setFill];
    // [[UIColor blueColor] setStroke];
    // [[UIColor greenColor] set];  // 同时设定实心与空心
    [[UIColor colorWithRed:1.0 green:0 blue:0 alpha:1.0] set];

    // 3. 渲染:空心
    CGContextStrokePath(ctx);
    // 渲染:实心
    // CGContextFillPath(ctx);
}

@end
效果(空心与实心):
提示:想画实心就把 StrokePath 换成 FillPath,想画空心则相反;两者不能混用于同一条路径的同一属性设定。
四、画圆与椭圆
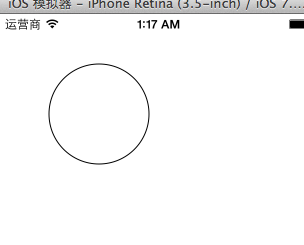
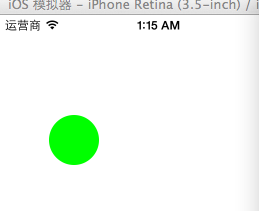
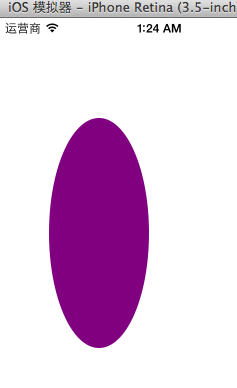
圆形有两种常见作法:一是用圆弧函数 CGContextAddArc 扫满 2π;二是用 CGContextAddEllipseInRect 在给定矩形内内切出椭圆——矩形是正方形时就是正圆,矩形被拉扁时就得到椭圆。
作法一:以圆心与半径画圆
- (void)drawRect:(CGRect)rect
{
    // 1. 取得上下文
    CGContextRef ctx = UIGraphicsGetCurrentContext();

    // 2. 画圆(x, y 为圆心,50 为半径,0 ~ 2π 扫满一圈)
    CGContextAddArc(ctx, 100, 100, 50, 0, 2 * M_PI, 0);

    // 3. 渲染(线条只能空心绘制)
    CGContextStrokePath(ctx);
}
效果:
作法二:在矩形内画内切圆(实心)
// 1. 取得上下文
CGContextRef ctx = UIGraphicsGetCurrentContext();

// 2. 在 50x50 的矩形内画内切圆
CGContextAddEllipseInRect(ctx, CGRectMake(50, 100, 50, 50));

[[UIColor greenColor] set];

// 3. 渲染为实心
CGContextFillPath(ctx);
效果:
作法三:把矩形拉成长条形,就得到椭圆
// 1. 取得上下文
CGContextRef ctx = UIGraphicsGetCurrentContext();

// 2. 宽高不相等 → 椭圆
CGContextAddEllipseInRect(ctx, CGRectMake(50, 100, 100, 230));

[[UIColor purpleColor] set];

// 3. 渲染
CGContextFillPath(ctx);
效果:
五、绘制圆弧与扇形
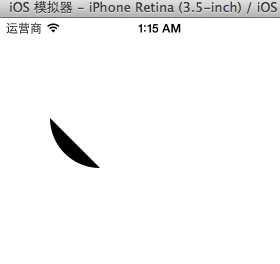
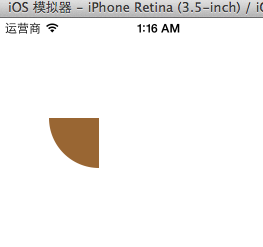
CGContextAddArc 的五个参数分别是:圆心 x、圆心 y、半径、起始弧度、结束弧度,以及绘制方向(0 为顺时针,1 为逆时针)。把不同的弧度区间组合起来,就能拼出各种缺口形状。
作法一:指定弧度区间画弧
// 1. 取得上下文
CGContextRef ctx = UIGraphicsGetCurrentContext();

// 2. 画圆弧
// x / y      → 圆心
// radius     → 半径
// startAngle → 起始弧度
// endAngle   → 结束弧度
// clockwise  → 方向(0 顺时针,1 逆时针)
CGContextAddArc(ctx, 100, 100, 50, M_PI_2, M_PI, 0);
CGContextClosePath(ctx);

// 3. 渲染
CGContextFillPath(ctx);
效果:
作法二:先连一条半径再画弧,闭合后就是扇形(饼图)
// 1. 取得上下文
CGContextRef ctx = UIGraphicsGetCurrentContext();

// 2. 从圆心拉一条直线到圆周
CGContextMoveToPoint(ctx, 100, 100);
CGContextAddLineToPoint(ctx, 100, 150);

// 接上圆弧
CGContextAddArc(ctx, 100, 100, 50, M_PI_2, M_PI, 0);

// 闭合路径
CGContextClosePath(ctx);
[[UIColor brownColor] set];

// 3. 渲染(扇形需要实心填充)
CGContextFillPath(ctx);
效果:
六、绘制文字
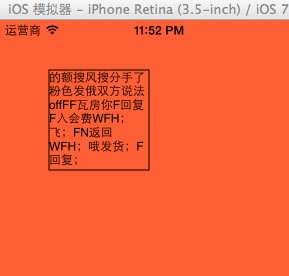
Quartz2D 虽然提供了 CGContextSelectFont、CGContextShowText 这组 C 语言的文字绘制接口,但实际开发中并不推荐:Core Graphics 的坐标原点在左下角,与 UIKit 的左上角原点相反,直接用 C 接口画出来的文字会是上下颠倒的,而且排版、换行都要自己处理。
正确做法是把 NSString 的 drawInRect:withAttributes: 或 drawAtPoint:withAttributes: 交给 UIKit 处理,由它去协调坐标系与排版。
#import "YYtextview.h"

@implementation YYtextview

- (void)drawRect:(CGRect)rect
{
    NSString *str = @"这是一段用于测试绘图的文字内容,包含中英文 mixed content 与标点。";

    // 不推荐:纯 C 接口绘制文字(坐标颠倒且繁琐)
    // CGContextSelectFont(...);
    // CGContextShowText(...);

    // 先画一个矩形作为对照
    CGContextRef ctx = UIGraphicsGetCurrentContext();
    CGContextAddRect(ctx, CGRectMake(50, 50, 100, 100));
    CGContextStrokePath(ctx);

    // 设定文字样式
    NSMutableDictionary *md = [NSMutableDictionary dictionary];
    md[NSForegroundColorAttributeName] = [UIColor redColor];   // 文字颜色
    md[NSBackgroundColorAttributeName] = [UIColor greenColor]; // 背景颜色
    md[NSFontAttributeName] = [UIFont systemFontOfSize:20];    // 字号

    // 方式一:绘制在指定坐标点
    // [str drawAtPoint:CGPointMake(10, 10) withAttributes:md];

    // 方式二:绘制在指定区域内,一行放不下会自动换行,超出范围的部分不显示
    [str drawInRect:CGRectMake(50, 50, 100, 100) withAttributes:nil];
}

@end
效果:
七、把图片画到图层上
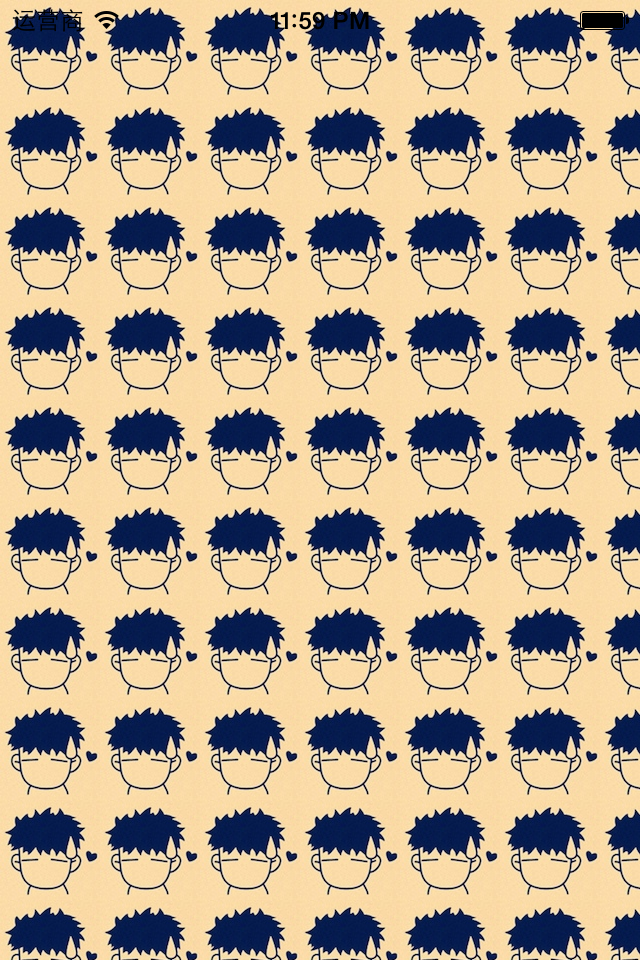
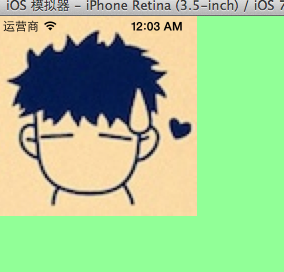
UIImage 提供了三种绘制方法,行为差别很大:drawAtPoint: 按原始尺寸贴在指定位置、drawInRect: 拉伸填满矩形、drawAsPatternInRect: 用平铺方式重复填满区域。选哪一个,取决于你要的是定位、缩放还是纹理填充。
作法一:平铺(Pattern)
#import "YYimage.h"

@implementation YYimage

- (void)drawRect:(CGRect)rect
{
    // 1. 把图片载入内存
    UIImage *image = [UIImage imageNamed:@"me"];

    // 2. 以平铺方式铺满整个区域
    [image drawAsPatternInRect:CGRectMake(0, 0, 320, 480)];
}

@end
效果(平铺):
作法二:拉伸(Stretch)
#import "YYimage.h"

@implementation YYimage

- (void)drawRect:(CGRect)rect
{
    UIImage *image = [UIImage imageNamed:@"me"];

    // 拉伸原图填满指定区域
    [image drawInRect:CGRectMake(0, 0, 200, 200)];

    // 平铺写法(对比用)
    // [image drawAsPatternInRect:CGRectMake(0, 0, 320, 480)];
}

@end
效果(拉伸):
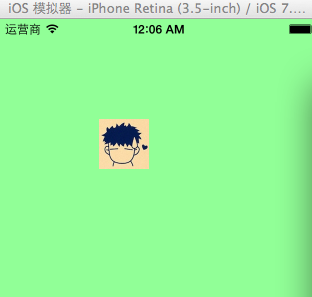
作法三:定位(保持原始尺寸)
#import "YYimage.h"

@implementation YYimage

- (void)drawRect:(CGRect)rect
{
    UIImage *image = [UIImage imageNamed:@"me"];

    // 按原始尺寸绘制在固定坐标
    [image drawAtPoint:CGPointMake(100, 100)];
}

@end
效果(绘制在固定位置):
小结
把上面七个范例放在一起看,Quartz2D 的心智模型其实很简单:路径负责描述「形状」,状态负责描述「长什么样」,渲染函数负责决定「空心还是实心」。把这三层分清楚,再复杂的自绘控件都能拆解成同样的步骤。
- 上一篇文章: Quartz2D 繪圖狀態管理:上下文棧與 CTM 矩陣變形
- 下一篇文章: iOS 为什么要用多执行绪,以及三种实作方式的完整比较