
詳解 iOS 開發中 Core Data 資料儲存的使用
編輯:iOS 開發綜合
Core Data 是 iOS 平台上一套強大的物件圖管理與資料持久化框架,本質上可視為對 SQLite 的更高層封裝。它把底層的資料庫操作抽象為物件操作,讓開發者能用更直觀的方式管理資料。本文將從建立專案到增刪查改,完整示範 Core Data 的用法。
建立帶有 Core Data 的專案
建立 Core Data 應用最簡單的方式,是在專案初始化時勾選「Use Core Data」選項。
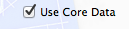
建立完成後,你會發現 AppDelegate 中自動多出了三個屬性與兩個方法:
@property (readonly, strong, nonatomic) NSManagedObjectContext *managedObjectContext;
@property (readonly, strong, nonatomic) NSManagedObjectModel *managedObjectModel;
@property (readonly, strong, nonatomic) NSPersistentStoreCoordinator *persistentStoreCoordinator;

- (void)saveContext;
- (NSURL *)applicationDocumentsDirectory;
Core Data 的核心類別
在深入實作前,先認識幾個關鍵類別,理解它們各自的角色:
- NSManagedObjectModel(被管理的物件模型):相當於實體定義,且包含實體之間的關係。
- NSManagedObjectContext(物件上下文):操作實際資料的樞紐,負責插入、查詢、更新、刪除。
- NSPersistentStoreCoordinator(持久化儲存助理):相當於資料庫的連接器。
- NSFetchRequest:獲取資料的請求,相當於查詢語句。
- NSPredicate:查詢條件。
- NSEntityDescription:實體結構,相當於表格結構。
- .xcdatamodeld 套件:以資料模型編輯器編輯,編譯後成為 .momd 或 .mom 檔——這也是為何專案裡看不到它、程式卻能正常讀取的原因。
建立實體與物件類別
點擊 .xcdatamodel 檔,選擇 Add Entity 新增一個實體(例如 Person),再為它添加想要的字段(如 firstName、lastName、age)。
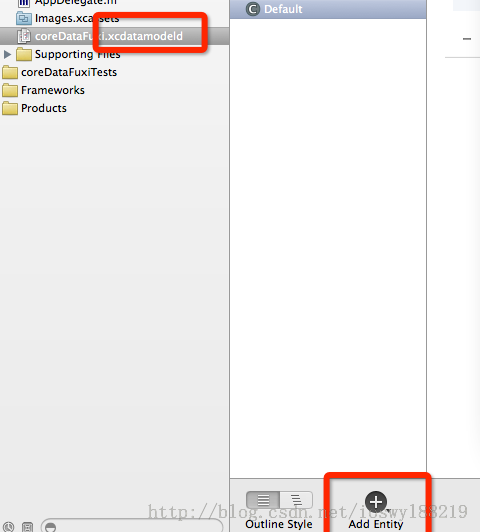
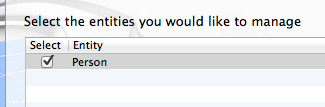
接著透過 command + n,選擇 Core Data 下的 NSManagedObject Subclass 來產生對應的物件類別,讓程式碼能型別安全地操作資料。
新增資料
透過 NSEntityDescription 建立一個新的實體物件,賦值後存檔即可:
Person *newPerson = [NSEntityDescription insertNewObjectForEntityForName:@"Person"
                                               inManagedObjectContext:self.managedObjectContext];
if (newPerson == nil) {
    NSLog(@"Failed to create the new person.");
    return NO;
}
newPerson.firstName = paramFirstName;
newPerson.lastName  = paramLastName;
newPerson.age       = [NSNumber numberWithUnsignedInteger:paramAge];

NSError *savingError = nil;
if ([self.managedObjectContext save:&savingError]) {
    return YES;
} else {
    NSLog(@"Failed to save the new person. Error = %@", savingError);
}
查詢資料
查詢時先建立 NSFetchRequest,指定要讀取的實體,再交給 context 執行:
NSFetchRequest *fetchRequest = [[NSFetchRequest alloc] init];
NSEntityDescription *entity =
    [NSEntityDescription entityForName:@"Person" inManagedObjectContext:self.managedObjectContext];
[fetchRequest setEntity:entity];

NSError *requestError = nil;
NSArray *persons = [self.managedObjectContext executeFetchRequest:fetchRequest error:&requestError];

if ([persons count] > 0) {
    NSUInteger counter = 1;
    for (Person *thisPerson in persons) {
        NSLog(@"Person %lu First Name = %@, Age = %ld",
              (unsigned long)counter,
              thisPerson.firstName,
              (unsigned long)[thisPerson.age unsignedIntegerValue]);
        counter++;
    }
}
刪除資料
刪除的關鍵是先从 context 取回要刪的物件,呼叫 deleteObject: 後,別忘了再 save: 一次讓變更落地:
NSArray *persons = [self.managedObjectContext executeFetchRequest:fetchRequest error:&requestError];
if ([persons count] > 0) {
    Person *lastPerson = [persons lastObject];
    [self.managedObjectContext deleteObject:lastPerson];

    NSError *savingError = nil;
    if ([self.managedObjectContext save:&savingError]) {
        NSLog(@"Successfully deleted the last person in the array.");
    }
}
排序
若需要有序結果,透過 NSSortDescriptor 設定排序規則,再掛到 fetchRequest 上即可。ascending:YES 表示升冪排序:
NSSortDescriptor *ageSort =
    [[NSSortDescriptor alloc] initWithKey:@"age" ascending:YES];
NSSortDescriptor *firstNameSort =
    [[NSSortDescriptor alloc] initWithKey:@"firstName" ascending:YES];
NSArray *sortDescriptors =
    [[NSArray alloc] initWithObjects:ageSort, firstNameSort, nil];

fetchRequest.sortDescriptors = sortDescriptors;
以上就是 Core Data 從建置到增刪查改的完整流程。作為 SQLite 的高階封裝,Core Data 以物件導向的方式大幅簡化了資料管理,非常適合需要處理複雜資料模型與物件關係的專案。