
iOS 圓形頭像裁剪與加邊框:UIBezierPath 加 addClip 實作
編輯:iOS 開發綜合
圓形頭像大概是最常被要求、也最容易被寫錯的繪圖需求之一。關鍵觀念只有一個:先設定裁剪區域,再畫圖。順序顛倒,圖就會溢出圓外。
一、最基礎的圓形裁剪
- (void)viewDidLoad {
    [super viewDidLoad];

    // 載入圖片
    UIImage *image = [UIImage imageNamed:@"菲哥"];
    CGSize size = image.size;

    // 開啟位圖上下文
    UIGraphicsBeginImageContextWithOptions(size, NO, 0);

    // 建立圓形路徑
    UIBezierPath *path = [UIBezierPath bezierPathWithOvalInRect:CGRectMake(0, 0, image.size.width, image.size.height)];

    // 設為裁剪區域(關鍵步驟)
    [path addClip];

    // 繪製圖片
    [image drawAtPoint:CGPointZero];

    // 從上下文取出結果
    _imageView.image = UIGraphicsGetImageFromCurrentImageContext();

    // 關閉上下文
    UIGraphicsEndImageContext();
}
UIGraphicsBeginImageContextWithOptions 的第三個參數傳 0,代表使用螢幕的預設解析度(retina 螢幕會自動以 2x 或 3x 繪製),這樣輸出的圖才不會模糊。
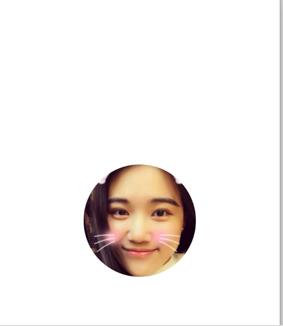
成果如下:
二、加上外圈邊框
思路是「先畫一個大圓當底色,再在大圓內側畫一個小圓作為裁剪區」。兩個圓半徑相差的就是邊框寬度。
- (void)viewDidLoad {
    [super viewDidLoad];

    UIImage *image = [UIImage imageNamed:@"大菲哥"];

    // 邊框寬度
    CGFloat border = 3;
    CGFloat imageWH = image.size.width;

    // 外圓尺寸 = 圖片尺寸 + 左右各一個 border
    CGFloat ovalWH = imageWH + 2 * border;

    // 開啟上下文(尺寸以外圓為準)
    UIGraphicsBeginImageContextWithOptions(image.size, NO, 0);

    // 先畫大圓並填色,作為邊框
    UIBezierPath *path = [UIBezierPath bezierPathWithOvalInRect:CGRectMake(0, 0, ovalWH, ovalWH)];
    [[UIColor orangeColor] set];
    [path fill];

    // 再設定內側裁剪區域
    UIBezierPath *path1 = [UIBezierPath bezierPathWithOvalInRect:CGRectMake(border, border, imageWH, imageWH)];
    [path1 addClip];

    // 在內側區域繪製圖片
    [image drawAtPoint:CGPointMake(border, border)];

    _imageView.image = UIGraphicsGetImageFromCurrentImageContext();
    UIGraphicsEndImageContext();
}
注意這裡有個細節值得修正:上下文尺寸應該用 ovalWH 而非 image.size,否則右側與底部的邊框會被裁掉。把 UIGraphicsBeginImageContextWithOptions 改成傳入 CGSizeMake(ovalWH, ovalWH),四邊才會一致。
效果如下:

三、順手學會螢幕截圖
原理相同,只是把「要畫的內容」從一張圖換成某個 view 的 layer:
- (void)viewDidLoad {
    [super viewDidLoad];

    // 開啟上下文,尺寸等同 view 大小
    UIGraphicsBeginImageContextWithOptions(self.view.bounds.size, NO, 0);

    // 取得目前上下文
    CGContextRef ctx = UIGraphicsGetCurrentContext();

    // 把 view 的圖層渲染進上下文
    [self.view.layer renderInContext:ctx];

    // 取出圖片
    UIImage *image = UIGraphicsGetImageFromCurrentImageContext();

    UIGraphicsEndImageContext();

    // 存入相冊
    UIImageWriteToSavedPhotosAlbum(image, nil, nil, nil);
}
renderInContext: 是離屏渲染的核心。它能渲染 layer 上的內容,但對某些特殊 layer(例如使用 Metal、OpenGL ES 或相機預覽層的內容)無效,會得到空白。這類情況需要改用 UIGraphicsImageRenderer 搭配 drawViewHierarchyInRect:afterScreenUpdates:。
補充:新版的簡潔寫法
iOS 10 之後,蘋果提供了 UIGraphicsImageRenderer,把 begin/end 這對容易成對出現、也容易漏掉的呼叫收進區塊裡,更安全:
UIGraphicsImageRendererFormat *format = [UIGraphicsImageRendererFormat preferredFormat];
UIGraphicsImageRenderer *renderer = [[UIGraphicsImageRenderer alloc] initWithSize:image.size format:format];

UIImage *result = [renderer imageWithActions:^(UIGraphicsImageRendererContext *ctx) {
    UIBezierPath *path = [UIBezierPath bezierPathWithOvalInRect:CGRectMake(0, 0, image.size.width, image.size.height)];
    [path addClip];
    [image drawAtPoint:CGPointZero];
}];
新專案建議直接採用這個版本,程式碼更短,也不容易忘記關閉上下文。
- 上一篇文章: iOS 抽屜效果實作:Pan 手勢搭配框架縮放與邊緣吸附
- 下一篇文章: iOS 九宮格手勢密碼解鎖實作:LockView 從繪製到驗證