
iOS 開發實戰小抄:六個能立刻提效的技巧與登入架構思路
先用一張圖概括 iOS 開發該掌握的能力版圖:
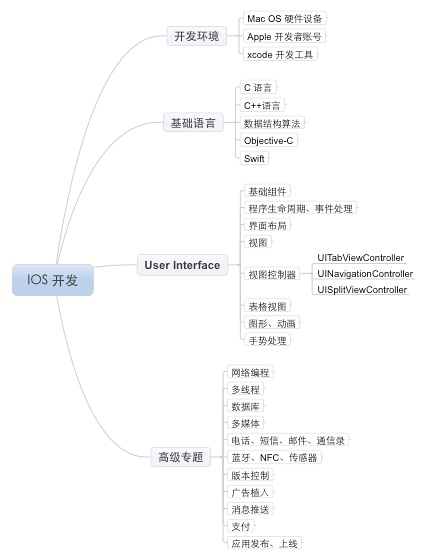
接下來是幾個在專案裡反覆被驗證過的實用技巧,從 UI 細節一路聊到登入與互踢的架構設計。
一、全圖背景導致側滑返回卡頓
現象:以整張圖作為背景時,側滑返回會出現圖片「黏」一下才跟手。
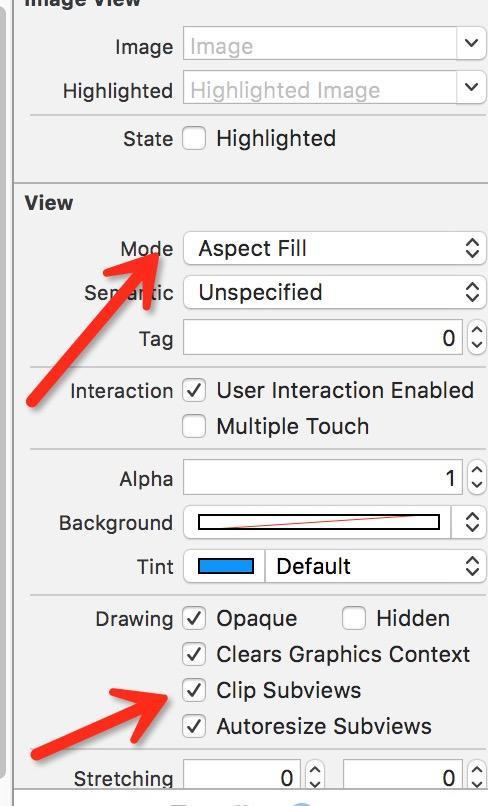
原因:這類介面通常選用了 imageView 的第三種填充方式(Aspect Fill)。
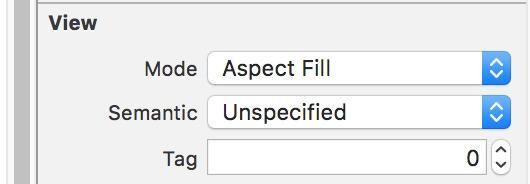
這種填充能在不變形的前提下盡量鋪滿容器,但記得同時把超出範圍的部分裁掉:
另外,加約束時務必選中 currentview 對應的那個物件,選錯父視圖後續一切都白搭。
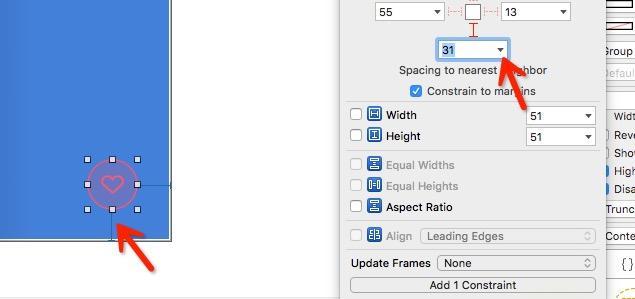
二、與其堆一堆型別判斷,不如按寬度取值
同一張圖,在 6P 上按設計稿布好約束,跑到 5s 上就會發現愛心與下方文案擠在一起。直覺做法是為每個尺寸寫一套分支,但其實按螢幕寬度取一組常數更清爽:
CGFloat top = 0; CGFloat left = 0; CGFloat bottom = 0; CGFloat right = 0; if ([UIScreen ff_screenSize].width == 375) { top = 80; left = 70; bottom = 31; self.titleLabel.font = [UIFont systemFontOfSize:18]; self.englishLabel.font = [UIFont systemFontOfSize:20]; self.introduceLabel.font = [UIFont systemFontOfSize:14]; right = 33; }else if ([UIScreen ff_screenSize].width == 414){ bottom = 31; top = 88; left = 84; right = 33; }else if ([UIScreen ff_screenSize].width == 320){ self.titleLabel.font = [UIFont systemFontOfSize:16]; self.englishLabel.font = [UIFont systemFontOfSize:18]; self.introduceLabel.font = [UIFont systemFontOfSize:13]; self.introduceTop.constant = 8; top = 70; left = 44; bottom = 24; right = 28; } self.collectionButtonLeft.constant = right; self.chineseLabelTop.constant = top; self.introlduceLeft.constant = left; self.collectionButtonbottom.constant = bottom; [self.view setNeedsLayout];
最後那句 [self.view setNeedsLayout]; 千萬別省。改完常數不主動觸發重新排版,畫面是不會有任何變化的——這是很多人「代碼明明對了卻沒效果」的元兇。
三、數字跳動動畫
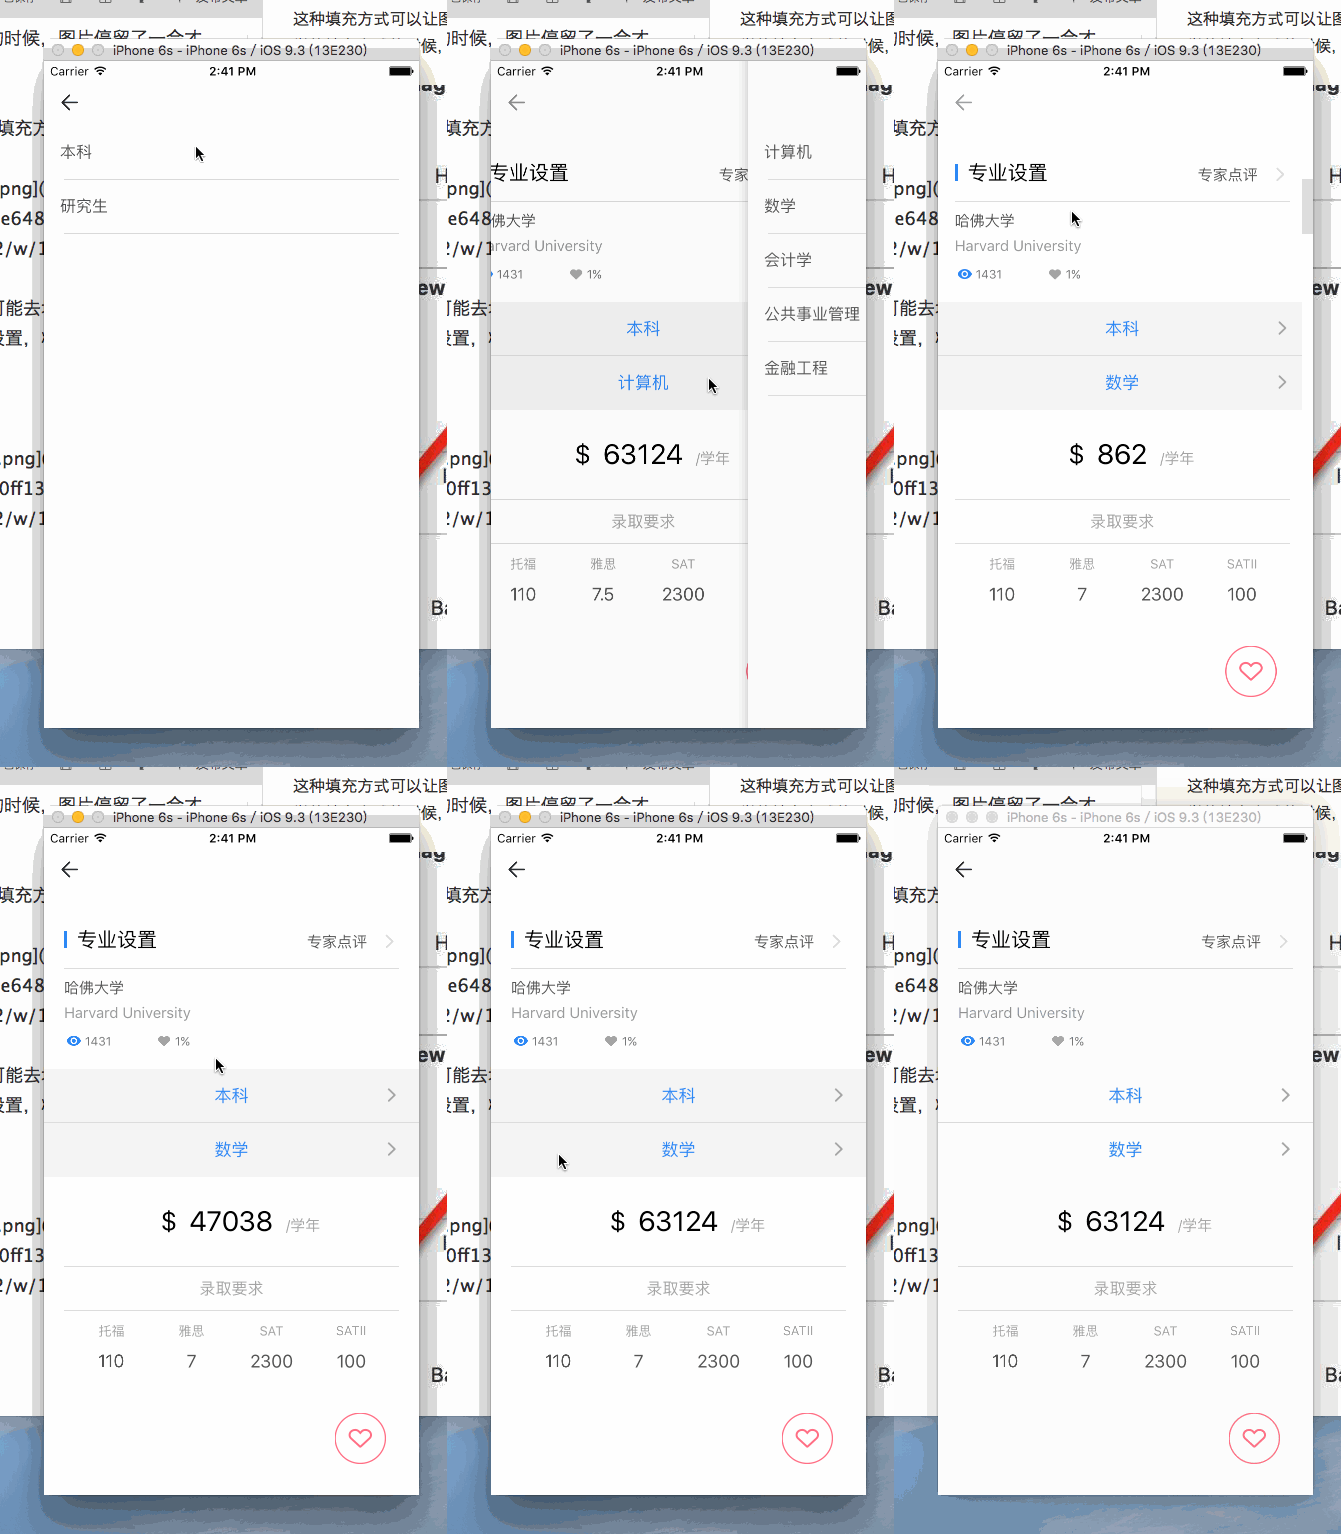
面對學費、點擊量這類大數字,一個遞增動畫就能讓整頁的質感提升不少,實作卻出乎意料地簡單:
@property (weak, nonatomic) IBOutlet UICountingLabel *tuitionLabel; weakSelf.tuitionLabel.text = self.tuitionForAcademyModel.tuition; NSInteger grade = [self.tuitionForAcademyModel.tuition integerValue]; weakSelf.tuitionLabel.format = @"%d%"; [weakSelf.tuitionLabel countFromZeroTo:grade];
最容易漏掉的是設定 format。不設的話它會一路把浮點小數也滾出來。
四、調整 label 的字元間距
UILabel 本身沒有 lineSpacing 這類屬性,得靠可變樣式串繞 Core Text 的 key:
- (void)configureContentLabelText { NSMutableAttributedString *attributedString = [[NSMutableAttributedString alloc]initWithString:@"Label"]; long number = 5; CFNumberRef num = CFNumberCreate(kCFAllocatorDefault,kCFNumberSInt8Type,&number); [attributedString addAttribute:(id)kCTKernAttributeName value:(__bridge id)num range:NSMakeRange(0,[attributedString length])]; CFRelease(num); self.label.attributedText = attributedString; }
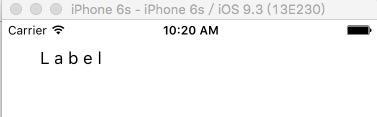
注意 CFNumberCreate 建立的物件需要 CFRelease 手動釋放,否則在 MRC 環境下就是洩漏。
五、登入流程該怎麼鋪
一個能撐住專案的登入思路大致是這樣:
- 使用者瀏覽 App,觸發需要身分的操作;
- 該操作對應的後台介面需要帶 token,此時先判斷本地是否已持久化 token;
- 若本地沒有,直接彈出登入框;
- 登入成功後,把 token 等資訊落地保存。
幾個容易忽略的細節:
- App 啟動時把 token 讀進單例,後續直接使用,避免反覆做 IO 這種高成本操作。
- 自訂控制項往往也會遇到需要登入的情境,而控制項級別無法 present 控制器,只能發通知讓二級控制器代勞。這樣通知會氾濫,更好的做法是把 login 直接掛在 window 上。(這點當初工期太緊沒能改,留給後人警惕。)
- token 失效應該由後台回傳統一錯誤碼,前端集中攔截處理,別讓每個介面各寫一份判斷。
六、帳號互踢的處理位置
最重要的一句:千萬不要在單個頁面裡處理互踢。思路應該是全局收斂:
- 登入/登出時發通知,各控制器在通知中完成自身狀態重置;
- 後台在 token 失效時回傳約定好的錯誤碼;
- 在 AFN 的統一封裝層集中攔截這個碼,再對外拋通知(各家後台協議不同,這裡只示意位置)。
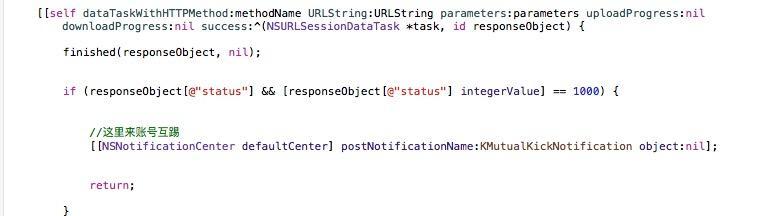
通知最終由 UITabBarController 接收,負責提示並重新拉起登入:
#import <UIKit/UIKit.h> @interface WXMainController : UITabBarController @end
#pragma mark -監聽賬號互踢,這時候先退出登錄,然後回到首頁 - (void)addNotification{ WS(weakSelf); // [[NSNotificationCenter defaultCenter] postNotificationName:KMutualKickNotification object:nil]; [[NSNotificationCenter defaultCenter] addObserverForName:KMutualKickNotification object:nil queue:nil usingBlock:^(NSNotification * _Nonnull note) { [weakSelf alertWindow]; }]; } #pragma mark-彈出框選擇界面 - (void)alertWindow{ if (!self.isShow) { self.isShow = YES; UIAlertView *alter = [[UIAlertView alloc] initWithTitle:@"" message:@"您的賬號已在其他設備登錄,現在您已經處於退出登錄狀態" delegate:self cancelButtonTitle:@"確定" otherButtonTitles:nil]; [alter show]; } } #pragma mark-彈出框選擇界面的代理方法,點擊確定就彈出登錄框 - (void)alertView:(UIAlertView *)alertView clickedButtonAtIndex:(NSInteger)buttonIndex{ if (buttonIndex == 0) { WXLoginController * loginController = [WXLoginController showLoginContoller:NO andIsShowColse:NO]; [self presentViewController:loginController animated:YES completion:nil]; self.isShow = NO; } }
用 isShow 標記位攔一次重複彈窗,是個小而有效的保護。
任何領域都有方法與技巧,但沒有捷徑。iOS 開發也一樣,先把功夫下在實踐裡,熟練之後技巧自然浮現。