
自製 iOS 密碼輸入框:像微信支付那樣的方格密碼鍵盤
編輯:iOS 開發綜合
專案裡要做紅包功能,就需要一個支付密碼輸入框。這裡不打算直接堆幾個 label 上去,而是自己畫一個具備輸入能力的 view,主要用到 UIKeyInput 協定與 CoreGraphics 繪圖,成品效果接近微信支付。
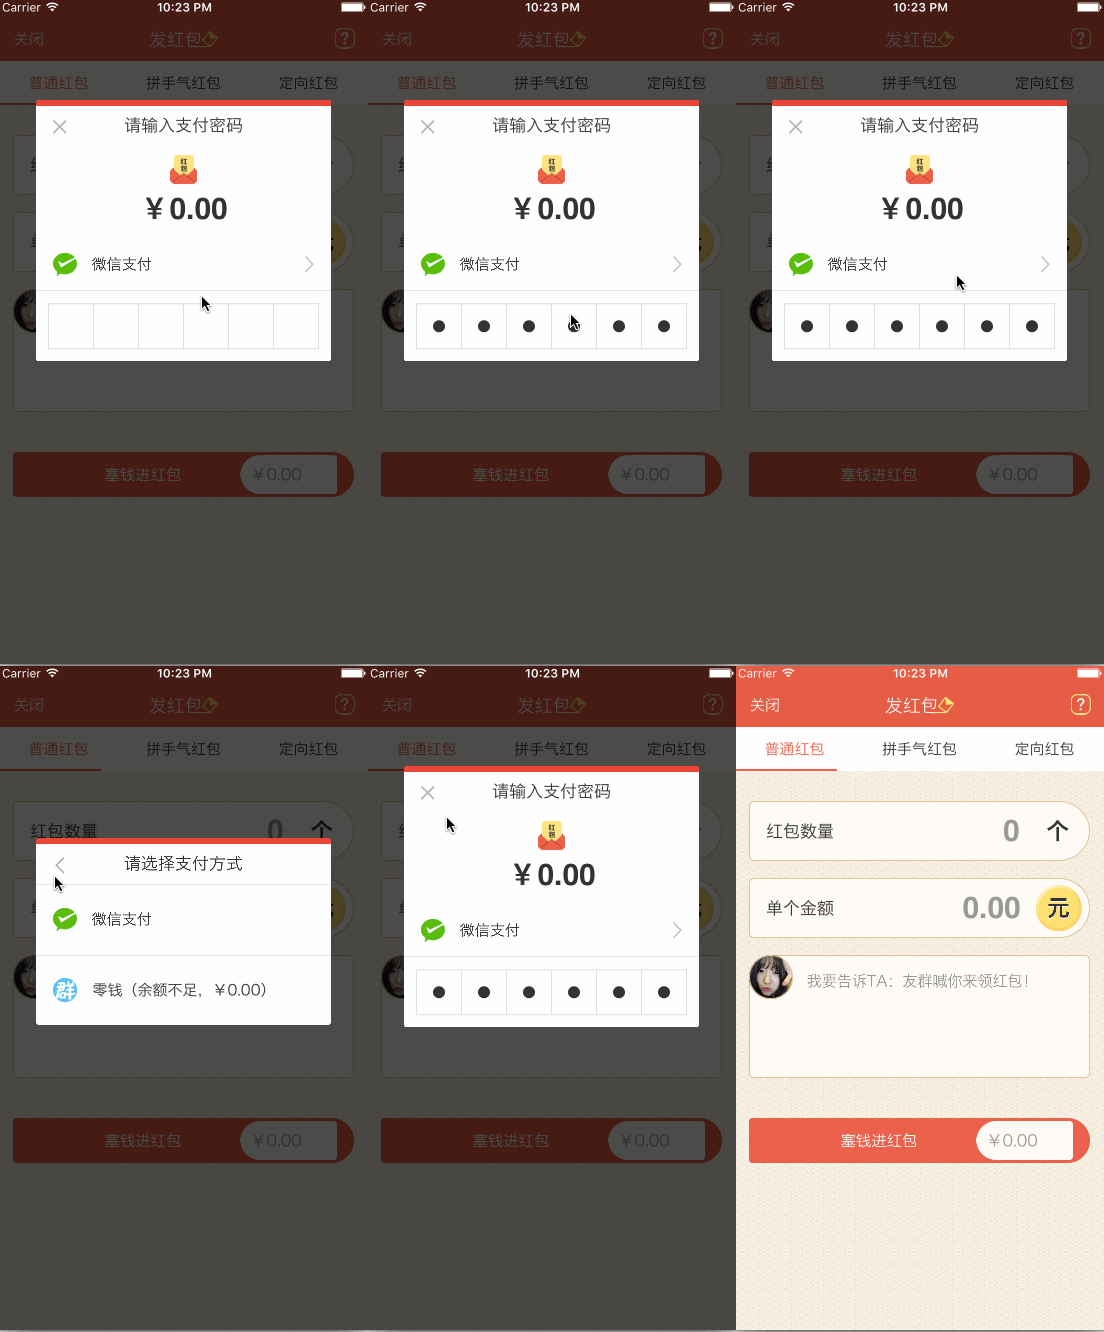
第一步:讓自訂 view 能接收鍵盤輸入
UIKeyInput 為 responder 提供了最精簡的鍵盤輸入能力。只要讓自訂 view 具備這個協定,並成為第一響應者,系統就會為它彈出鍵盤。協定中必須實作的方法有幾個:
 #pragma mark - UIKeyInput

 /** 是否有可顯示的文字 */
 - (BOOL)hasText {
     return self.textStore.length > 0;
 }

 /** 插入文字 */
 - (void)insertText:(NSString *)text {
     if (self.textStore.length < self.passWordNum) {
         // 只允許數字:把非數字字元濾掉後比對
         NSCharacterSet *cs = [[NSCharacterSet characterSetWithCharactersInString:MONEYNUMBERS] invertedSet];
         NSString *filtered = [[text componentsSeparatedByCharactersInSet:cs] componentsJoinedByString:@""];
         BOOL basicTest = [text isEqualToString:filtered];
         if (basicTest) {
             if ([self.delegate respondsToSelector:@selector(passWordDidChange:)]) {
                 [self.delegate passWordDidChange:self];
             }
             // 輸入完成時另外回呼
             if (self.textStore.length == self.passWordNum) {
                 if ([self.delegate respondsToSelector:@selector(passWordCompleteInput:)]) {
                     [self.delegate passWordCompleteInput:self];
                 }
             }
             [self.textStore appendString:text];
             [self setNeedsDisplay];
         }
     }
 }

 /** 刪除前一個字元 */
 - (void)deleteBackward {
     if (self.textStore.length > 0) {
         [self.textStore deleteCharactersInRange:NSMakeRange(self.textStore.length - 1, 1)];
         if ([self.delegate respondsToSelector:@selector(passWordDidChange:)]) {
             [self.delegate passWordDidChange:self];
         }
     }
     [self setNeedsDisplay];
 }

 /** 允許成為第一響應者 */
 - (BOOL)canBecomeFirstResponder {
     return YES;
 }

 /** 點擊時取得焦點 */
 - (void)touchesBegan:(NSSet<UITouch *> *)touches withEvent:(UIEvent *)event {
     if (![self isFirstResponder]) {
         [self becomeFirstResponder];
     }
 }
第二步:用 CoreGraphics 把格子畫出來
繪製邏輯是:先畫外框與分隔線,再依已輸入的位數畫出對應數量的小圓點。每次字元數變動都呼叫 setNeedsDisplay 觸發重繪。
 /** 單格邊長 */
 - (void)setSquareWidth:(CGFloat)squareWidth {
     _squareWidth = squareWidth;
     [self setNeedsDisplay];
 }

 /** 使用數字鍵盤 */
 - (UIKeyboardType)keyboardType {
     return UIKeyboardTypeNumberPad;
 }

 /** 密碼位數 */
 - (void)setPassWordNum:(NSUInteger)passWordNum {
     _passWordNum = passWordNum;
     [self setNeedsDisplay];
 }

 - (void)drawRect:(CGRect)rect {
     CGFloat height = rect.size.height;
     CGFloat width  = rect.size.width;
     // 讓整組格子水平垂直居中
     CGFloat x = (width - self.squareWidth * self.passWordNum) / 2.0;
     CGFloat y = (height - self.squareWidth) / 2.0;

     CGContextRef context = UIGraphicsGetCurrentContext();

     // 外框
     CGContextAddRect(context, CGRectMake(x, y, self.squareWidth * self.passWordNum, self.squareWidth));
     CGContextSetLineWidth(context, 1);
     CGContextSetStrokeColorWithColor(context, self.rectColor.CGColor);
     CGContextSetFillColorWithColor(context, [UIColor whiteColor].CGColor);

     // 分隔線
     for (int i = 1; i <= self.passWordNum; i++) {
         CGContextMoveToPoint(context, x + i * self.squareWidth, y);
         CGContextAddLineToPoint(context, x + i * self.squareWidth, y + self.squareWidth);
         CGContextClosePath(context);
     }
     CGContextDrawPath(context, kCGPathFillStroke);

     // 已輸入的黑點
     CGContextSetFillColorWithColor(context, self.pointColor.CGColor);
     for (int i = 1; i <= self.textStore.length; i++) {
         CGContextAddArc(context,
                         x + i * self.squareWidth - self.squareWidth / 2.0,
                         y + self.squareWidth / 2,
                         self.pointRadius, 0, M_PI * 2, YES);
         CGContextDrawPath(context, kCGPathFill);
     }
 }
原始碼:https://github.com/631106979/WCLPassWordView
這個做法的優點是完全自繪,格線粗細、圓點大小、顏色都能自由調整,也不必為了幾個方框而堆疊一堆子 view。想再加上「輸入錯誤抖動」或「指紋驗證」的入口,在 delegate 回呼裡接上即可。
- 上一篇文章: iOS 倒數計時實作:搶購活動剩餘時間怎麼算
- 下一篇文章: iOS 頁面跳轉的幾種寫法與適用時機整理