
封裝可複用的 iOS 二維碼掃描控件
編輯:iOS 開發綜合
效果
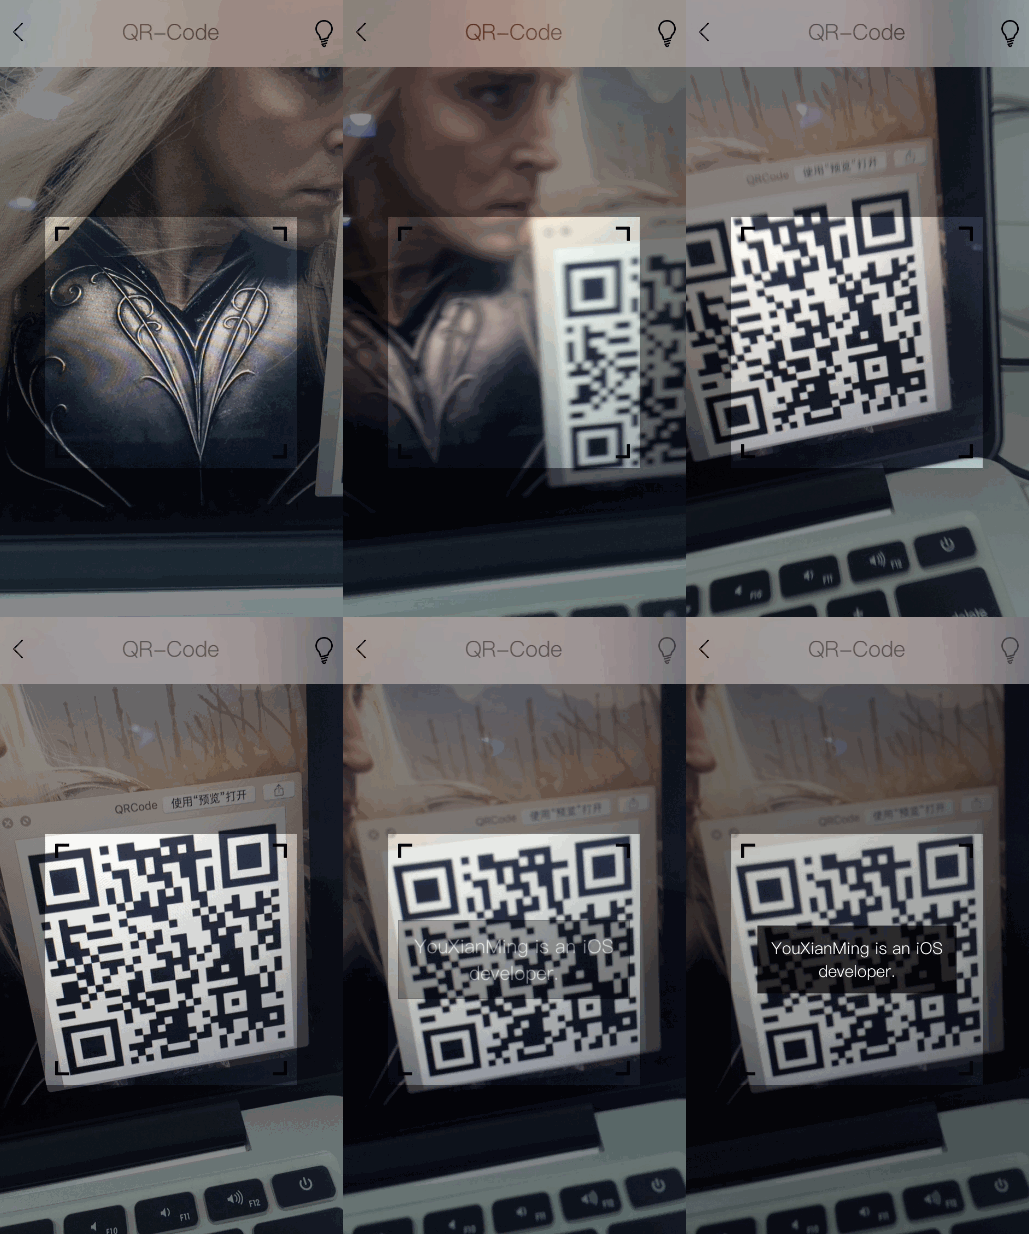
標頭檔設計
將掃描功能封裝為 QRCodeView,對外提供 delegate、手電筒模式、感興趣區域與開始/停止方法:
@protocol QRCodeViewDelegate <NSObject>
@optional
/** 取得 QR 掃描結果 */
- (void)QRCodeView:(QRCodeView *)codeView codeString:(NSString *)codeString;
@end

@interface QRCodeView : UIView
@property (nonatomic, weak) id <QRCodeViewDelegate> delegate;
@property (nonatomic) AVCaptureTorchMode torchMode;   // 燈的狀態,預設關閉
@property (nonatomic) CGRect interestArea;           // 感興趣區域,不設則為全部
@property (nonatomic, strong) UIView *contentView;   // 用來添加自訂控件的 view
@property (nonatomic, readonly) BOOL isRunning;      // 是否正在運行
- (BOOL)start;   // 開始掃描
- (void)stop;    // 結束掃描
@end
開始與停止掃描
start 方法依序建立輸入流(AVCaptureDeviceInput)、會話(AVCaptureSession)、輸出流(AVCaptureMetadataOutput)與預覽圖層(AVCaptureVideoPreviewLayer),並指定要掃描的 metadata 類型為 QRCode:
- (BOOL)start {
    BOOL result = NO;
    NSError *error = nil;
    self.deviceInput = [AVCaptureDeviceInput deviceInputWithDevice:self.captureDevice error:&error];
    if (self.deviceInput == nil) {
        NSLog(@"%@", error);
        return result;
    }
    self.captureSession = [[AVCaptureSession alloc] init];
    [self.captureSession addInput:self.deviceInput];
    self.captureMetadataOutput = [[AVCaptureMetadataOutput alloc] init];
    [self.captureSession addOutput:self.captureMetadataOutput];
    [self.captureMetadataOutput setMetadataObjectsDelegate:self queue:dispatch_queue_create(nil, nil)];
    self.captureMetadataOutput.metadataObjectTypes = @[AVMetadataObjectTypeQRCode];
    self.videoPreviewLayer = [[AVCaptureVideoPreviewLayer alloc] initWithSession:self.captureSession];
    self.videoPreviewLayer.videoGravity = AVLayerVideoGravityResizeAspectFill;
    self.videoPreviewLayer.frame = self.contentView.bounds;
    [self.videoView.layer addSublayer:self.videoPreviewLayer];
    [self.captureSession startRunning];
    self.isRunning = YES;
    result = YES;
    return result;
}

- (void)stop {
    [self.captureSession stopRunning];
    self.isRunning = NO;
    self.captureSession = nil;
}
取得掃描結果
實作 AVCaptureMetadataOutputObjectsDelegate,在偵測到 QRCode 時透過 delegate 回傳字串:
- (void)captureOutput:(AVCaptureOutput *)captureOutput didOutputMetadataObjects:(NSArray *)metadataObjects fromConnection:(AVCaptureConnection *)connection {
    if (metadataObjects.count > 0) {
        AVMetadataMachineReadableCodeObject *metadata = metadataObjects.firstObject;
        if ([metadata.type isEqualToString:AVMetadataObjectTypeQRCode]) {
            NSString *result = metadata.stringValue;
            if (_delegate && [_delegate respondsToSelector:@selector(QRCodeView:codeString:)]) {
                [_delegate QRCodeView:self codeString:result];
            }
        }
    }
}
此外,透過手電筒 setter 可控制補光燈,並在 interestArea 有設定時,利用 metadataOutputRectOfInterestForRect: 換算 rectOfInterest 以限定掃描範圍。以上就是封裝可複用二維碼掃描控件的完整做法,希望對你的學習有所幫助。
- 上一篇文章: iOS 實作側滑欄效果
- 下一篇文章: iOS 遊戲開發:Objective-C 版五子棋