
iOS 實現圓形圖片的兩種方法對比
先看效果
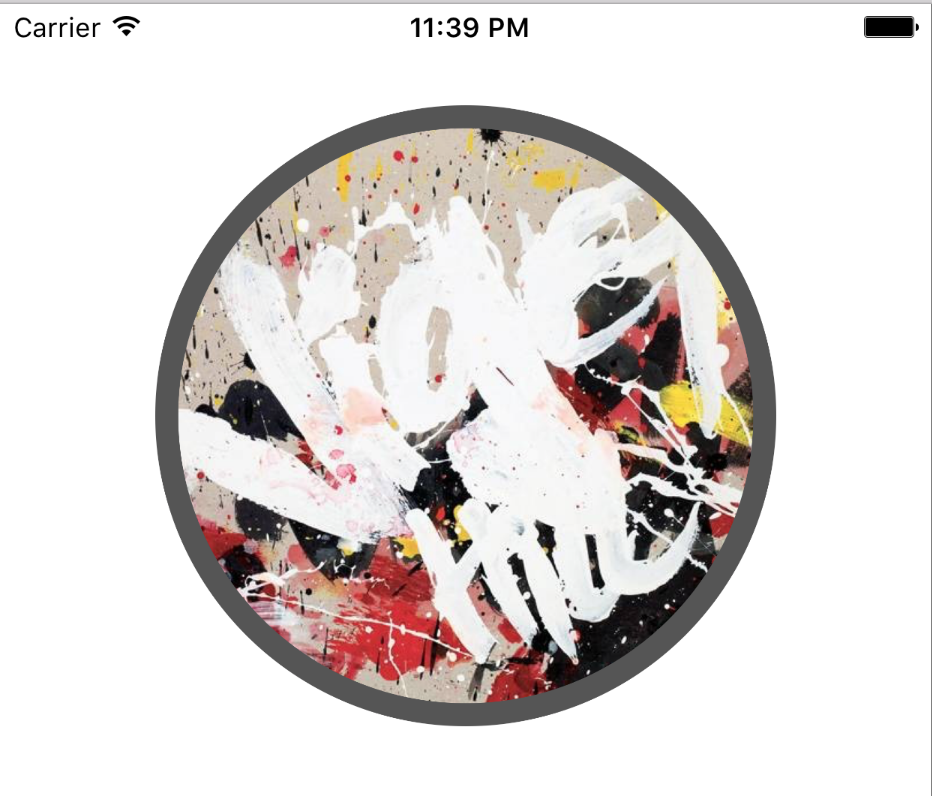
方法一:用兩個 imageView 疊出邊框
最直覺的做法是準備兩張圖:一張作為外圈邊框,一張放在中間,兩者都透過 cornerRadius 變成圓形。
backImageView.layer.cornerRadius  = backImageView.frame.size.width  / 2;
backImageView.layer.masksToBounds = YES;
frontImageView.layer.cornerRadius  = frontImageView.frame.size.width  / 2;
frontImageView.layer.masksToBounds = YES;
缺點很明顯:需要兩張素材,多一層 view,邊框寬度也依賴兩張圖的尺寸差。
方法二:用圖形上下文直接生成帶邊框的圓形圖
只用一張原圖,就能產出一張「自帶邊框」的圓形圖片:
// borderWidth 為邊框寬度
CGFloat imageW = image.size.width + 2 * borderWidth;
CGFloat imageH = imageW;
CGSize imageSize = CGSizeMake(imageW, imageH);

// 1. 開啟圖形上下文
UIGraphicsBeginImageContextWithOptions(imageSize, NO, 0.0);
CGContextRef context = UIGraphicsGetCurrentContext();

// 2. 設定填充色(即邊框顏色)
[borderColor set];

// 3. 畫外圓並填色
CGFloat bigRadius = imageW * 0.5;
CGFloat centerX = bigRadius;
CGFloat centerY = bigRadius;
CGContextAddArc(context, centerX, centerY, bigRadius, 0, M_PI * 2, 0);
CGContextFillPath(context);

// 4. 再畫內圓並以它作為裁剪路徑
CGFloat smallRadius = bigRadius - borderWidth;
CGContextAddArc(context, centerX, centerY, smallRadius, 0, M_PI * 2, 0);
CGContextClip(context);

// 5. 把原圖畫進裁剪範圍內
[image drawInRect:CGRectMake(borderWidth, borderWidth,
                            image.frame.size.width, image.frame.size.height)];

// 6. 取出結果並關閉上下文
UIImage *newImage = UIGraphicsGetImageFromCurrentImageContext();
UIGraphicsEndImageContext();
逐行原理說明
核心思路:先畫一個半徑為 bigRadius 的實心圓(顏色即邊框色),再用一個較小的圓把路徑裁剪出來,最後把原圖畫進這個圓形區域。結果就是「外圈一層顏色 + 內圈一張圓形圖」。
前三行:計算帶邊框後的整體寬高(圓形必須等寬高),並建立 CGSize 供後續使用。
UIGraphicsBeginImageContextWithOptions(size, opaque, scale):開啟一個離屏繪圖上下文。第一個參數是繪圖範圍;opaque 設為 NO 以保留透明通道;scale 傳 0.0 代表採用主螢幕的縮放比例,也就是自動支援 Retina。
UIGraphicsGetCurrentContext():取得當前上下文,後續所有 CGContext 繪圖指令都作用在它上面。
[borderColor set]:設定上下文的填充色與描邊色,等同於「先調好顏料」。
CGContextAddArc(c, x, y, radius, startAngle, endAngle, clockwise):畫一段圆弧。參數依次是上下文、圓心 x、圓心 y、半徑、起始角、結束角、是否順時針。0 到 M_PI * 2 剛好是一整圈;順時針填 1、逆時針填 0。
CGContextFillPath(context):用目前的填充色把路徑填滿,此時得到一顆實心圓。
smallRadius 與 CGContextClip:再畫一個半徑為 bigRadius - borderWidth 的圓,並呼叫 CGContextClip 把「當前路徑」設為後續繪圖的裁剪範圍。也就是說,接下來畫的所有東西只會顯示在這個內圓裡。
drawInRect:把原圖畫進去。由於已有裁剪路徑,圖片只保留圓內部分。
UIGraphicsGetImageFromCurrentImageContext() 與 UIGraphicsEndImageContext():把上下文物化成 UIImage,然後關閉上下文。關閉這一步不可省略,否則會造成上下文累積與記憶體洩漏。
兩種方法的取捨
- 方法一靠視覺疊加達成邊框效果,實作簡單,適合邊框是純色或漸層、且圖片來源固定的情況。
- 方法二真正產出了一張帶邊框的圓形圖,可以直接存檔、上傳或做後續加工,適合需要「一張成品圖」的場景。
另外,如果只是想顯示圓形頭像而不需要產出圖檔,其實還有更省力的做法:layer.cornerRadius 加上 masksToBounds(單層即可),或使用 CAShapeLayer 搭配 mask。方法二的價值在於它輸出的 UIImage 是獨立可用的。
結語
日常開發中,同一個視覺效果往往有多種實作,選擇依據應該是「後續要拿它做什麼」,而不是「哪個看起來比較厲害」。需要一張可儲存的成品圖就用方法二,只需要畫面好看就用方法一或 cornerRadius。
- 上一篇文章: 限制 TextField 與 TextView 的輸入字數
- 下一篇文章: iOS 實現左右兩個 TableView 聯動