
iOS 10 通知新玩法:Service Extension 實作圖文推送
前陣子接到需求要做 iOS 10 的推送,目標是衝 App Store 頭條。當時工具都還沒到位,連夜裝 Xcode beta 與 iOS 10 beta,然後就是一路查資料——畢竟全是新東西。總算在發表會之前趕了出來,拖到現在才有空把過程寫下來。
推送原理

圖中的 Provider 是某個 App 的推送伺服器(本文用 .NET 實作),APNS 則是 Apple Push Notification Service,蘋果自家的伺服器。整個流程分三段:
第一階段:.NET 程式把要發送的消息與目標 iPhone 的標識打包,交給 APNS。
第二階段:APNS 在已註冊的設備清單中查找對應標識的 iPhone,把消息投遞過去。
第三階段:iPhone 收到後轉交給對應的 App,並依設定彈出通知。
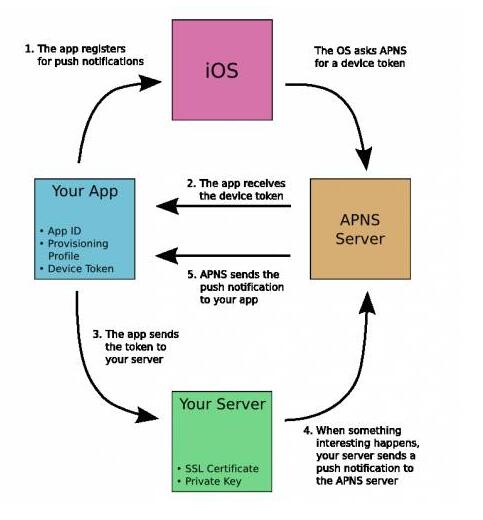
換成步驟來說:
1. App 註冊消息推送。
2. iOS 向 APNS 索取 deviceToken,App 接收。
3. App 把 deviceToken 回報給自己的推送伺服器。
4. 伺服器帶著 token 向 APNS 發送消息。
5. APNS 把消息投給指定的 iPhone App。
Xcode 8 之後測試環境的證書可以自動生成,這部分就不多談了。
建立 Target
寫法類似當年做 iOS 9 的 Today Extension,同樣要新增一個 target:
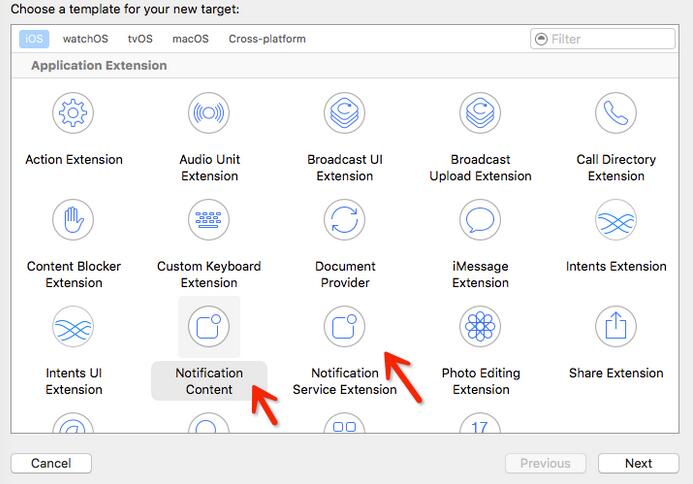
其中 Notification Content Extension 負責自訂通知 UI,Notification Service Extension 負責攔截並加工收到的資料。
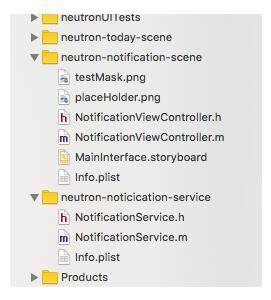
正片開始
擴充套件無法直接發網路請求,所以通知要顯示網路圖片時,必須自己在 Service Extension 裡下載再存本機。先準備一張 https 圖片當素材,推送格式則參考 Apple 官方文件。

上圖就是實際使用的 payload。aps 字典內部的欄位 iOS 會自動處理歸類:
alert 是通知文字內容;
sound 是提示音,這裡取預設;
badge 決定是否顯示應用圖示徽章;
mutable-content 是重點,設為 1 才會觸發自訂通知界面,也就是 Notification Content 控制器;
category 是與後端約定好的值,用來決定通知下方要顯示哪些 action 按鈕,讓使用者不必進入 App 就能操作。
aps 之外還可以放自訂欄位,實際要什麼由需求決定。
Service Extension 程式碼
- (void)didReceiveNotificationRequest:(UNNotificationRequest *)request
                   withContentHandler:(void (^)(UNNotificationContent *))contentHandler {
    self.contentHandler = contentHandler;
    self.bestAttemptContent = [request.content mutableCopy];

    // 從自訂欄位取出圖片網址
    NSString *attchUrl = [request.content.userInfo objectForKey:@"image"];

    // 下載圖片
    UIImage *imageFromUrl = [self getImageFromURL:attchUrl];

    // 存檔到 Documents 目錄
    NSArray *paths = NSSearchPathForDirectoriesInDomains(NSDocumentDirectory,
                                                        NSUserDomainMask, YES);
    NSString *documentsDirectoryPath = [paths objectAtIndex:0];
    NSString *localPath = [self saveImage:imageFromUrl
                             withFileName:@"MyImage"
                                   ofType:@"png"
                             inDirectory:documentsDirectoryPath];

    if (localPath && ![localPath isEqualToString:@""]) {
        UNNotificationAttachment *attachment =
            [UNNotificationAttachment attachmentWithIdentifier:@"photo"
                                                           URL:[NSURL URLWithString:
                                                                [@"file://" stringByAppendingString:localPath]]
                                                       options:nil
                                                         error:nil];
        if (attachment) {
            self.bestAttemptContent.attachments = @[attachment];
        }
    }

    self.contentHandler(self.bestAttemptContent);
}
因為不方便引入 SDWebImage 這類框架,網路請求只能自己動手。另外 iOS 10 的通知雖然支援附件圖片,但只吃本機路徑,所以必須先下載再落地。
- (UIImage *)getImageFromURL:(NSString *)fileURL {
    // dataWithContentsOfURL 需要 https 連線
    NSData *data = [NSData dataWithContentsOfURL:[NSURL URLWithString:fileURL]];
    return [UIImage imageWithData:data];
}

- (NSString *)saveImage:(UIImage *)image
           withFileName:(NSString *)imageName
                 ofType:(NSString *)extension
            inDirectory:(NSString *)directoryPath {
    NSString *urlStr = @"";

    if ([[extension lowercaseString] isEqualToString:@"png"]) {
        urlStr = [directoryPath stringByAppendingPathComponent:
                  [NSString stringWithFormat:@"%@.%@", imageName, @"png"]];
        [UIImagePNGRepresentation(image) writeToFile:urlStr
                                            options:NSAtomicWrite
                                              error:nil];
    } else if ([[extension lowercaseString] isEqualToString:@"jpg"] ||
               [[extension lowercaseString] isEqualToString:@"jpeg"]) {
        urlStr = [directoryPath stringByAppendingPathComponent:
                  [NSString stringWithFormat:@"%@.%@", imageName, @"jpg"]];
        [UIImageJPEGRepresentation(image, 1.0) writeToFile:urlStr
                                                  options:NSAtomicWrite
                                                    error:nil];
    } else {
        NSLog(@"extension error");
    }
    return urlStr;
}
Content Extension:自訂通知界面
自帶的 storyboard 很好用,拉好約束之後就能把圖片填進去。
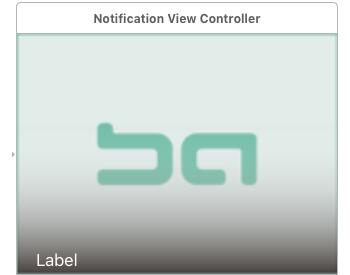
- (void)didReceiveNotification:(UNNotification *)notification {
    self.label.text = notification.request.content.body;

    UNNotificationContent *content = notification.request.content;
    UNNotificationAttachment *attachment = content.attachments.firstObject;

    if (attachment.URL.startAccessingSecurityScopedResource) {
        self.imageView.image = [UIImage imageWithContentsOfFile:attachment.URL.path];
    }
}
附件是透過安全範圍資源機制存取的,所以要用 startAccessingSecurityScopedResource 開一道門,讀完再關。
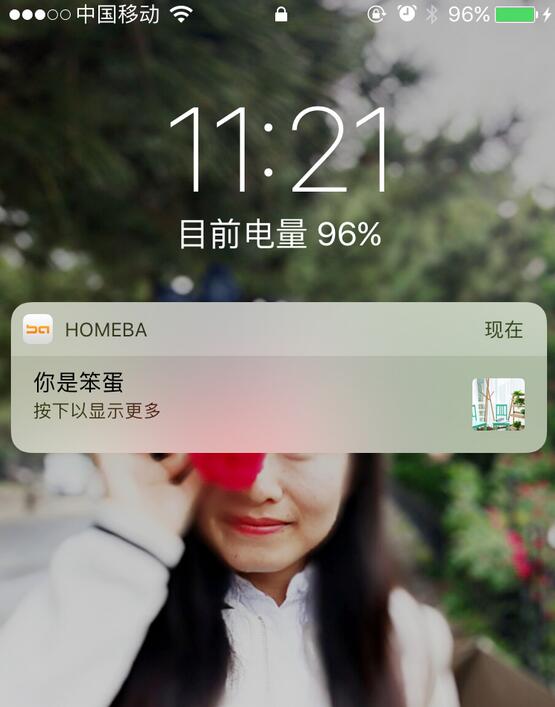
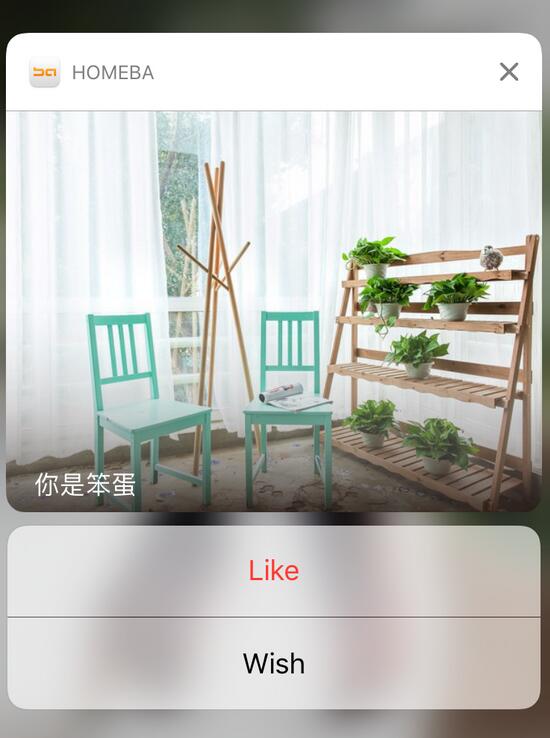
就這麼簡單,收工。
- 上一篇文章: iOS 遠程推送完整流程:從證書申請到取得 DeviceToken
- 下一篇文章: iOS 遠程通知三種狀態處理:前台、後台與未啟動