
詳解 iOS 中 Button 的狀態切換與點擊事件處理
一、按鈕的四種狀態
1. UIControlStateNormal
除了 highlighted、disabled、selected 之外的所有情況都屬於 normal;此狀態下的按鈕可以接收點擊事件。
2. UIControlStateHighlighted
按住按鈕不放,或手動設 highlighted = YES 時進入此狀態;可以接收點擊事件。
3. UIControlStateDisabled
設定 button.enabled = NO 時進入此狀態;此狀態下的按鈕無法接收點擊事件。
4. UIControlStateSelected
設定 button.selected = YES 時進入此狀態;可以接收點擊事件。
二、讓按鈕無法點擊的兩種方式
1. button.enabled = NO;
會進入 UIControlStateDisabled 狀態,外觀通常也會一起改變。
2. button.userInteractionEnabled = NO;
不會進入 disabled 狀態,按鈕維持目前外觀,只是不再回應互動。
兩者的差異在實務上很重要:若你只想「暫時不能按,但別讓樣子變灰」,第二種才是對的選擇。
三、點擊事件的兩種處理方式
iOS 中按鈕的使用頻率極高,負責觸發跳轉、送出表單等互動。常見做法有兩種:
一是目標—動作:直接在 view 或 controller 中綁定,寫法直覺,但會讓 view 與 controller 的耦合變高,不建議在架構上依賴它。
二是委託:事件綁定留在 view 內部,由 controller 作為 view 的 delegate 實作對應方法,耦合度更低、也更貼近後續擴充的需要。
目標—動作的實作
假設有一個含單顆按鈕的 view,把按鈕放在.h 中讓外部可存取,再由 controller 把該 view 設為自己的 view,並在 controller 裡處理點擊事件。
1、MyView.h —— 一個對外暴露按鈕的 view
@interface MyView : UIView @property (strong, nonatomic) UIButton *myBtn; @end
2、MyView.m
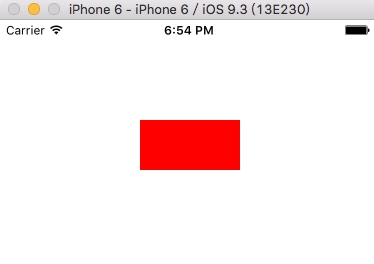
#import "MyView.h" @implementation MyView //view的初始化方法 - (id)initWithFrame:(CGRect)frame { self = [super initWithFrame:frame]; if (self) { //初始化按鈕 _myBtn = [[UIButton alloc] initWithFrame:CGRectMake(140, 100, 100, 50)]; _myBtn.backgroundColor = [UIColor redColor]; //將按鈕添加到自身 [self addSubview:_myBtn]; } return self; } @end
3、MyViewController.h
#import <UIKit/UIKit.h> @interface MyViewController : UIViewController @end
4、MyViewController.m —— 以 MyView 作為自身 view
#import "MyViewController.h" #import "MyView.h" @interface MyViewController () @property (strong, nonatomic) MyView *myview; @end @implementation MyViewController - (void)loadView { MyView *myView = [[MyView alloc] initWithFrame: [[UIScreen mainScreen] bounds] ]; self.view = myView; self.myview = myView; //在controller中設置按鈕的目標-動作,其中目標是self,也就是控制器自身,動作是用目標提供的BtnClick:方法, [self.myview.myBtn addTarget:self action:@selector(BtnClick:) forControlEvents:UIControlEventTouchUpInside]; } //MyView中的按鈕的事件 - (void)BtnClick:(UIButton *)btn { NSLog(@"Method in controller."); NSLog(@"Button clicked."); }
5、AppDelegate.m
#import "AppDelegate.h" #import "MyViewController.h" @interface AppDelegate () @end @implementation AppDelegate - (BOOL)application:(UIApplication *)application didFinishLaunchingWithOptions:(NSDictionary *)launchOptions { self.window = [ [UIWindow alloc] initWithFrame: [[UIScreen mainScreen] bounds ] ]; MyViewController *myVC = [[MyViewController alloc] init]; self.window.rootViewController = myVC; self.window.backgroundColor = [UIColor whiteColor]; [self.window makeKeyAndVisible]; return YES; }
6、執行結果
畫面:
輸出:

總結
按鈕這塊的知識可以拆成兩半來記:狀態決定「能不能點、長什麼樣子」,而 enabled 與 userInteractionEnabled 的差別決定了視覺回饋;事件處理則建議優先考慮委託模式,讓 view 與 controller 的職責更清楚。以上就是本文的全部內容,若有疑問歡迎留言交流。
- 上一篇文章: iOS 開發中清除快取功能的完整實作
- 下一篇文章: iOS 逆向工程:用 dumpdecrypted 為 App 脫殼