
iOS 模仿擦玻璃效果的實作與效能優化
照例先看效果圖
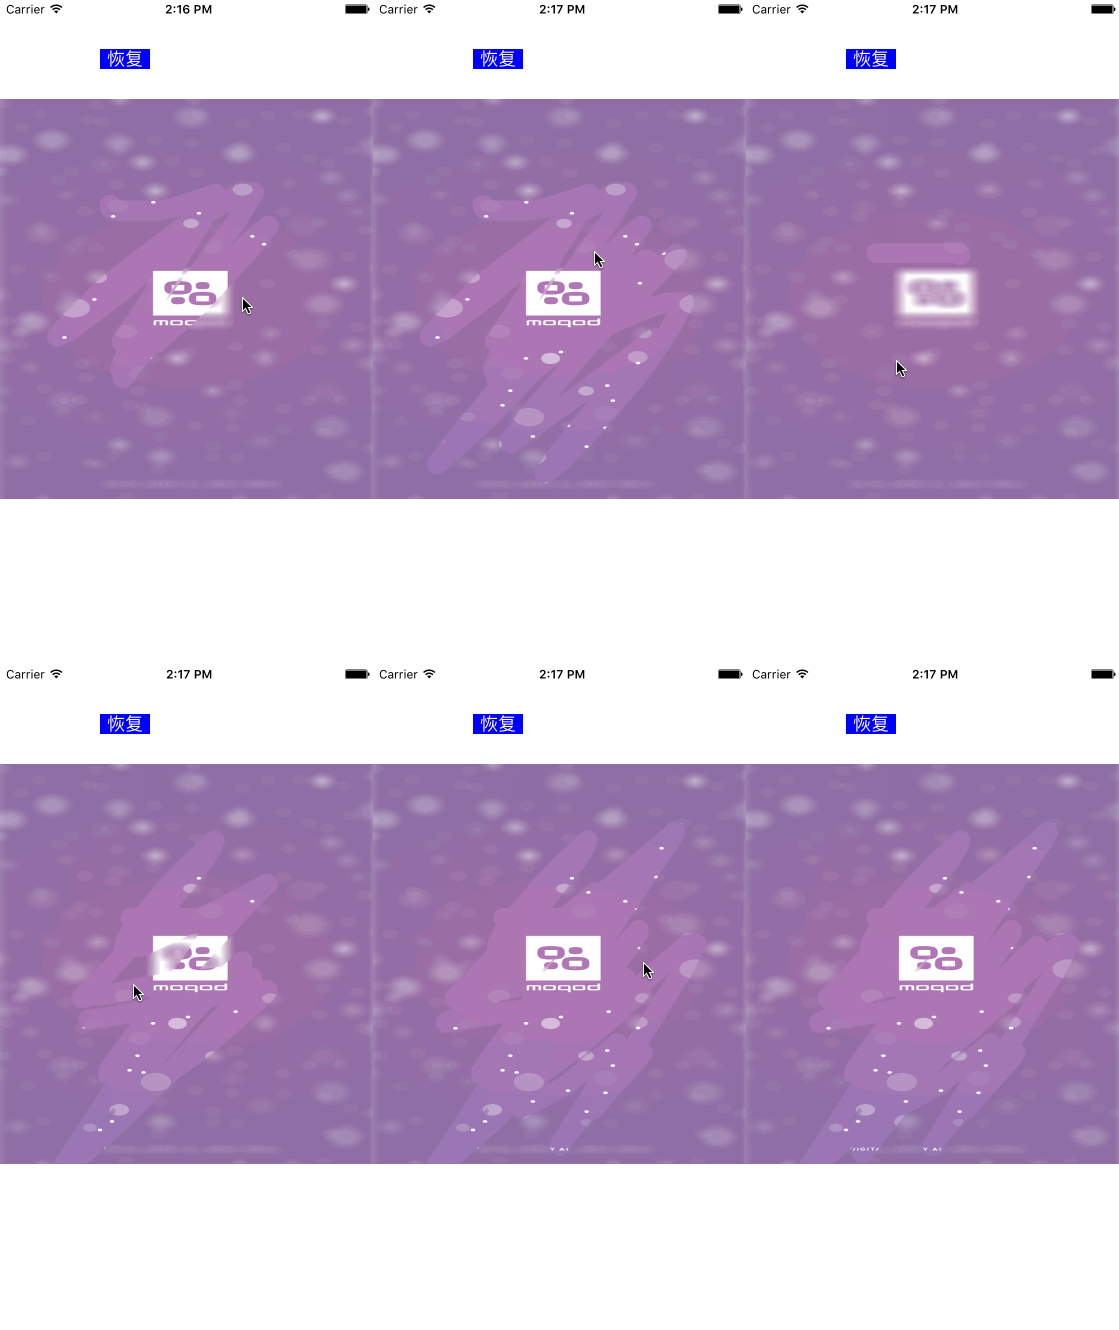
實作思路
動手前先理了一下思路:採用塗鴉加上設置 layer 的 mask 的方式,這樣做可以說相當簡單。然後花了半個下午寫完,效果基本和原作者一致,而且對比代碼量後發現,我用了不到對方一半的代碼就完成了同樣的功能,心情格外愉悅。接著我又跑了一下原作者的應用測試 CPU 利用率(用 5s 測的),最高大約維持在十幾趴,感覺略高但還能接受;再跑我自己寫的版本,結果令我大吃一驚——隨便劃幾下就飆到 40% 以上。這麼個小東西卻耗這麼多 CPU,未免太遜了……
bug 測試及解決
經過測試,發現問題出在塗鴉方案有性能瓶頸:雖然代碼簡單、思路清晰,但隨著觸控螢幕的點不斷增加,整個繪製的複雜度呈指數上升,導致 CPU 消耗極為嚴重。因此關於繪製圖片,我不得不另尋他法。冥想了一整天也沒找到降低繪製複雜度的好辦法(除了原作者的方法),最後的解法也確實簡單——沒錯,就是採用原作者的方案。
以下重點介紹原作者解決塗鴉 CPU 消耗問題的方法(這是重點):
圖形上下文:不再使用 layer 預設的圖形上下文(也就是在 drawRect 方法中透過 UIGraphicsGetCurrentContext() 取得的),而是自己建立一個全域的 bitmap 上下文
self.imageContext = CGBitmapContextCreate(0, frame.size.width, frame.size.height, 8, frame.size.width * 4, self.colorSpace, kCGImageAlphaPremultipliedLast); CGContextSetStrokeColorWithColor(self.imageContext,[UIColor redColor].CGColor); CGContextSetFillColorWithColor(self.imageContext, [UIColor redColor].CGColor); CGContextTranslateCTM(self.imageContext, 0.0f, self.bounds.size.height); CGContextScaleCTM(self.imageContext, 1.0f, -1.0f);
在觸控螢幕時(touchesBegan、touchesMoved 等方法),依觸控位置把每兩個相鄰點連線,繪製到上面建立的圖形上下文中。如此一來,隨著觸控不斷往圖形上下文追加繪製,不會把先前已繪製的內容重新計算,從根本上解決了性能消耗過高的問題。
#pragma mark - touch - (void)touchesBegan:(NSSet *)touches withEvent:(UIEvent *)event { UITouch* touch = [touches anyObject]; [self reCreateImageWithTouchDict:@{@"touch":touch, @"lineWidth":@(touch.majorRadius)}]; } - (void)touchesMoved:(NSSet *)touches withEvent:(UIEvent *)event { UITouch* touch = [touches anyObject]; [self reCreateImageWithTouchDict:@{@"touch":touch, @"lineWidth":@(touch.majorRadius)}]; } - (UIImage *)reCreateImageWithTouchDict:(NSDictionary *)touchDict{ UITouch* touch = touchDict[@"touch"]; CGFloat lineWidth = [touchDict[@"lineWidth"] floatValue] * 0.5; if (lineWidth < 1.0) { lineWidth = 10; } if (touch) { CGPoint point = [touch locationInView:touch.view]; if (touch.phase == UITouchPhaseBegan) { CGRect rect = CGRectMake(point.x - lineWidth, point.y - lineWidth, lineWidth*2, lineWidth*2); CGContextAddEllipseInRect(self.imageContext, rect); CGContextFillPath(self.imageContext); [self.points removeAllObjects]; [self.points addObject:[NSValue valueWithCGPoint:point]]; }else if (touch.phase == UITouchPhaseMoved){ [self.points addObject:[NSValue valueWithCGPoint:point]]; if (self.points.count > 2) { CGContextSetLineCap(self.imageContext, kCGLineCapRound); CGContextSetLineWidth(self.imageContext, 2 * lineWidth); do{ CGPoint point0 = [(NSValue *)self.points[0] CGPointValue]; CGPoint point1 = [(NSValue *)self.points[1] CGPointValue]; CGContextMoveToPoint(self.imageContext, point0.x, point0.y); CGContextAddLineToPoint(self.imageContext, point1.x, point1.y); [self.points removeObjectAtIndex:0]; }while (self.points.count > 2); } } CGContextStrokePath(self.imageContext); } CGImageRef cgImage = CGBitmapContextCreateImage(self.imageContext); UIImage *image = [UIImage imageWithCGImage:cgImage]; CGImageRelease(cgImage); return image; } 最後實作
最後設置 mask 就非常簡單了:把要顯示的圖片(那張清晰的)的 layer 的 mask 設為上面繪製生成的 image 的 layer,如此一來只有繪製過的位置才能看到目標圖片,功能就完成了。我覺得這個小技巧能玩出很多有趣的東西(類似刮刮樂等)。
CALayer *mask = [CALayer layer]; mask.contents = (id)image.CGImage; mask.anchorPoint = CGPointZero; mask.frame = self.bounds; self.imageView.layer.mask = mask; self.imageView.layer.masksToBounds = YES;
最後
別忘了釋放相關記憶體
- (void)dealloc{ if (_imageContext != NULL) { CFRelease(_imageContext); } if (_colorSpace != NULL) { CFRelease(_colorSpace); } } demo 地址:https://github.com/yuchuanfeng/CFScratchViewDemo
總結
以上就是利用 iOS 模仿擦玻璃效果的全部內容,感興趣的朋友不妨親手操作一下,如此更能加深理解與學習。希望這篇文章對各位 iOS 開發者有所幫助,若有疑問歡迎留言交流。
- 上一篇文章: Objective-C 宏定義全面深入解析
- 下一篇文章: iOS 文字漸變色效果的實作方法