
自繪圓形文字頭像:Core Graphics 逐步實作
編輯:iOS 開發綜合
群組列表裡常見那種「底色圓形 + 中間兩個字」的頭像,缺圖時特別好用。它的規則其實很清楚:取字串前兩個字、底色依字串而變、文字永遠居中。
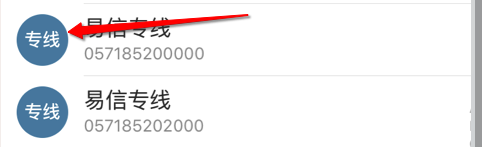
需求拆解
1. 畫一個帶背景色的圓形
2. 在中間畫上文字
3. 文字取字串開頭的一部分
4. 不同字串對應不同底色
5. 中英文一視同仁,一個英文字母與一個中文字都算一個字
6. 文字永遠居中
最終效果
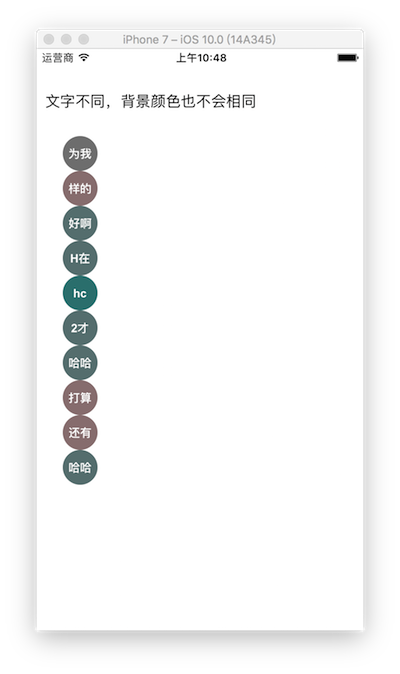
自訂一個 view,在 drawRect 裡完成繪製。
@interface RoundHeadView ()
@property (nonatomic, copy) NSString *title;      // 需要繪制的標題
@property (nonatomic, assign) CGFloat colorPoint; // 計算顏色的隨機值
- (void)setTitle:(NSString *)title;
@end

@implementation RoundHeadView

- (instancetype)initWithFrame:(CGRect)frame {
    self = [super initWithFrame:frame];
    if (self) {
        self.backgroundColor = [UIColor clearColor];
    }
    return self;
}
@end
第一步:畫圓
- (void)drawRect:(CGRect)rect {
    // 取得當前繪畫上下文,相當於一張畫布
    CGContextRef context = UIGraphicsGetCurrentContext();
    [self caculateColor];

    /* 畫圓 */
    CGContextSetRGBFillColor(context, _colorPoint, 0.5, 0.5, 1.0);
    CGContextAddArc(context, self.frame.size.width / 2.0, self.frame.size.width / 2.0,
                    self.frame.size.width / 2.0, 0, 2 * M_PI, 0);
    CGContextDrawPath(context, kCGPathFill);
}

第二步:處理文字
文字交給 setter,並在最後呼叫 setNeedsDisplay 觸發重繪:
- (void)setTitle:(NSString *)title {
    _title = [[self subStringWithLendth:2 string:title] copy];
    [self setNeedsDisplay]; // 觸發重繪,view 會重新調用 drawRect
}
截字時,中英文一律按「一個字元算一個」處理:
/**
 * 截取字符串最開始的兩個字符,漢字與英文同樣處理
 */
- (NSString *)subStringWithLendth:(int)length string:(NSString *)string {
    NSString *copyStr = [string copy];
    NSMutableString *realStr = [[NSMutableString alloc] init];
    for (int i = 0; i < copyStr.length; i++) {
        if (length == 0) break;
        unichar ch = [copyStr characterAtIndex:i];
        if (0x4e00 < ch && ch < 0x9fff) {
            // 如果是漢字,可在此做額外處理
        }
        [realStr appendString:[copyStr substringWithRange:NSMakeRange(i, 1)]];
        length = length - 1;
    }
    return realStr;
}
接著算文字尺寸,確保能置中。這裡取寬度的三分之一當字級:
- (CGSize)caculateLableSize {
    UILabel *lable = [[UILabel alloc] initWithFrame:CGRectZero];
    lable.font = [UIFont fontWithName:@"Arial-BoldMT" size:self.frame.size.width / 3.0];
    lable.text = self.title;
    [lable sizeToFit];
    return lable.frame.size;
}
第三步:依拼音決定底色
先把中文轉成拼音:
/**
 * 獲取漢字拼音
 */
- (NSString *)pinyin:(NSString *)originalStr {
    NSMutableString *str = [originalStr mutableCopy];
    CFStringTransform((CFMutableStringRef)str, NULL, kCFStringTransformMandarinLatin, NO);
    CFStringTransform((CFMutableStringRef)str, NULL, kCFStringTransformStripDiacritics, NO);
    return [str stringByReplacingOccurrencesOfString:@" " withString:@""];
}
再用拼音長度算出一個 0~1 之間的值,當作紅色通道:
/**
 * 隨機一個顏色,填充圓形頭像底色
 */
- (void)caculateColor {
    if (_title.length == 0) return;

    if (_title.length > 1) {
        NSString *firstStr  = [_title substringWithRange:NSMakeRange(0, 1)];
        NSString *secondStr = [_title substringWithRange:NSMakeRange(1, 1)];
        NSString *firstPinyin  = [self pinyin:firstStr];
        NSString *secondPinyin = [self pinyin:secondStr];
        NSUInteger count = firstPinyin.length + secondPinyin.length;
        if (count > 10) count -= 10;
        self.colorPoint = count / 10.0;
    } else {
        NSString *firstStr = [_title substringWithRange:NSMakeRange(0, 1)];
        NSString *firstPinyin = [self pinyin:firstStr];
        self.colorPoint = firstPinyin.length / 10.0;
    }
}
第四步:把文字畫上去
- (void)drawRect:(CGRect)rect {
    CGContextRef context = UIGraphicsGetCurrentContext();
    [self caculateColor];

    /* 畫圓 */
    CGContextSetRGBFillColor(context, _colorPoint, 0.5, 0.5, 1.0);
    CGContextAddArc(context, self.frame.size.width / 2.0, self.frame.size.width / 2.0,
                    self.frame.size.width / 2.0, 0, 2 * M_PI, 0);
    CGContextDrawPath(context, kCGPathFill);

    /* 寫文字 */
    NSDictionary *dic = @{
        NSFontAttributeName: [UIFont fontWithName:@"Arial-BoldMT" size:self.frame.size.width / 3.0],
        NSForegroundColorAttributeName: [UIColor whiteColor]
    };

    CGSize size = [self caculateLableSize];
    CGFloat X = (self.frame.size.width - size.width) / 2.0;
    CGFloat Y = (self.frame.size.height - size.height) / 2.0;

    [self.title drawInRect:CGRectMake(X, Y, self.frame.size.width, self.frame.size.width)
             withAttributes:dic];
}
測試
UILabel *label = [[UILabel alloc] initWithFrame:CGRectMake(10, 50, 300, 20)];
label.text = @"文字不同,背景顏色也不會相同";
[self.view addSubview:label];

NSArray *strs = @[@"為我", @"樣的", @"好啊", @"H在", @"hc",
                  @"2才", @"哈哈", @"打算打算打算的", @"還有人v", @"哈哈"];
for (int i = 0; i < 10; i++) {
    RoundHeadView *head = [[RoundHeadView alloc] initWithFrame:CGRectMake(30, 100 + (40 * i), 40, 40)];
    [head setTitle:strs[i]];
    [self.view addSubview:head];
}
可以再加強的地方
目前的 colorPoint 只動了紅色通道,所以出來的顏色都偏藍。想讓色盤更完整,可以把拼音的 hash 值拆成三段分別餵給 R、G、B。另外 drawRect 每次重繪都會重新呼叫 caculateColor,若在意效能,可以在 setTitle: 時算好並快取起來。
- 上一篇文章: iOS 接入微信支付的完整流程與踩坑清單
- 下一篇文章: Xcode 8 控制台中文亂碼?兩種根治方式