
iOS 實現圓角箭頭矩形提示框
編輯:iOS 開發綜合
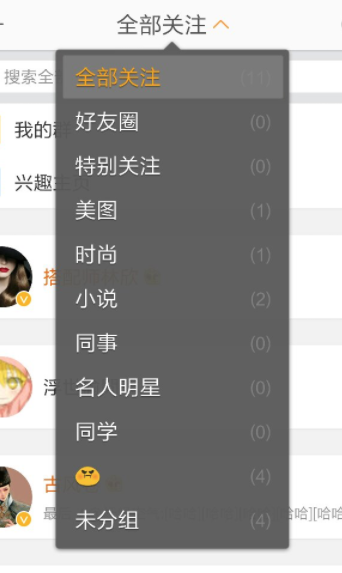
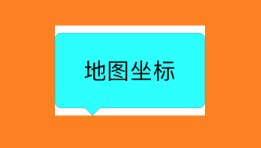
在許多 App 中,常會看到帶有箭頭的圓角提示框。這類提示框可以用來標示按鈕、引導操作或顯示重點資訊。以下先觀察常見效果:

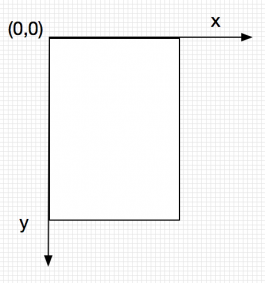
了解 CGContextRef 座標系
若要用程式繪製圓角箭頭矩形,先要了解 CGContextRef 的座標系統。Core Graphics 的起點通常在左上角,y 軸向下增加。透過移動目前點、增加線段與增加圓角弧線,就能完成自訂外框。
例如商城類 App 常會顯示原價與現價,若要在文字上畫一條刪除線,就可以透過 CGContextRef 畫出直線。
- (void)drawRect:(CGRect)rect {
    CGContextRef context = UIGraphicsGetCurrentContext();
    CGContextMoveToPoint(context, 0, rect.size.height * 0.5);
    CGContextAddLineToPoint(context, rect.size.width, rect.size.height * 0.5);
    [[UIColor redColor] set];
    CGContextSetLineWidth(context, 1);
    CGContextStrokePath(context);
}
自定義 UILabel 繪製箭頭提示框
若不想另外建立 UIView 子類,也可以直接自定義 UILabel,在 drawRect 中完成繪製。
@interface CustomLabel : UILabel
@property (nonatomic, copy) NSString *fillColorStr;
@end
- (void)drawRect:(CGRect)rect {
float w = rect.size.width - 20;
float h = rect.size.height - 20;
CGContextRef context = UIGraphicsGetCurrentContext();
CGContextSetLineWidth(context, 0.2);
CGContextSetStrokeColorWithColor(context, [UIColor grayColor].CGColor);
CGContextSetFillColorWithColor(context, [UIColor cyanColor].CGColor);
CGContextMoveToPoint(context, 6, 0);
CGContextAddArcToPoint(context, w, 0, w, 10, 6);
CGContextAddArcToPoint(context, w, h, w - 10, h, 6);
CGContextAddLineToPoint(context, 30, h);
CGContextAddLineToPoint(context, 25, h + 8);
CGContextAddLineToPoint(context, 20, h);
CGContextAddArcToPoint(context, 0, h, 0, h - 10, 6);
CGContextAddArcToPoint(context, 0, 0, 6, 0, 6);
CGContextDrawPath(context, kCGPathFillStroke);
}簡單封裝
完成基本繪製後,可將圓角半徑、箭頭位置、填充顏色等參數抽出,讓提示框更容易重複使用。

- (void)drawRect:(CGRect)rect {
    float r = 4;
    float offset = 5;
    float positionNum = 20;
    float changeNum = r + offset;
    float w = self.frame.size.width;
    float h = self.frame.size.height;
    CGContextRef context = UIGraphicsGetCurrentContext();

    CGContextSetLineWidth(context, 0.2);
    CGContextSetStrokeColorWithColor(context, [UIColor grayColor].CGColor);

    if ([self.fillColorStr isEqualToString:@"fillColorChange"]) {
        CGContextSetFillColorWithColor(context, [UIColor blueColor].CGColor);
    } else {
        CGContextSetFillColorWithColor(context, [UIColor redColor].CGColor);
    }

    CGContextMoveToPoint(context, r, offset);
    CGContextAddArcToPoint(context, w, offset, w, changeNum, r);
    CGContextAddArcToPoint(context, w, h - offset, w - changeNum, h - offset, r);
    CGContextAddLineToPoint(context, positionNum + 10, h - offset);
    CGContextAddLineToPoint(context, positionNum + 5, h);
    CGContextAddLineToPoint(context, positionNum, h - offset);
    CGContextAddArcToPoint(context, 0, h - offset, 0, h - changeNum, r);
    CGContextAddArcToPoint(context, 0, offset, r, offset, r);
    CGContextDrawPath(context, kCGPathFillStroke);
    [super drawRect:rect];
}
使用可拉伸圖片
除了純程式繪製,也可以使用圖片素材。若擔心不同尺寸造成變形,可利用 UIImage 的可拉伸圖片方法,保留四角不拉伸。
UIImage *tempImage = [UIImage imageNamed:@"tip.png"];
tempImage = [tempImage stretchableImageWithLeftCapWidth:80 topCapHeight:20];

UIImageView *imgView = [[UIImageView alloc] initWithImage:tempImage];
imgView.frame = CGRectMake(100, 100, 200, 56);
[self.view addSubview:imgView];
整體而言,若需要高度客製,建議使用 drawRect 繪製;若只需要快速套用,也可以使用可拉伸圖片。可依專案需求選擇。
- 上一篇文章: iOS 將影片畫面擷取為縮圖的實作
- 下一篇文章: iOS 中對 URL 進行編碼與解碼的範例