
iOS 模糊效果的三種實作路線
編輯:iOS 開發綜合
毛玻璃、背景虛化這類效果在介面設計裡幾乎是標配。iOS 提供了好幾條路可以走到同一個終點,各有取捨。下面整理三種常見做法。
方案一:CoreImage 濾鏡
這條路要理解四個關鍵角色:CIImage、CIFilter、CIContext、CGImageRef。
要注意的是,濾鏡運算並不快,容易讓圖片顯示出現明顯延遲,建議放到子執行緒處理,避免卡住主執行緒。
- (void)viewDidLoad {
    [super viewDidLoad];
    // 載入一張圖片
    UIImage *image = [UIImage imageNamed:@"che"];

    /************** CoreImage 部分 **************/
    // 1. 建立 CIImage
    CIImage *ciImage = [[CIImage alloc] initWithImage:image];

    // 2. 建立濾鏡
    CIFilter *blurFilter = [CIFilter filterWithName:@"CIGaussianBlur"];

    // 2.1 把 CIImage 餵進濾鏡
    [blurFilter setValue:ciImage forKey:kCIInputImageKey];

    // 可透過此方法查看所有可設定的參數(如模糊半徑)
    NSLog(@"%@", [blurFilter attributes]);

    // 2.2 設定模糊程度
    [blurFilter setValue:@(2) forKey:@"inputRadius"];

    // 2.3 取出處理後的結果
    CIImage *outCiImage = [blurFilter valueForKey:kCIOutputImageKey];

    // 3. CIContext(option 傳 nil 代表用 CPU 渲染;想用 GPU 請調整此參數)
    CIContext *context = [CIContext contextWithOptions:nil];

    // 4. 取得 CGImage 句柄
    CGImageRef outCGImage = [context createCGImage:outCiImage fromRect:[outCiImage extent]];

    // 5. 轉回 UIImage
    UIImage *blurImage = [UIImage imageWithCGImage:outCGImage];

    // 6. 釋放 CGImage
    CGImageRelease(outCGImage);
    /********************************************/

    UIImageView *imageV = [[UIImageView alloc] initWithFrame:CGRectMake(0, 0, 750 / 2, 1334 / 2)];
    imageV.image = blurImage;
    imageV.center = self.view.center;
    [self.view addSubview:imageV];
}
方案二:UIImage+ImageEffects 分類
把 UIImage+ImageEffects.h 與 UIImage+ImageEffects.m 兩個檔案拖進工程,引入標頭檔,一行就能完成:
#import "ViewController.h"
#import "UIImage+ImageEffects.h"

- (void)viewDidLoad {
    [super viewDidLoad];
    // 原始圖片
    UIImage *sourceImage = [UIImage imageNamed:@"che"];
    // 半徑 10 的模糊
    UIImage *blurImage = [sourceImage blurImageWithRadius:10];
    // 顯示模糊後的圖片
    UIImageView *imageV = [[UIImageView alloc] initWithImage:blurImage];
    [self.view addSubview:imageV];
}
方案三:UIVisualEffectView(iOS 8 起)
系統原生的解法,效能最好,還能做出「內容在模糊層下方滾動」的動態效果。更進階的玩法是搭配 UIVibrancyEffect,讓放在模糊層上的文字、圖示保持清晰並自適應背景色。
#import "ViewController.h"

@interface ViewController ()
/** 背景 */
@property (nonatomic, strong) UIScrollView *scrollView;
@end

@implementation ViewController

- (void)viewDidLoad {
    [super viewDidLoad];

    // 加入可滾動的背景,方便觀察動態模糊
    self.scrollView = [[UIScrollView alloc] initWithFrame:self.view.bounds];
    UIImageView *imageV = [[UIImageView alloc] initWithImage:[UIImage imageNamed:@"fengjing"]];
    self.scrollView.contentSize = imageV.image.size;
    self.scrollView.bounces = NO;
    [self.scrollView addSubview:imageV];
    [self.view addSubview:self.scrollView];

    /*************** 加入模糊效果 ****************/
    // 1. 建立模糊 view
    UIVisualEffectView *effectView = [[UIVisualEffectView alloc] initWithEffect:[UIBlurEffect effectWithStyle:UIBlurEffectStyleLight]];
    // 2. 設定尺寸
    effectView.frame = CGRectMake(0, 100, 375, 200);
    // 3. 加到畫面上
    [self.view addSubview:effectView];

    /**************** 加入要顯示的文字 ****************/
    UILabel *label = [[UILabel alloc] initWithFrame:effectView.bounds];
    label.text = @"模糊效果";
    label.font = [UIFont systemFontOfSize:40];
    label.textAlignment = NSTextAlignmentCenter;

    /**************** 加入模糊層的子 view ****************/
    // 1. 建立子模糊 view
    UIVisualEffectView *subEffectView = [[UIVisualEffectView alloc] initWithEffect:[UIVibrancyEffect effectForBlurEffect:(UIBlurEffect *)effectView.effect]];
    // 2. 設定尺寸
    subEffectView.frame = effectView.bounds;
    // 3. 必須加到 effectView 的 contentView 上才會顯示
    [effectView.contentView addSubview:subEffectView];
    // 4. 把要顯示的 view 放進去,才能拿到特殊效果
    [subEffectView.contentView addSubview:label];
}

@end
動畫效果如下:
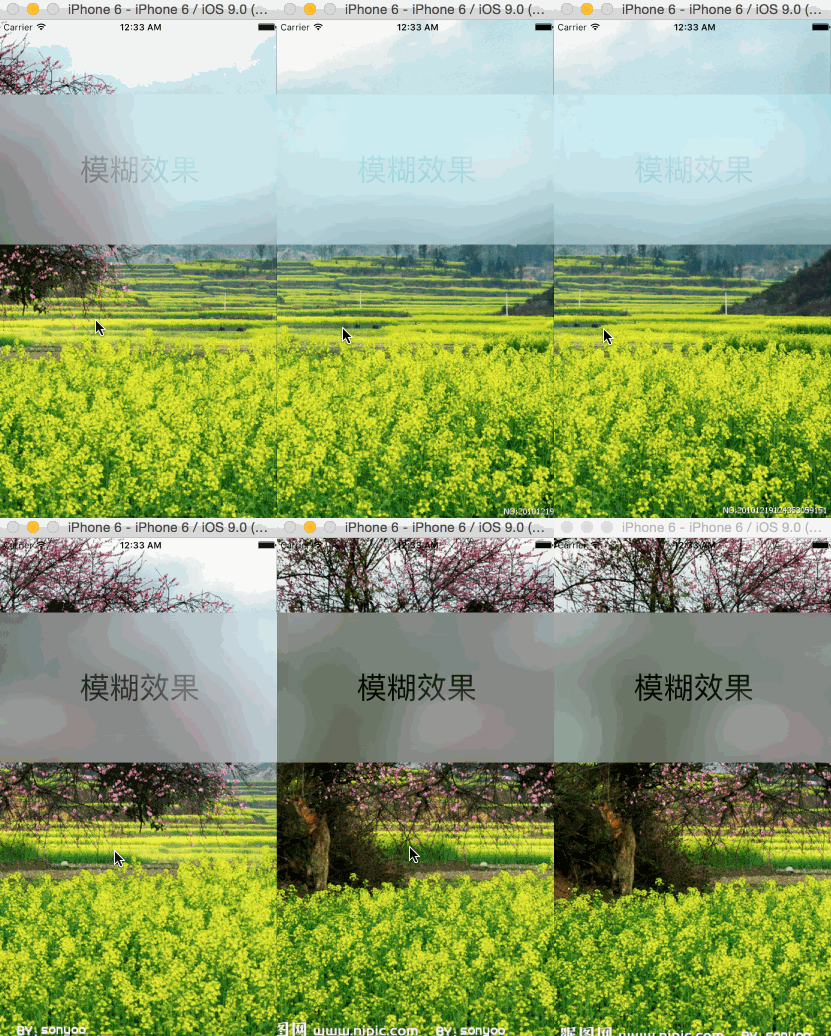
三個方案怎麼選?追求畫質與效能就用 UIVisualEffectView;需要對一張離屏圖片做模糊,用 CoreImage 或 ImageEffects 分類更合適。
- 上一篇文章: iOS 圖片拉伸的四種套路一次講清
- 下一篇文章: UITextField 密碼明文/暗文切換,順便解掉游標跑掉的坑