
iOS手勢密碼的實現方法
編輯:IOS開發綜合
本次講的手勢密碼,是在九個按鍵上實現的,這裡講的是手勢密碼的基本實現和效果
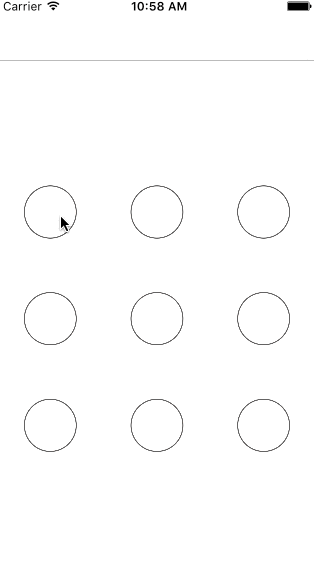
同樣先上效果圖
其實就是對畫圖功能的一個實現,再加上手勢操作結合起來。
屏幕寬度高度,方便下面操作,不做解釋
#define ScreenHeight [[UIScreen mainScreen] bounds].size.height
#define ScreenWidth [[UIScreen mainScreen] bounds].size.width
控制器.m文件
這裡的imageView是用來裝手勢畫圖之後的image,看後面就清楚了
@property (nonatomic,strong)NSMutableArray *buttonArr;//全部手勢按鍵的數組
@property (nonatomic,strong)NSMutableArray *selectorArr;//選中手勢按鍵的數組
@property (nonatomic,assign)CGPoint startPoint;//記錄開始選中的按鍵坐標
@property (nonatomic,assign)CGPoint endPoint;//記錄結束時的手勢坐標
@property (nonatomic,strong)UIImageView *imageView;//畫圖所需
-(NSMutableArray *)selectorArr
{
  if (!_selectorArr) {
    _selectorArr = [[NSMutableArray alloc]init];
  }
  return _selectorArr;
}
添加九個按鍵,設置狀態圖片,實際開發中一般有三種狀態,即默認,選中正確和選擇錯誤,錯誤一般指的是我們要記錄下用戶的手勢密碼,需要用戶。
畫出兩次相同的手勢密碼才能保存,若兩次輸入不一致,就是錯誤狀態的一種,當然還包括其它的,不多說了。
這裡要強調
btn.userInteractionEnabled = NO;
這句的重要性,如果不關閉按鍵的用戶交互,下面的UITouch則無法在按鍵中觸發,所以這裡必須關閉
- (void)viewDidLoad {
  [super viewDidLoad];
  self.view.backgroundColor = [UIColor whiteColor];


  if (!_buttonArr) {
    _buttonArr = [[NSMutableArray alloc]initWithCapacity:9];
  }

  self.imageView = [[UIImageView alloc]initWithFrame:CGRectMake(0, 0, ScreenWidth, ScreenHeight)];
  [self.view addSubview:self.imageView];

  for (int i=0; i<3; i++) {
    for (int j=0; j<3; j++) {
      UIButton *btn = [UIButton buttonWithType:UIButtonTypeCustom];
      btn.frame = CGRectMake(ScreenWidth/12+ScreenWidth/3*j, ScreenHeight/3+ScreenWidth/3*i, ScreenWidth/6, ScreenWidth/6);
      [btn setImage:[UIImage imageNamed:@"pbg"] forState:UIControlStateNormal];
      [btn setImage:[UIImage imageNamed:@"pbg01"] forState:UIControlStateHighlighted];
      btn.userInteractionEnabled = NO;
      [self.buttonArr addObject:btn];
      [self.imageView addSubview:btn];
    }

  }
}
這個方法就是實現畫圖的方法
-(UIImage *)drawLine{
  UIImage *image = nil;

  UIColor *col = [UIColor colorWithRed:1 green:0 blue:0 alpha:1];
  UIGraphicsBeginImageContext(self.imageView.frame.size);//設置畫圖的大小為imageview的大小
  CGContextRef context = UIGraphicsGetCurrentContext();
  CGContextSetLineWidth(context, 5);
  CGContextSetStrokeColorWithColor(context, col.CGColor);

  CGContextMoveToPoint(context, self.startPoint.x, self.startPoint.y);//設置畫線起點

  //從起點畫線到選中的按鍵中心,並切換畫線的起點
  for (UIButton *btn in self.selectorArr) {
    CGPoint btnPo = btn.center;
    CGContextAddLineToPoint(context, btnPo.x, btnPo.y);
    CGContextMoveToPoint(context, btnPo.x, btnPo.y);
  }
  //畫移動中的最後一條線
  CGContextAddLineToPoint(context, self.endPoint.x, self.endPoint.y);

  CGContextStrokePath(context);

  image = UIGraphicsGetImageFromCurrentImageContext();//畫圖輸出
  UIGraphicsEndImageContext();//結束畫線
  return image;
}
最後部分是手勢,每次在屏幕上點擊的時候都會調用的方法
//開始手勢
-(void)touchesBegan:(NSSet<UITouch *> *)touches withEvent:(UIEvent *)event
{
  UITouch *touch = [touches anyObject];//保存所有觸摸事件
  if (touch) {


    for (UIButton *btn in self.buttonArr) {

      CGPoint po = [touch locationInView:btn];//記錄按鍵坐標

      if ([btn pointInside:po withEvent:nil]) {//判斷按鍵坐標是否在手勢開始范圍內,是則為選中的開始按鍵

        [self.selectorArr addObject:btn];
        btn.highlighted = YES;
        self.startPoint = btn.center;//保存起始坐標
      }

    }

  }

}

//移動中觸發,畫線過程中會一直調用畫線方法
-(void)touchesMoved:(NSSet<UITouch *> *)touches withEvent:(UIEvent *)event
{
  UITouch *touch = [touches anyObject];
  if (touch) {

    self.endPoint = [touch locationInView:self.imageView];
    for (UIButton *btn in self.buttonArr) {
      CGPoint po = [touch locationInView:btn];
      if ([btn pointInside:po withEvent:nil]) {

        BOOL isAdd = YES;//記錄是否為重復按鍵
        for (UIButton *seBtn in self.selectorArr) {
          if (seBtn == btn) {
            isAdd = NO;//已經是選中過的按鍵,不再重復添加
            break;
          }
        }
        if (isAdd) {//未添加的選中按鍵,添加並修改狀態
          [self.selectorArr addObject:btn];
          btn.highlighted = YES;
        }

      }
    }
  }
  self.imageView.image = [self drawLine];//每次移動過程中都要調用這個方法,把畫出的圖輸出顯示

}
//手勢結束觸發
-(void)touchesEnded:(NSSet<UITouch *> *)touches withEvent:(UIEvent *)event
{
  self.imageView.image = nil;
  self.selectorArr = nil;
  for (UIButton *btn in self.buttonArr) {
    btn.highlighted = NO;
  }
}
開發中有時需要在最後時把畫出的手勢密碼圖顯示保留一秒時,不能直接使用上面的畫圖image輸出多一次,因為輸出的連最後一條線都畫出來了,如果要實現這個保留效果,可以在畫線方法裡添加一個是否畫最後一條線的判斷,加個bool傳參,在畫線結束時再調用這個方法和參數,禁止最後一條線畫出來就行了,當然不能在畫的過程禁止,而是在結束的時候,不然一條線都畫不出的,最後把圖片展示多次就行了。
需要的把btn和密碼相關聯,方法也有很多種,例如給btn設置tag值,把tag對應作為密碼保存和驗證就行了。
以上就是本文的全部內容,希望對大家的學習有所幫助,也希望大家多多支持本站。


相關文章
+