ios新手開發——toast提示和旋轉圖片加載框
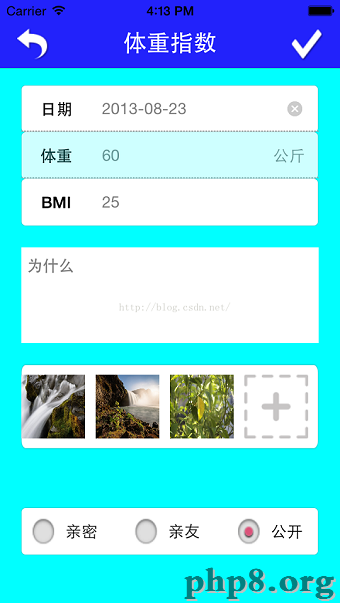
不知不覺自學ios已經一個月了,從OC語法到app開發,過程雖然枯燥無味,但是結果還是挺有成就感的,在此分享我的ios開發之路中的小小心得~廢話不多說,先上我們今天要實現的效果圖:
有過一點做APP經驗的都知道,提示框和等待加載框一直是APP首當其中的效果,ios不像android一樣,自帶toast和progressbarDialog,所以在做ios開發的時候,我首先想到了先封裝這兩個基礎控件~當然網上的資源數不勝數,但是博主抱著一顆自主研究的精神,做出的效果也不錯,也已適配了所有iphone型號和版本.望大家多多支持~
YPXToastView實現
接觸過安卓開發的ios開發者可能對待toast這麼個東西很不陌生,它主要是一種輕量級的提示,代替了復雜的對話框,有的顯示在中間,有的顯示在屏幕下方,當然,這些都是根據需求而來的.廢話不多說,首先清理一下我們實現這個toast的一些必要思路:
1.實現的基礎控件------UILabel封裝
2.彈出的時間和透明度變化設置
3.顯示的位置調整
一.UILabel的封裝
首先我們想要實現一下這個效果,首當其沖的肯定想到UILabel,那麼接下來就是對UILabel的封裝了,首先我們創建一文件繼承UIlabel,然後寫好要對外暴露的方法:
@interface YPXToastView : UILabel

{
    @public
    CGFloat screenWidth,screenHeight;
    int _corner;
    int _duration;
}

@property(assign,nonatomic)int corner;
@property(assign,nonatomic)int duration;


-(void)showToastViewWithText:(NSString *)text andDuration:(int)duration andParentView:(UIView *)parentView;

-(void)showToastViewWithText:(NSString *)text andParentView:(UIView *)parentView;

-(void)showToastViewWithText:(NSString *)text andDuration:(int)duration andCorner:(int)corner andParentView:(UIView *)parentView;

+(void)showToastViewWithText:(NSString *)text andDuration:(int)duration andParentView:(UIView *)parentView;

+(void)showToastViewWithText:(NSString *)text andParentView:(UIView *)parentView;

+(void)showToastViewWithText:(NSString *)text andDuration:(int)duration andCorner:(int)corner andParentView:(UIView *)parentView;

-(void)setBackgroundWithColor:(UIColor *)color;

@end
定義了四個全局變量,兩個屬性,分別制定了提示框的圓角和時間.方法中定義了三個類方法,和四個實例方法,主要是因為我們在使用時並不想實例化一次我們的提示框,所有的實例方法中抽出了三個類方法方便用戶調用.
下面我們來看內部主要方法實現:
/**
 *  新建UI
 *
 *  @param str 要顯示的文本
 */
-(void)createUIByText:(NSString *)str{
    self.textAlignment = NSTextAlignmentCenter;
    self.backgroundColor = [UIColor colorWithRed:00 green:00 blue:00 alpha:0.5];
    self.alpha = 0.8;
    self.text=str;
    self.font = [UIFont systemFontOfSize:14];
    self.textColor=[UIColor whiteColor];
    NSDictionary *attributes = @{NSFontAttributeName:[UIFont systemFontOfSize:self.font.pointSize],};
    CGSize textSize = [self.text boundingRectWithSize:CGSizeMake(100, 100) options:NSStringDrawingTruncatesLastVisibleLine attributes:attributes context:nil].size;;
    self.frame=CGRectMake(screenWidth/2-(textSize.width*1.7)/2, screenHeight*0.5,textSize.width*1.7,
                               textSize.height*2);
    self.layer.cornerRadius = _corner;
    self.clipsToBounds = YES;
}

-(void)setBackgroundWithColor:(UIColor *)color{
    self.backgroundColor =color;
}


/**
 *  初始化測量數據
 */
-(void)caculateSize{
    screenWidth=[UIScreen mainScreen].bounds.size.width;
    screenHeight=[UIScreen mainScreen].bounds.size.height;
}
方法一目了然,指定了UILabel的居中方式和背景,並設置屬性讓其寬度自適應,涉及到一些簡單的frame計算,主要是定位於屏幕中間,寬度設為文本寬度的1.7倍,看起來比較適中.y點主要就是屏幕高度的一半,理應減去文本的高度的一半,但是博主在這偷個懶,並沒有計算label的高度,所以就不贅述了~~
二.彈出的時間和透明度變化設置
原理很簡單,就是設定了一個animateWithDuration的block回調,然後設置label的透明度和時間,具體實現如下:
/**
 *  顯示toast
 *
 *  @param parentView <#parentView description#>
 */
-(void)showToastByParentView:(UIView *)parentView{
    [parentView addSubview:self];
    //animateWithDuration可以控制label顯示持續時間
    [UIView animateWithDuration:_duration animations:^{
        self.alpha = 1.0;
    } completion:^(BOOL finished){
        [self removeFromSuperview];
    }];
}
默認時間為1秒,思路很清晰,先添加進我們的parentView中,然後指定時間後移除.
到此,我們的YPXToastView已經全部完成,其實內部邏輯主要是對UILabel的定制,思路簡單,但是對於ios開發之路的封裝思想有很大的幫助.調用時只需要一行代碼:
[YPXToastView showToastViewWithText:@"已開啟" andDuration:3 andCorner:5 andParentView:self.view];
調用方便簡潔,以後測試就不需要用NSLog了嘿嘿~
YPXLoddingView實現
相信在ios的開發中少不了加載等待框的開發,畢竟原生系統中貌似沒有這樣的對話框,我們在訪問網絡或者讀取數據時可能需要給用戶一個等待回饋,這裡就用到了我們的等待加載.上面的gif中提供了兩種等待加載框的樣式,一種是自定義圖片的旋轉,順時針或者逆時針,另一種是使用系統的UIActivityIndicatorView,使用大的加載Loadding.具體開發思路如下:
1.繼承UIView通過添加UIImageView和UILabel來組合實現
2.控制UIImageView的旋轉以及UIlabel的三個點的動態效果
3.顯示和隱藏
一.UIView的封裝
通過效果我們可以一目了然的知道,實現這個控件至少需要一個UIImageView(或者UIActivityIndicatorView)和UILabel,一個提供加載圖片,一個提供加載文本,組合方式為豎直方向,然後設置背景的透明度.具體.h文件如下:
#import@interface YPXLoaddingView : UIView { @public int num; CGFloat angle; BOOL isShowLoadding; UIImageView * imageView; UILabel * label; CGFloat width; CGFloat x; CGFloat y,screenWidth,screenHeight; UIView * _parentView; NSString * _text; NSTimer * _timer; UIActivityIndicatorView * _activityView; UIView * view; } @property(retain,nonatomic)NSTimer * timer; @property(copy,nonatomic) NSString * text; @property(retain,nonatomic) UIActivityIndicatorView * activityView; -(void)showLoaddingViewWithText:(NSString *) string; -(void)dismissLoaddingView; -(instancetype)initWithParentView:(UIView *) parentView; +(id)initWithParentView:(UIView *) parentView; -(BOOL)isShowing; -(void)showLoaddingView; -(void)showLoaddingViewWithStyle:(int)style; -(void)showLoaddingViewWithText:(NSString * )text andStyle:(int)style; @end
定義了一些必要的屬性,包括計時器和顯示文本等,主要功能為show開頭的方法,style應該是個枚舉類型,但是博主目前還沒有寫過枚舉類,所以直接引用0和1來指定使用圖片還是系統的菊花加載.看完.h我們來看看具體的UIView代碼實現:
/**
 *  計算一些必要尺寸
 *
 *  @param parentView <#parentView description#>
 */
-(void)caculatSizeWithTarget:(UIView *) parentView
{
    screenWidth=[UIScreen mainScreen].bounds.size.width;
    screenHeight=[UIScreen mainScreen].bounds.size.height;
    width=screenWidth*0.3;
    x= screenWidth/2-width/2;
    y= screenHeight/2-width/2;
    angle=0;
    num=0;
    isShowLoadding=NO;
    _parentView=parentView;

}

/**
 *  創建loadding視圖
 */
-(void)creatLoaddingView
{
    view=[[UIView alloc]init];
    view.frame=CGRectMake(0, 0, screenWidth, screenHeight);

    imageView=[[UIImageView alloc]init];
    imageView.frame=CGRectMake(width/2-width*0.5/2,15, width*0.5,width*0.4);
    imageView.clipsToBounds=YES;
    imageView.layer.rasterizationScale=[UIScreen mainScreen].scale;
    [imageView setImage:[UIImage imageNamed:@"loadding.png"]];

    _activityView=[[UIActivityIndicatorView alloc]initWithFrame:CGRectMake(width/2-width*0.55/2,15, width*0.55,width*0.45)];
    _activityView.activityIndicatorViewStyle=UIActivityIndicatorViewStyleWhiteLarge;


    label=[[UILabel alloc]init];
    label.textColor=[UIColor whiteColor];
    label.font=[UIFont systemFontOfSize:14];
    int y2=imageView.frame.size.height+(width-imageView.frame.size.height)/2;
    label.frame=CGRectMake(0,y2, width, 20);
    label.textAlignment=NSTextAlignmentCenter;

}
手動布局,我們指定了imageview和label的frame,通過一系列計算,把imageview設為UIView中上部,並留出四周的邊距,看起來更親切自然一點.label的位置根據imageview的frame來指定,這樣就可以完成適配避免在不同屏幕上顯示不同的問題.完場上述代碼,一個初步的靜態效果已經生成,剩下的就是添加動畫;
二.UIImageView旋轉動畫以及UILabel點點動態展示
imageview的動畫添加很簡單,因為我們只是涉及一點點的旋轉動畫,其中並沒有加速度變化,讀者若是想要添加,可以自己嘗試一下.旋轉動畫的實現方式有兩種:
一種是用animateWithDuration來動態的旋轉一定角度,然後通過延時來改變旋轉的速率,好處是簡單,但是缺點也很明顯,在5s中動畫顯得僵硬,並伴隨著一點點的卡頓,如下是第一種動畫方案的代碼:
/**
 *  開啟loadding動畫
 */
- (void)startAnimation
{
    if(isShowLoadding==YES){
        CGAffineTransform endAngle = CGAffineTransformMakeRotation(angle * (M_PI / -180.0f));
        [UIView animateWithDuration:0.03f delay:0 options:UIViewAnimationOptionCurveLinear animations:^{
            imageView.transform =endAngle;
        } completion:^(BOOL finished) {
            if(angle==360){
                angle=0;
            }
            if(angle==0||angle==360){
                label.text=[_text stringByAppendingString:@"..."];
            }else if(angle==90){
                label.text=_text;
            }else if(angle==180){
                label.text=[_text stringByAppendingString:@"."];
            }else if(angle==270){
                label.text=[_text stringByAppendingString:@".."];
            }
            angle += 10;

            [self startAnimation];
        }];
    }

}
通過改變imageview的角度來旋轉圖片的方式,使用block回調中的角度關系,我們可以動態的設置提示文本省略號的動態展示.因為實現效果有點卡頓,所以博主采用了第二種實現方式,代碼如下:
/**
 *  啟動計數定時器
 */
-(void)UpdateText
{
    num++;
    if (num>4) {
        num=0;
    }
    if(num==0||num==4){
       label.text=[_text stringByAppendingString:@"..."];
    }else if(num==1){
       label.text=_text;
    }else if(num==2){
       label.text=[_text stringByAppendingString:@"."];
    }else if(num==3){
        label.text=[_text stringByAppendingString:@".."];
    }

}

/**
 *  給imageView添加動畫
 *
 *  @param imageView imageview
 *
 *  @return imageview
 */
+ (UIImageView *)rotateImageView:(UIImageView *)imageView
{
    CABasicAnimation *animation = [ CABasicAnimation
                                   animationWithKeyPath: @"transform" ];
    animation.fromValue = [NSValue valueWithCATransform3D:CATransform3DIdentity];

    //圍繞Z軸旋轉,垂直與屏幕
    animation.toValue = [ NSValue valueWithCATransform3D:
                         CATransform3DMakeRotation(M_PI, 0.0, 0.0, 1.0) ];
    animation.duration = 0.5;
    //旋轉效果累計,先轉180度,接著再旋轉180度,從而實現360旋轉
    animation.cumulative = YES;
    animation.repeatCount = 10000;

    [imageView.layer addAnimation:animation forKey:nil];
    return imageView;
}
采用CABasicAnimation的動畫效果可以達到動畫流暢度的完美展示,優點就是增加了旋轉性能,缺點就是沒有像animateWithDuration那樣有動畫的回調,這樣我們就沒有辦法動態的去改變label的提示文本,所以細心的讀者會發現,博主前面的.h文件中已經申明了一個定時器,那麼這個定時器的作用是用來干嘛的呢?我們通過啟動定時器,來動態的刷新label的提示文本達到一種動態展示的效果,這種思路在安卓裡也同樣適用.
完成了我們的圖片旋轉,基本上這個功能已經完成了百分之八十,剩下就是顯示和隱藏了;
三.顯示和隱藏
前面介紹.h文件申明的時候,已經把本控件的所有調用方法已經列出來了,其中包含了一系列的.show方法,因為loadding這種控件,我們可能需要對其狀態進行判斷,而且可能在網絡請求中調用多次,為了不浪費內存,我們在這裡提倡使用單例模式,並初始化一個Loadding在ViewDidLoad中.後期調用只需要show和dismiss即可,下面我們來看具體的show和dismiss的方法實現:
/**
 *  顯示loadding.默認文本為 "正在加載"
 */
-(void)showLoaddingView
{
    if(isShowLoadding==YES){
        return;
    }
    if(_text==nil||[_text isEqualToString:@""]){
        _text=@"正在加載";
    }
    label.text=_text;
    isShowLoadding=YES;
    angle=0;
    self.hidden=NO;
    [self addSubview:imageView];
    [self addSubview:label];
    [view addSubview:self];
    [_parentView addSubview:view];
    [YPXLoaddingView rotateImageView:imageView];
    _timer=[NSTimer scheduledTimerWithTimeInterval:0.5 target:self selector:@selector(UpdateText) userInfo:nil repeats:YES];

}

-(void)showLoaddingViewWithStyle:(int)style
{
    if(style==0){//菊花加載
        if(isShowLoadding==YES){
            return;
        }
        if(_text==nil||[_text isEqualToString:@""]){

             _text=@"正在加載";
         }
        label.text=_text;
        isShowLoadding=YES;
        angle=0;
        self.hidden=NO;
        [self addSubview:_activityView];
        [self addSubview:label];
        [imageView removeFromSuperview];
        [_activityView startAnimating];
        [view addSubview:self];
        [_parentView addSubview:view];
        _timer=[NSTimer scheduledTimerWithTimeInterval:0.5 target:self selector:@selector(UpdateText) userInfo:nil repeats:YES];

    }else{//旋轉圖片加載
        [self showLoaddingView];
    }

}

/**
 *  顯示loadding
 *
 *  @param string 顯示的文本
 */
-(void)showLoaddingViewWithText:(NSString *) string
{
    _text=string;
    [self showLoaddingView];
}


-(void)showLoaddingViewWithText:(NSString *)text andStyle:(int)style{
    _text=text;
    [self showLoaddingViewWithStyle:style];
}
/**
 *  消失loadding
 */
-(void)dismissLoaddingView
{
    self.hidden=YES;
    isShowLoadding=NO;
    [_timer invalidate];
    [imageView.layer removeAllAnimations];
    [_activityView stopAnimating];
    [view removeFromSuperview];
}
總體來說show方法中就是單純的控制了imageview和_activityView通過style來隱藏和顯示,思路很簡單,再次不做贅述.dismiss中只需要移除我們的view就好,非常簡單,同時不要忘記stop我們的_activityView以及關閉定時器就好.
致此,所有的代碼實現已經完成,我們在需要調用的地方首先實例化一次,然後使用show和dismiss即可.