
iOS 設計模式實戰:以水平滾動視圖說明適配器模式與觀察者模式
這篇用一個具體範例把兩個設計模式講清楚:做一個可水平滾動的專輯封面列表,分別用「適配器模式」隔離滾動視圖與資料來源,再用「觀察者模式」處理封面圖的異步下載與回寫。
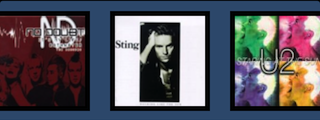
一、適配器(Adapter)模式
適配器讓介面不相容的類別能一起工作:它包裝一個物件,對外暴露一組標準的互動介面。Apple 實作這個模式的方式略有不同——用 protocol(協定)而非直接包裝。你可能早已用過 UITableViewDelegate、UIScrollViewDelegate、NSCoding、NSCopying,它們都是同一個思路:以協定約定標準方法,讓任何類別都能提供統一的行為。
定義協定
在專案中新增一個 UIView 子類 HorizontalScroller,然後在 .h 檔的 @end 之後定義協定:
@protocol HorizontalScrollerDelegate <NSObject>

@required
// 詢問委托要顯示幾個 view
- (NSInteger)numberOfViewsForHorizontalScroller:(HorizontalScroller *)scroller;

// 要求委托回傳指定索引的 view
- (UIView *)horizontalScroller:(HorizontalScroller *)scroller viewAtIndex:(int)index;

// 告知委托第 index 個 view 被點擊了
- (void)horizontalScroller:(HorizontalScroller *)scroller clickedViewAtIndex:(int)index;

@optional
// 詢問初始顯示的索引;未實作時預設為 0
- (NSInteger)initialViewIndexForHorizontalScroller:(HorizontalScroller *)scroller;

@end
協定繼承自 <NSObject> 是一條最佳實踐,這樣才能對委托送出 NSObject 定義的訊息。必需方法提供滾動視圖運作所不可或缺的資料:數量、指定索引的 view、點擊後的行為;可選方法則是初始索引,未實作時就從第一個開始。
前置宣告與屬性
協定定義在類別之後,類別內部看不到它,因此需要前置宣告:
@protocol HorizontalScrollerDelegate;

@interface HorizontalScroller : UIView

@property (weak) id<HorizontalScrollerDelegate> delegate;
- (void)reload;

@end
delegate 宣告為 weak 是為了避免循環引用:若類別強引用委托、委托又強引用該類別,兩者都無法被釋放,就會造成記憶體洩漏。用 id<Protocol> 而非具體類別,則能在保有彈性的同時維持一定的型別安全。reload 的語意等同 UITableView 的 reloadData,用於資料變動後重建內容。
實作檔骨架
#import "HorizontalScroller.h"

// 1. 版面常數,方便集中調整
#define VIEW_PADDING 10
#define VIEW_DIMENSIONS 100
#define VIEWS_OFFSET 100

// 2. 遵循 UIScrollViewDelegate,才能取得滾動結束事件
@interface HorizontalScroller () <UIScrollViewDelegate>
@end

// 3. 內部持有真正的 scroll view
@implementation HorizontalScroller
{
    UIScrollView *scroller;
}
@end
每個子視圖固定 100×100、間距 10 點。
初始化與手勢
- (id)initWithFrame:(CGRect)frame
{
    self = [super initWithFrame:frame];
    if (self) {
        scroller = [[UIScrollView alloc] initWithFrame:CGRectMake(0, 0, frame.size.width, frame.size.height)];
        scroller.delegate = self;
        [self addSubview:scroller];

        UITapGestureRecognizer *tapRecognizer =
            [[UITapGestureRecognizer alloc] initWithTarget:self action:@selector(scrollerTapped:)];
        [scroller addGestureRecognizer:tapRecognizer];
    }
    return self;
}
滾動視圖完全填滿 HorizontalScroller,並用 tap 手勢偵測封面是否被點擊。
處理點擊
- (void)scrollerTapped:(UITapGestureRecognizer *)gesture
{
    CGPoint location = [gesture locationInView:gesture.view];

    // 只遍歷自己加入的子視圖,而非 scrollView 的全部 subviews
    for (int index = 0; index < [self.delegate numberOfViewsForHorizontalScroller:self]; index++) {
        UIView *view = scroller.subviews[index];
        if (CGRectContainsPoint(view.frame, location)) {
            [self.delegate horizontalScroller:self clickedViewAtIndex:index];
            [scroller setContentOffset:CGPointMake(view.frame.origin.x - self.frame.size.width / 2
                                                                 + view.frame.size.width / 2, 0)
                              animated:YES];
            break;
        }
    }
}
這段最能說明適配器的價值:HorizontalScroller 除了知道「委托實作了 numberOfViewsForHorizontalScroller: 這個協定方法」之外,對委托一無所知,也不需要知道。它只負責把點擊事件翻譯成協定定義的訊息。
reload:重建內容
- (void)reload
{
    // 1. 沒有委托就什麼都不做
    if (self.delegate == nil) return;

    // 2. 移除所有舊子視圖
    [scroller.subviews enumerateObjectsUsingBlock:^(id obj, NSUInteger idx, BOOL *stop) {
        [obj removeFromSuperview];
    }];

    // 3. 從設定的偏移量開始排列
    CGFloat xValue = VIEWS_OFFSET;

    for (int i = 0; i < [self.delegate numberOfViewsForHorizontalScroller:self]; i++) {
        // 4. 依序向委托索取 view 並定位
        xValue += VIEW_PADDING;
        UIView *view = [self.delegate horizontalScroller:self viewAtIndex:i];
        view.frame = CGRectMake(xValue, VIEW_PADDING, VIEW_DIMENSIONS, VIEW_DIMENSIONS);
        [scroller addSubview:view];
        xValue += VIEW_DIMENSIONS + VIEW_PADDING;
    }

    // 5. 撐開可滾動範圍
    [scroller setContentSize:CGSizeMake(xValue + VIEWS_OFFSET, self.frame.size.height)];

    // 6. 若委托有實作初始索引,就把該 view 置中
    if ([self.delegate respondsToSelector:@selector(initialViewIndexForHorizontalScroller:)]) {
        int initialView = [self.delegate initialViewIndexForHorizontalScroller:self];
        [scroller setContentOffset:CGPointMake(initialView * (VIEW_DIMENSIONS + (2 * VIEW_PADDING)), 0)
                          animated:YES];
    }
}
第 6 步用 respondsToSelector: 做能力檢測,這正是 @optional 方法的正確用法。
另外在 view 被加入其他 view 時也要重建一次:
- (void)didMoveToSuperview
{
    [self reload];
}
讓當前 view 置中
- (void)centerCurrentView
{
    int xFinal = scroller.contentOffset.x + (VIEWS_OFFSET / 2) + VIEW_PADDING;
    int viewIndex = xFinal / (VIEW_DIMENSIONS + (2 * VIEW_PADDING));
    xFinal = viewIndex * (VIEW_DIMENSIONS + (2 * VIEW_PADDING));

    [scroller setContentOffset:CGPointMake(xFinal, 0) animated:YES];
    [self.delegate horizontalScroller:self clickedViewAtIndex:viewIndex];
}

- (void)scrollViewDidEndDragging:(UIScrollView *)scrollView willDecelerate:(BOOL)decelerate
{
    if (!decelerate) {
        [self centerCurrentView];
    }
}

- (void)scrollViewDidEndDecelerating:(UIScrollView *)scrollView
{
    [self centerCurrentView];
}
計算時把目前偏移量、視圖尺寸與間距都納入考量。最後一行很重要:一旦子視圖被置中,就必須把這個變化通知委托,否則外部狀態會與畫面不同步。兩個 delegate 方法涵蓋了「拖完立刻停手」與「拖完還在慣性滑動」兩種情況。
在 view controller 中使用
#import "HorizontalScroller.h"
#import "AlbumView.h"

@interface ViewController () <UITableViewDataSource, UITableViewDelegate, HorizontalScrollerDelegate>
@end

@implementation ViewController
{
    HorizontalScroller *scroller;
}
@end
#pragma mark - HorizontalScrollerDelegate methods

- (void)horizontalScroller:(HorizontalScroller *)scroller clickedViewAtIndex:(int)index
{
    currentAlbumIndex = index;
    [self showDataForAlbumAtIndex:index];
}

- (NSInteger)numberOfViewsForHorizontalScroller:(HorizontalScroller *)scroller
{
    return allAlbums.count;
}

- (UIView *)horizontalScroller:(HorizontalScroller *)scroller viewAtIndex:(int)index
{
    Album *album = allAlbums[index];
    return [[AlbumView alloc] initWithFrame:CGRectMake(0, 0, 100, 100) albumCover:album.coverUrl];
}

- (void)reloadScroller
{
    allAlbums = [[LibraryAPI sharedInstance] getAlbums];
    if (currentAlbumIndex < 0) currentAlbumIndex = 0;
    else if (currentAlbumIndex >= allAlbums.count) currentAlbumIndex = allAlbums.count - 1;

    [scroller reload];
    [self showDataForAlbumAtIndex:currentAlbumIndex];
}
在 viewDidLoad 中建立並掛上滾動視圖:
scroller = [[HorizontalScroller alloc] initWithFrame:CGRectMake(0, 0, self.view.frame.size.width, 120)];
scroller.backgroundColor = [UIColor colorWithRed:0.24f green:0.35f blue:0.49f alpha:1];
scroller.delegate = self;
[self.view addSubview:scroller];

[self reloadScroller];
小技巧:在 #pragma mark 之後寫方法,編譯器會忽略這行,但 Xcode 的方法跳轉選單會把後續方法歸在同一個粗體標題下,讓大型檔案好導航得多。
至此,滾動視圖完成——而它的程式碼中完全沒有出現 Album 或 AlbumView 的任何資訊。這代表它是完全獨立、可重複使用的元件,這就是適配器模式帶來的直接收益。
二、觀察者(Observer)模式
現在有個問題:封面圖還沒下載。若讓 AlbumView 自己去抓圖,就會把「顯示邏輯」與「網路邏輯」混在一起;而 LibraryAPI 也不該知道 AlbumView 的存在。可是圖下載完之後,总得有人通知 AlbumView 更新畫面。
觀察者模式正是為此而生:一個物件狀態改變時通知所有對此感興趣的物件,雙方不必知道彼此的存在,是一種鬆耦合的設計。通用實作是觀察者註冊自己感興趣的事件,狀態變化時全部收到通知——Apple 的推送通知就是這個模式的例子。若要遵循 MVC 概念,讓模型與視圖在不互相直接引用的前提下溝通,觀察者模式就是標準答案。
Cocoa 透過兩種機制實作它:通知(NSNotificationCenter) 與 Key-Value Observing(KVO)。
關於通知
別把它和遠端推送或本地通知搞混。通知是一種基於訂閱/發布的模型,發布者送訊息給訂閱者,且完全不需要知道訂閱者是誰。系統本身大量使用:鍵盤彈出與隱藏時送出 UIKeyboardWillShowNotification/UIKeyboardWillHideNotification,App 進入背景時送出 UIApplicationDidEnterBackgroundNotification。打開 UIApplication.h 檔尾,會看到超過二十個這類通知。
發送通知
在 AlbumView.m 的 init 方法中:
[[NSNotificationCenter defaultCenter] postNotificationName:@"BLDownloadImageNotification"
                                                    object:self
                                                  userInfo:@{@"imageView": coverImage,
                                                             @"coverUrl": albumCover}];
通知中帶上 UIImageView 與要下載的 URL——這就是完成下載任務所需的一切資訊。
訂閱通知
在 LibraryAPI 的 init 中:
[[NSNotificationCenter defaultCenter] addObserver:self
                                         selector:@selector(downloadImage:)
                                             name:@"BLDownloadImageNotification"
                                           object:nil];
於是每次 AlbumView 送出該通知,LibraryAPI 就會被呼叫。
記得退訂
在物件銷毀前必須移除觀察者,否則通知送給已釋放的物件會導致崩潰:
- (void)dealloc
{
    [[NSNotificationCenter defaultCenter] removeObserver:self];
}
順手做個本地快取
把下載過的封面存到本機,可以避免每次重複下載。在 PersistencyManager 中:
- (void)saveImage:(UIImage *)image filename:(NSString *)filename
{
    filename = [NSHomeDirectory() stringByAppendingFormat:@"/Documents/%@", filename];
    NSData *data = UIImagePNGRepresentation(image);
    [data writeToFile:filename atomically:YES];
}

- (UIImage *)getImage:(NSString *)filename
{
    filename = [NSHomeDirectory() stringByAppendingFormat:@"/Documents/%@", filename];
    NSData *data = [NSData dataWithContentsOfFile:filename];
    return [UIImage imageWithData:data];
}
若 Documents 中沒有對應檔案,getImage: 會回傳 nil。
串起來
- (void)downloadImage:(NSNotification *)notification
{
    // 1. 通知物件作為參數傳入,從中取出所需資訊
    UIImageView *imageView = notification.userInfo[@"imageView"];
    NSString *coverUrl = notification.userInfo[@"coverUrl"];

    // 2. 若已下載過,直接從快取取用
    imageView.image = [persistencyManager getImage:[coverUrl lastPathComponent]];

    if (imageView.image == nil) {
        // 3. 沒有則在背景佇列下載
        dispatch_async(dispatch_get_global_queue(DISPATCH_QUEUE_PRIORITY_DEFAULT, 0), ^{
            UIImage *image = [httpClient downloadImage:coverUrl];

            // 4. 回主執行緒更新 UI 並寫入快取
            dispatch_async(dispatch_get_main_queue(), ^{
                imageView.image = image;
                [persistencyManager saveImage:image filename:[coverUrl lastPathComponent]];
            });
        });
    }
}
三、兩個模式的取捨
- 適配器模式解決的是「介面不一致」:滾動視圖只認得協定,因此能搭配任何資料來源,日後換成相簿以外的內容也不必改動元件本身。
- 觀察者模式解決的是「誰該知道誰」:AlbumView 與 LibraryAPI 互不引用,卻能協作,網路層的改動不會波及視圖層。
- 通知的代價是「隱形耦合」——通知名稱字串寫錯不會編譯失敗,只會安靜地沒有反應。實務上建議把通知名稱定義成常數,並用 #pragma mark 標示觀察者的註冊與移除位置。
- 若一對一關係明確、且發送者只有一個,用 delegate 會比通知更直接;通知適合用於一對多、發送者數量不定的情境。
- 上一篇文章: 實作從底部彈出的選單:背景變暗與縮放動畫
- 下一篇文章: iOS 設計模式筆記:用 Memento 備忘錄模式保存與還原介面狀態